Puget Sound Annexes, 1944
B - Fire Control
Coast Artillery documents
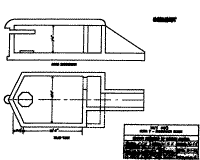
FC station plan.
1944 Annexes page
Documents home
Annex B - Fire Control.
Page 1, Table of contents
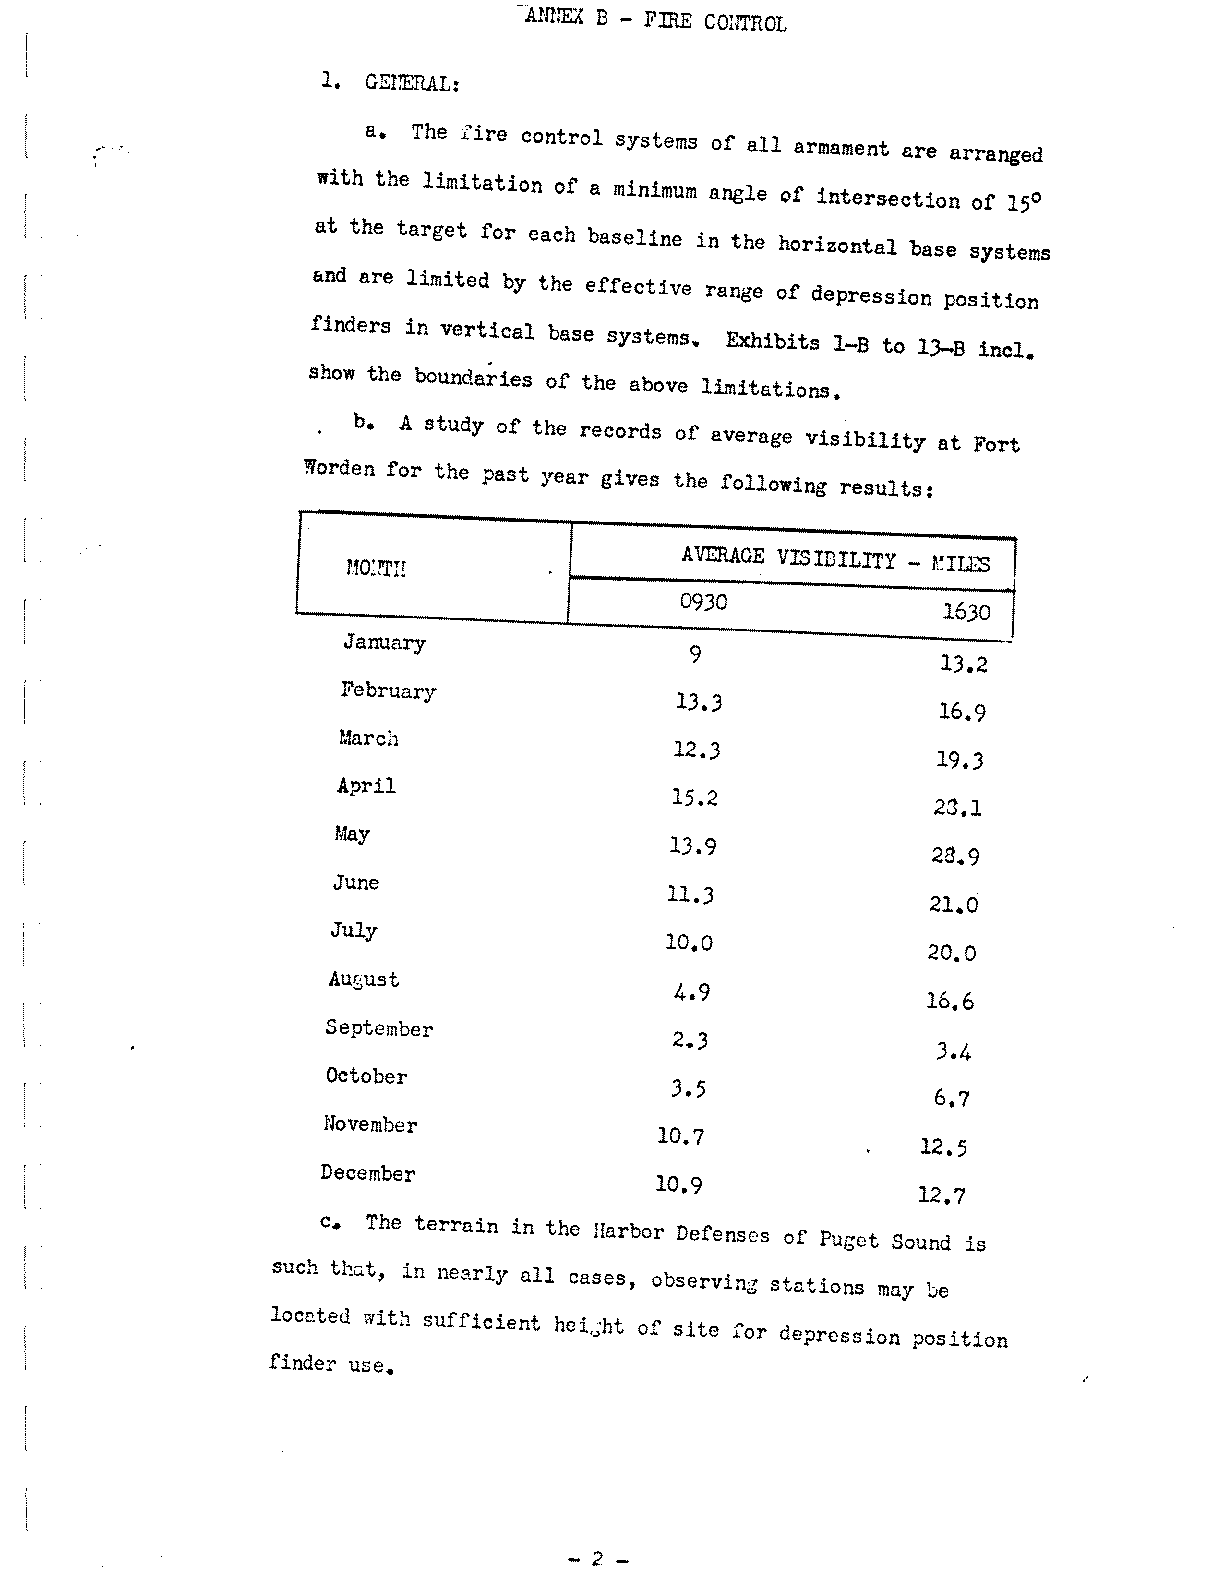
Page 2, Paragraph 1a, 1b and 1c
Page 3, Paragraph 1d
Page 4, Paragraph 1d
Page 4, Paragraph 1d
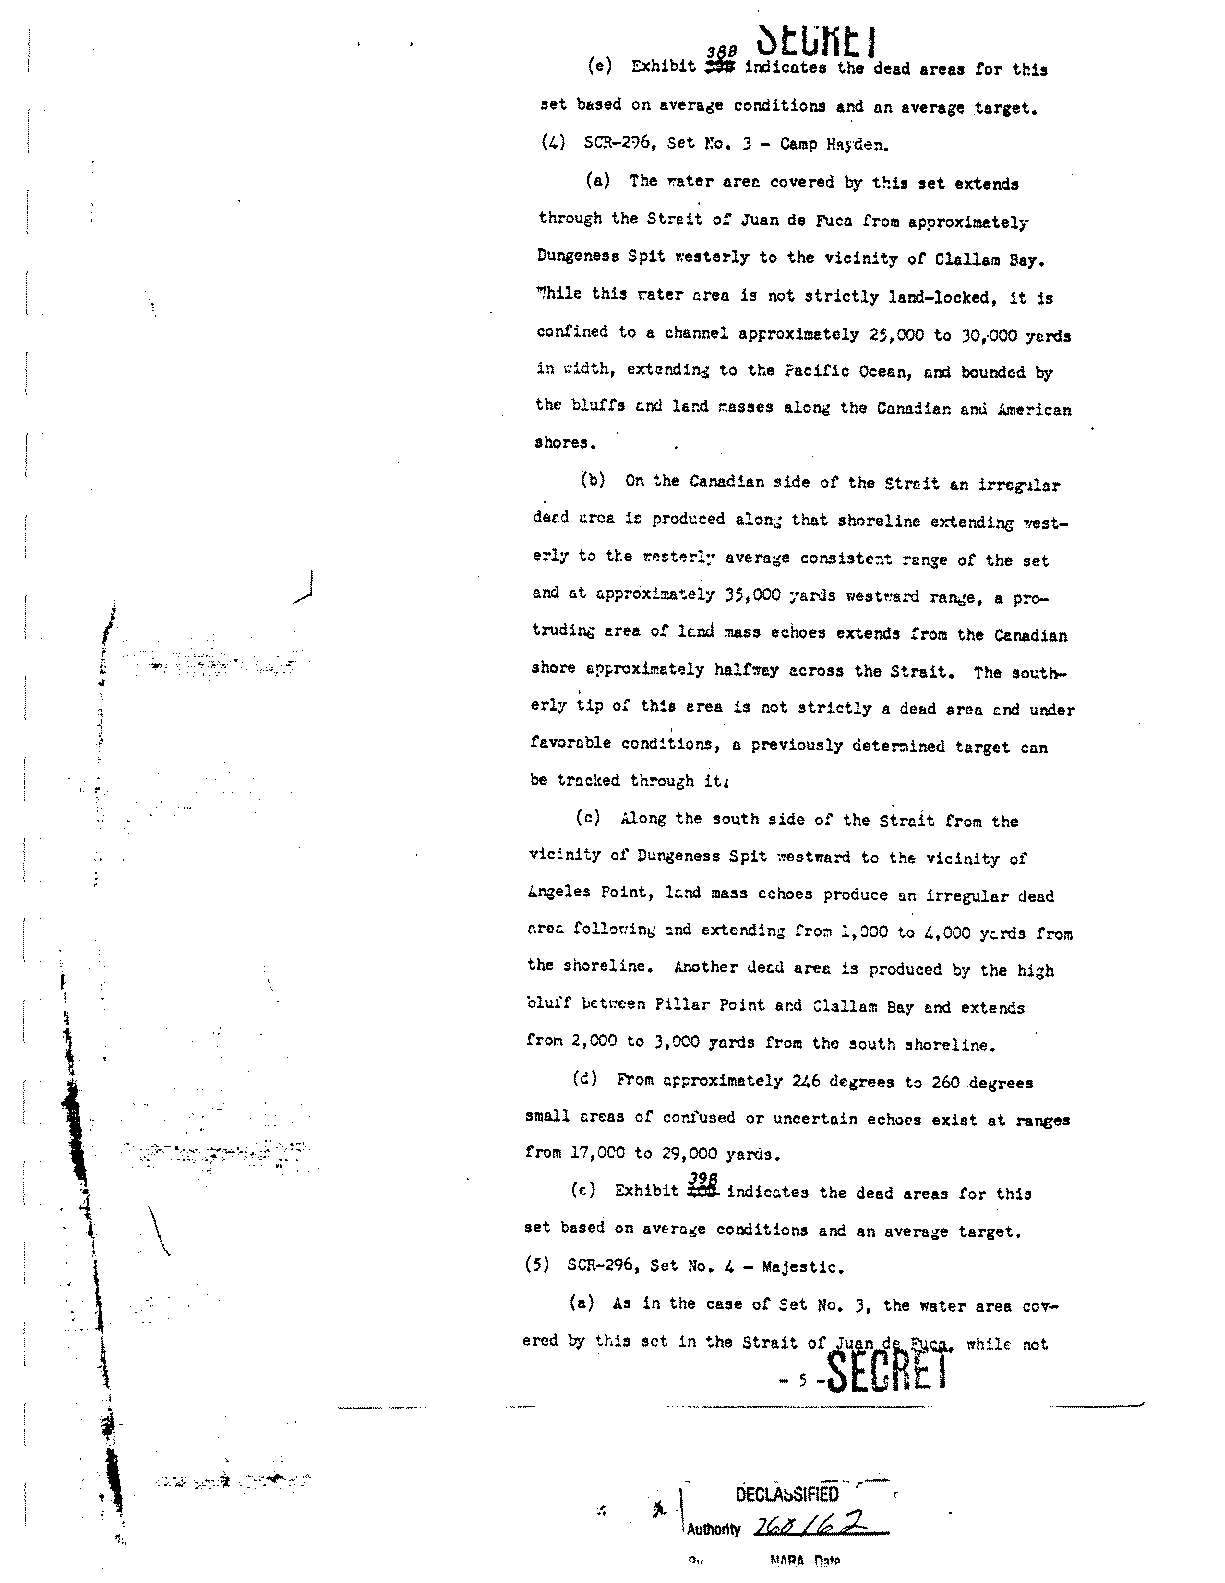
Page 5, Paragraph 1d
Page 6, Paragraph 1d
Page 7, Paragraphs 1d and 2
Page 8, Paragraph 2
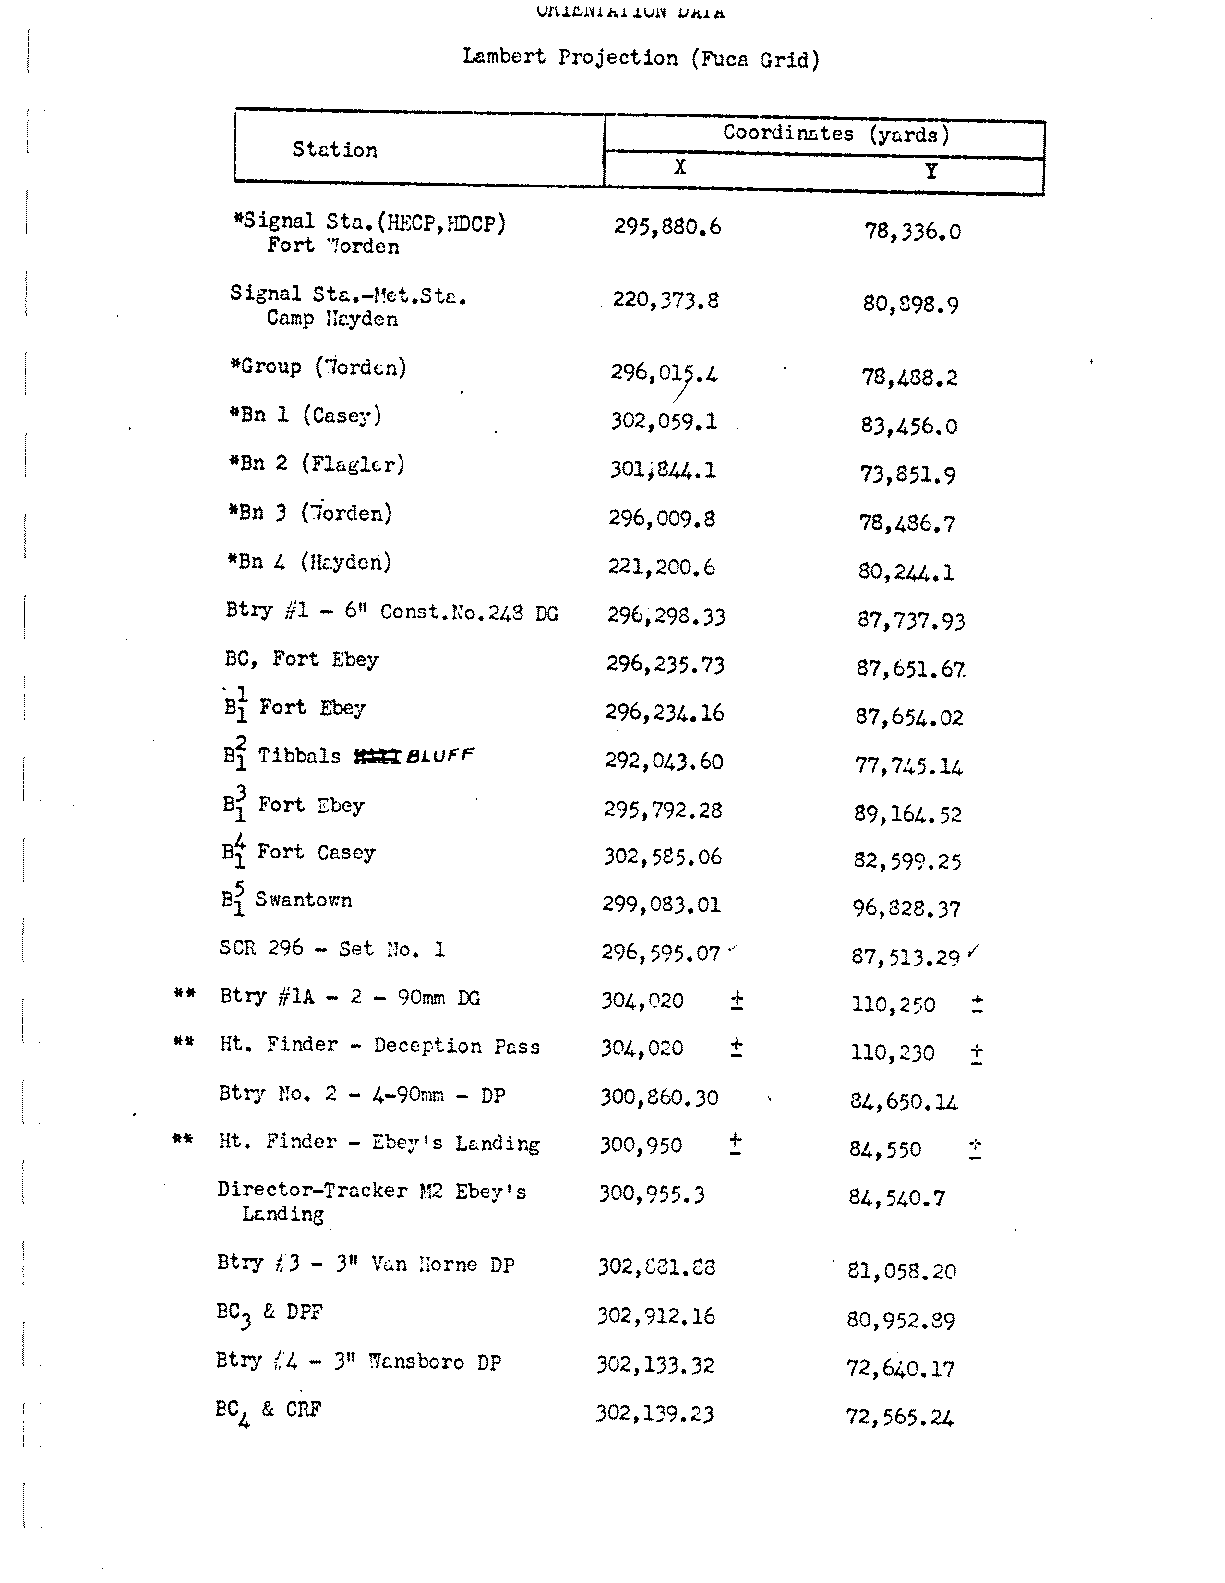
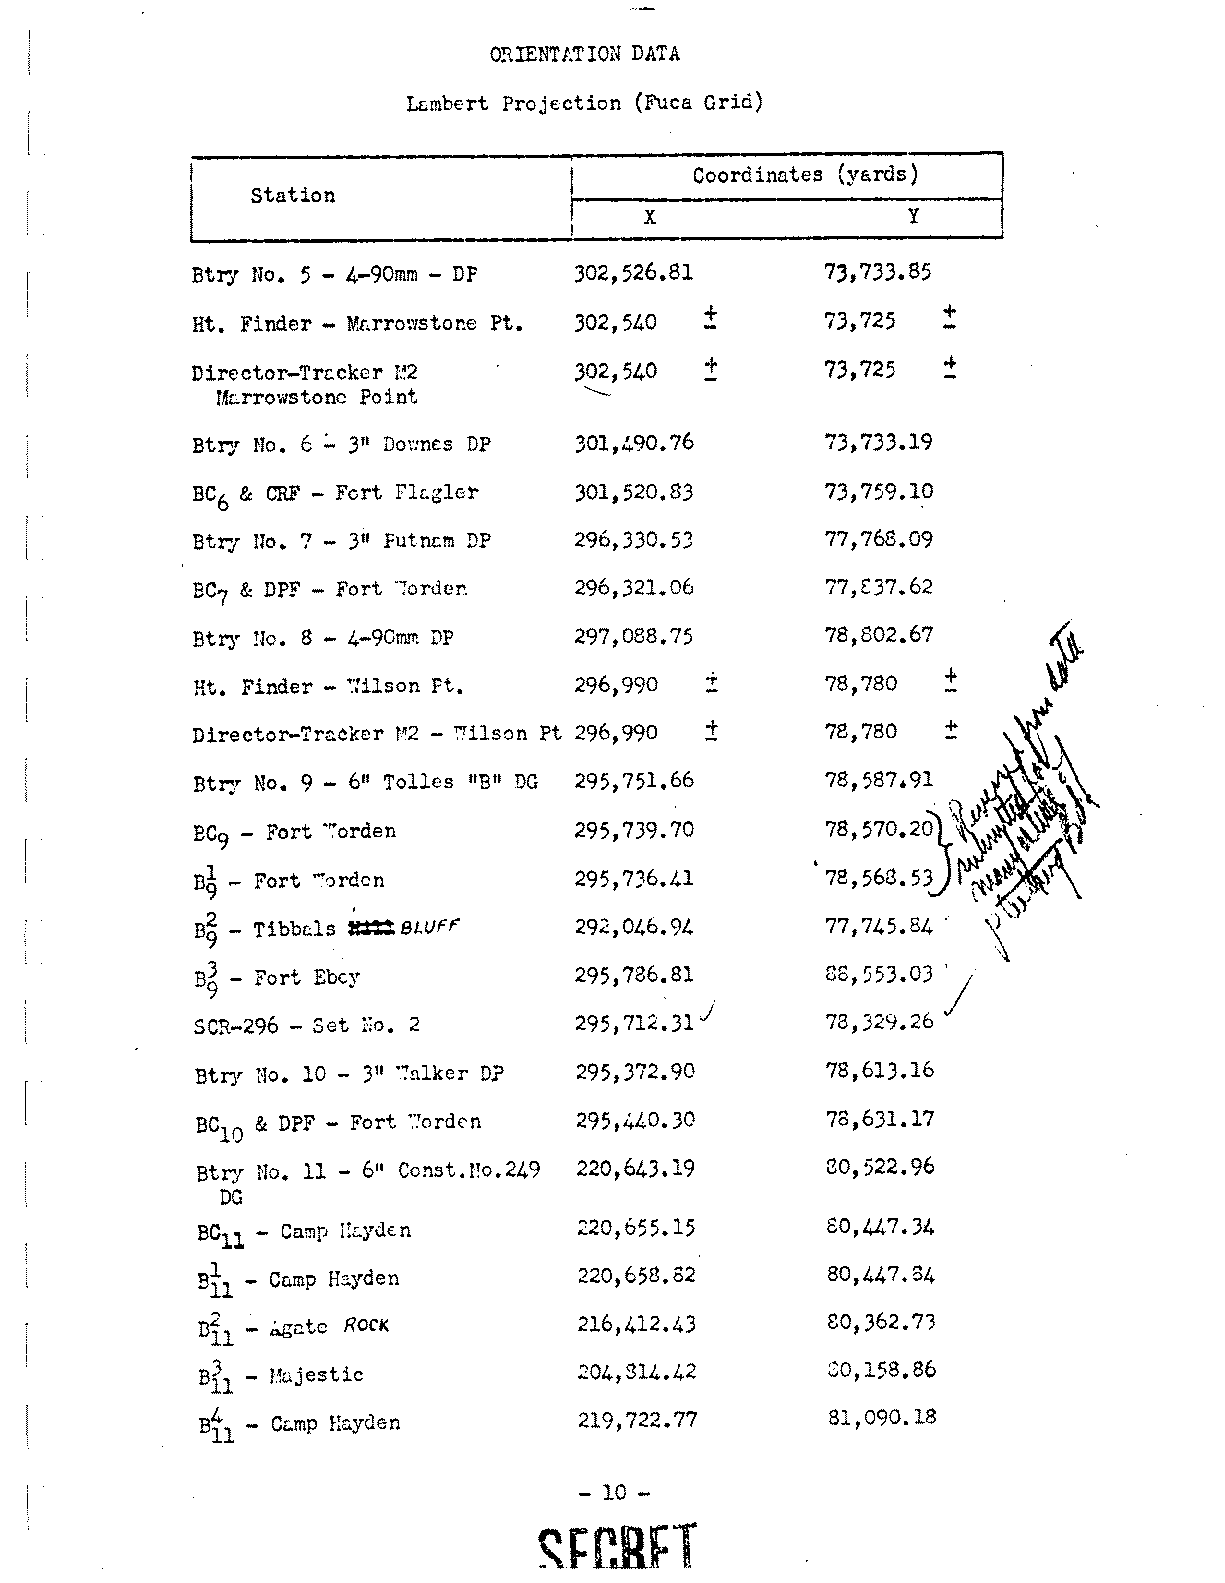
Page 9, Table: "Orientation data"
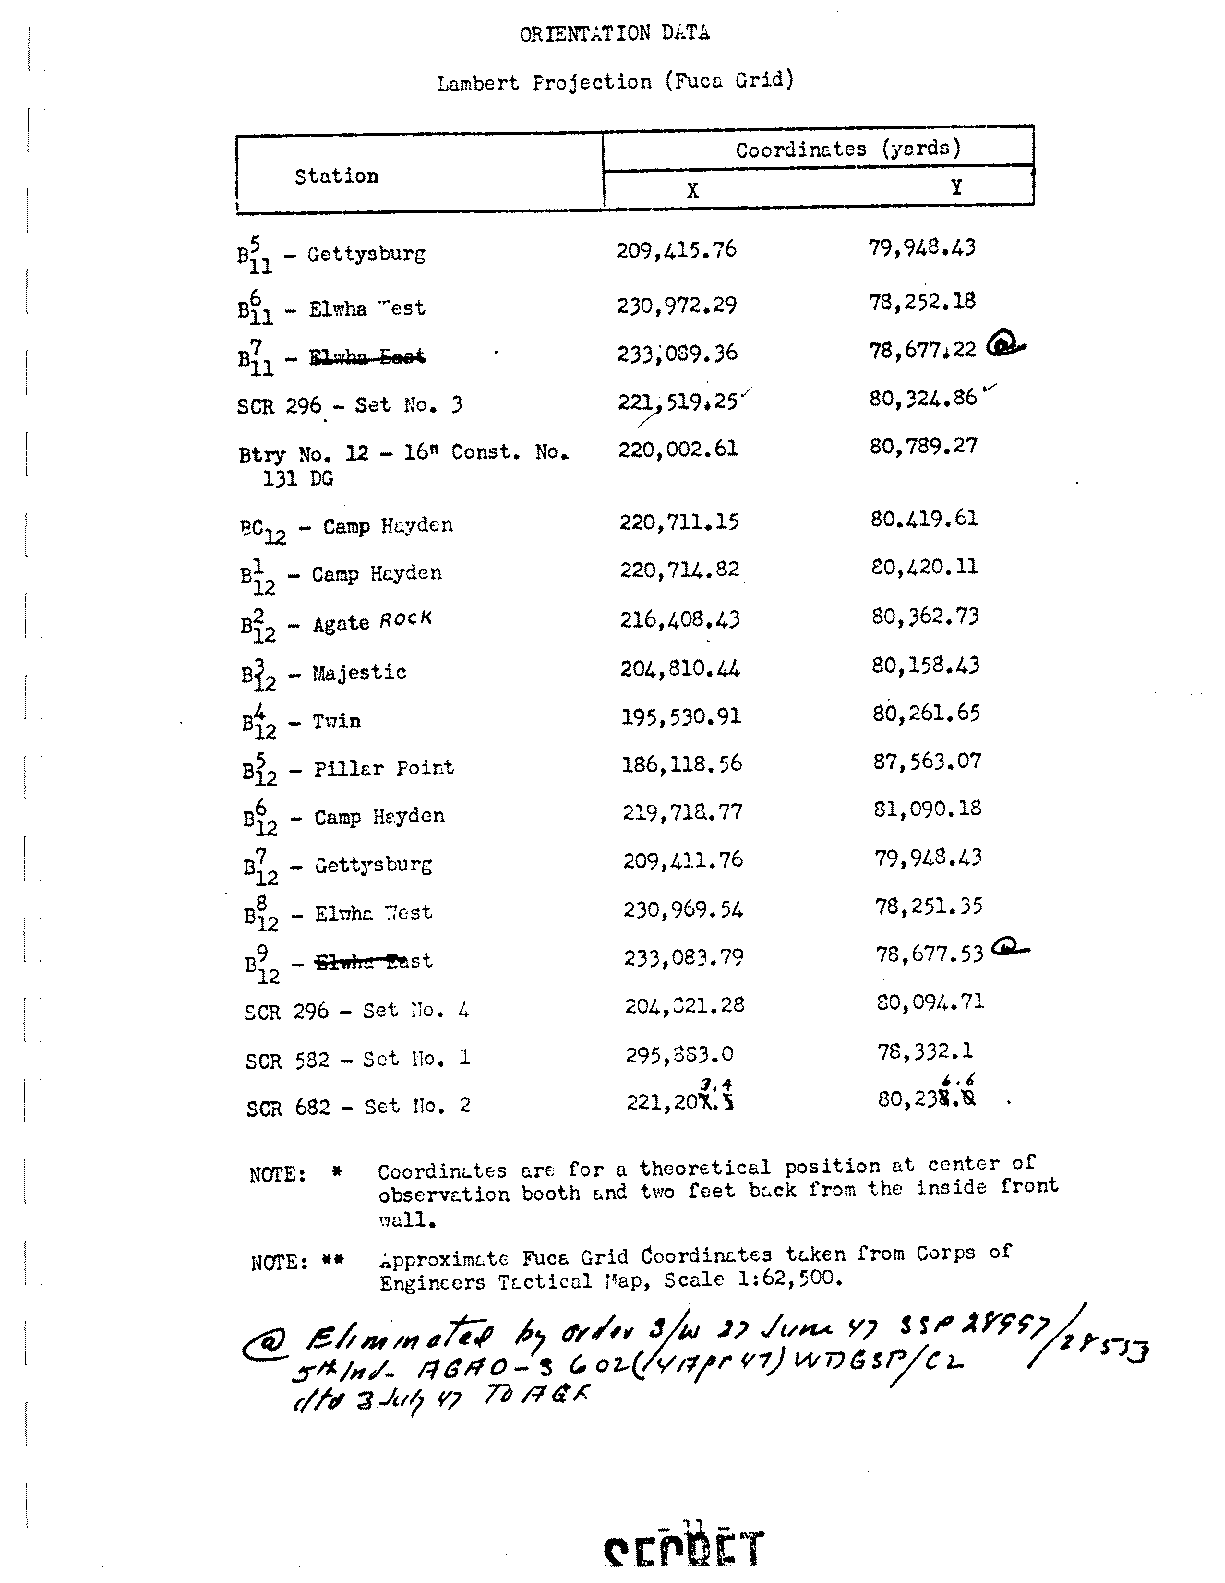
Page 10, Table: "Orientation data"
Page 11, Table: "Orientation data" and notes
Page 12, Paragraph 3
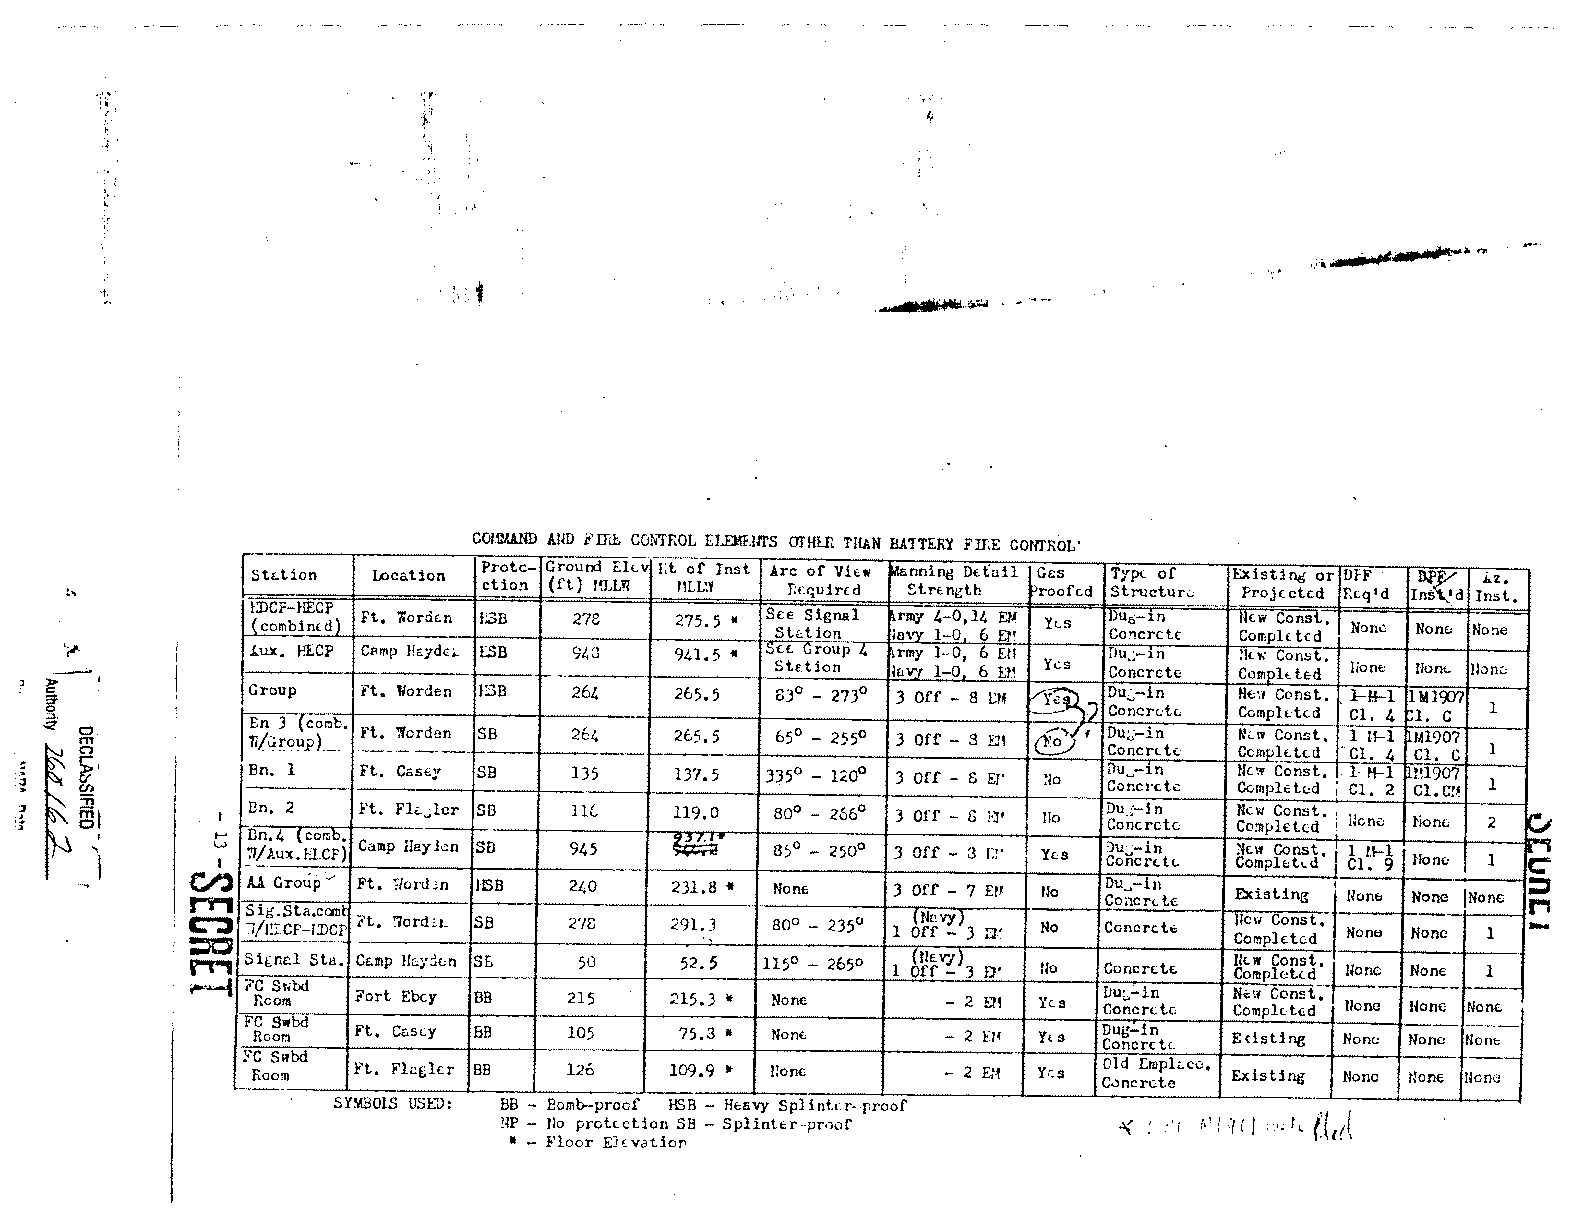
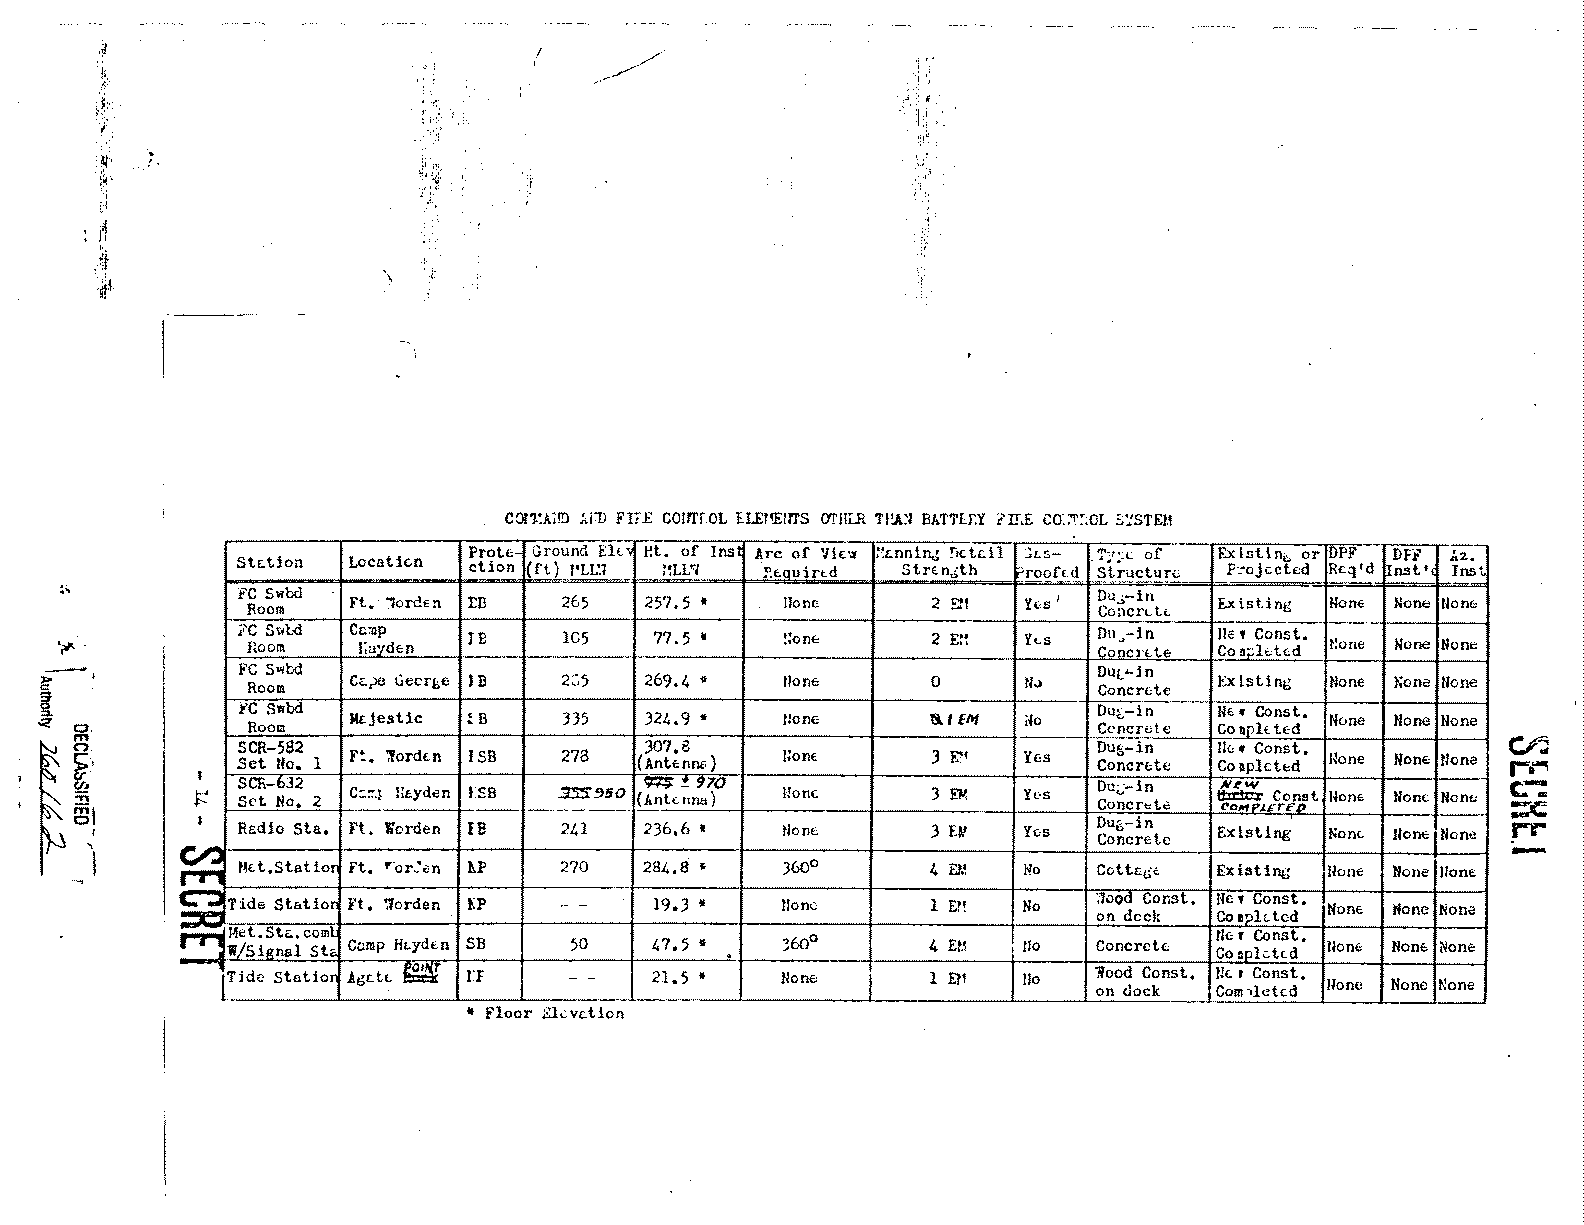
Page 13, Table: "Command and Fire Control Elements Other Than Battery Fire Control"
Page 14, Table: "Command and Fire Control Elements Other Than Battery Fire Control"
Page 15, Paragraphs 4, 5, 6 and 7
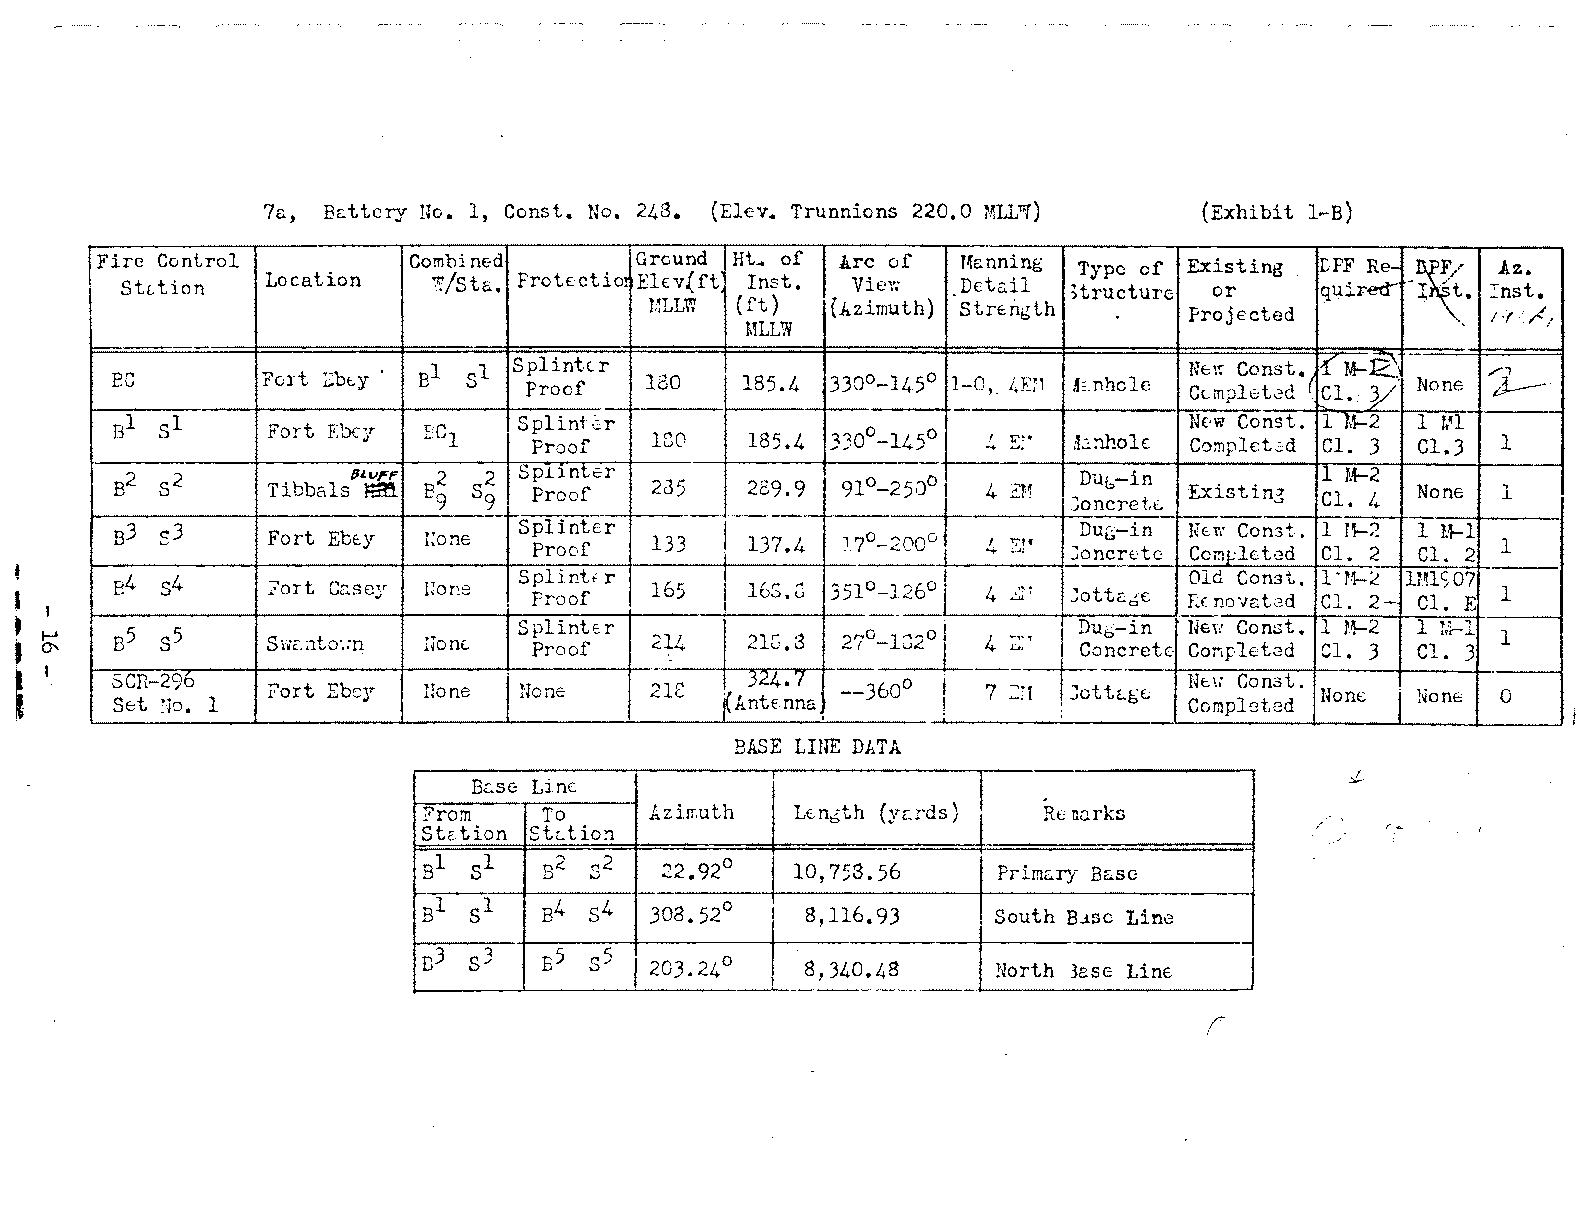
Page 16, Paragraph 7a (table)
Page 17, Paragraph 7b, 7c, 7d and 7e
Page 18, Paragraph 7f, 7g and 7h
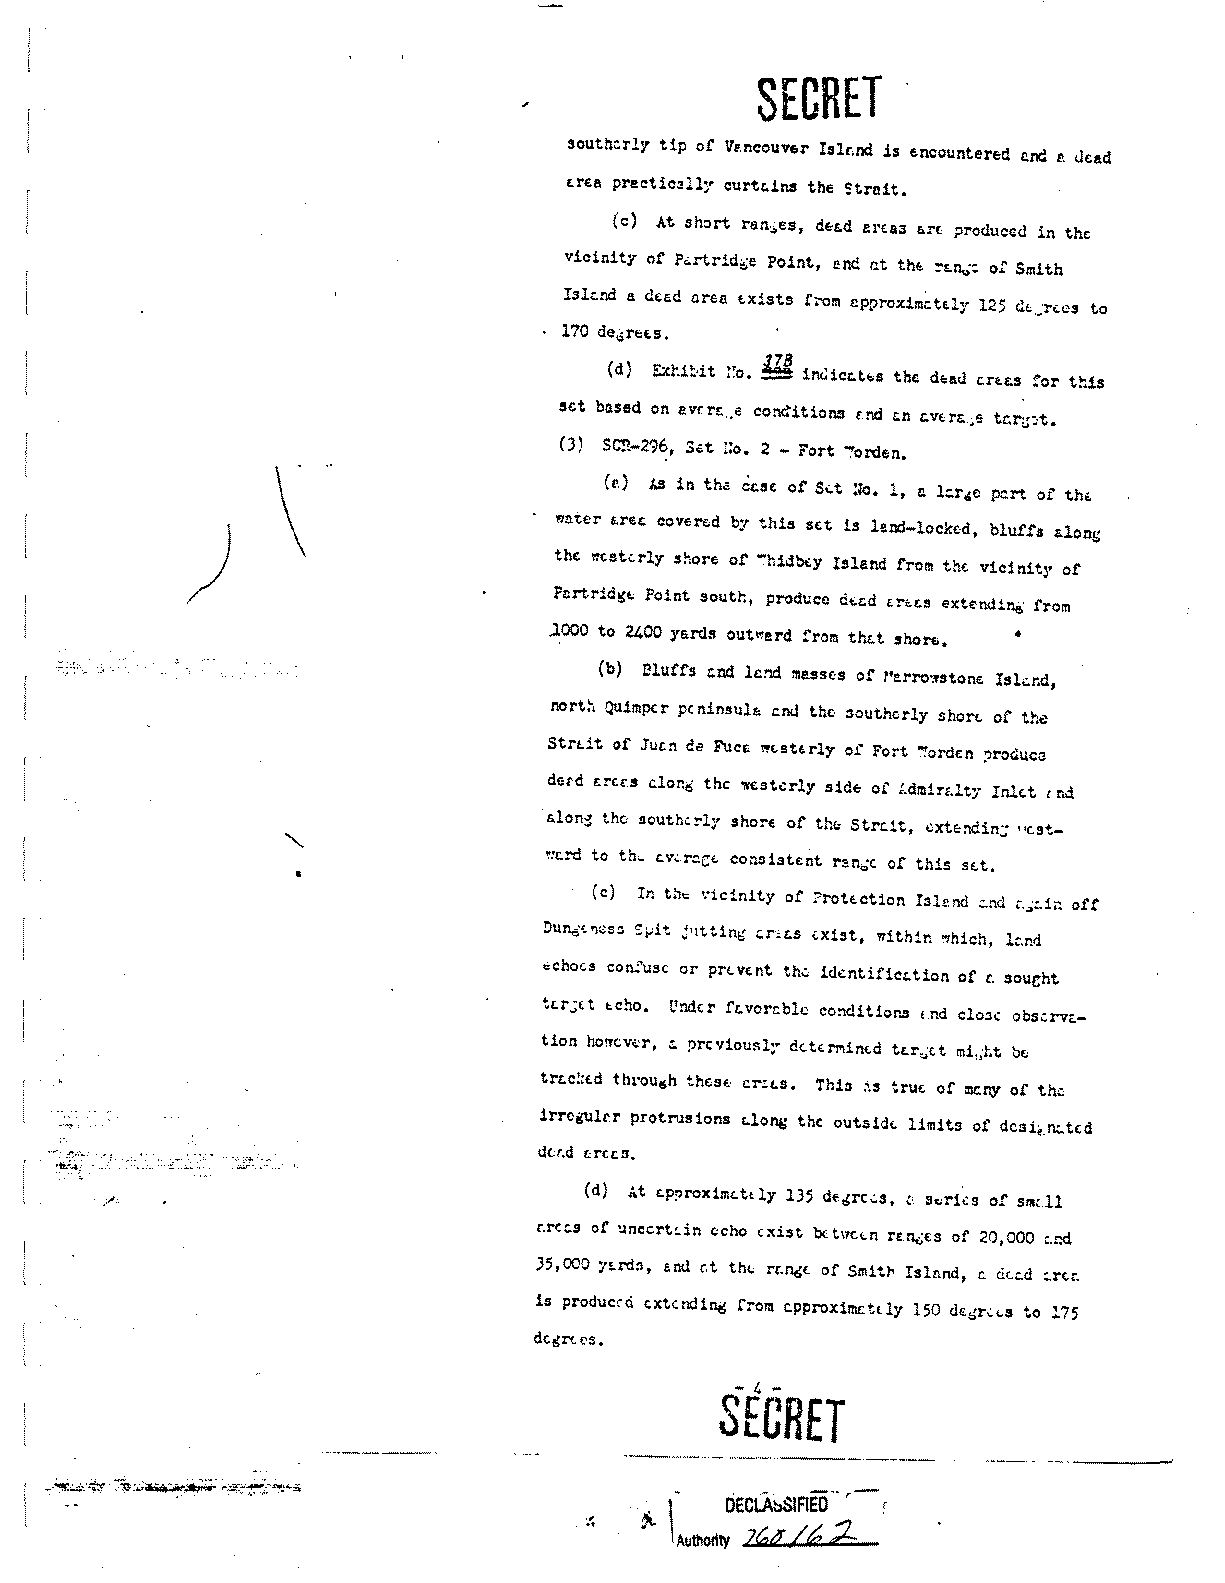
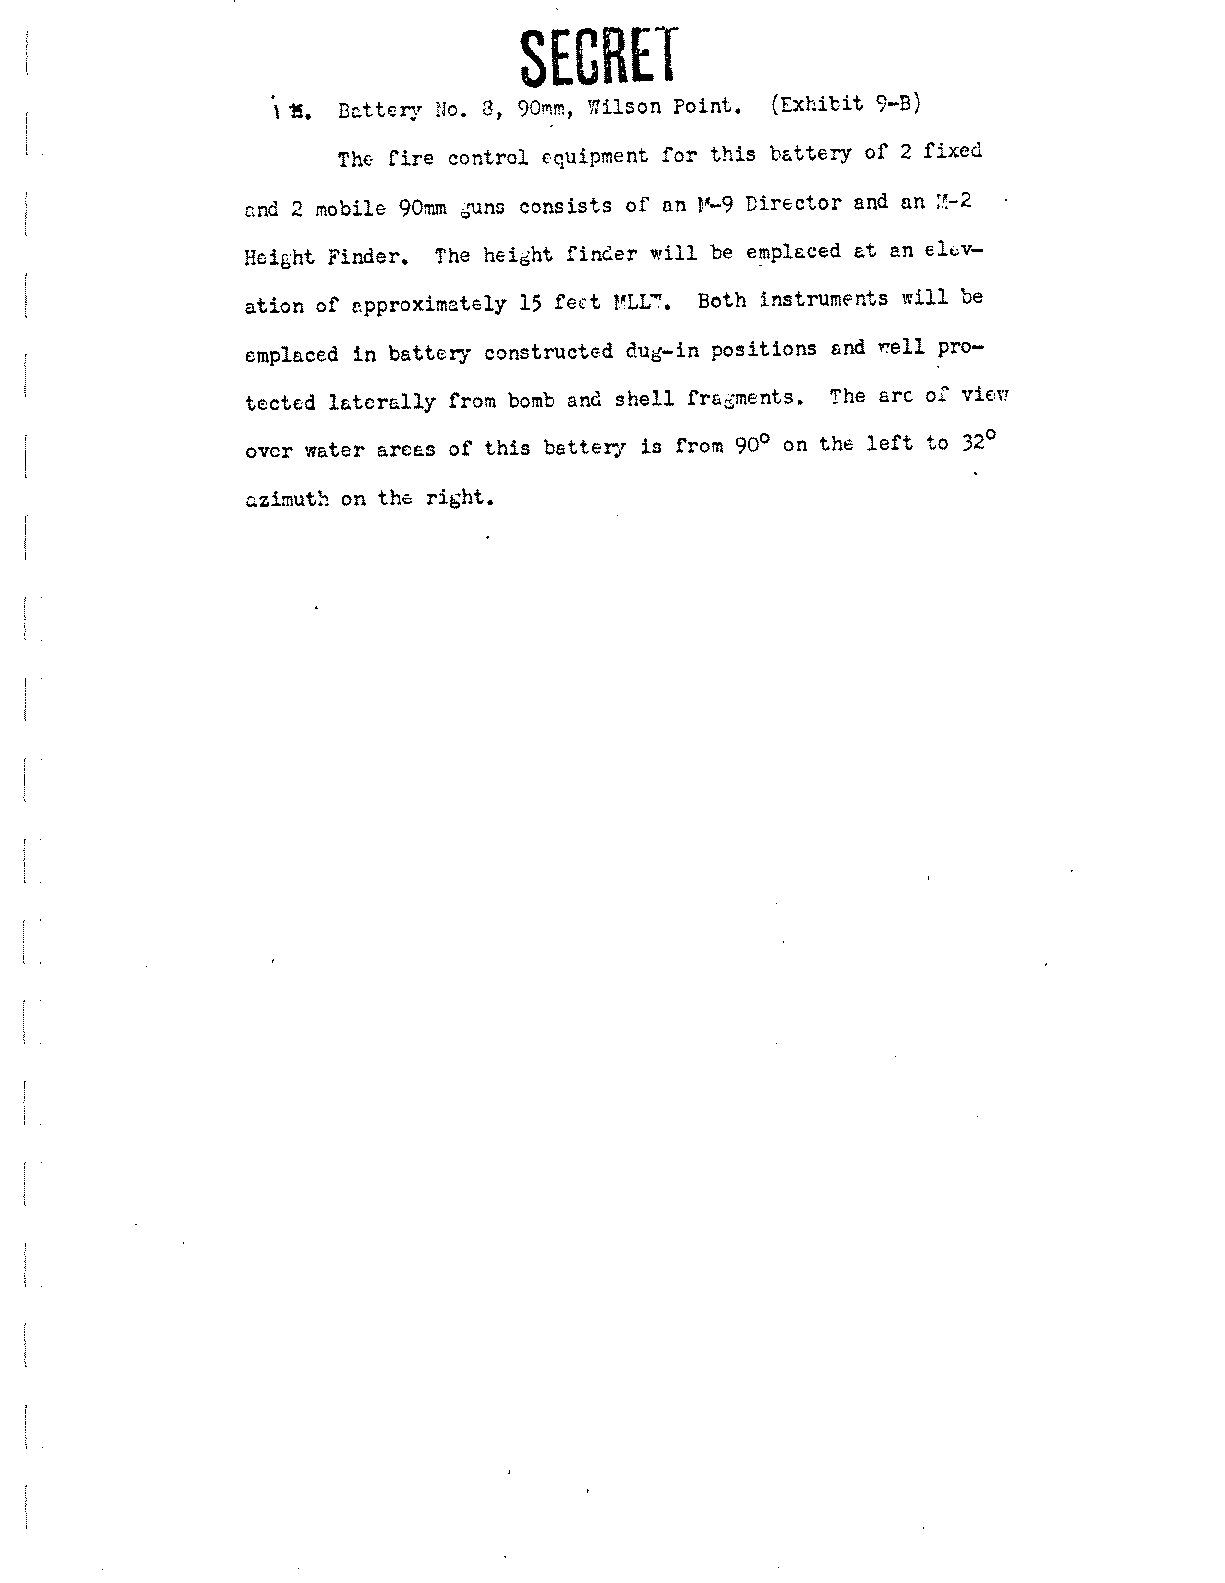
Page 19, Paragraph 7i
Page 20, Paragraph 7J (table)
Page 21, Paragraph 7k
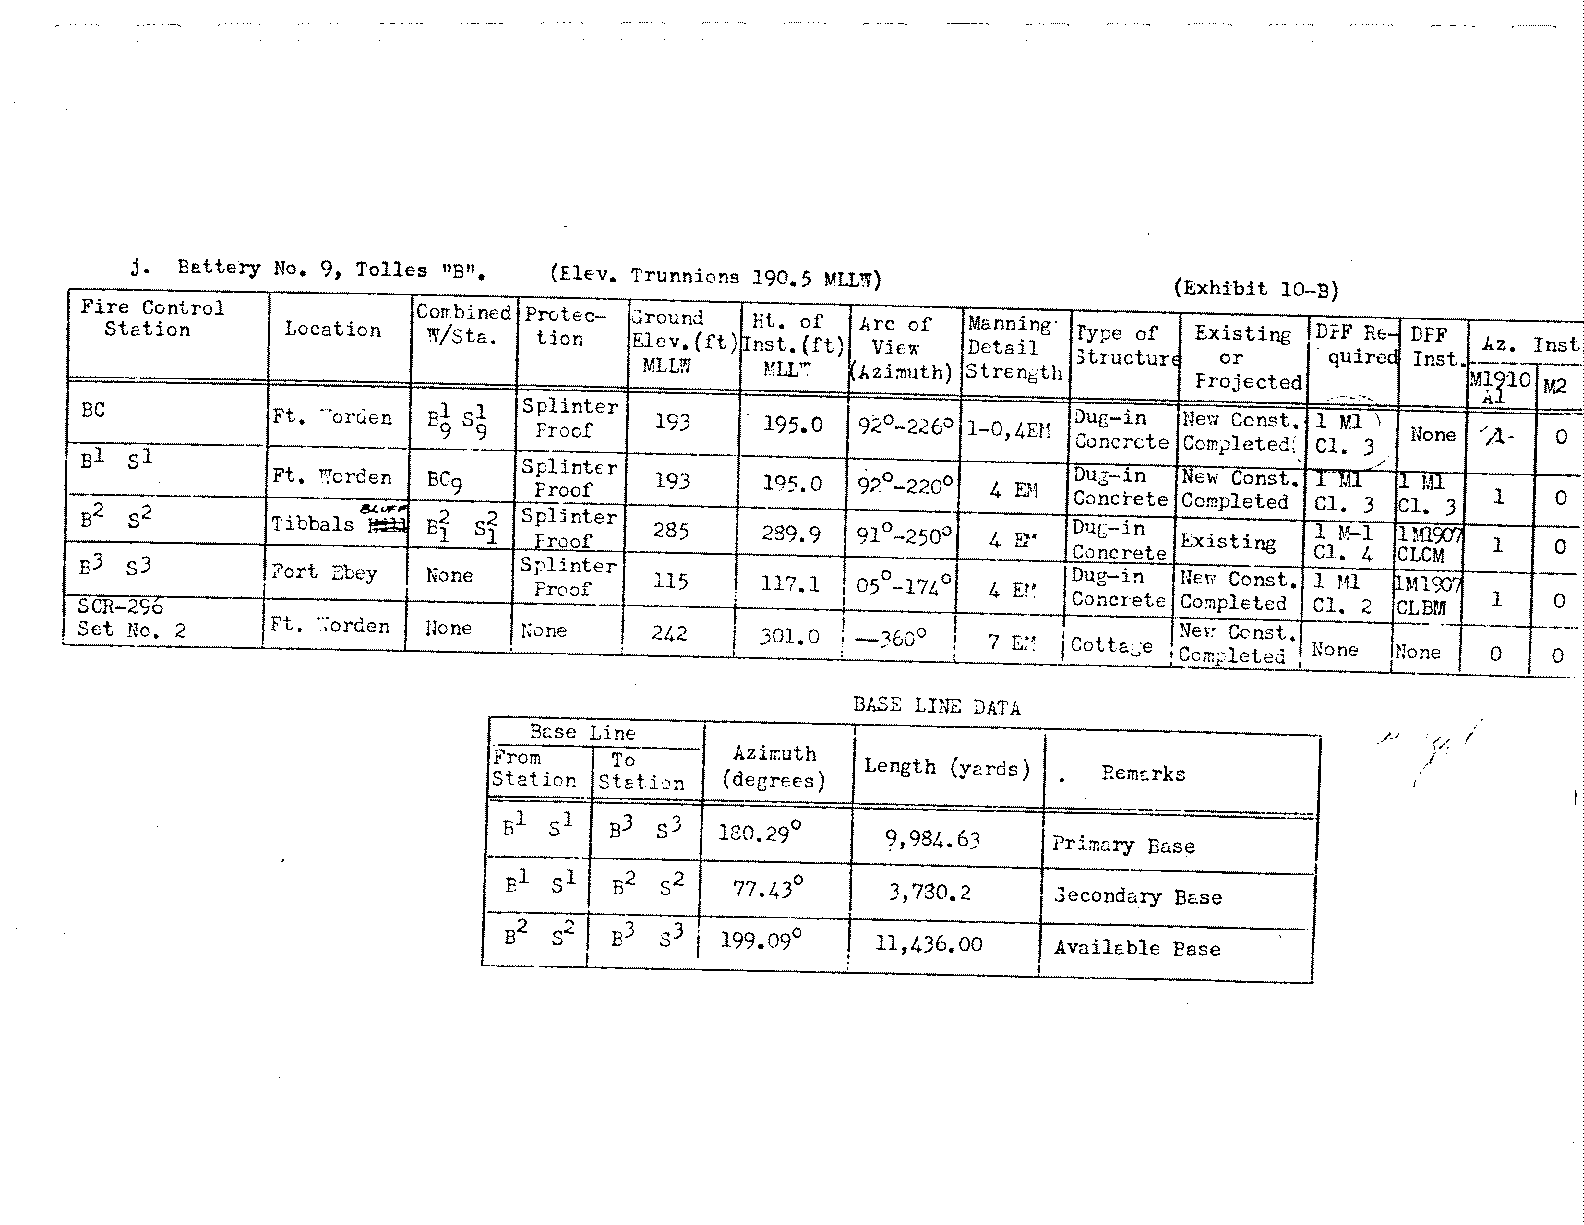
Page 22, Paragraph 7l (table)
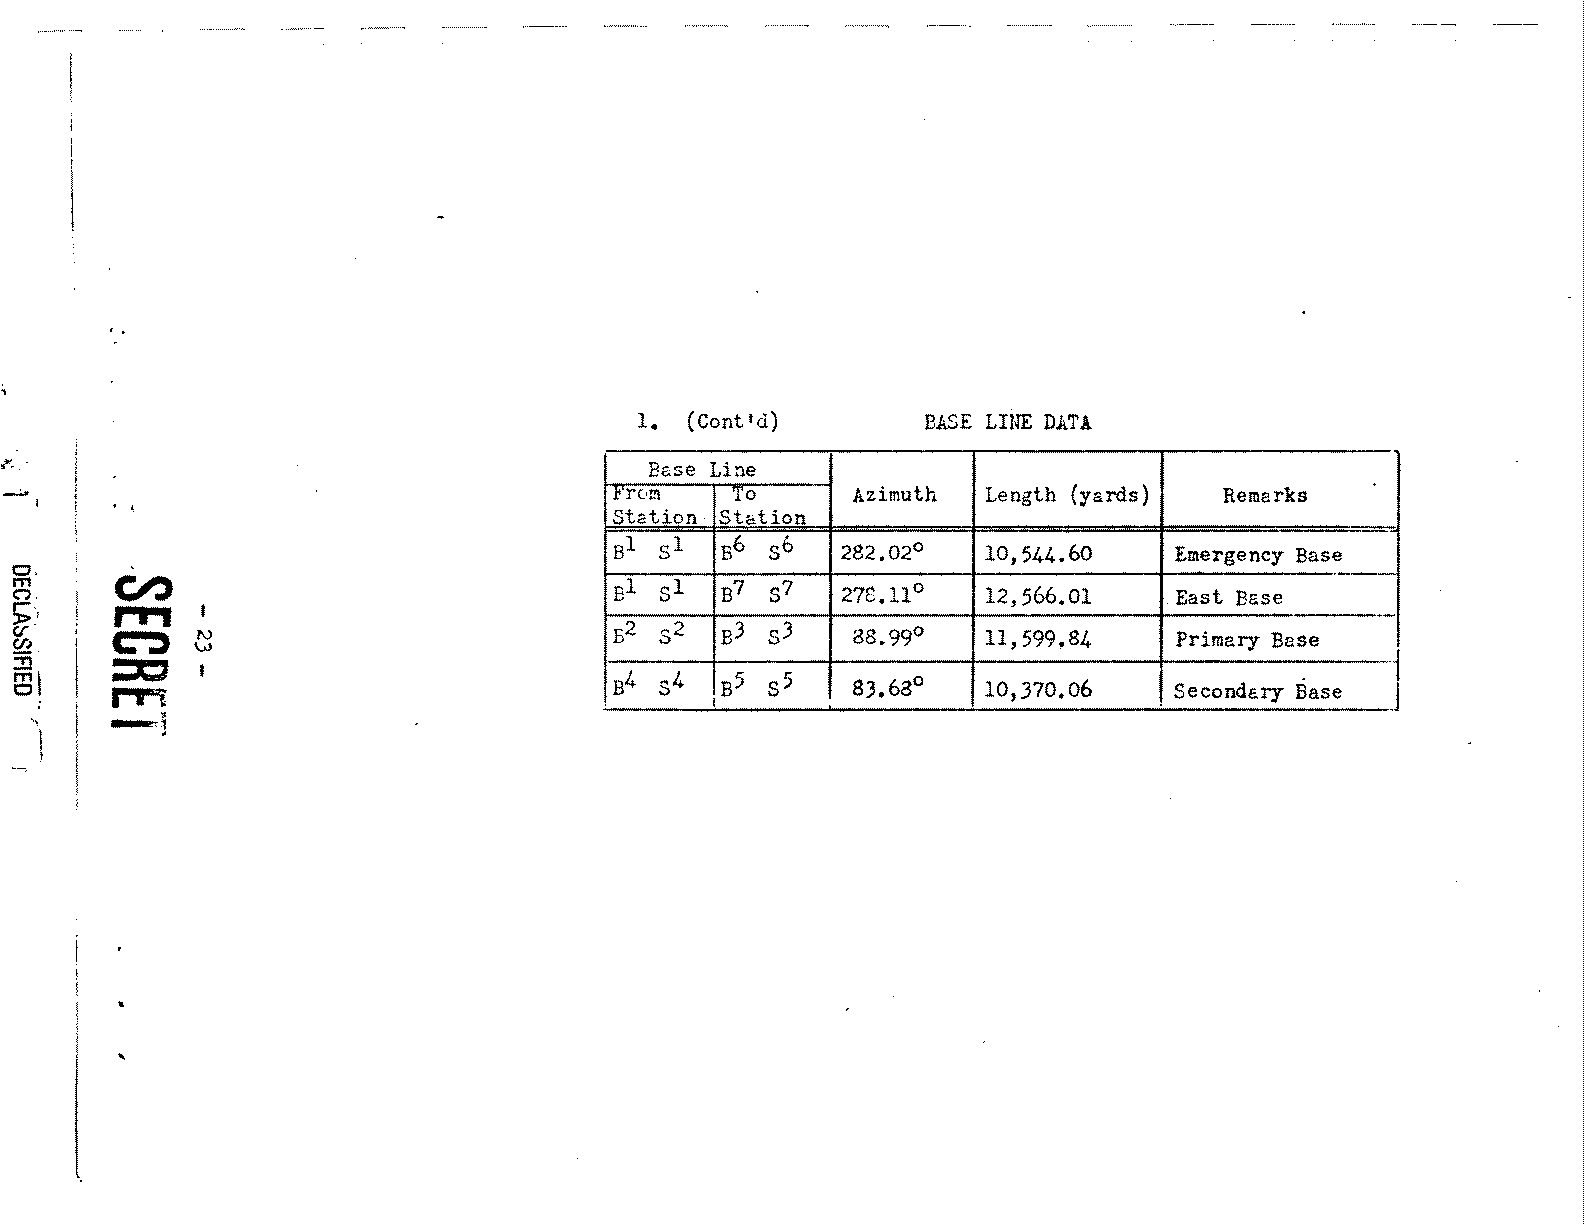
Page 23, Paragraph 7l (table)
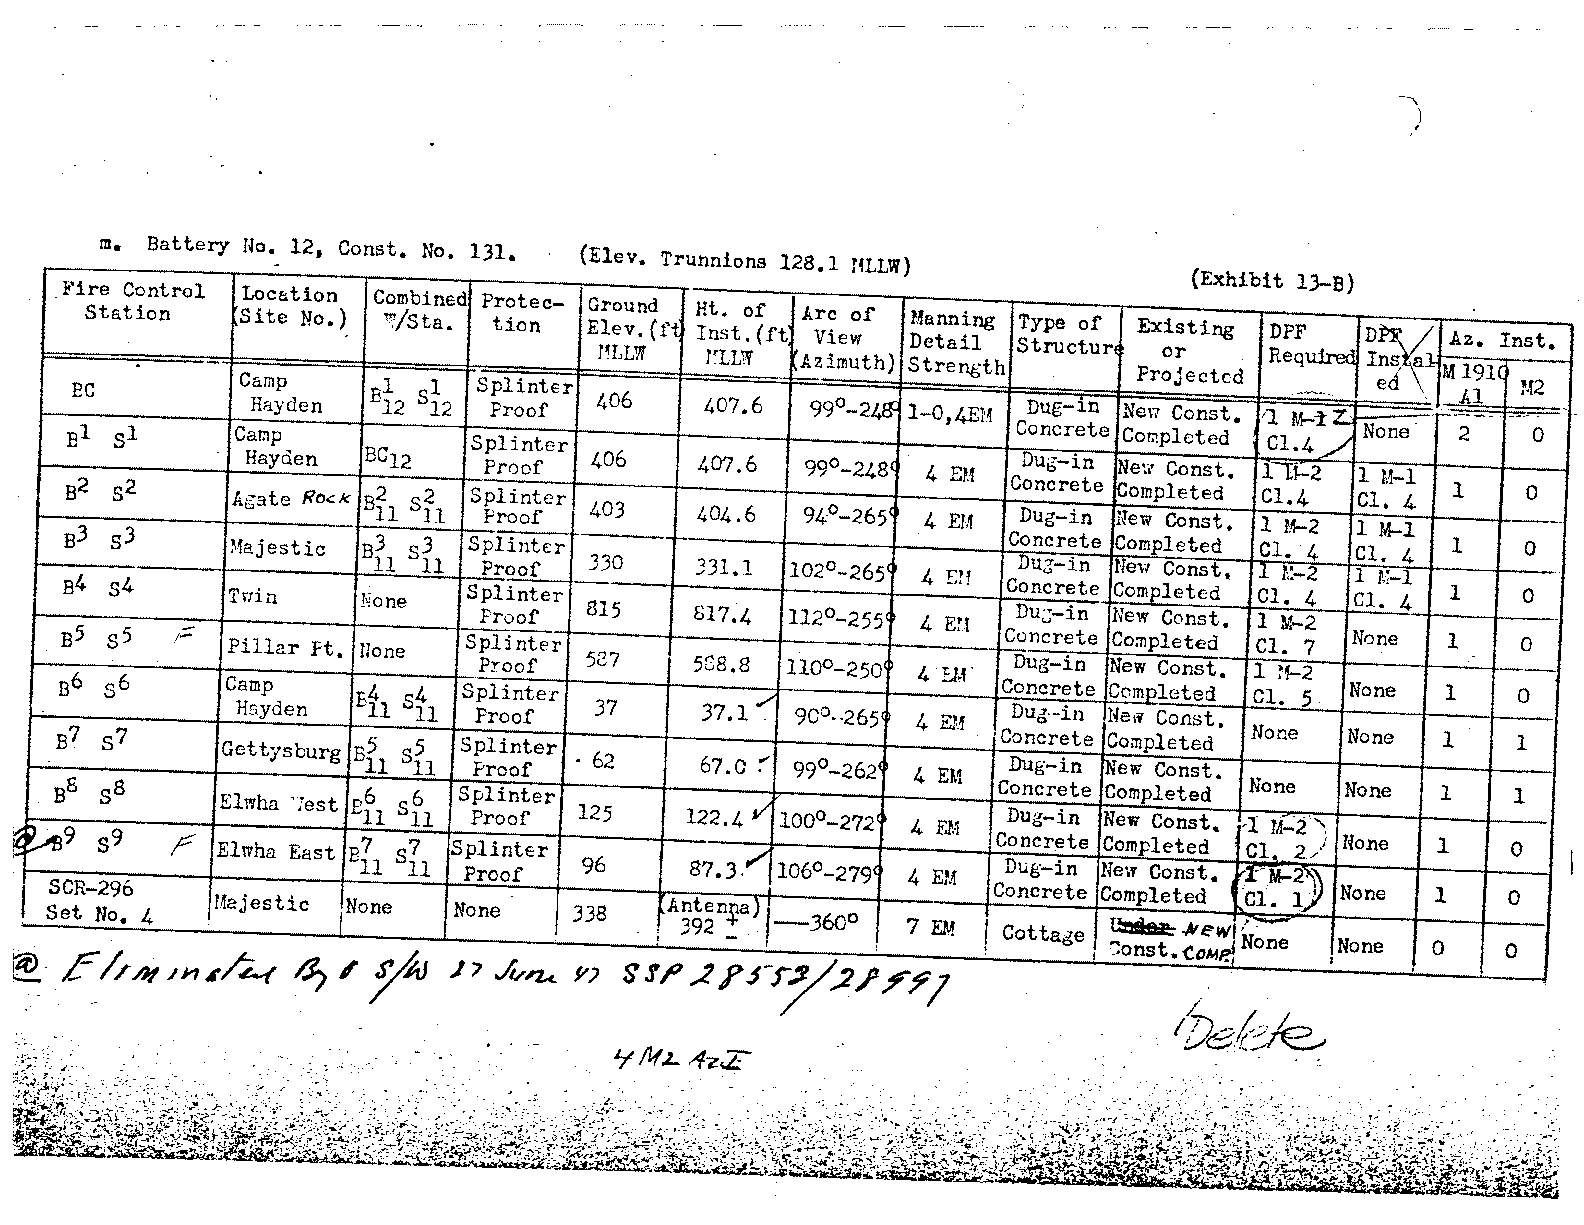
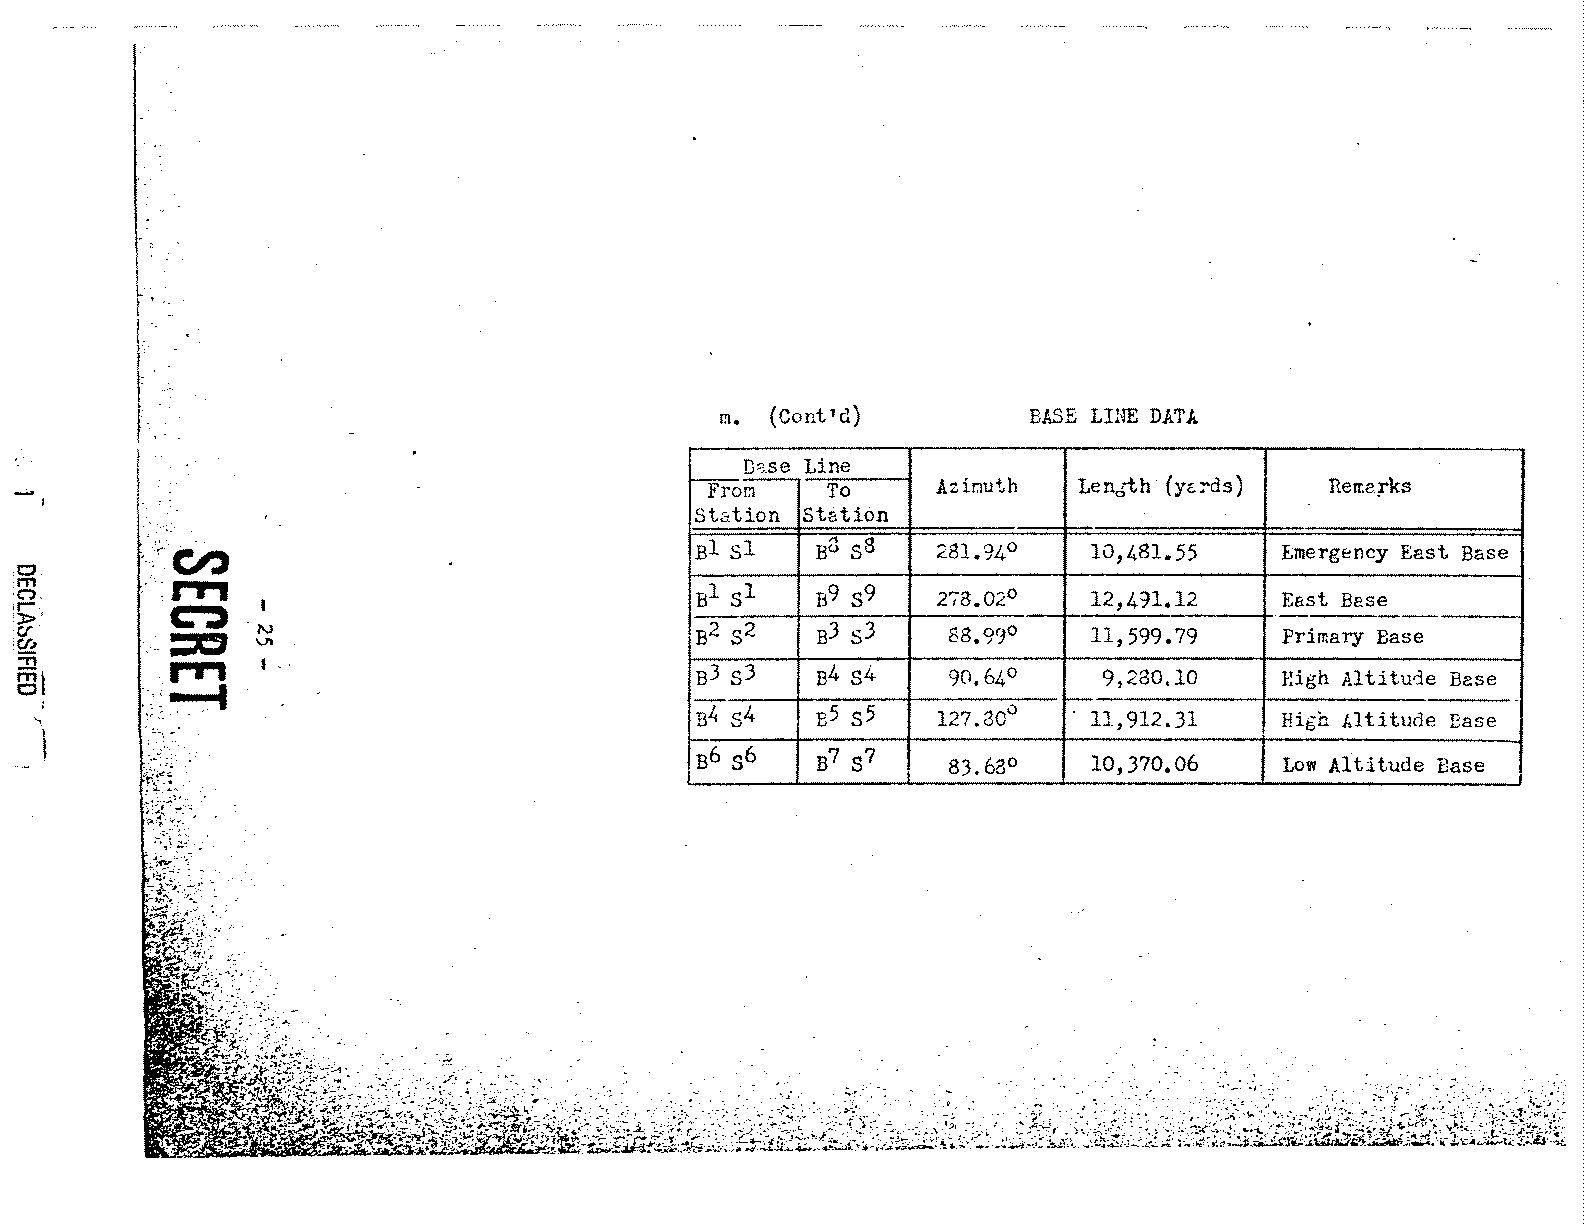
Page 24, Paragraph 7m (table)
Page 25, Paragraph 7m (table)
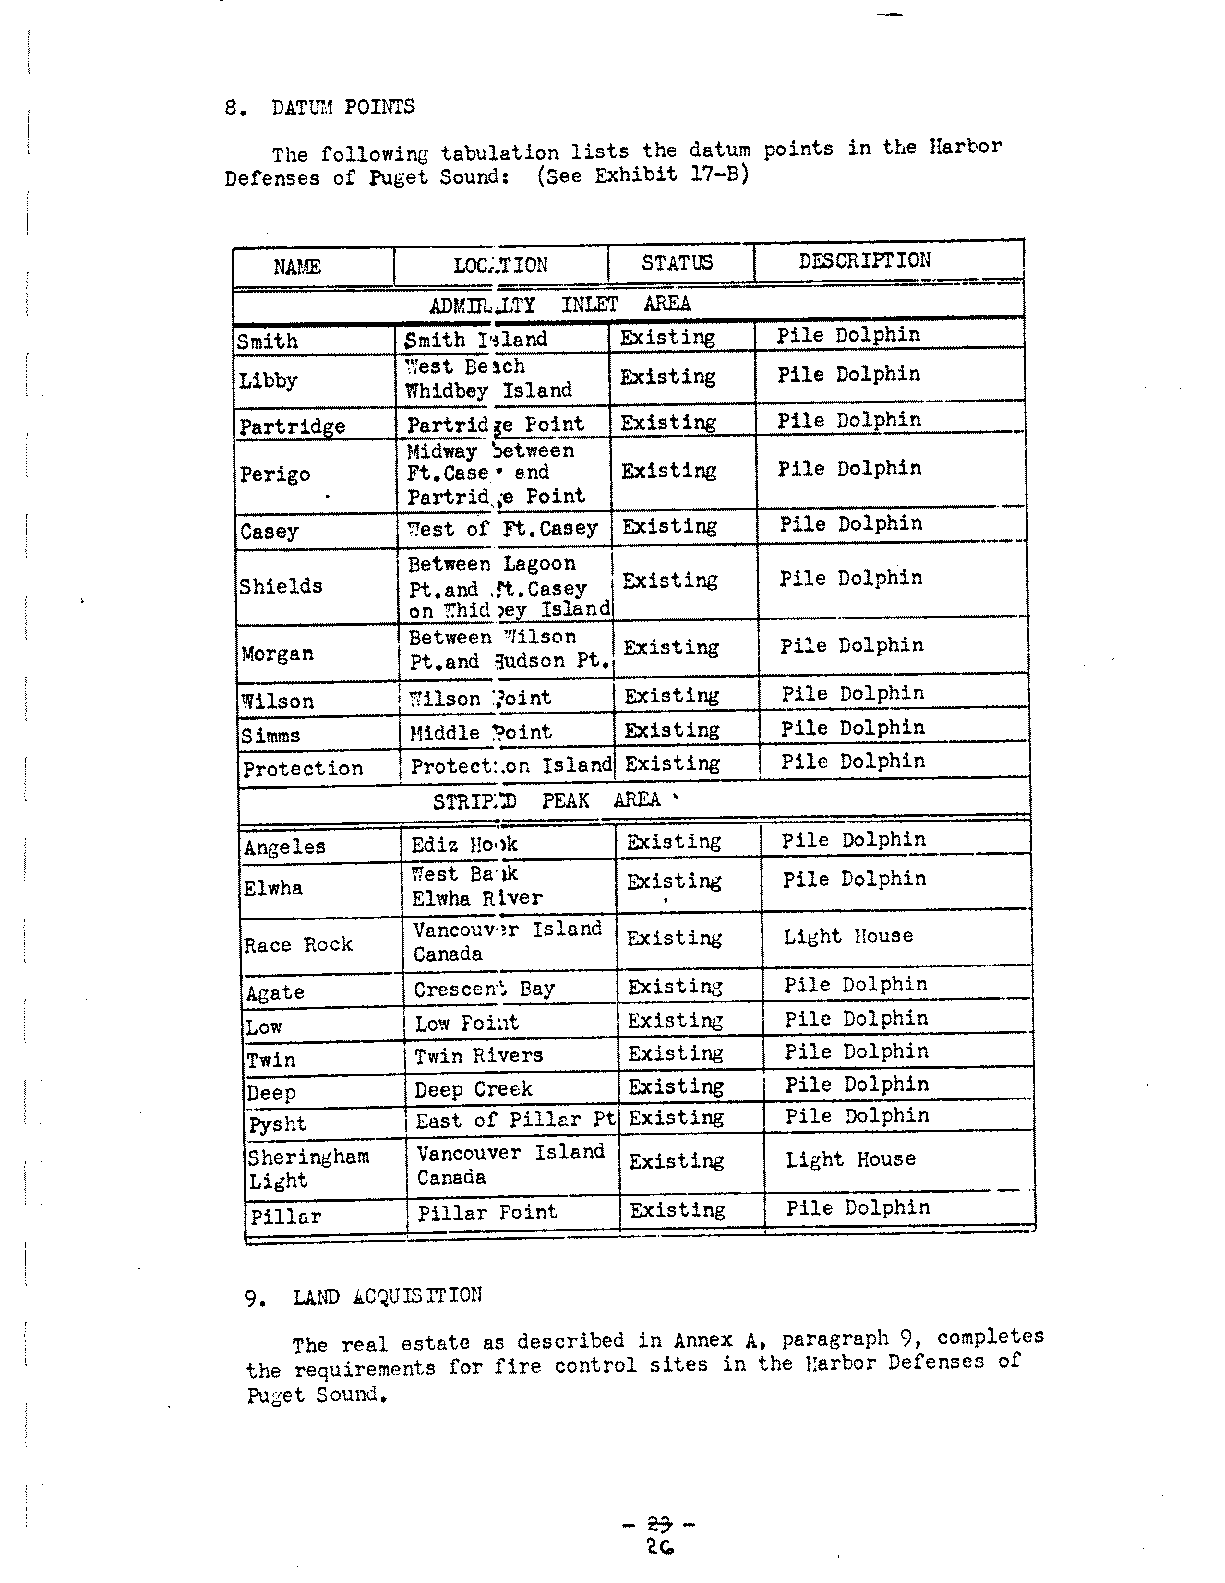
Page 26, Paragraph 8 and 9
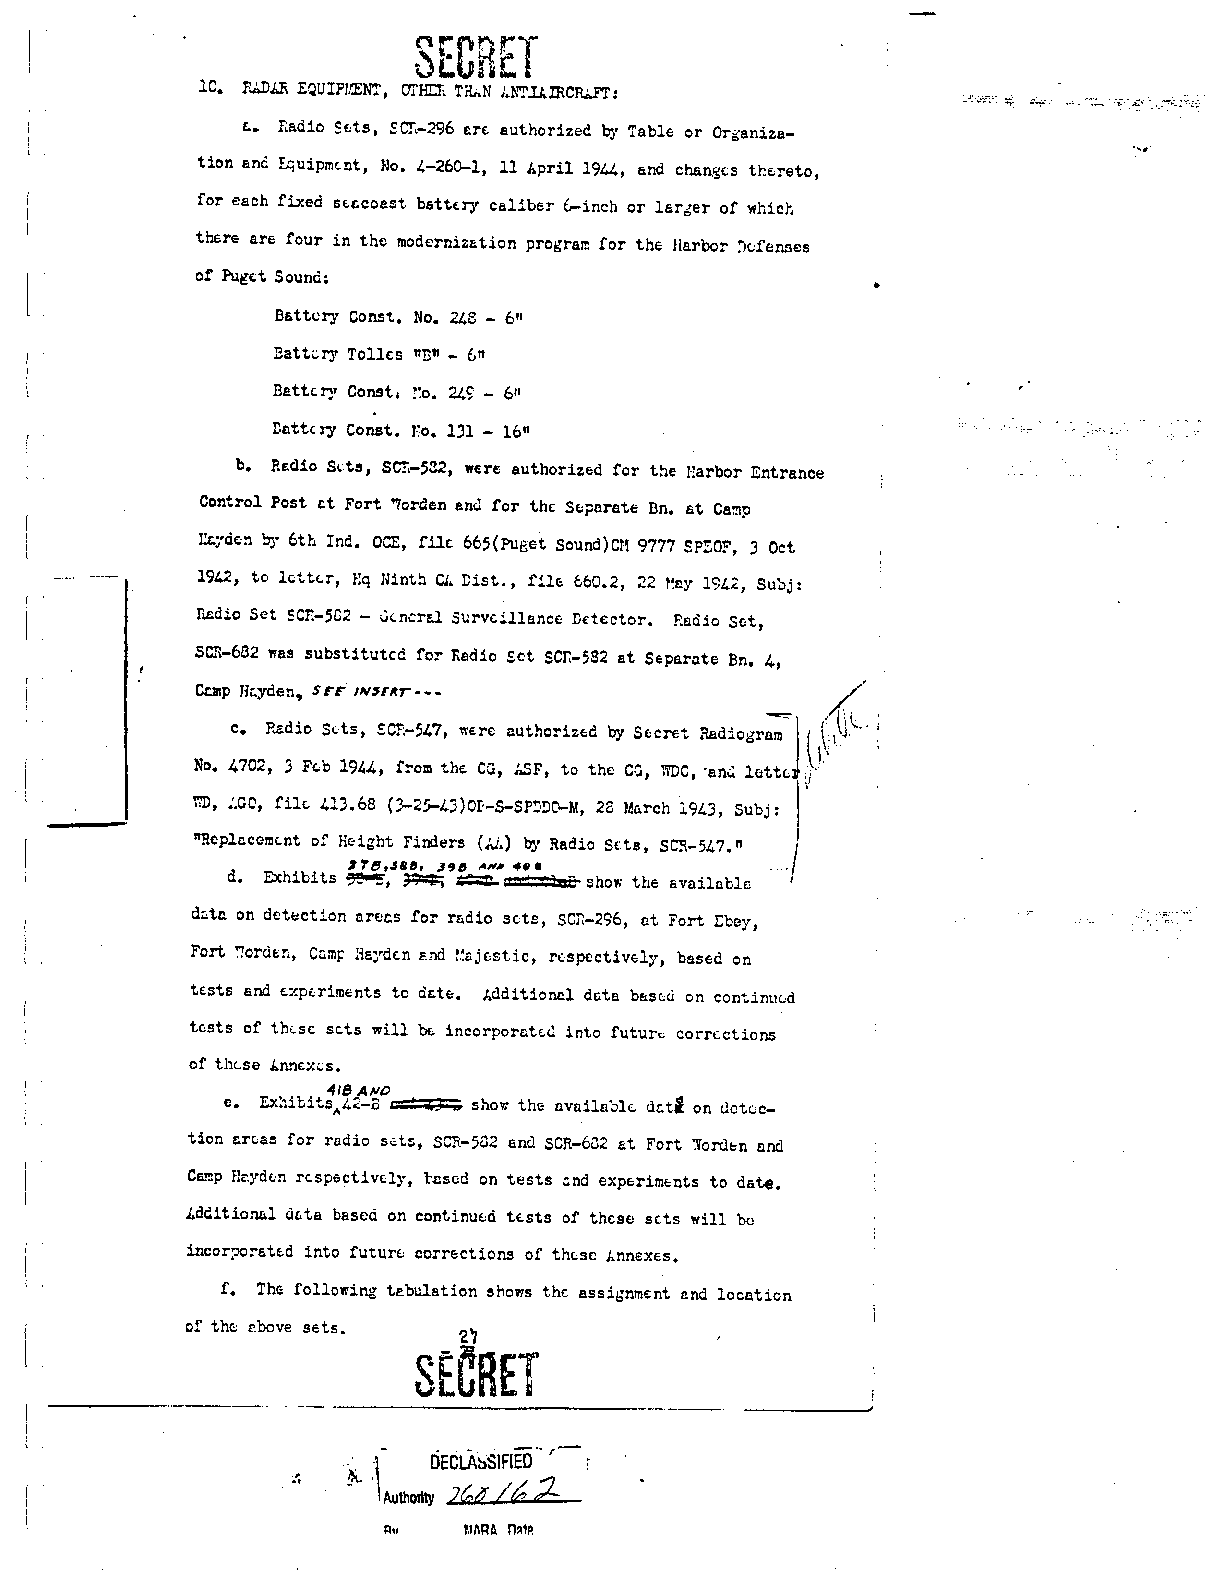
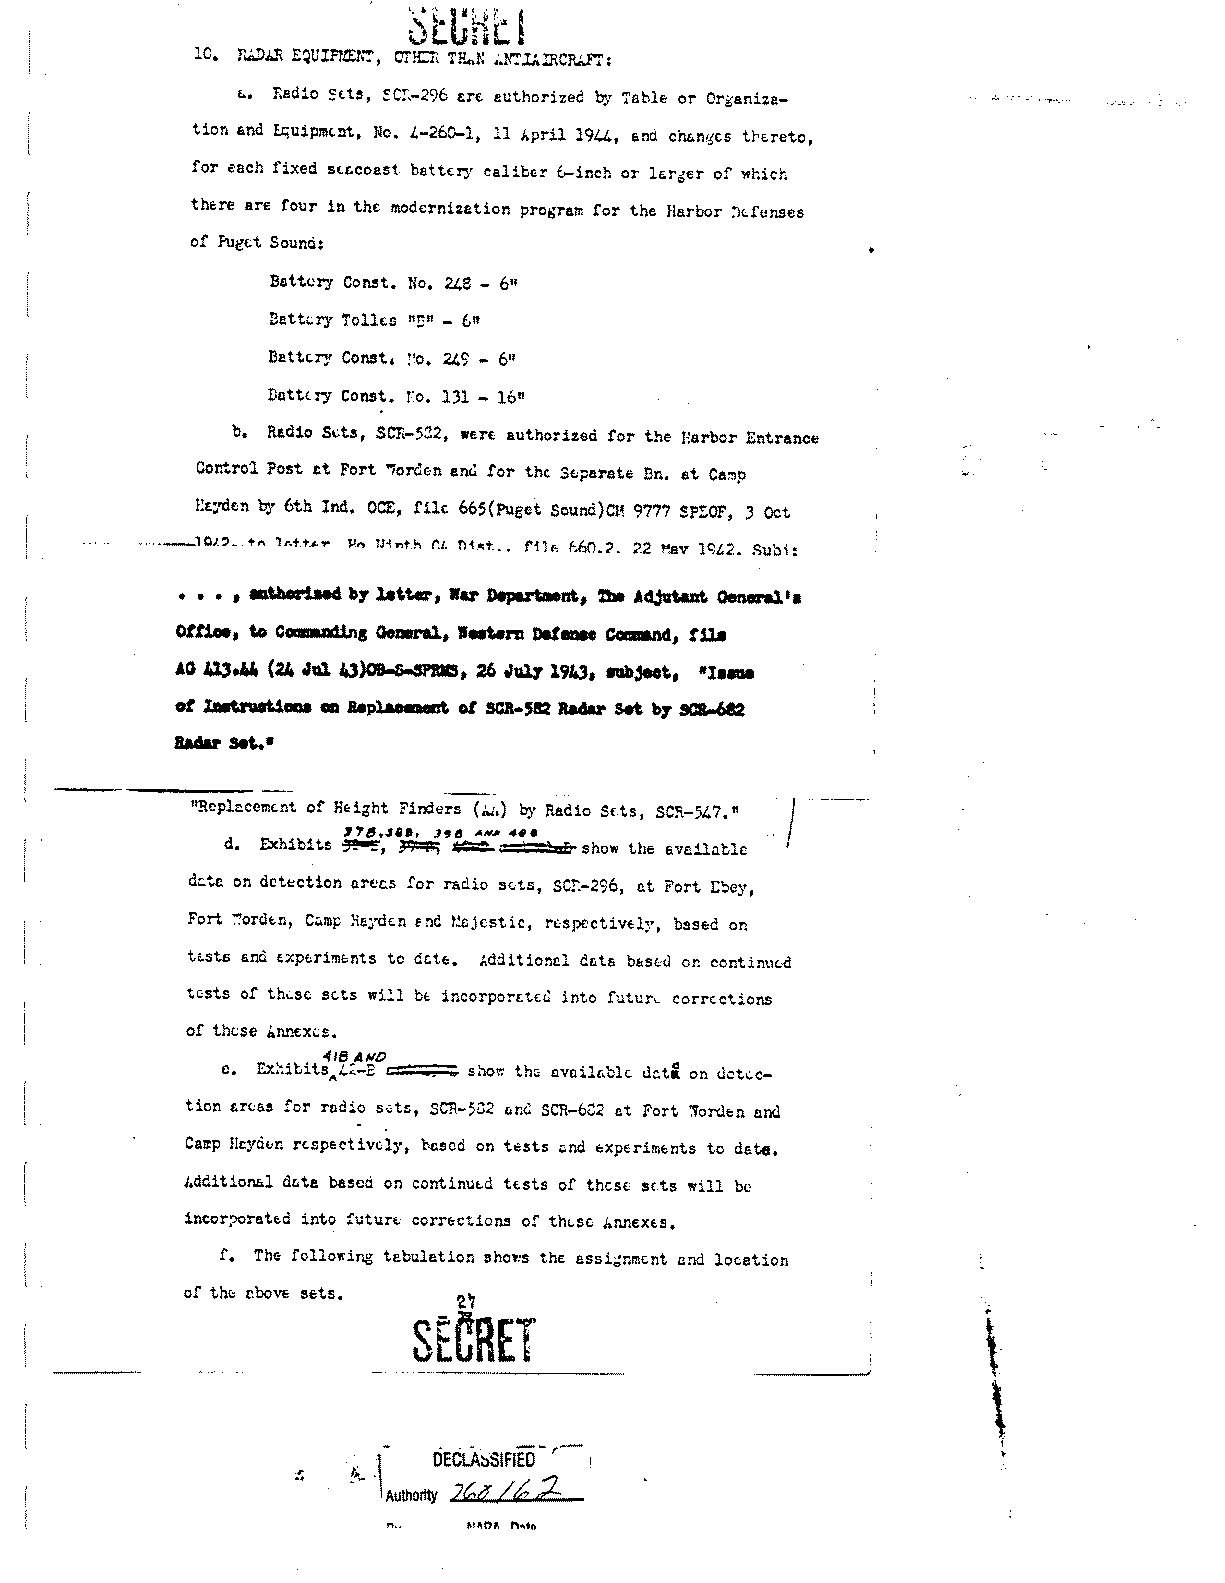
Page 27, Paragraph 10
Page 27, Inset
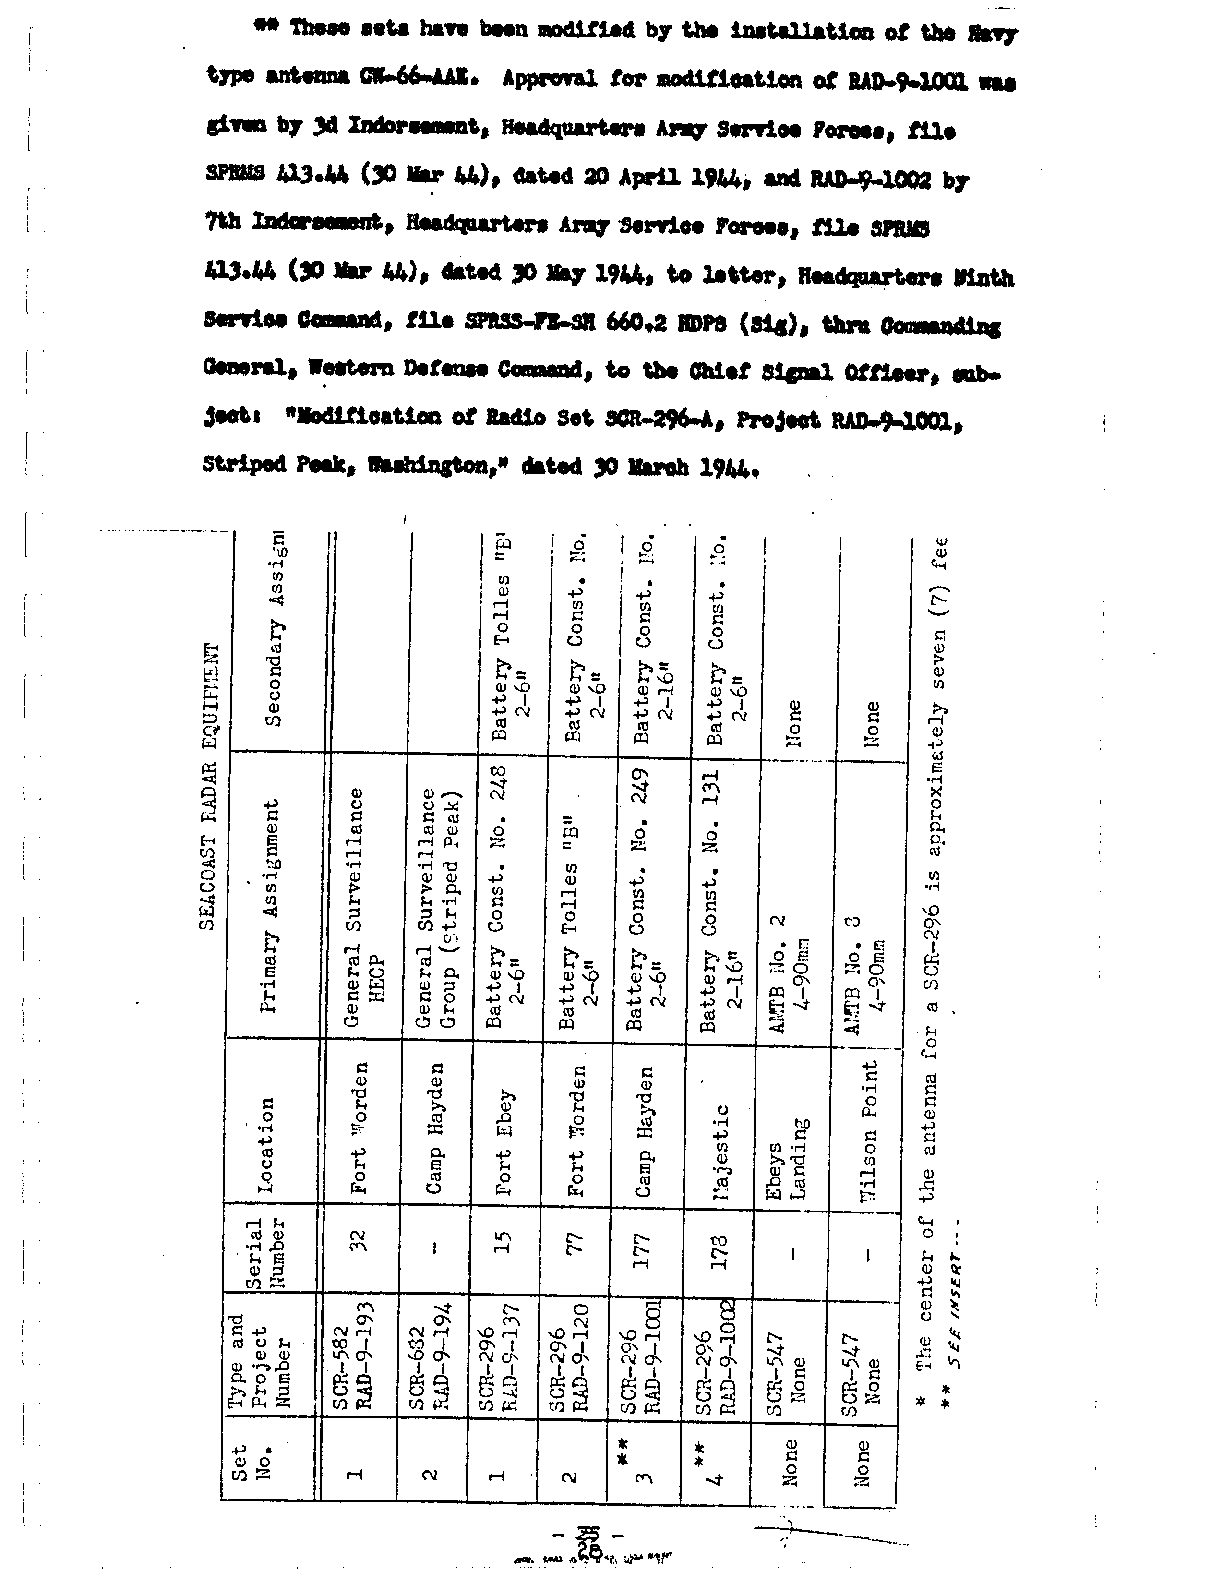
Page 28, Table: "Seacoast Radar Equipment"
Page 28, Inset
Annex B - Fire Control, exhibits.
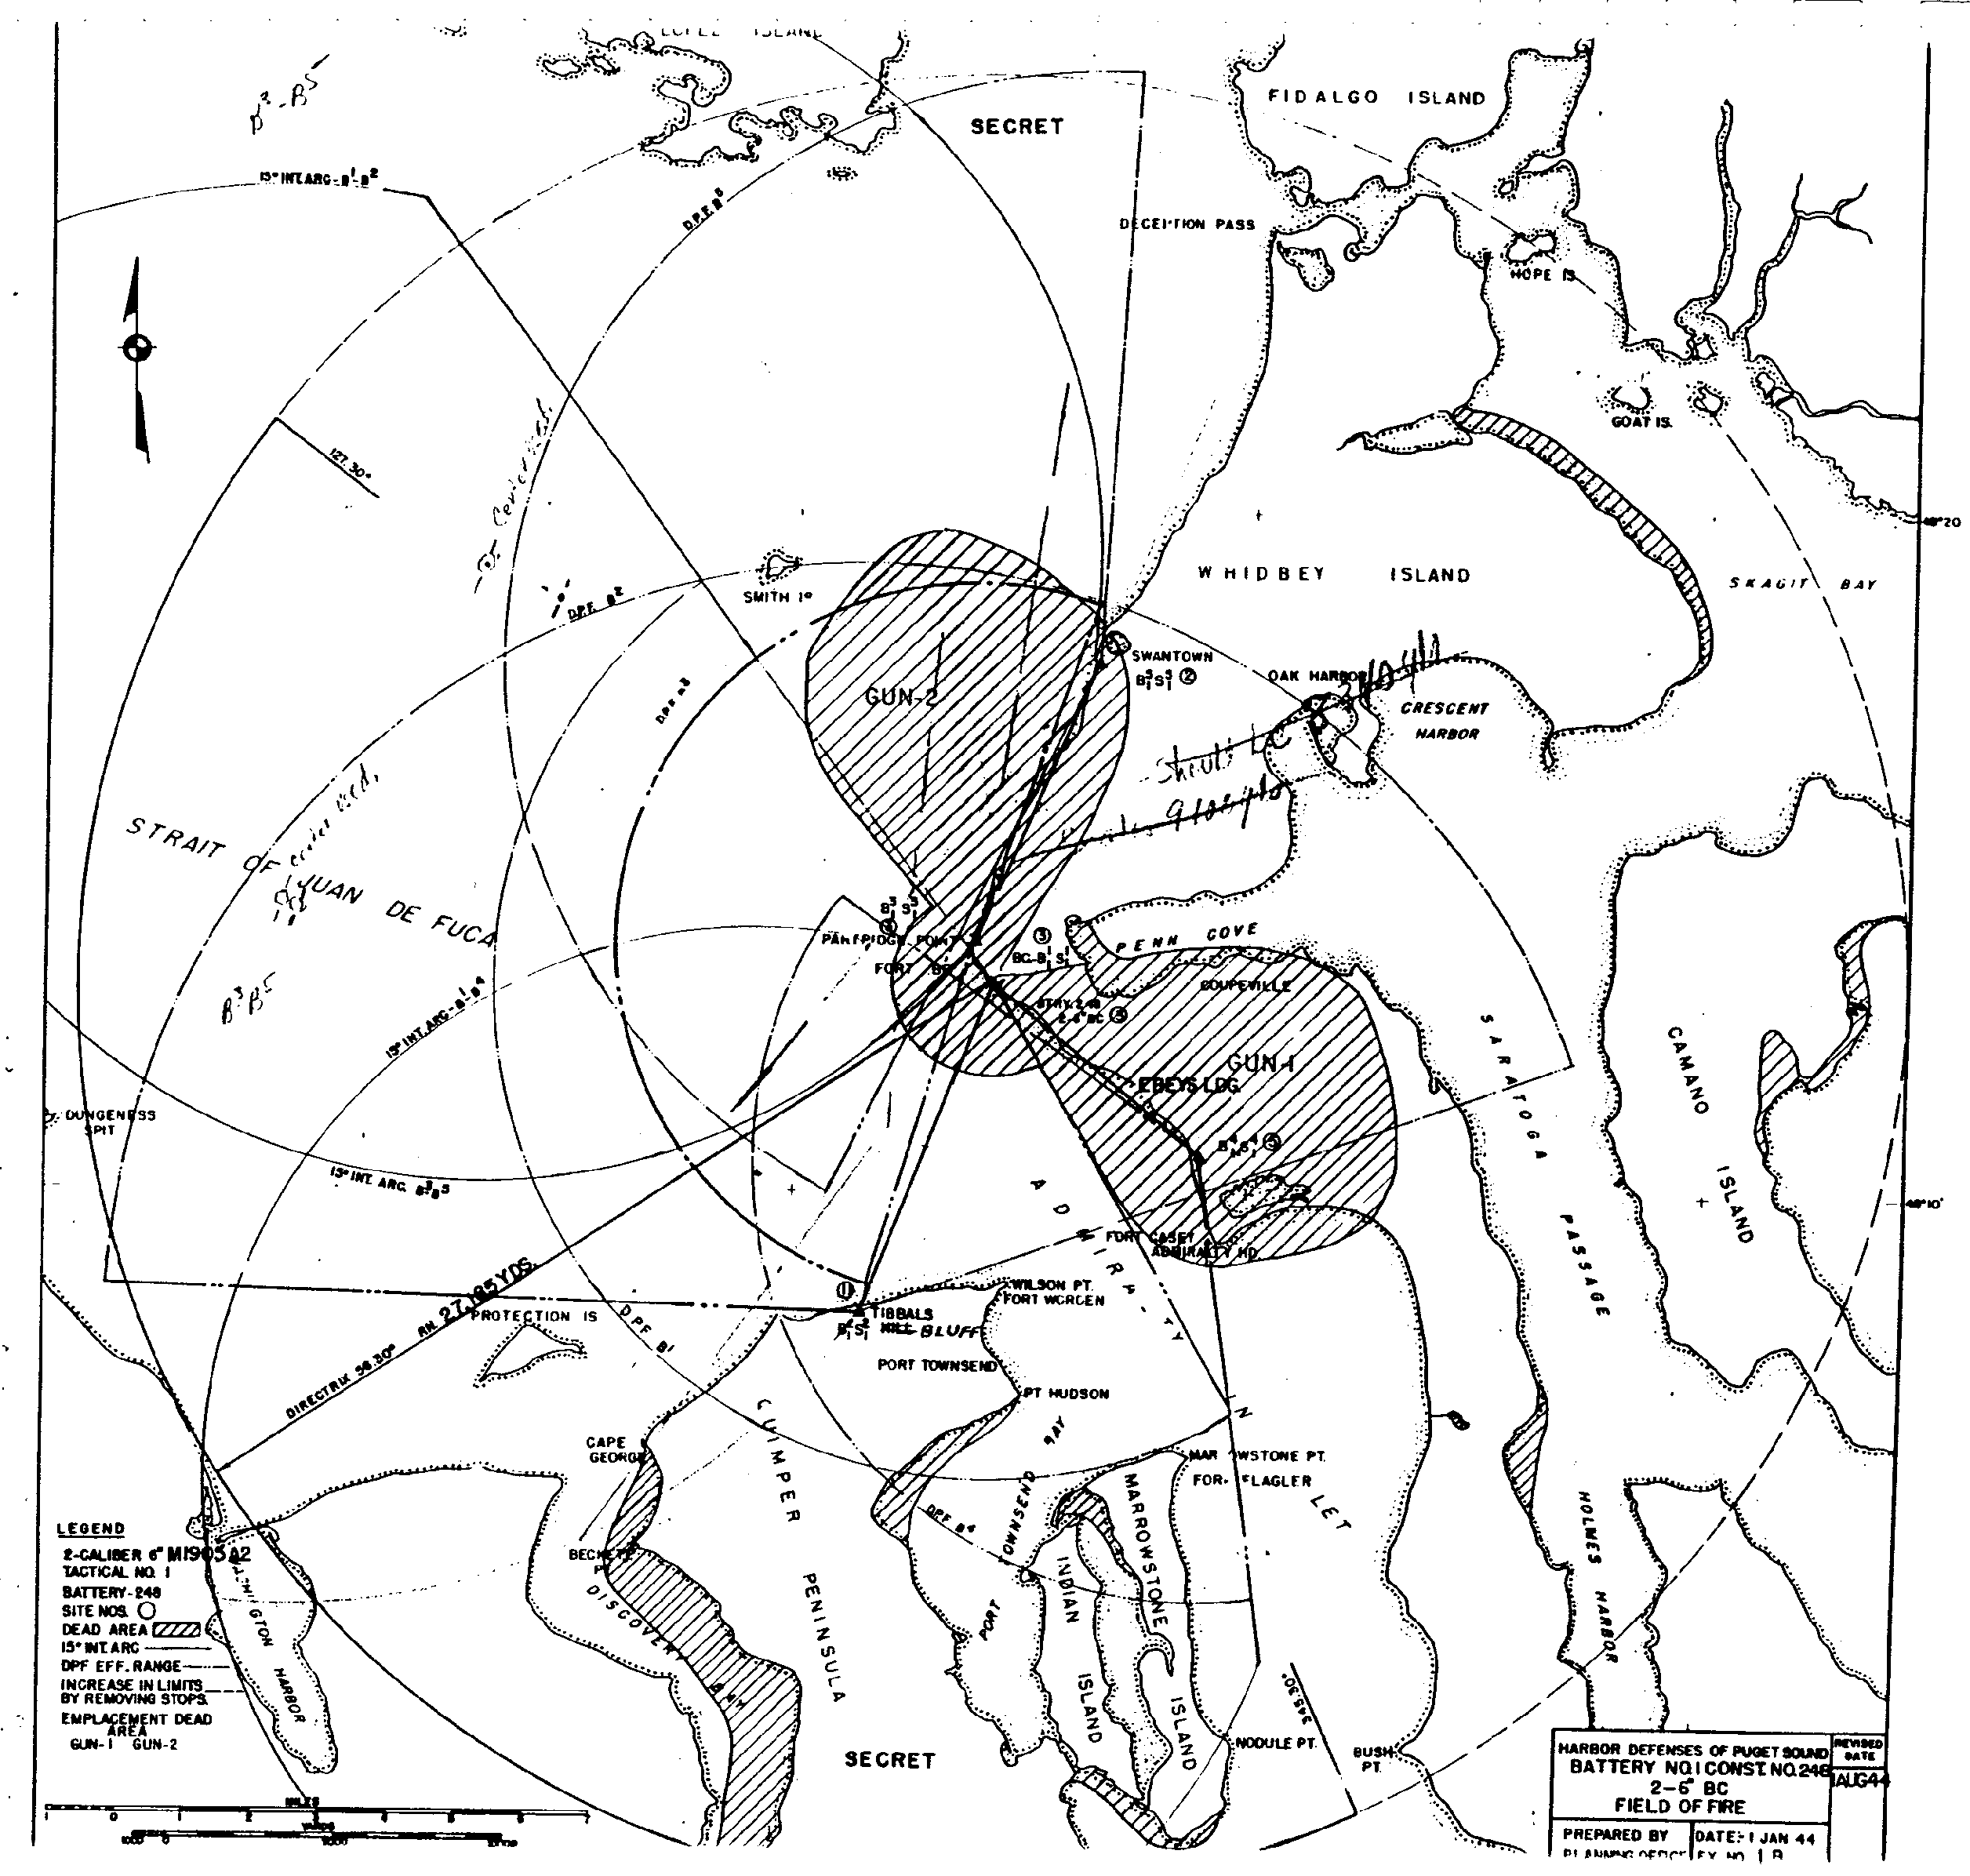
1 - B , Battery No. 1, Const. No. 248, 2-6" BC, Field of Fire
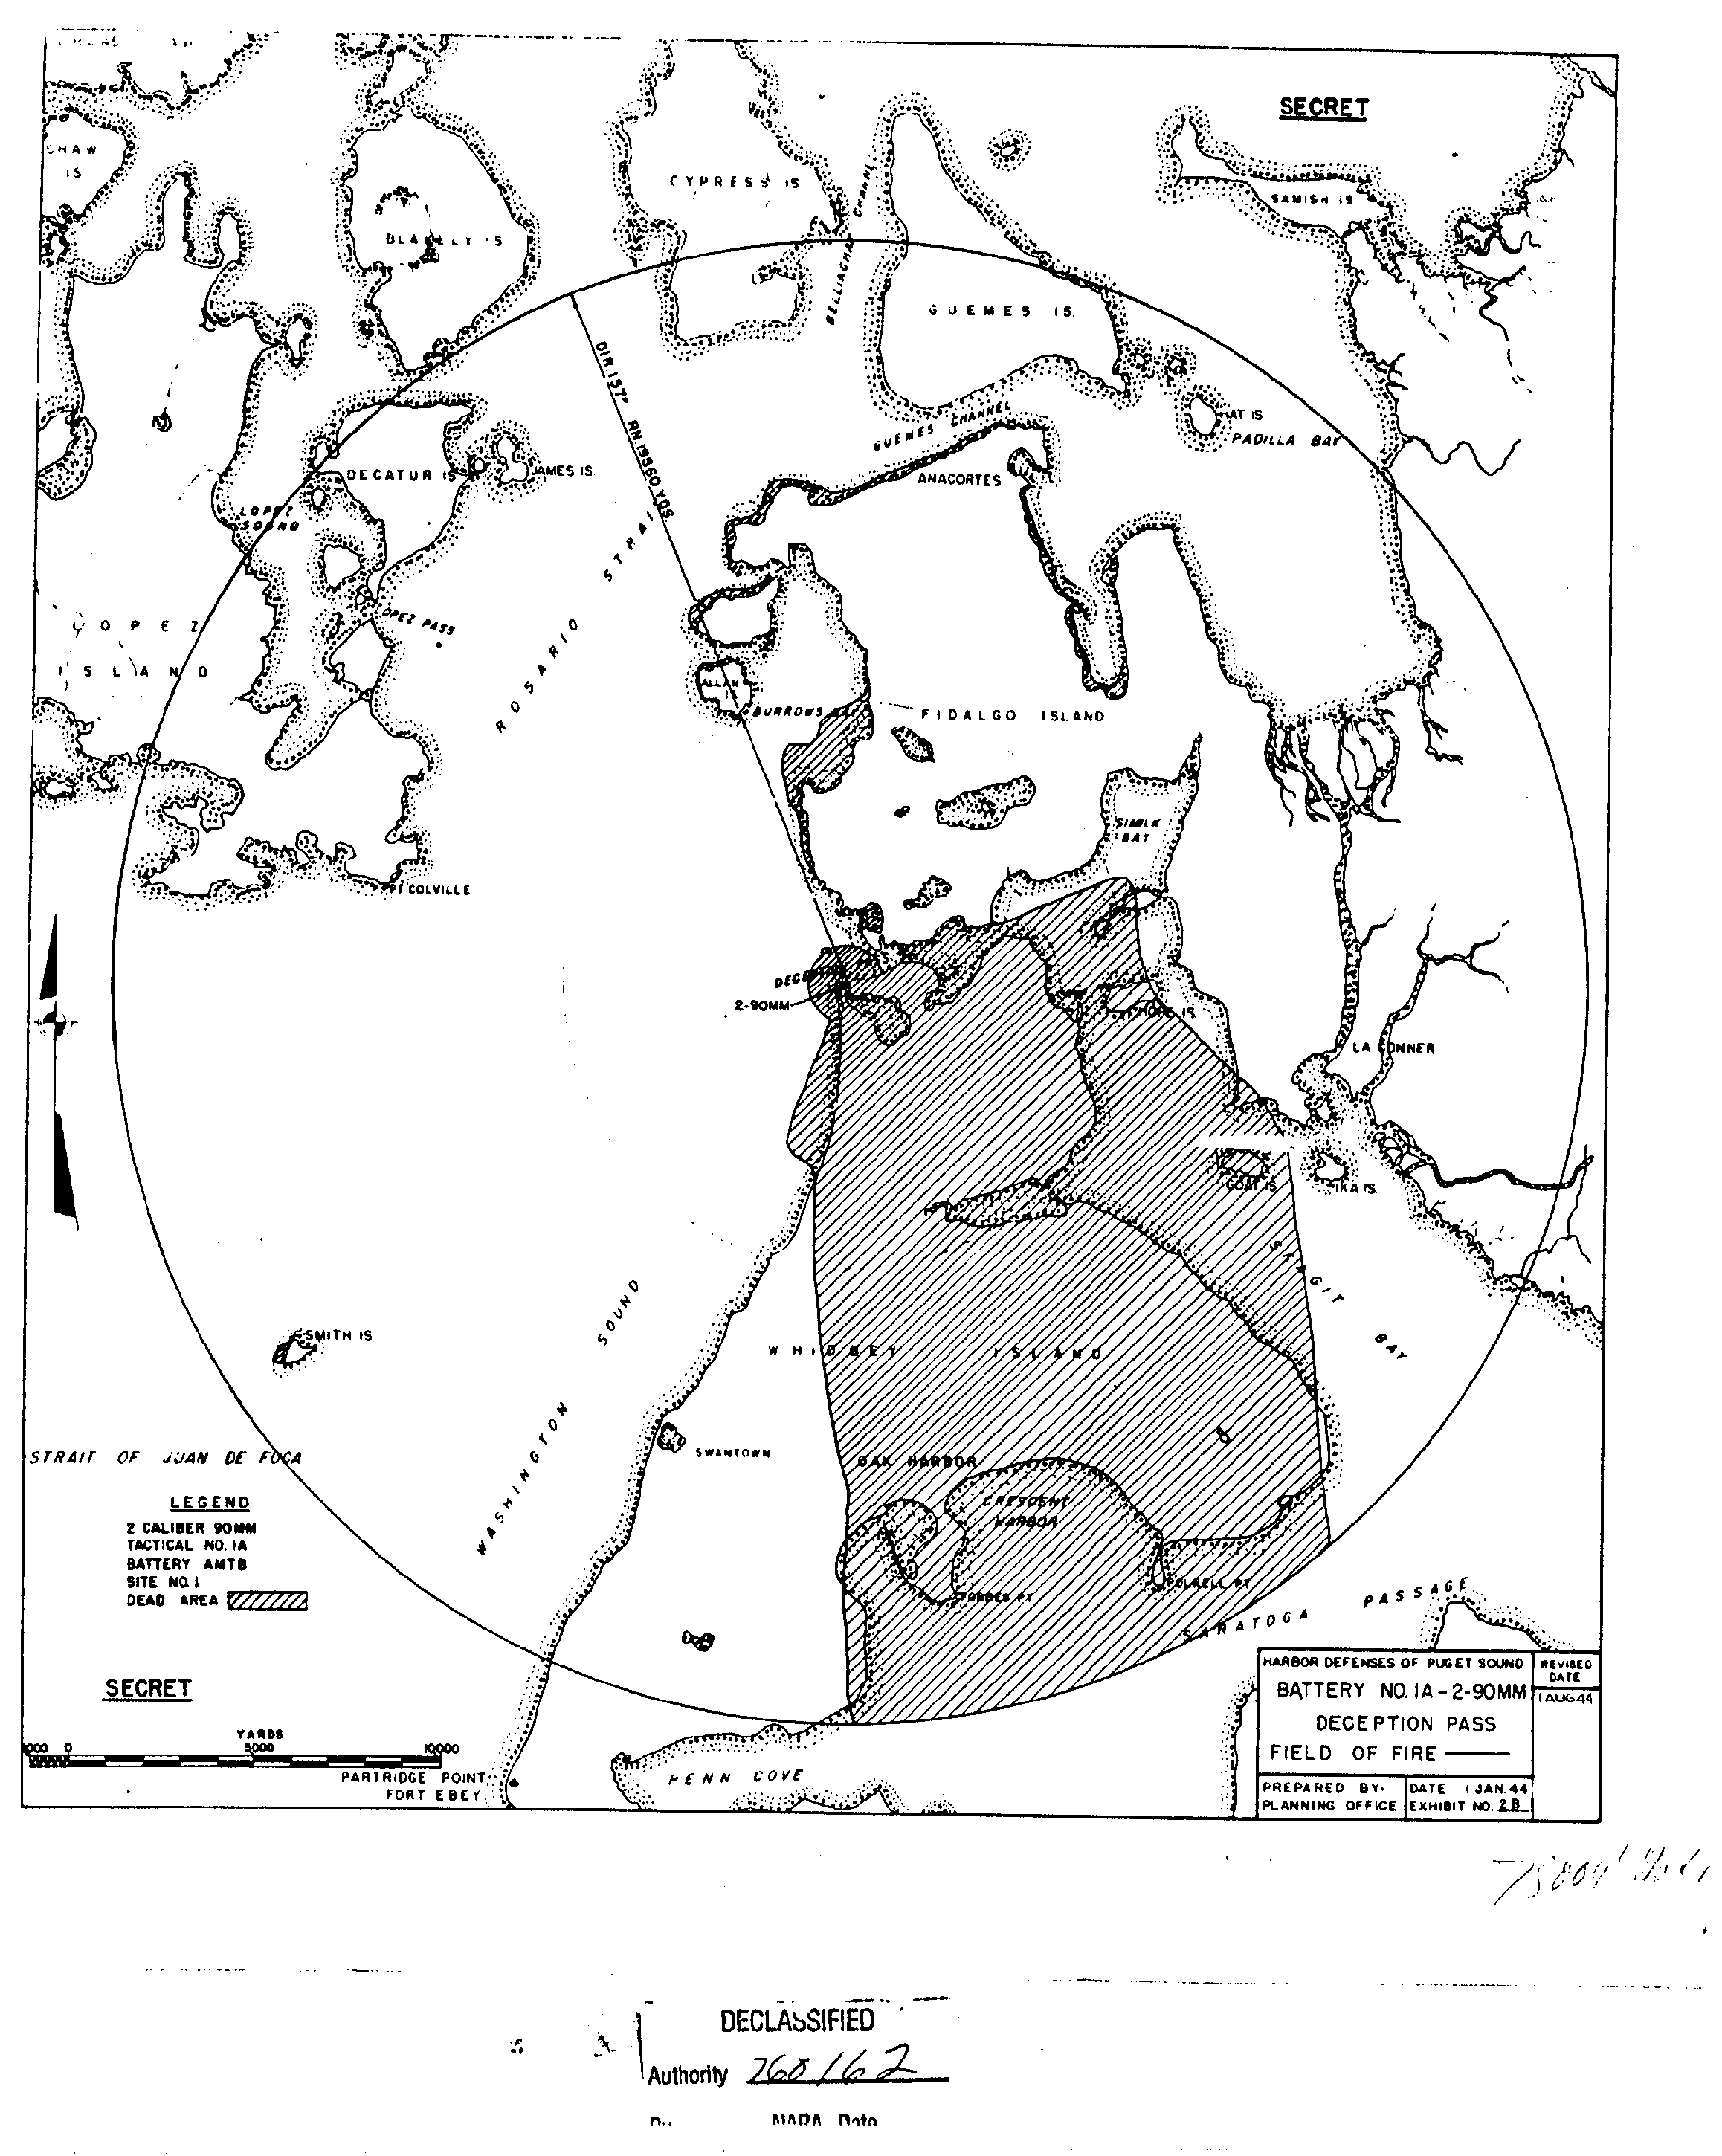
2 - B , Battery No. 1a, Deception Pass, 2-mobile 90mm, Field of Fire
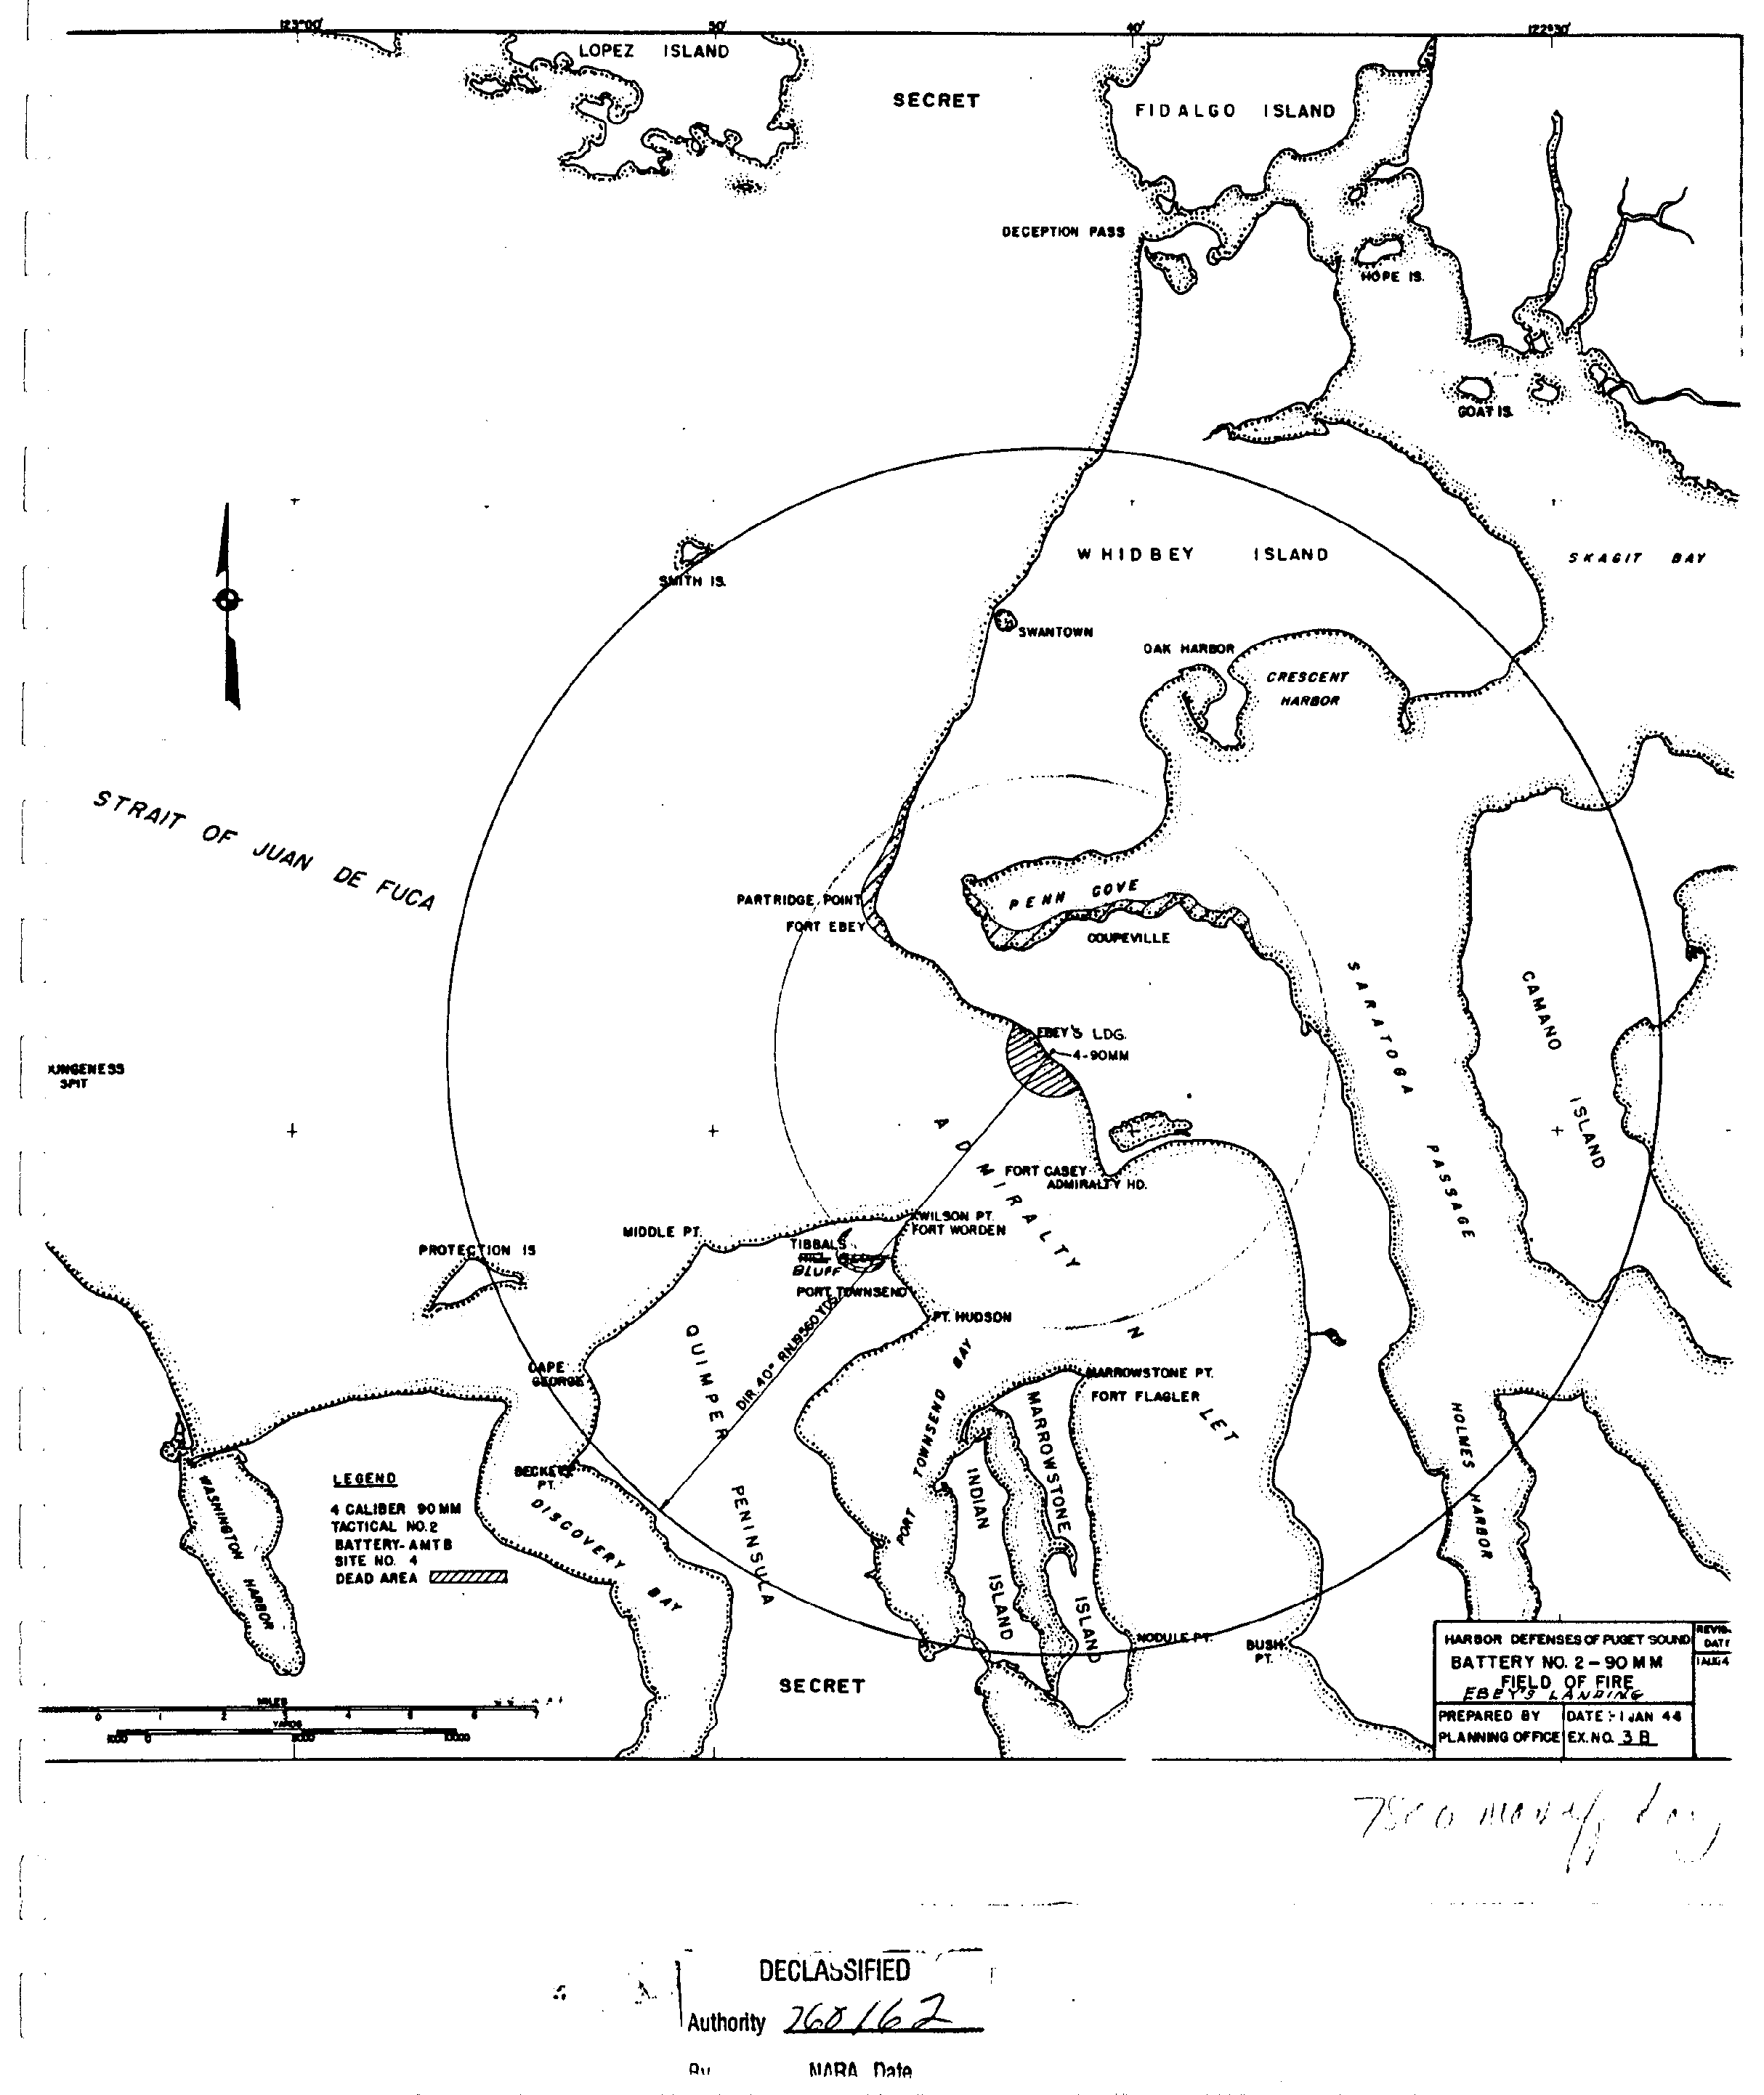
3 - B , Battery No. 2, Ebey's Landing, 4-90mm, Field of Fire
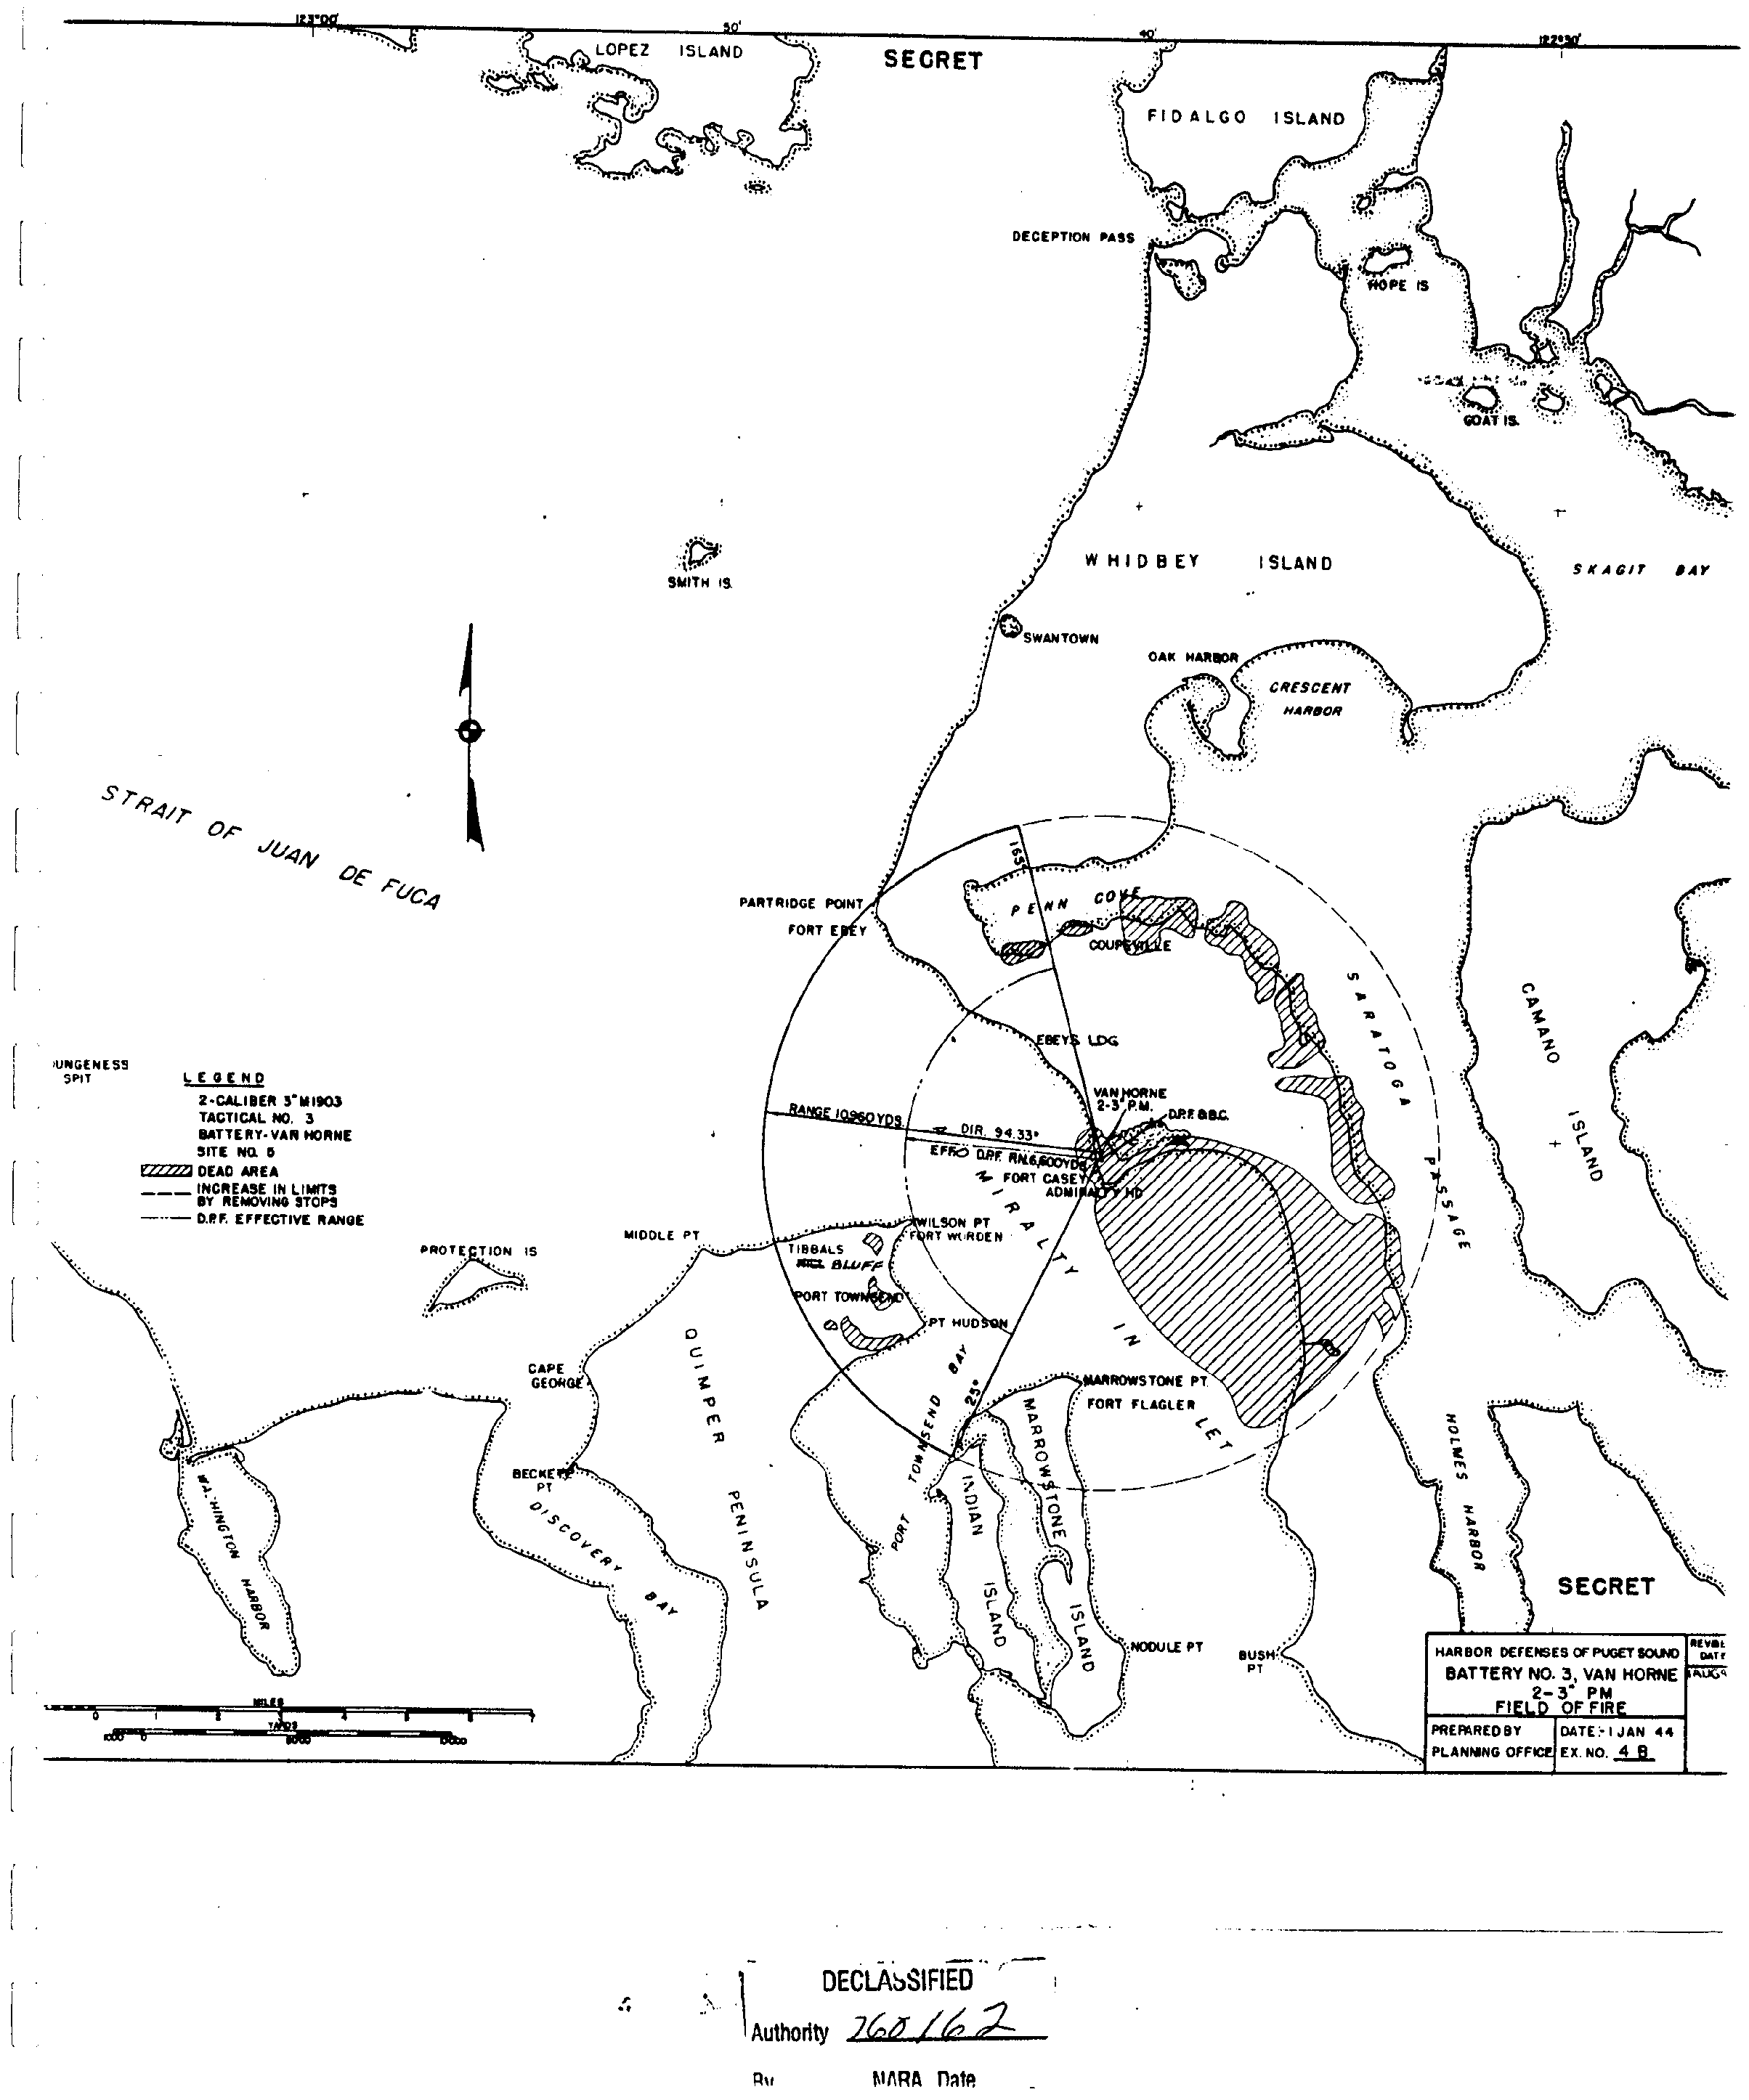
4 - B , Battery No. 3, Van Horne, 2-3" PM, Field of Fire
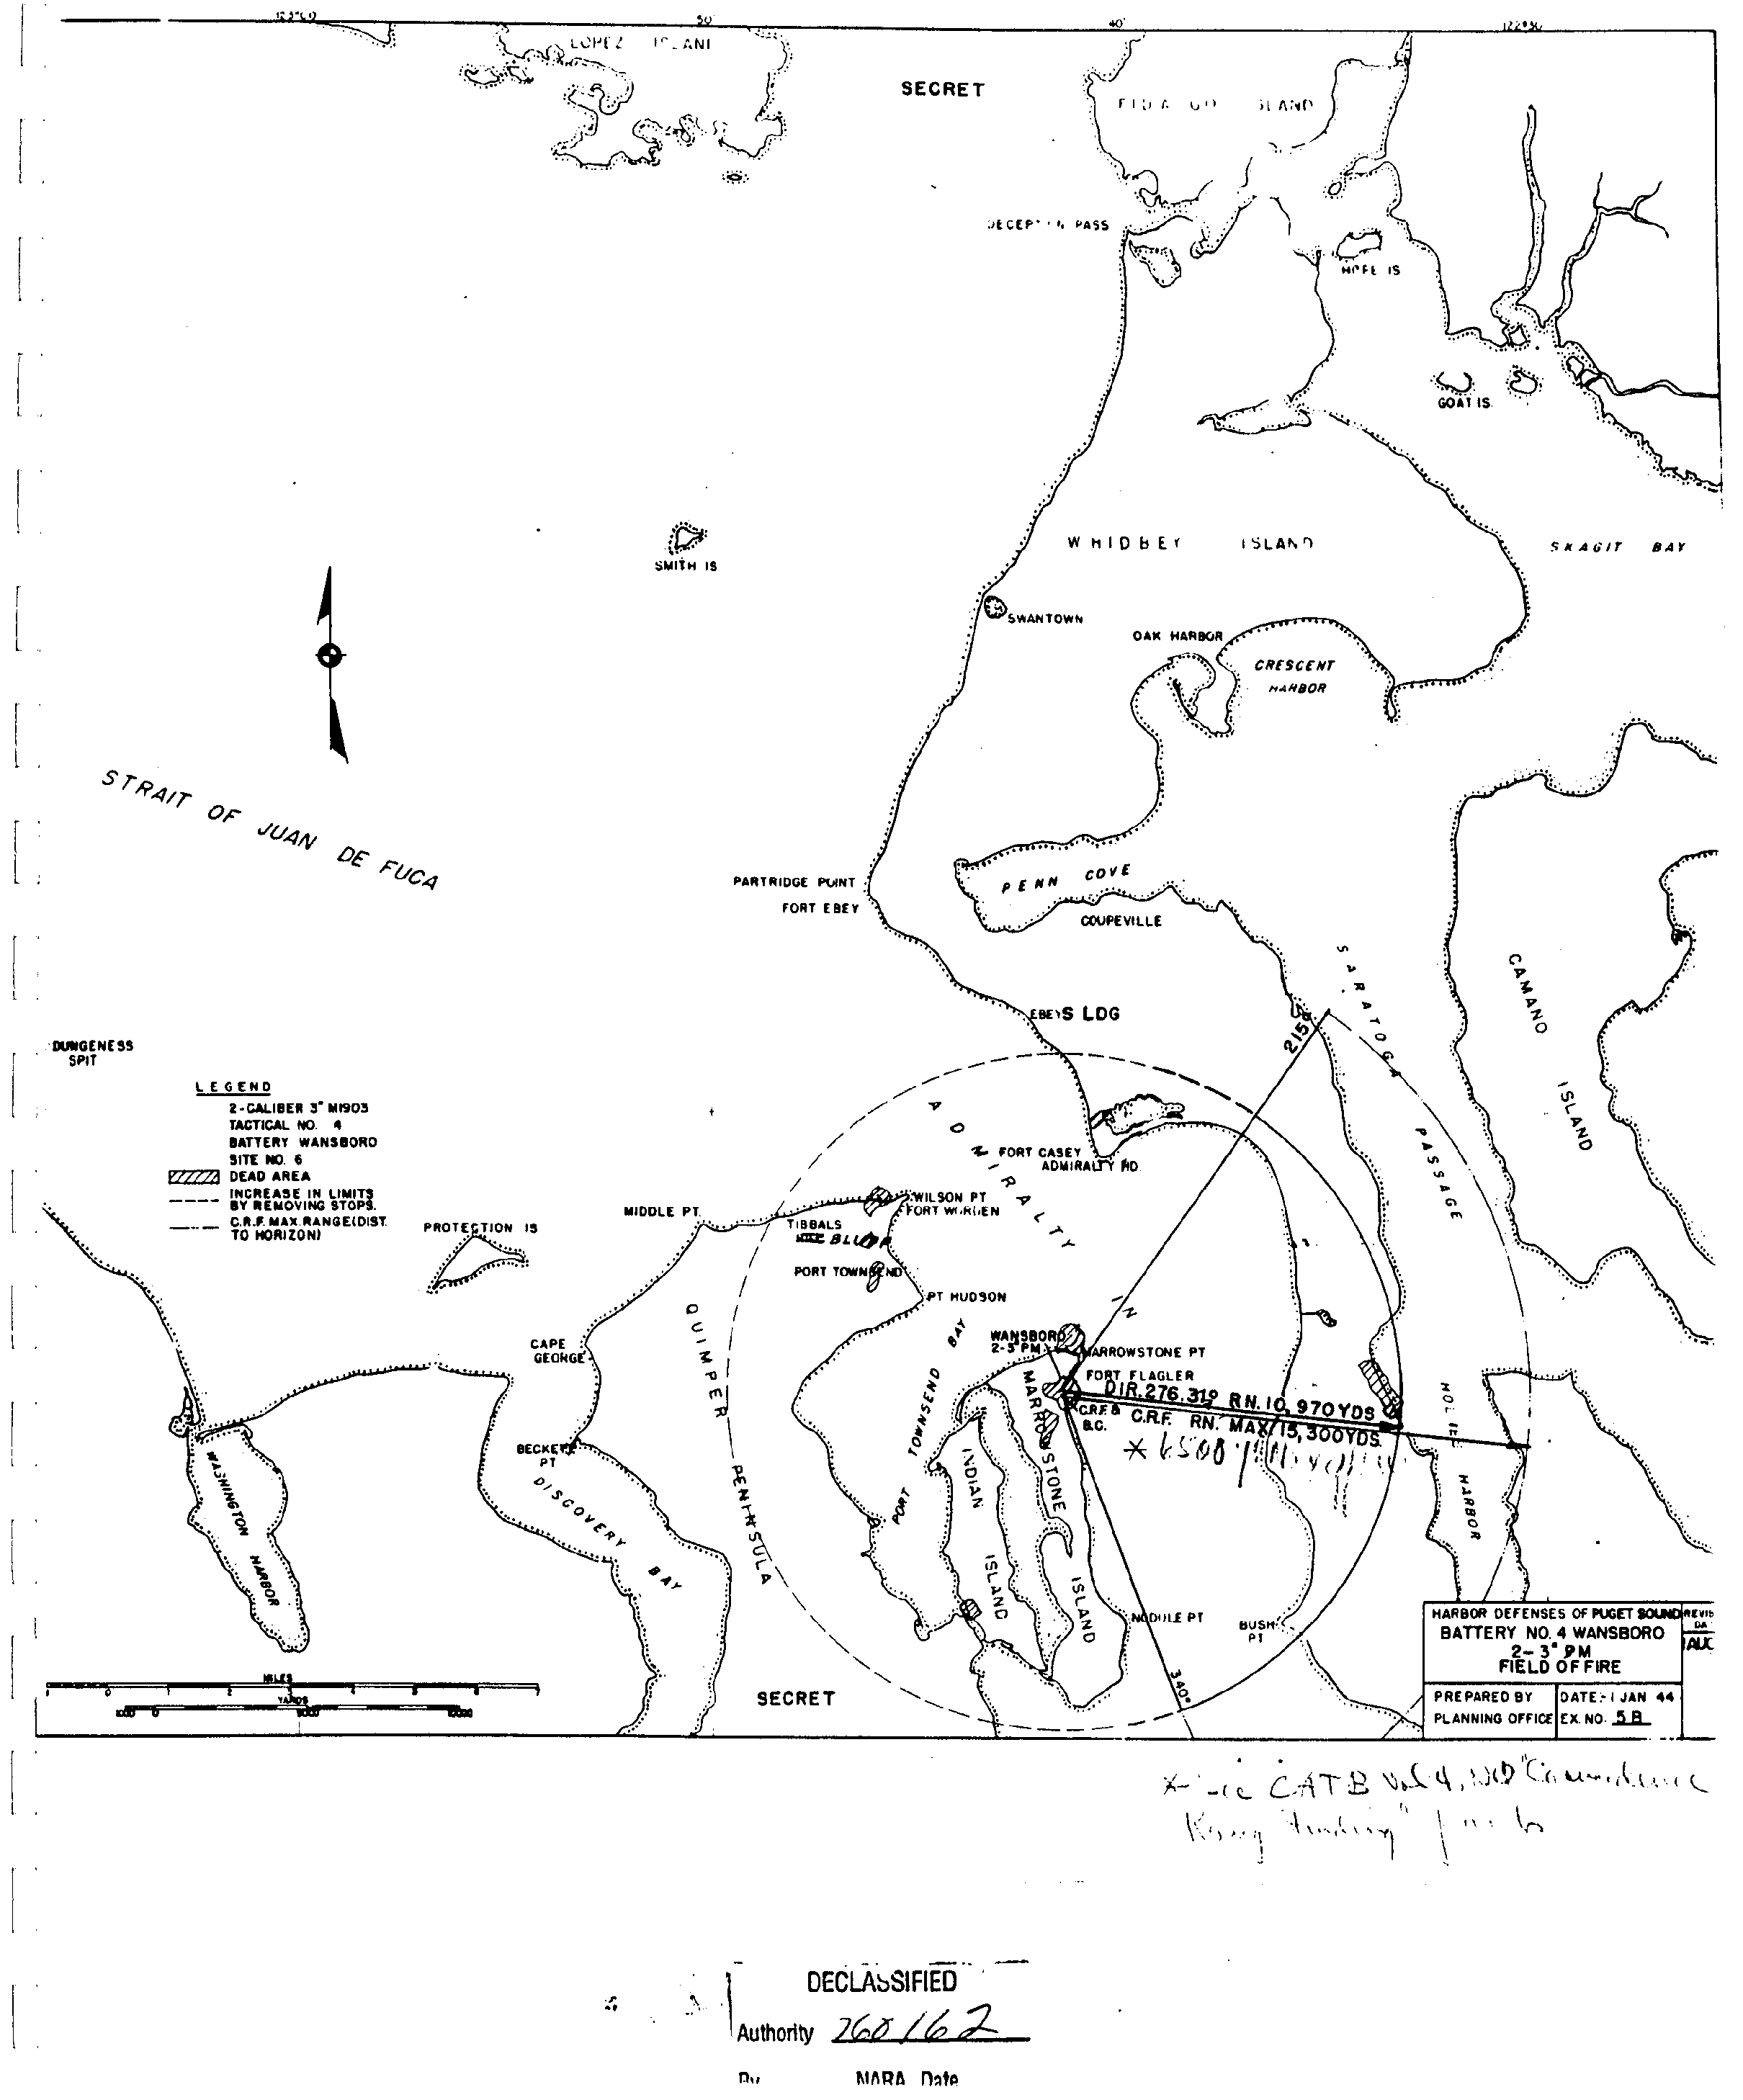
5 - B , Battery No. 4, Wansboro, 2-3" PM, Field of Fire
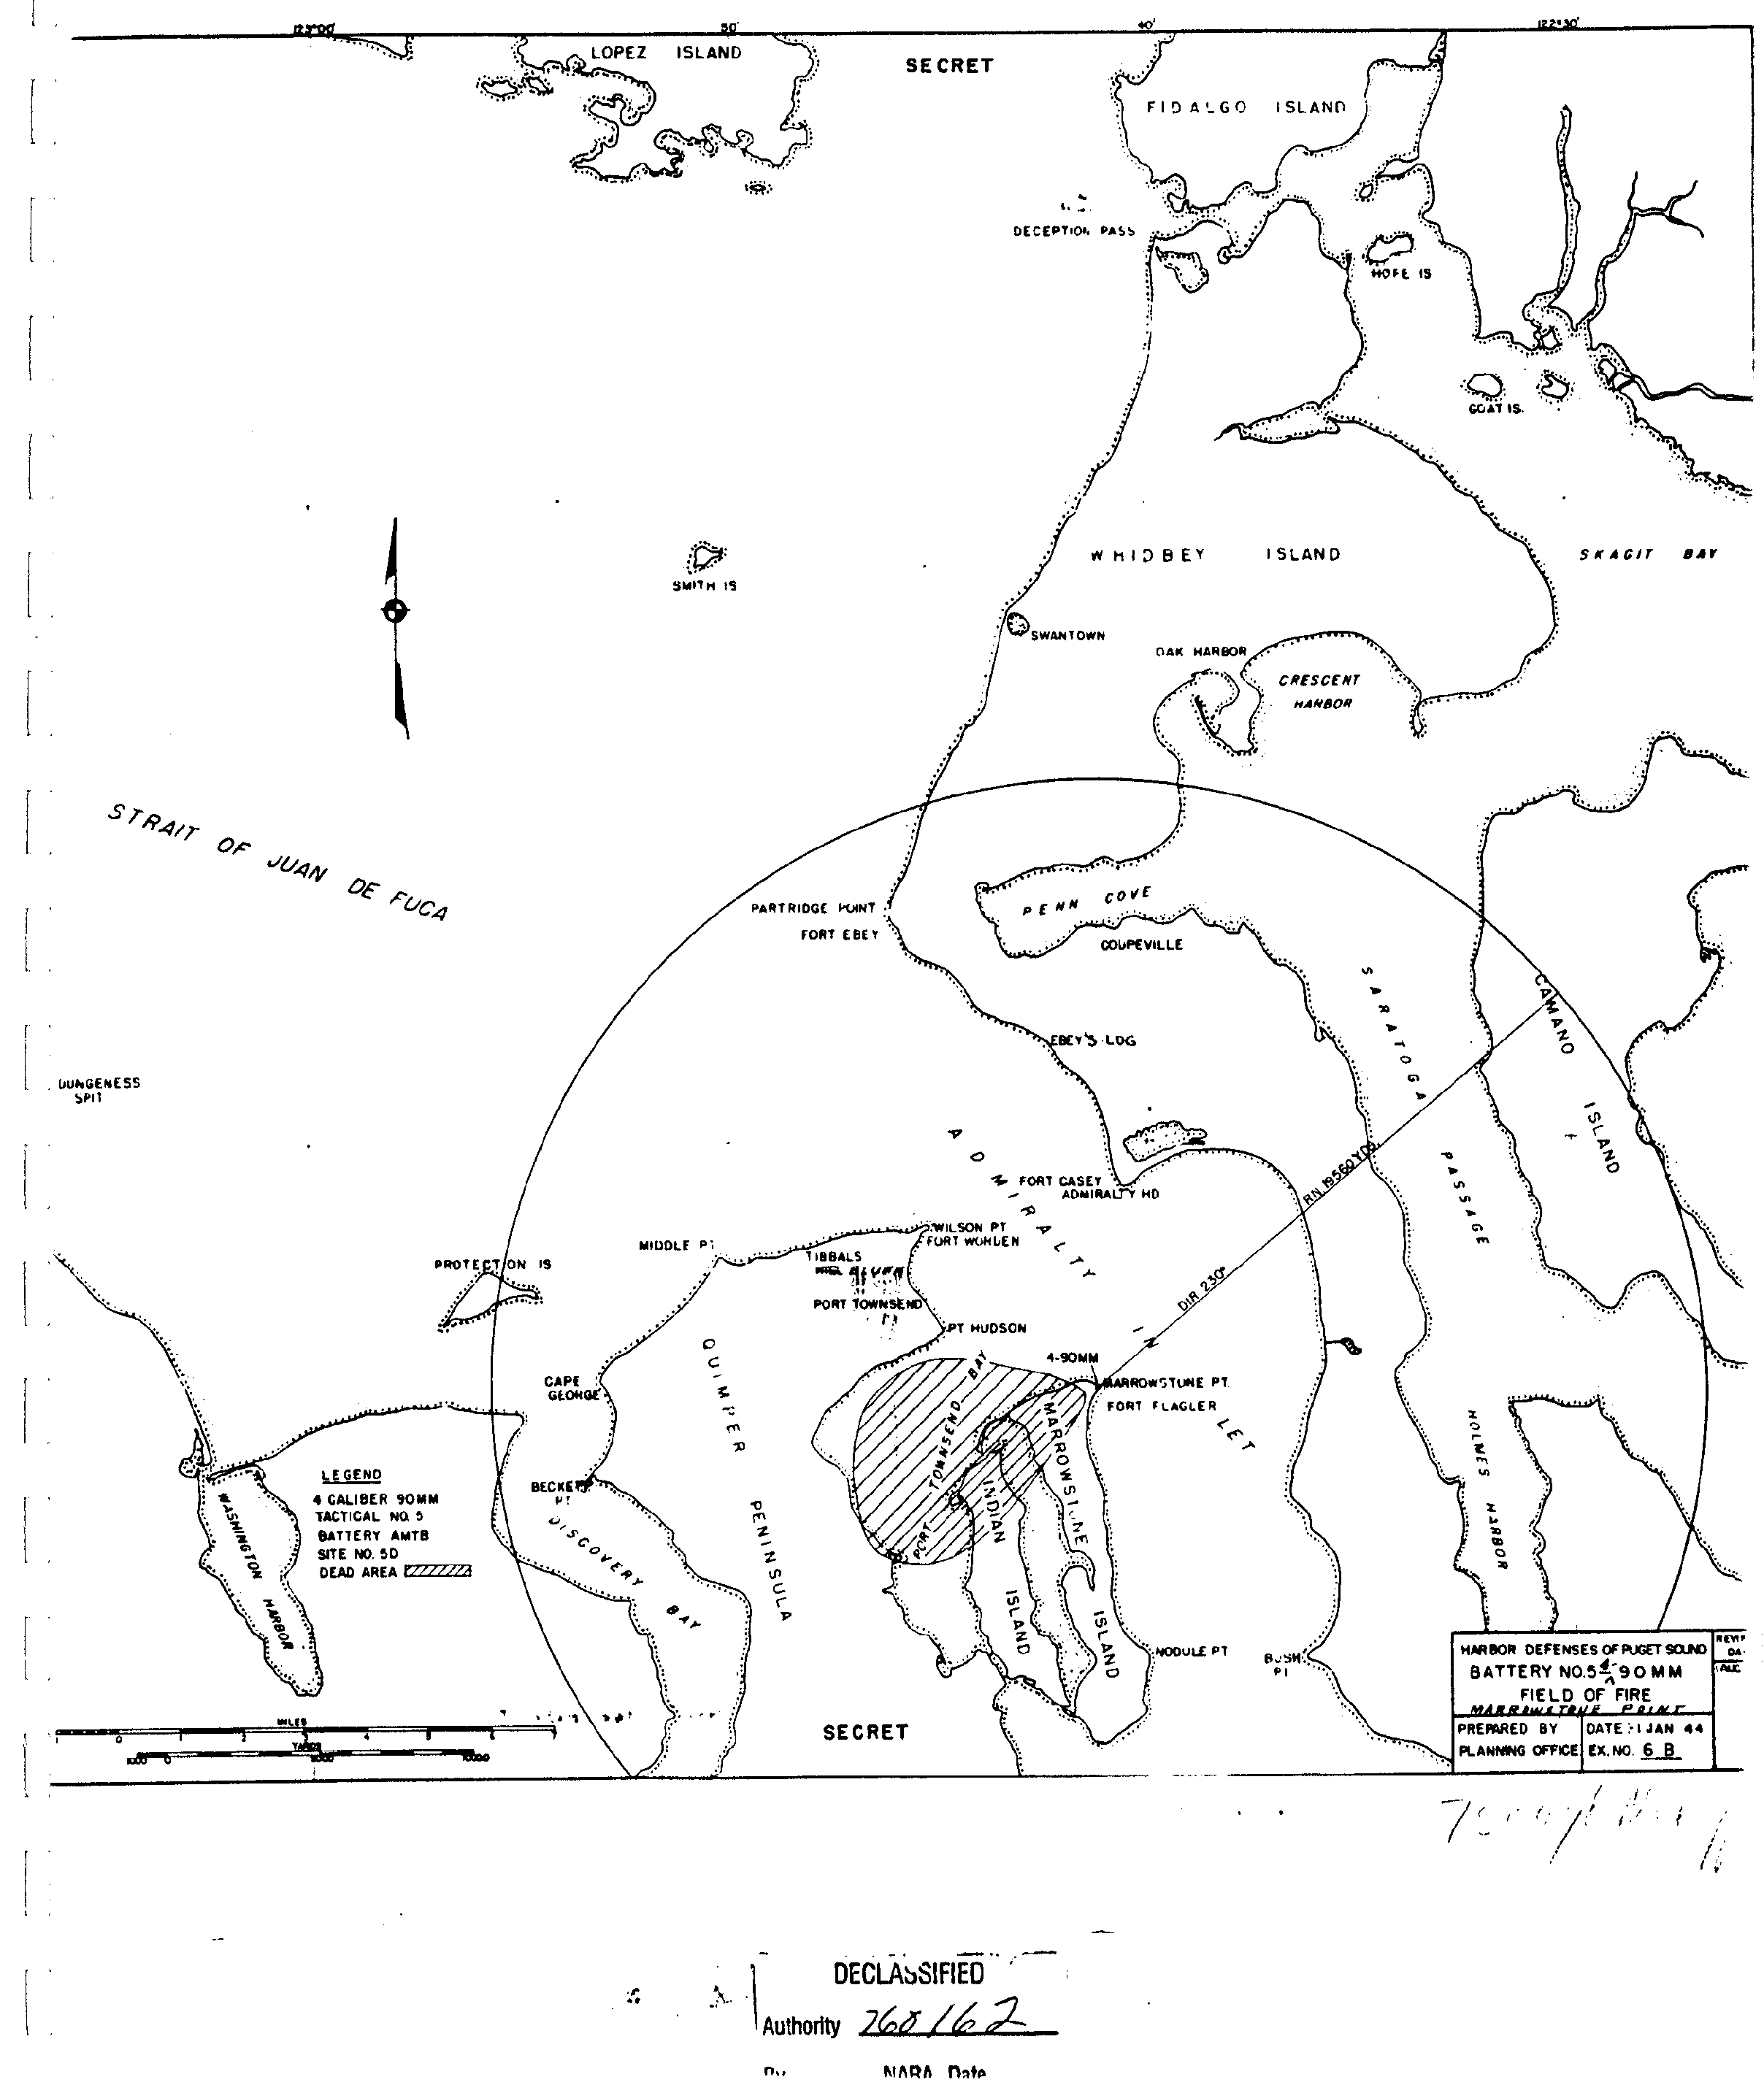
6 - B , Battery No. 5, Marrowstone Point, 4-90mm, Field of Fire
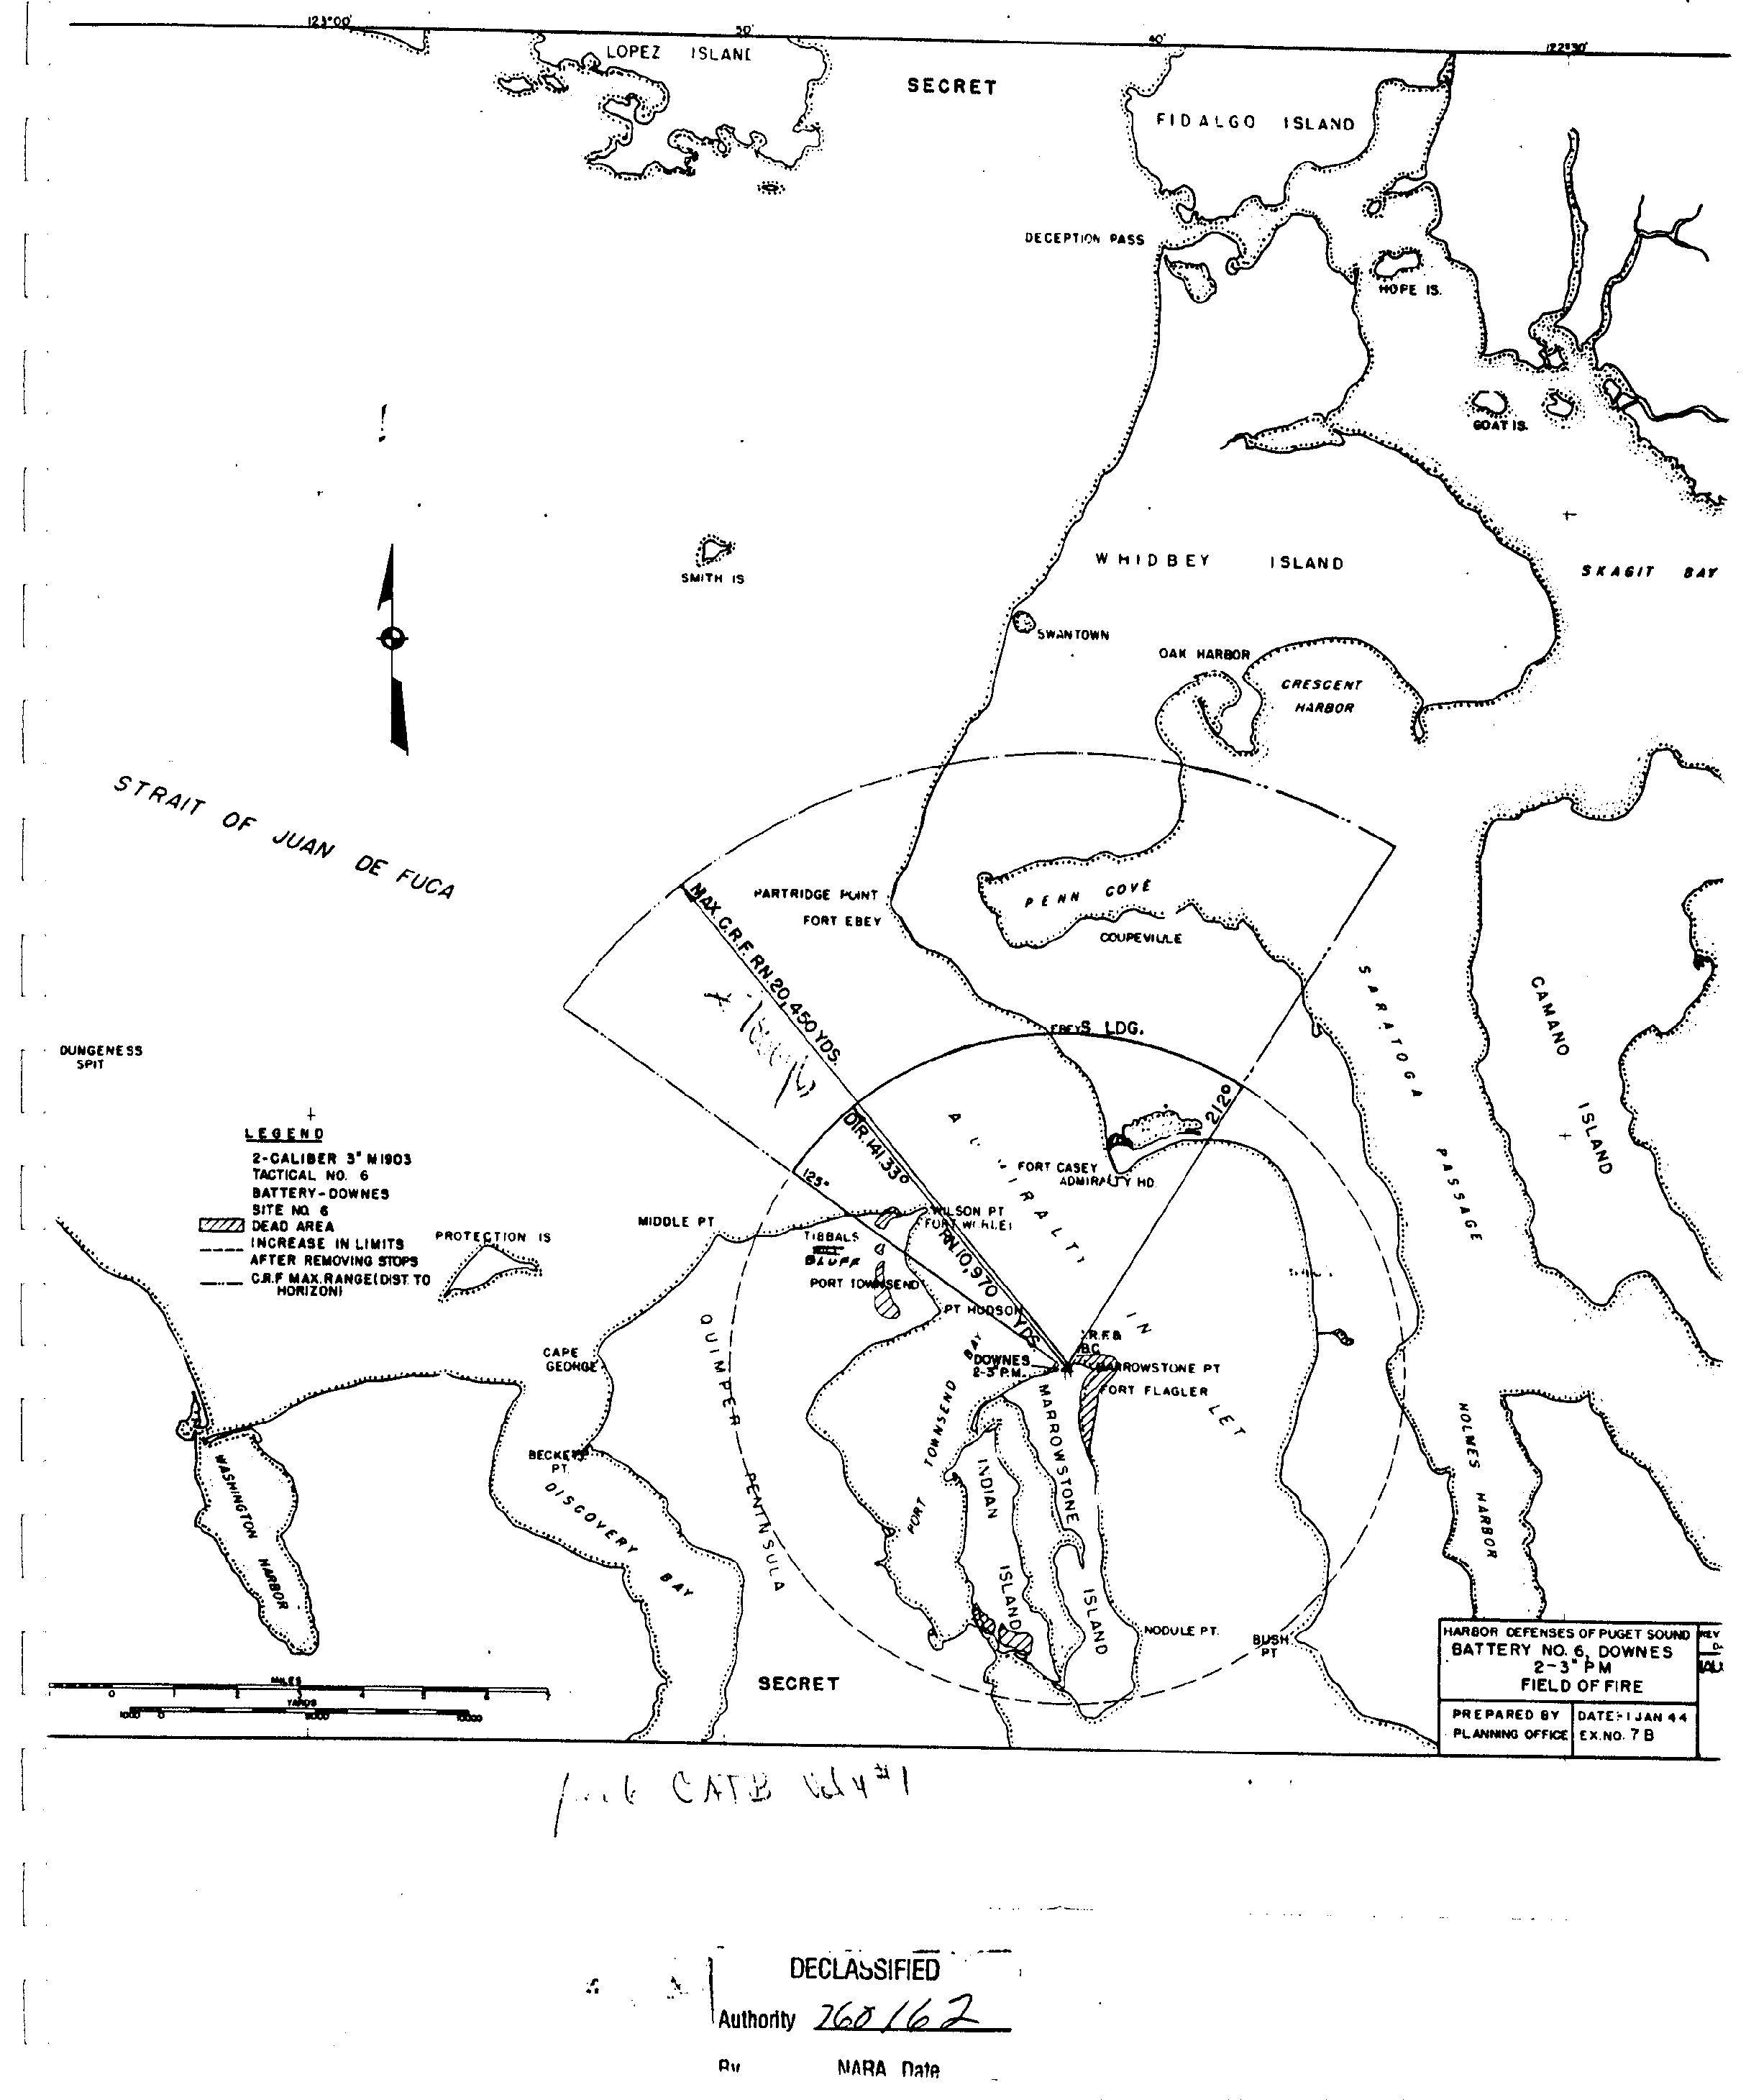
7 - B , Battery No. 6, Downes, 2-3" PM, Field of Fire
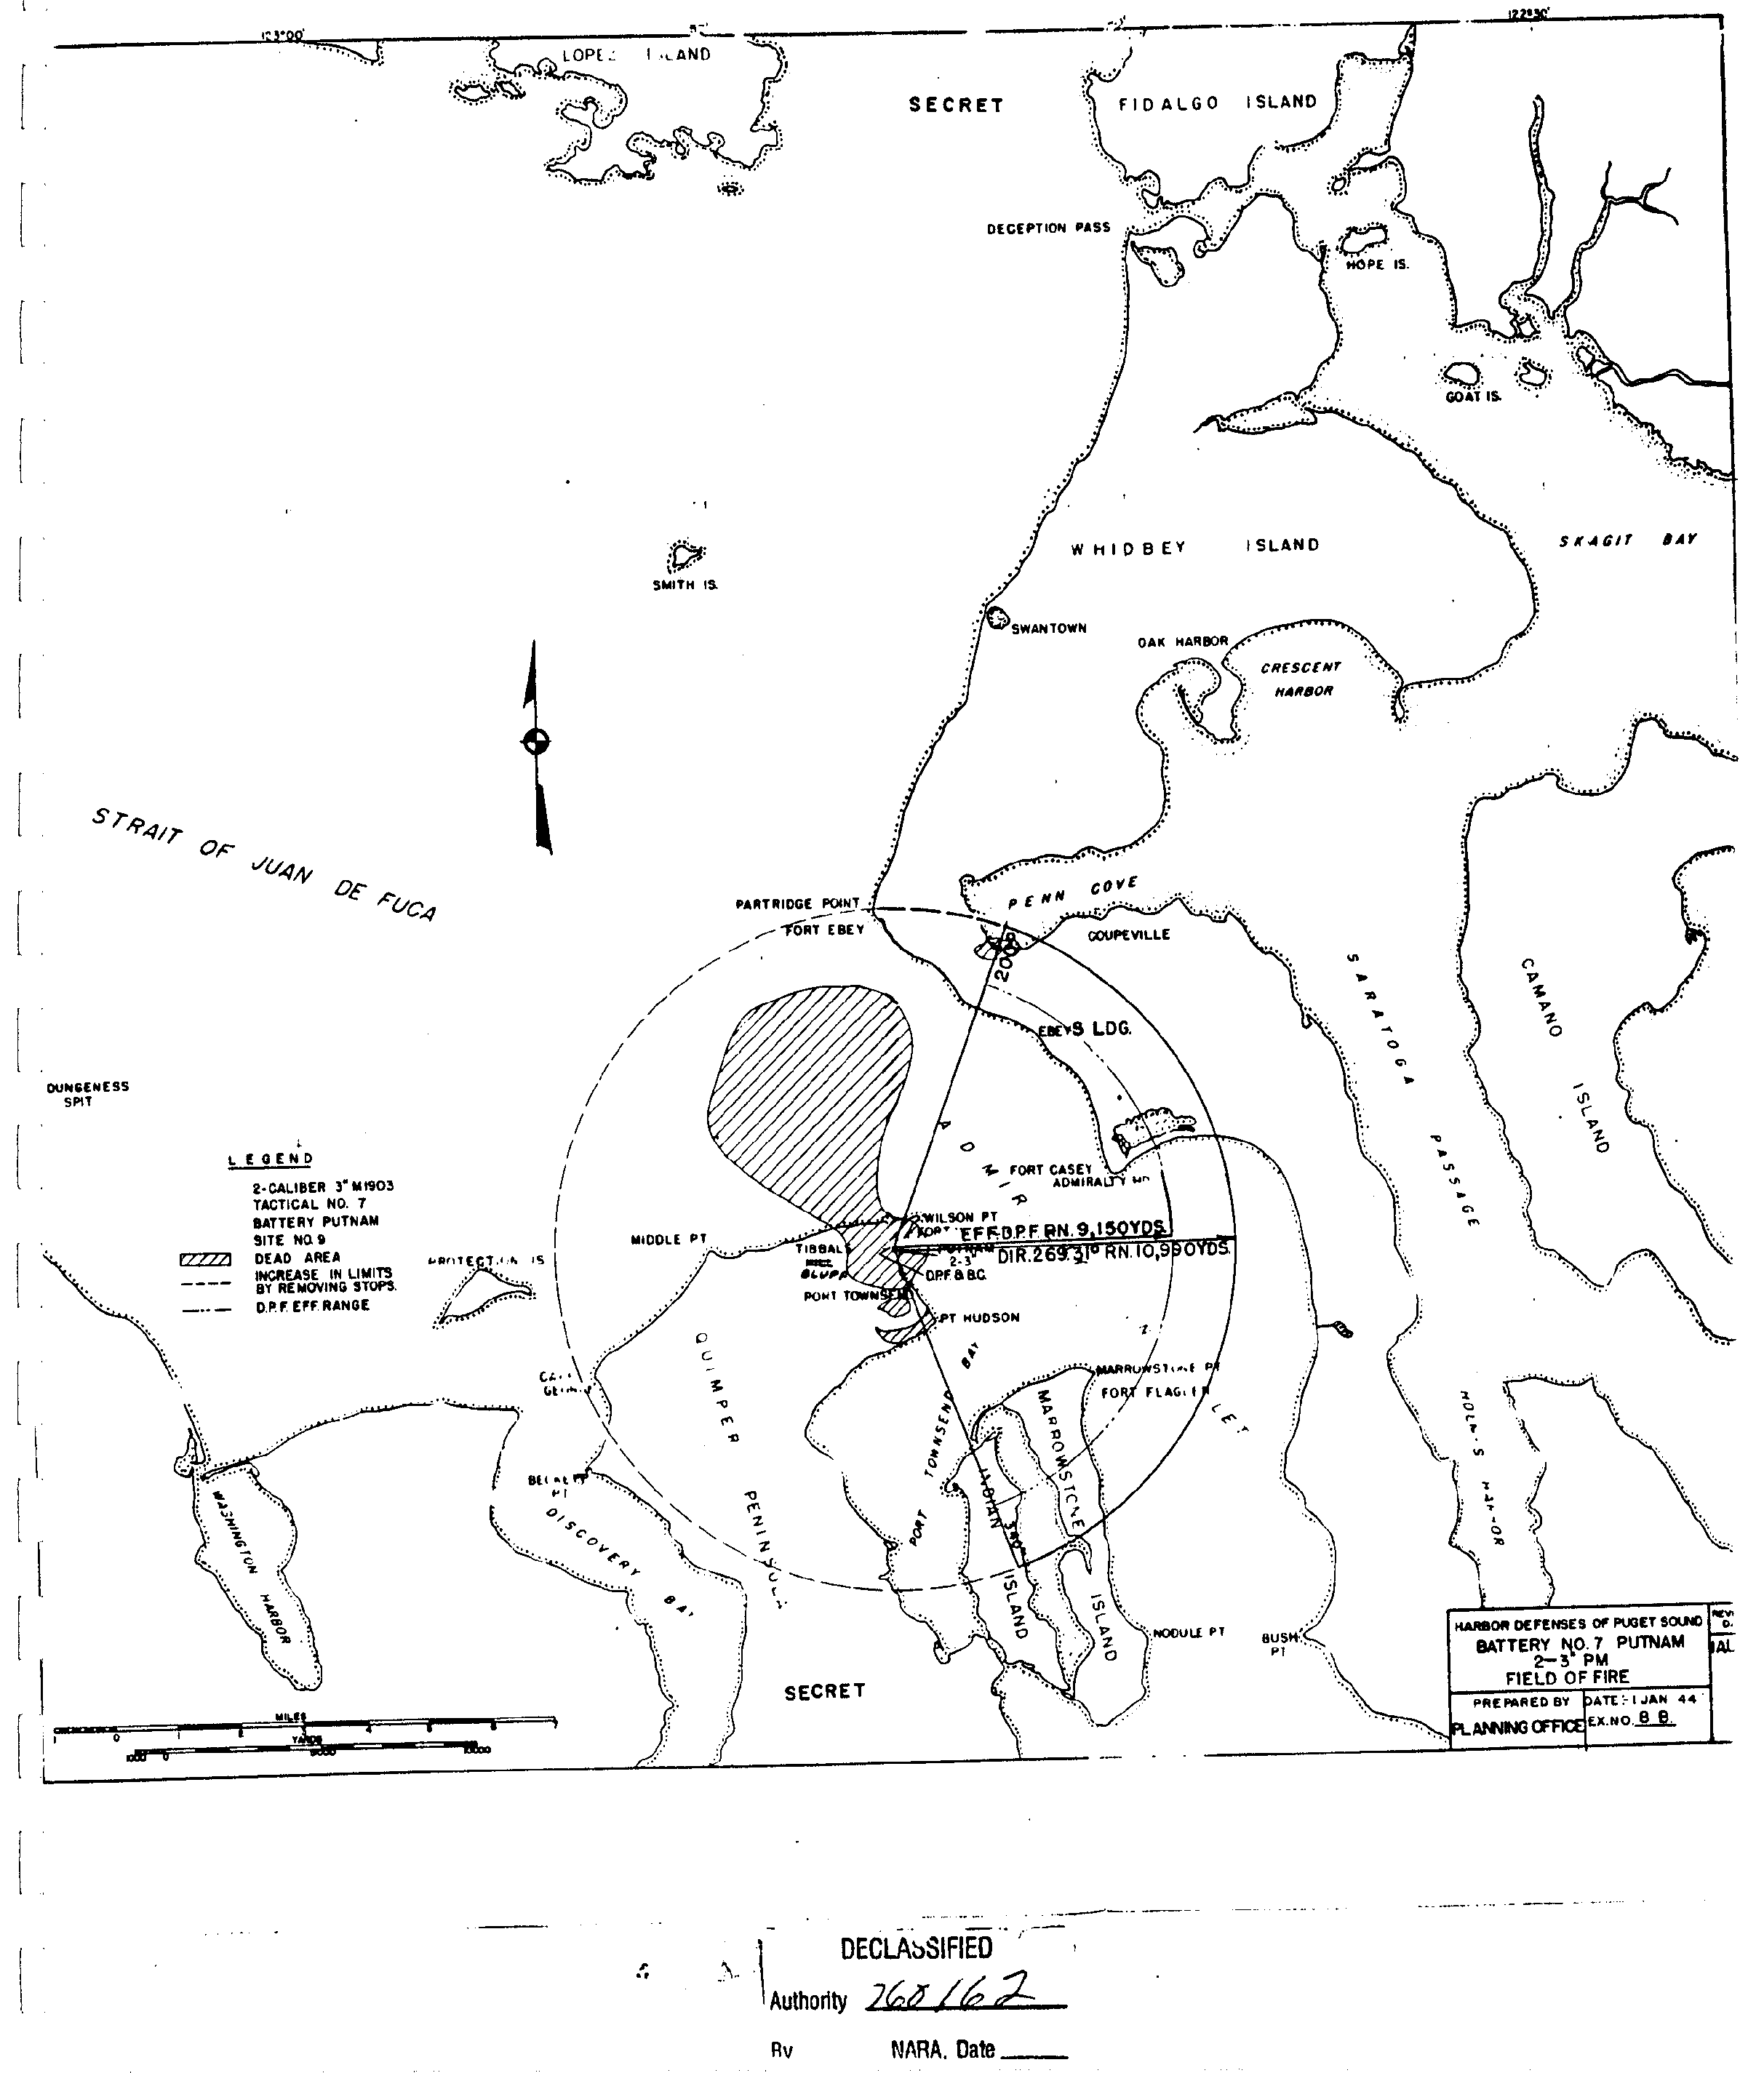
8 - B , Battery No. 7, Putnam, 2-3" PM, Field of Fire
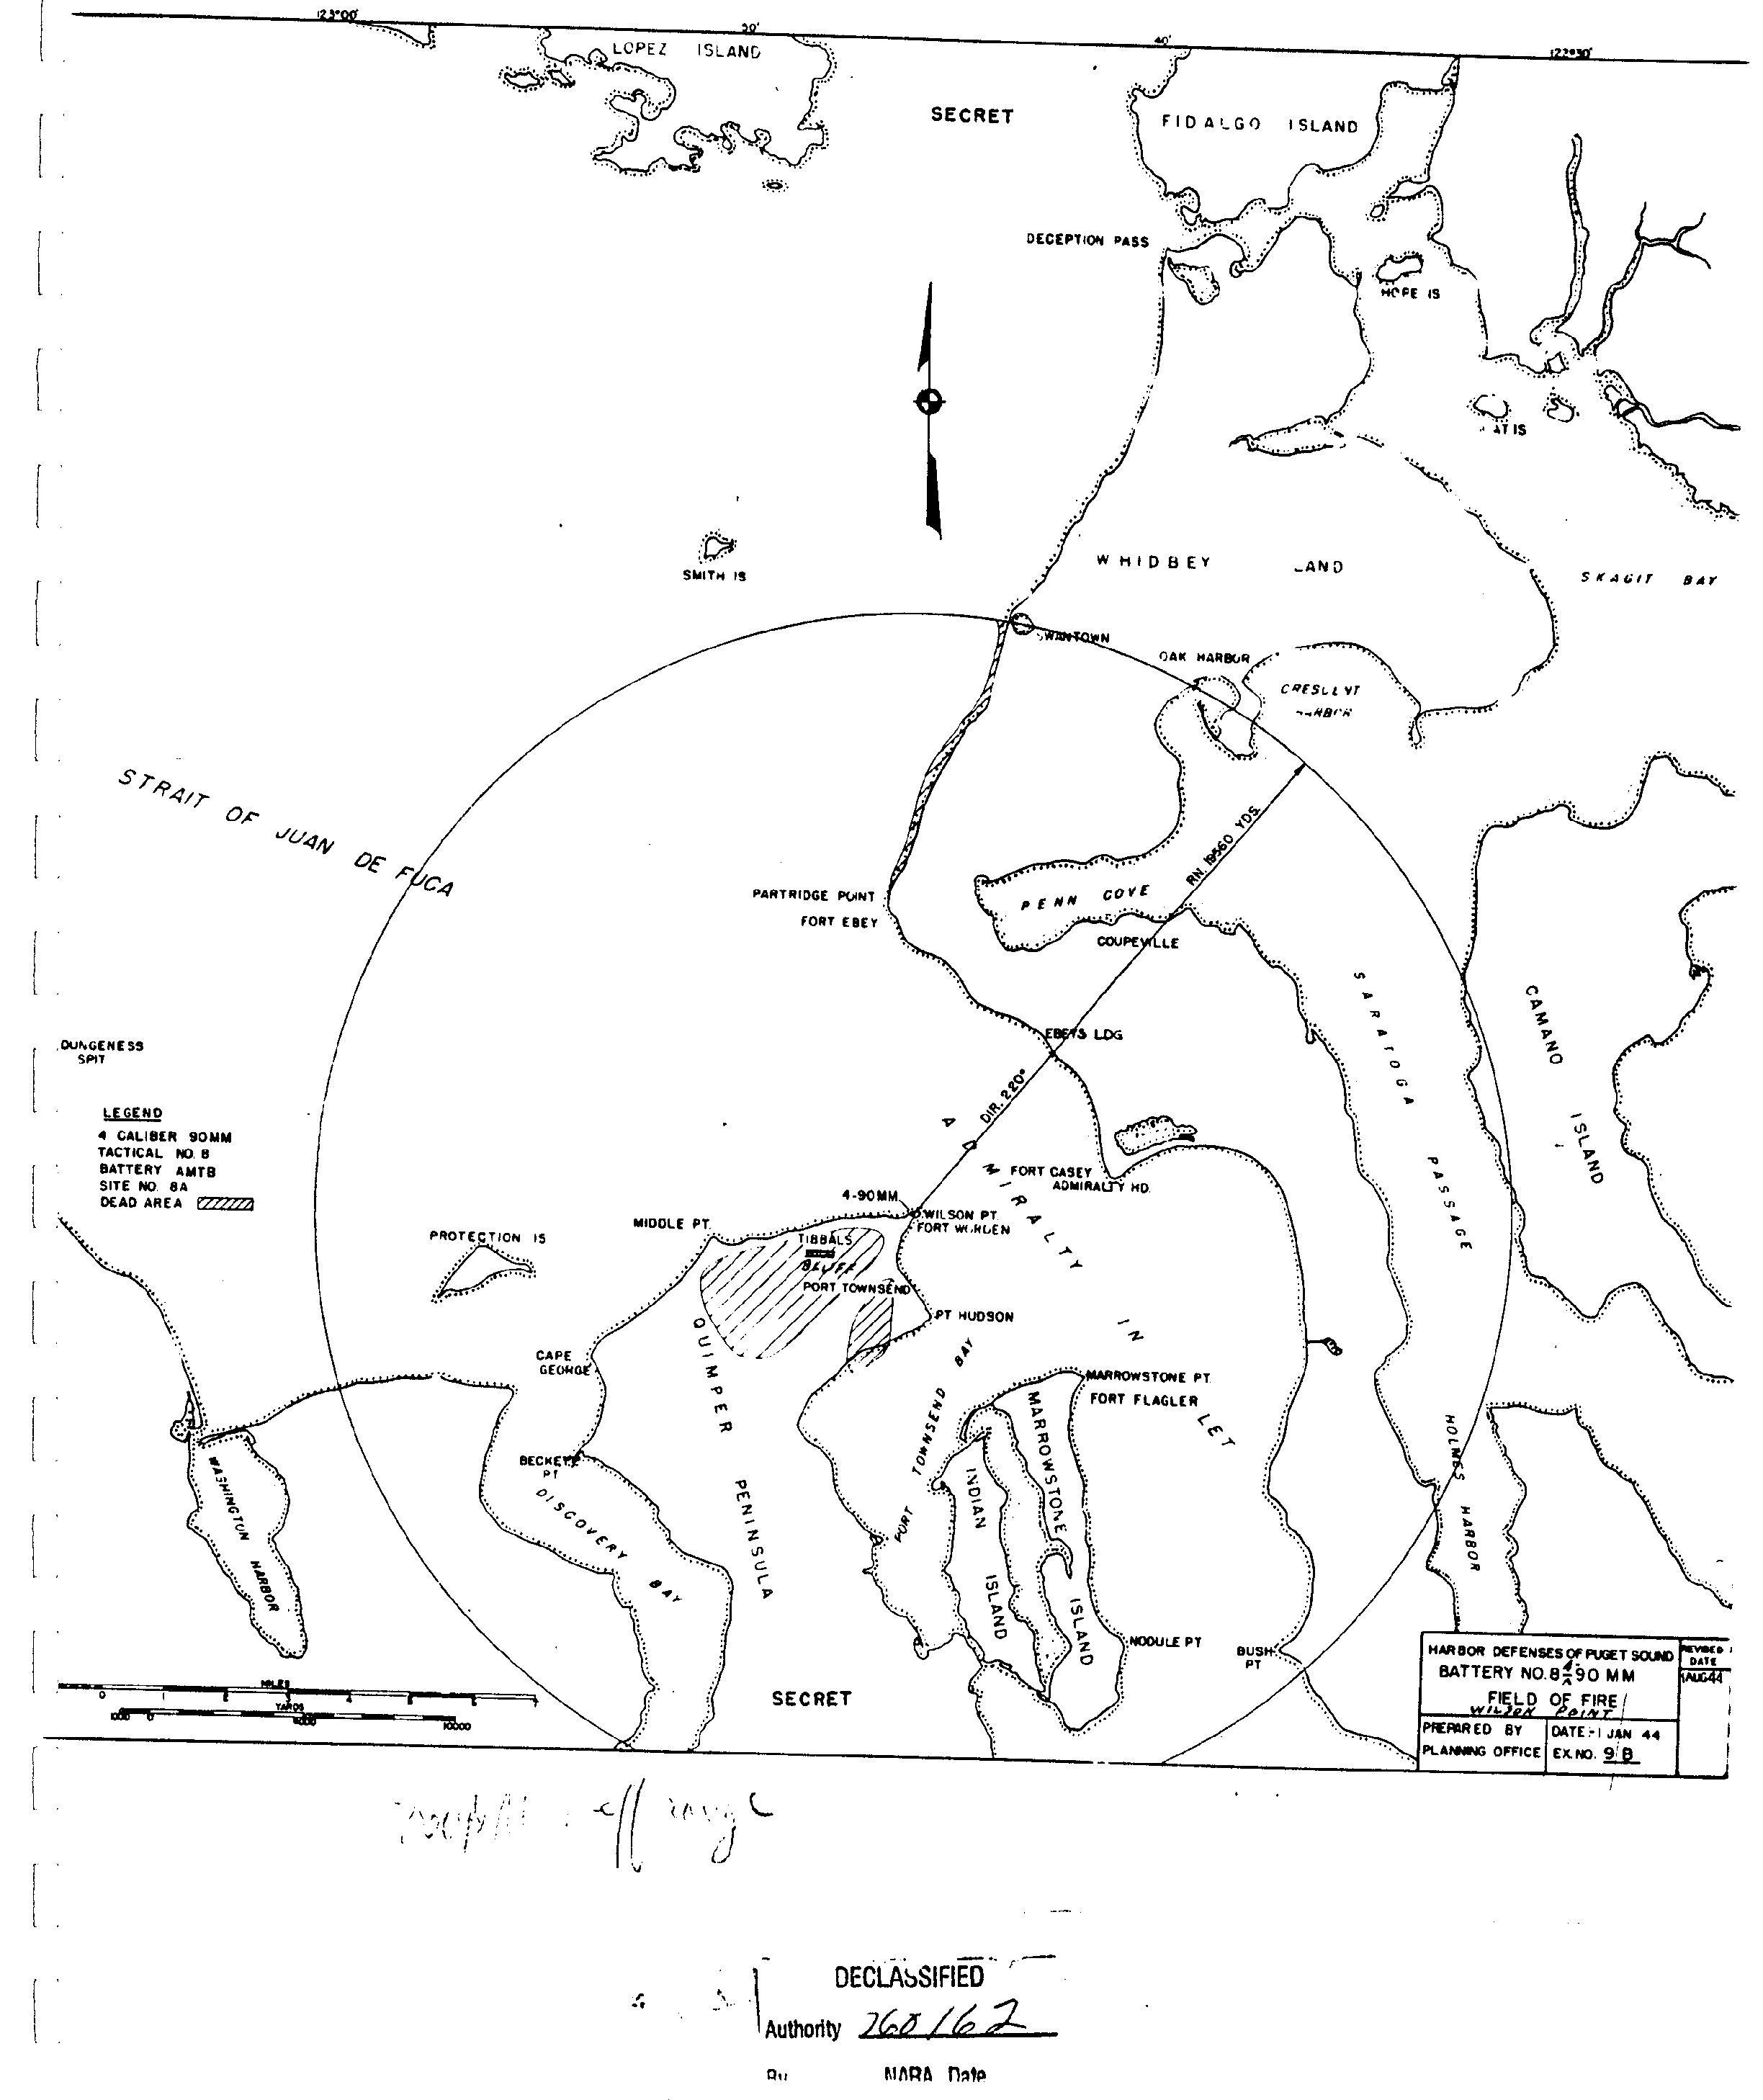
9 - B , Battery No. 8, Wilson Point, 4-90mm, Field of Fire
10 - B , Battery No. 9, Tolles-B, 2-6" BC, Field of Fire
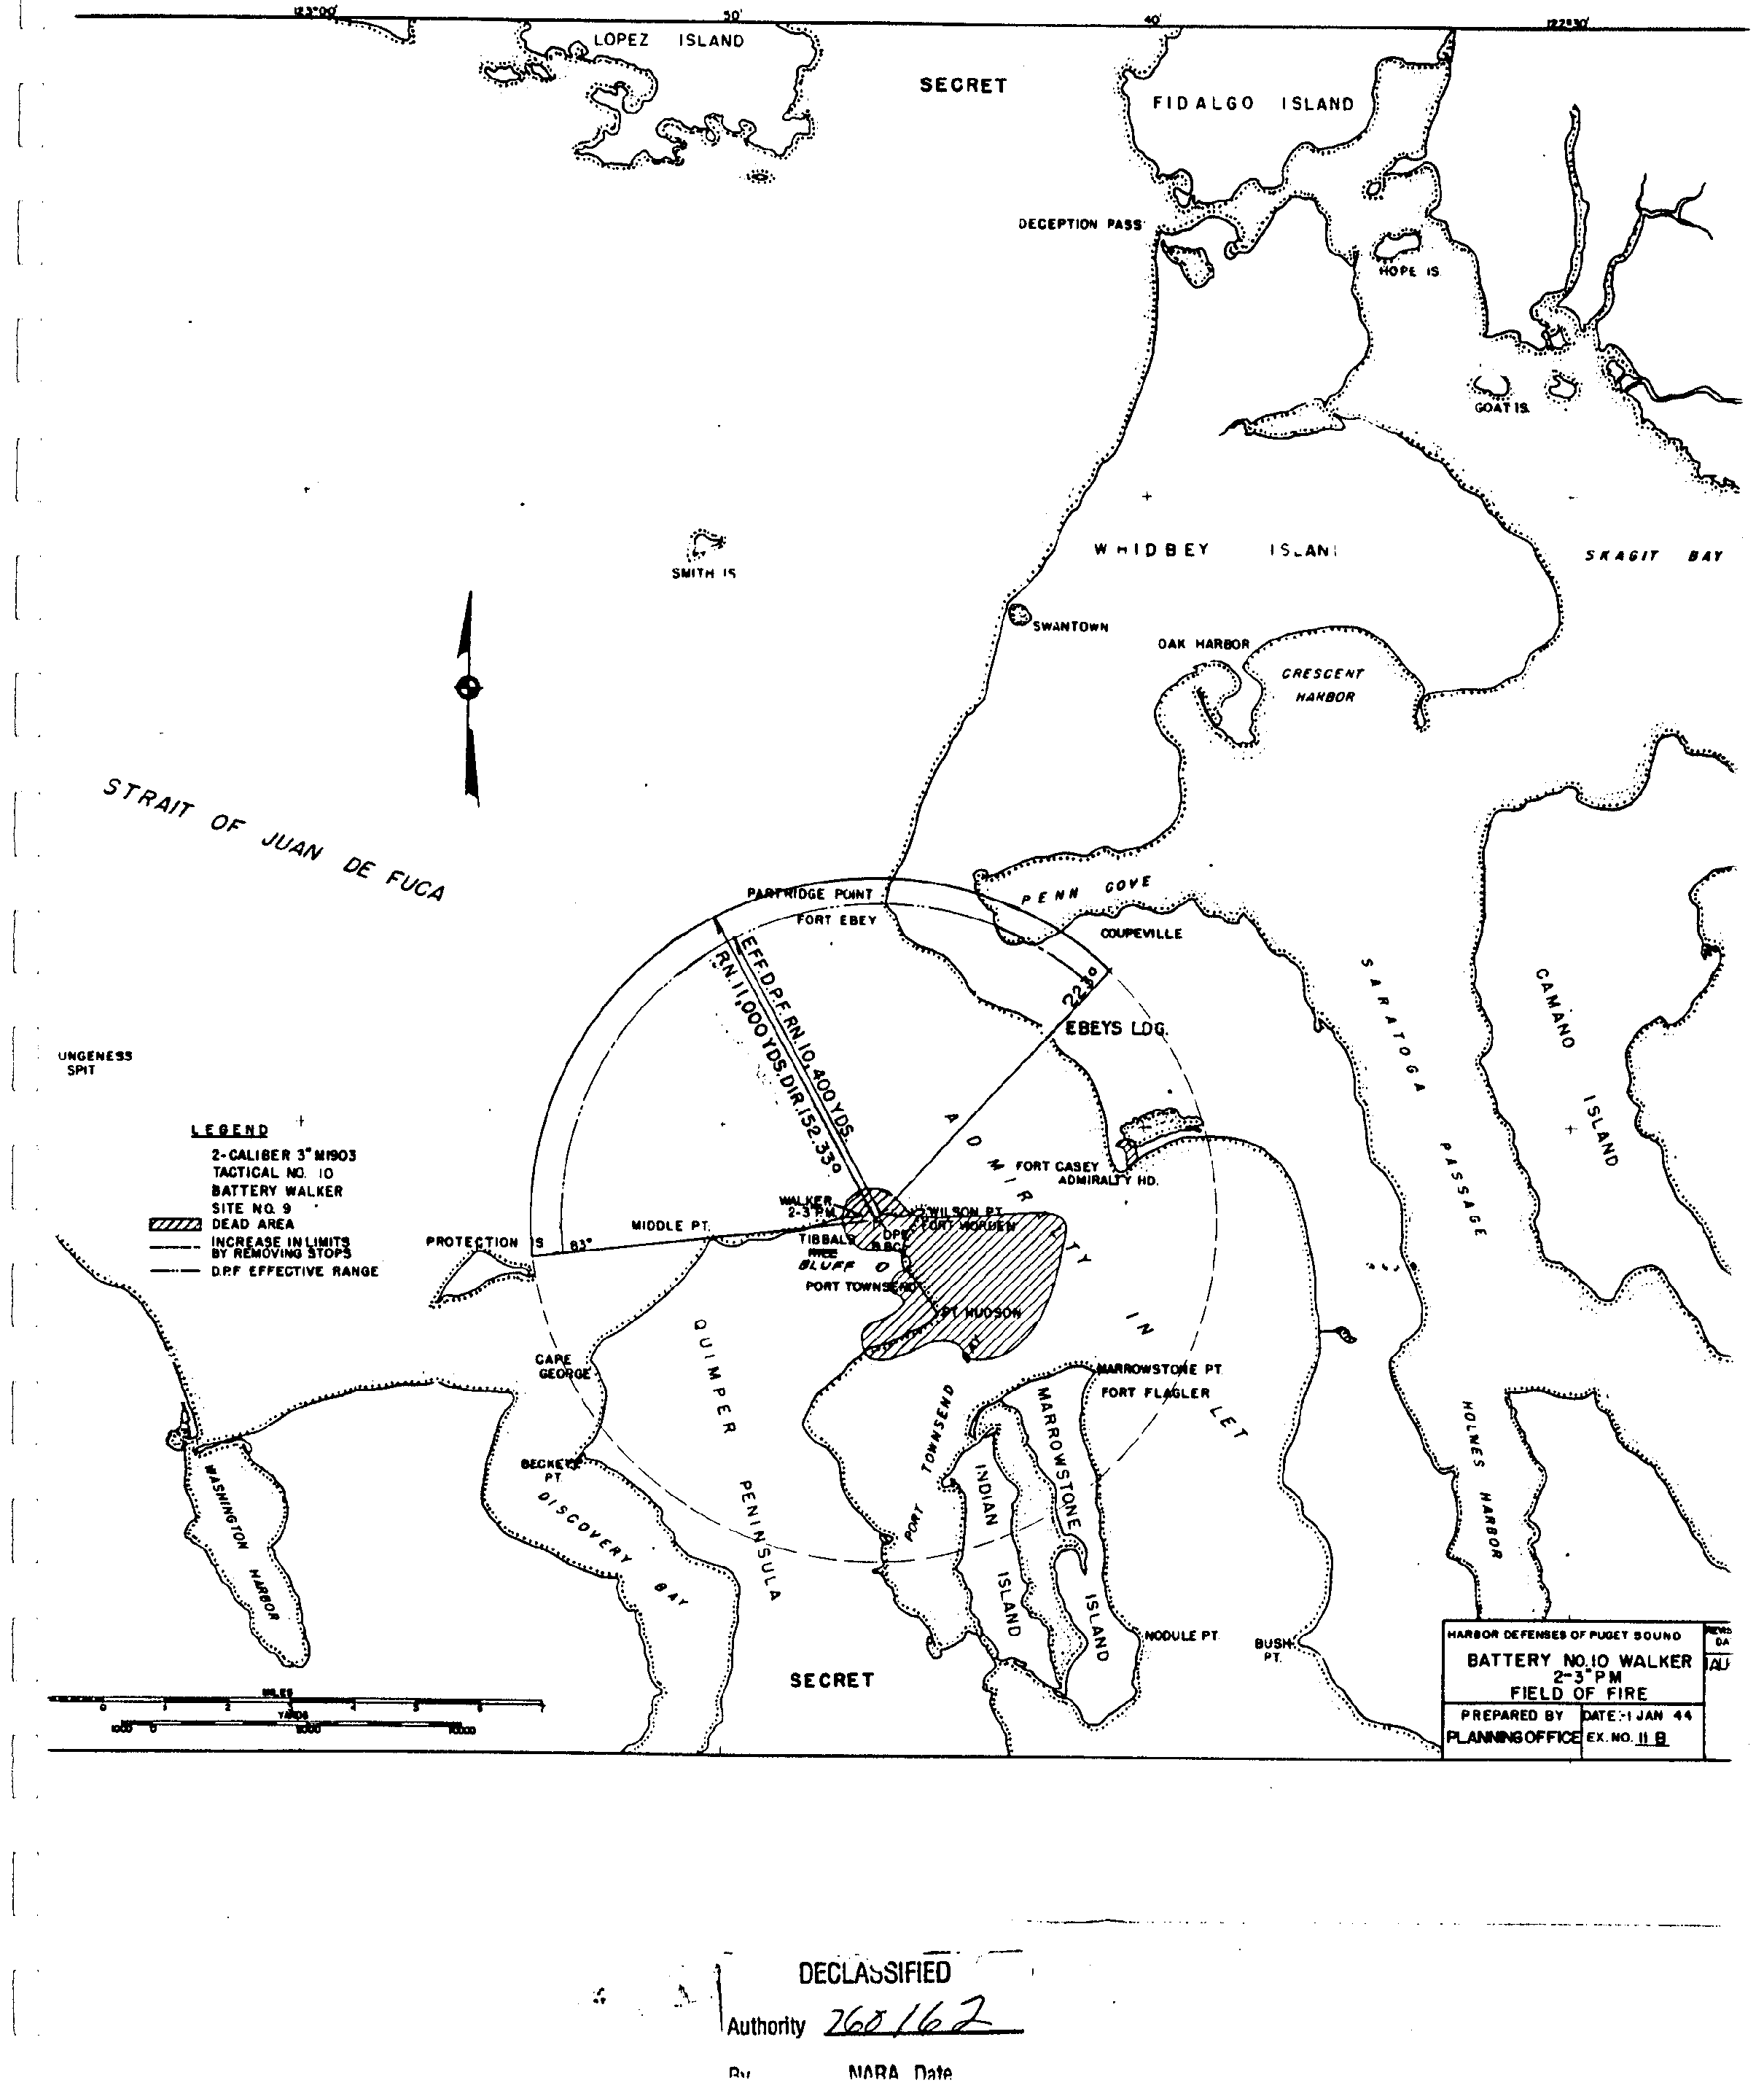
11 - B , Battery No. 10, Walker, 2-3" PM, Field of Fire
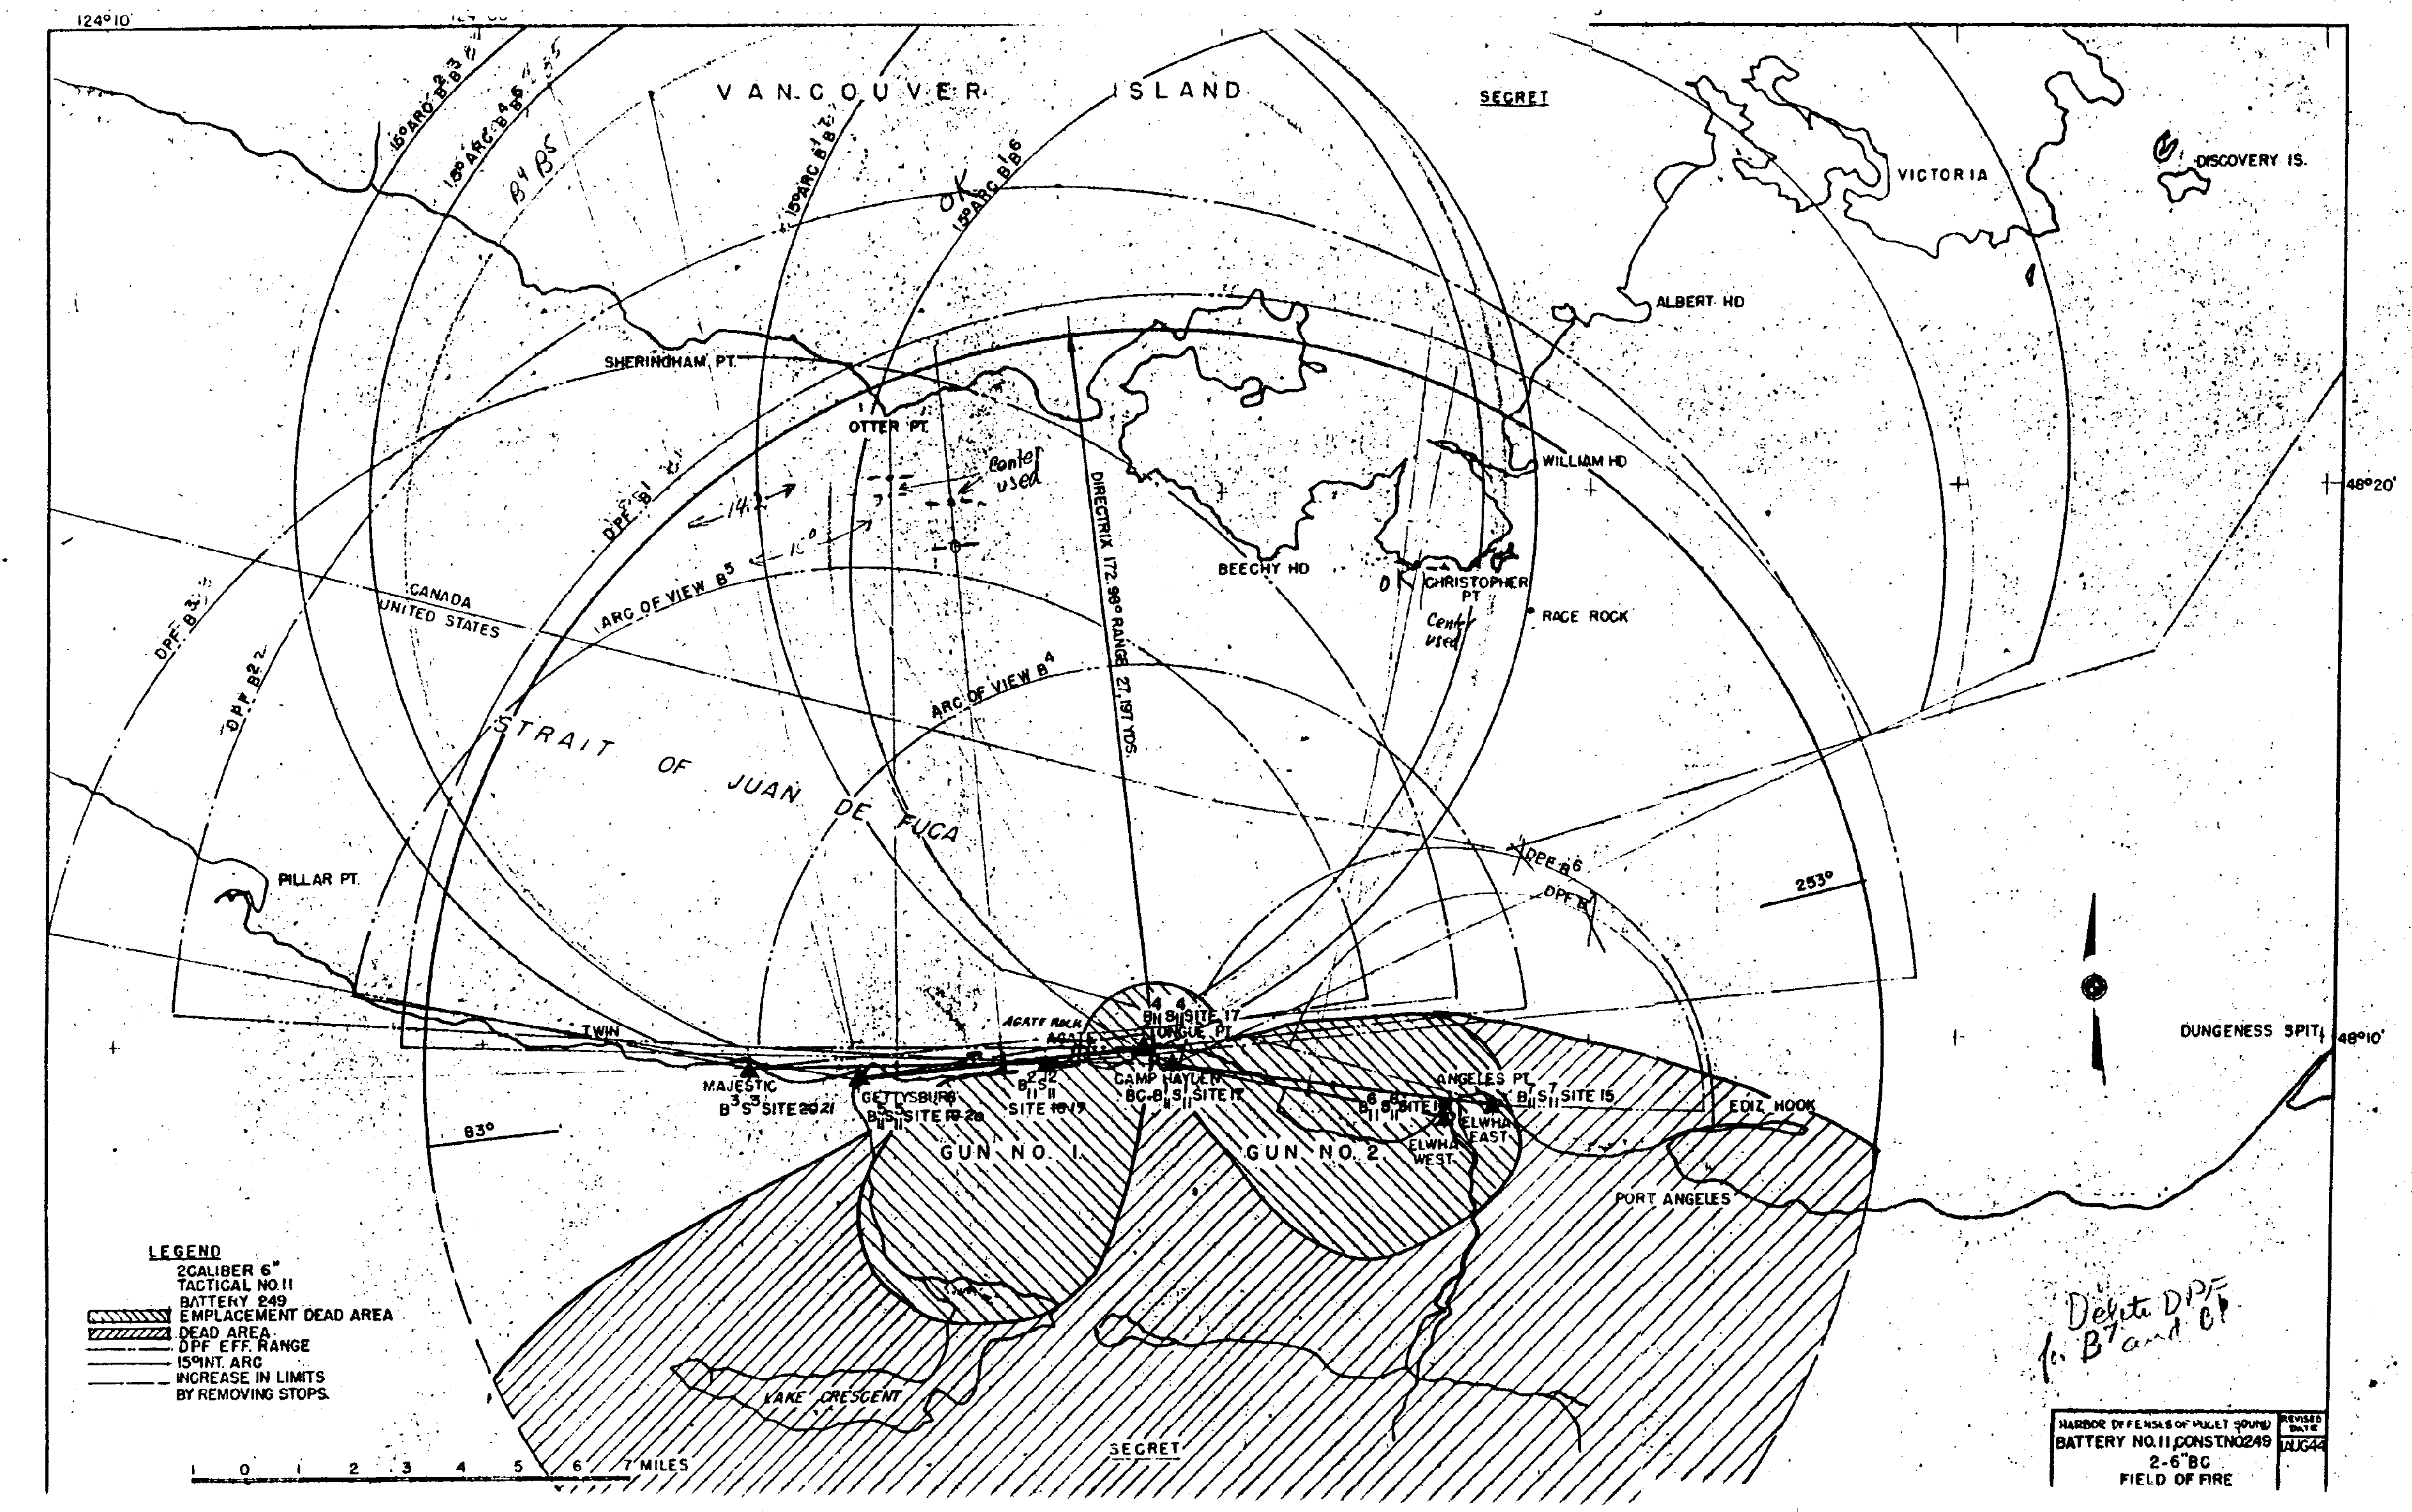
12 - B , Battery No. 11, Const. No. 249, 2-6" BC, Field of Fire
13 - B , Battery No. 12, Const. No. 131, 2-16" BC, Field of Fire
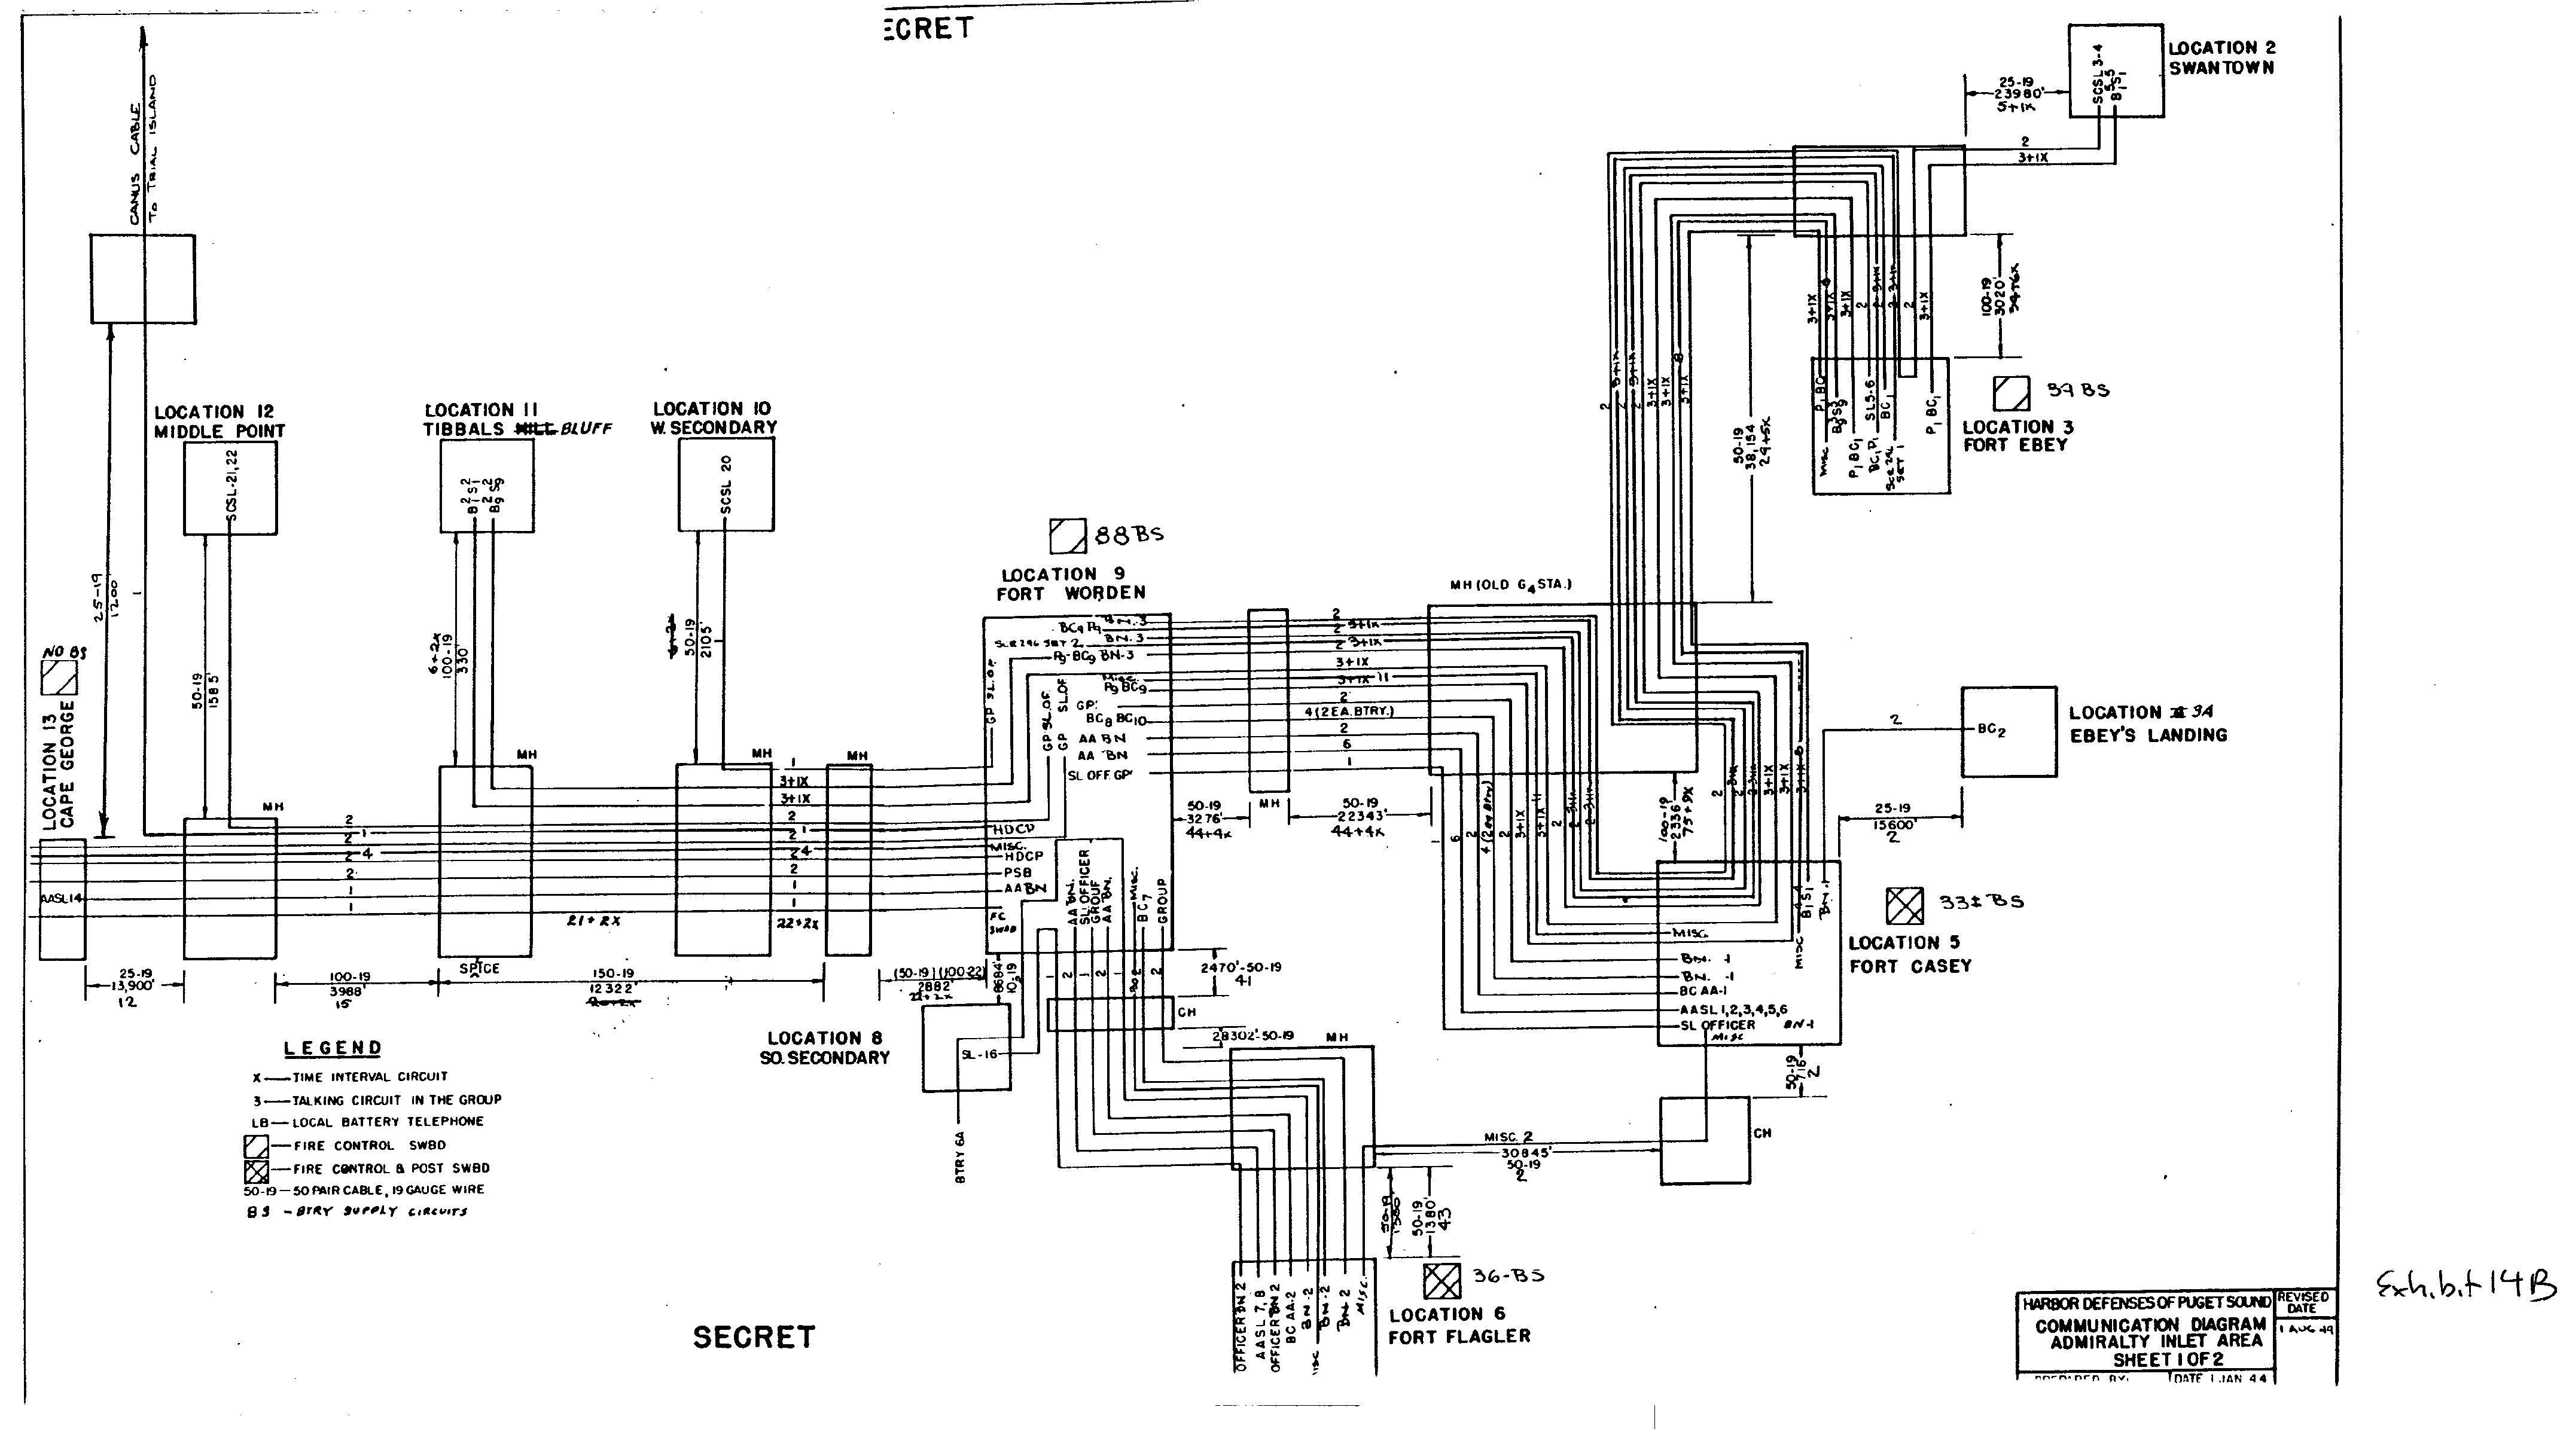
14 - B , Communication Diagram - Admiralty Inlet Area - Sheet 1 of 2 sheets
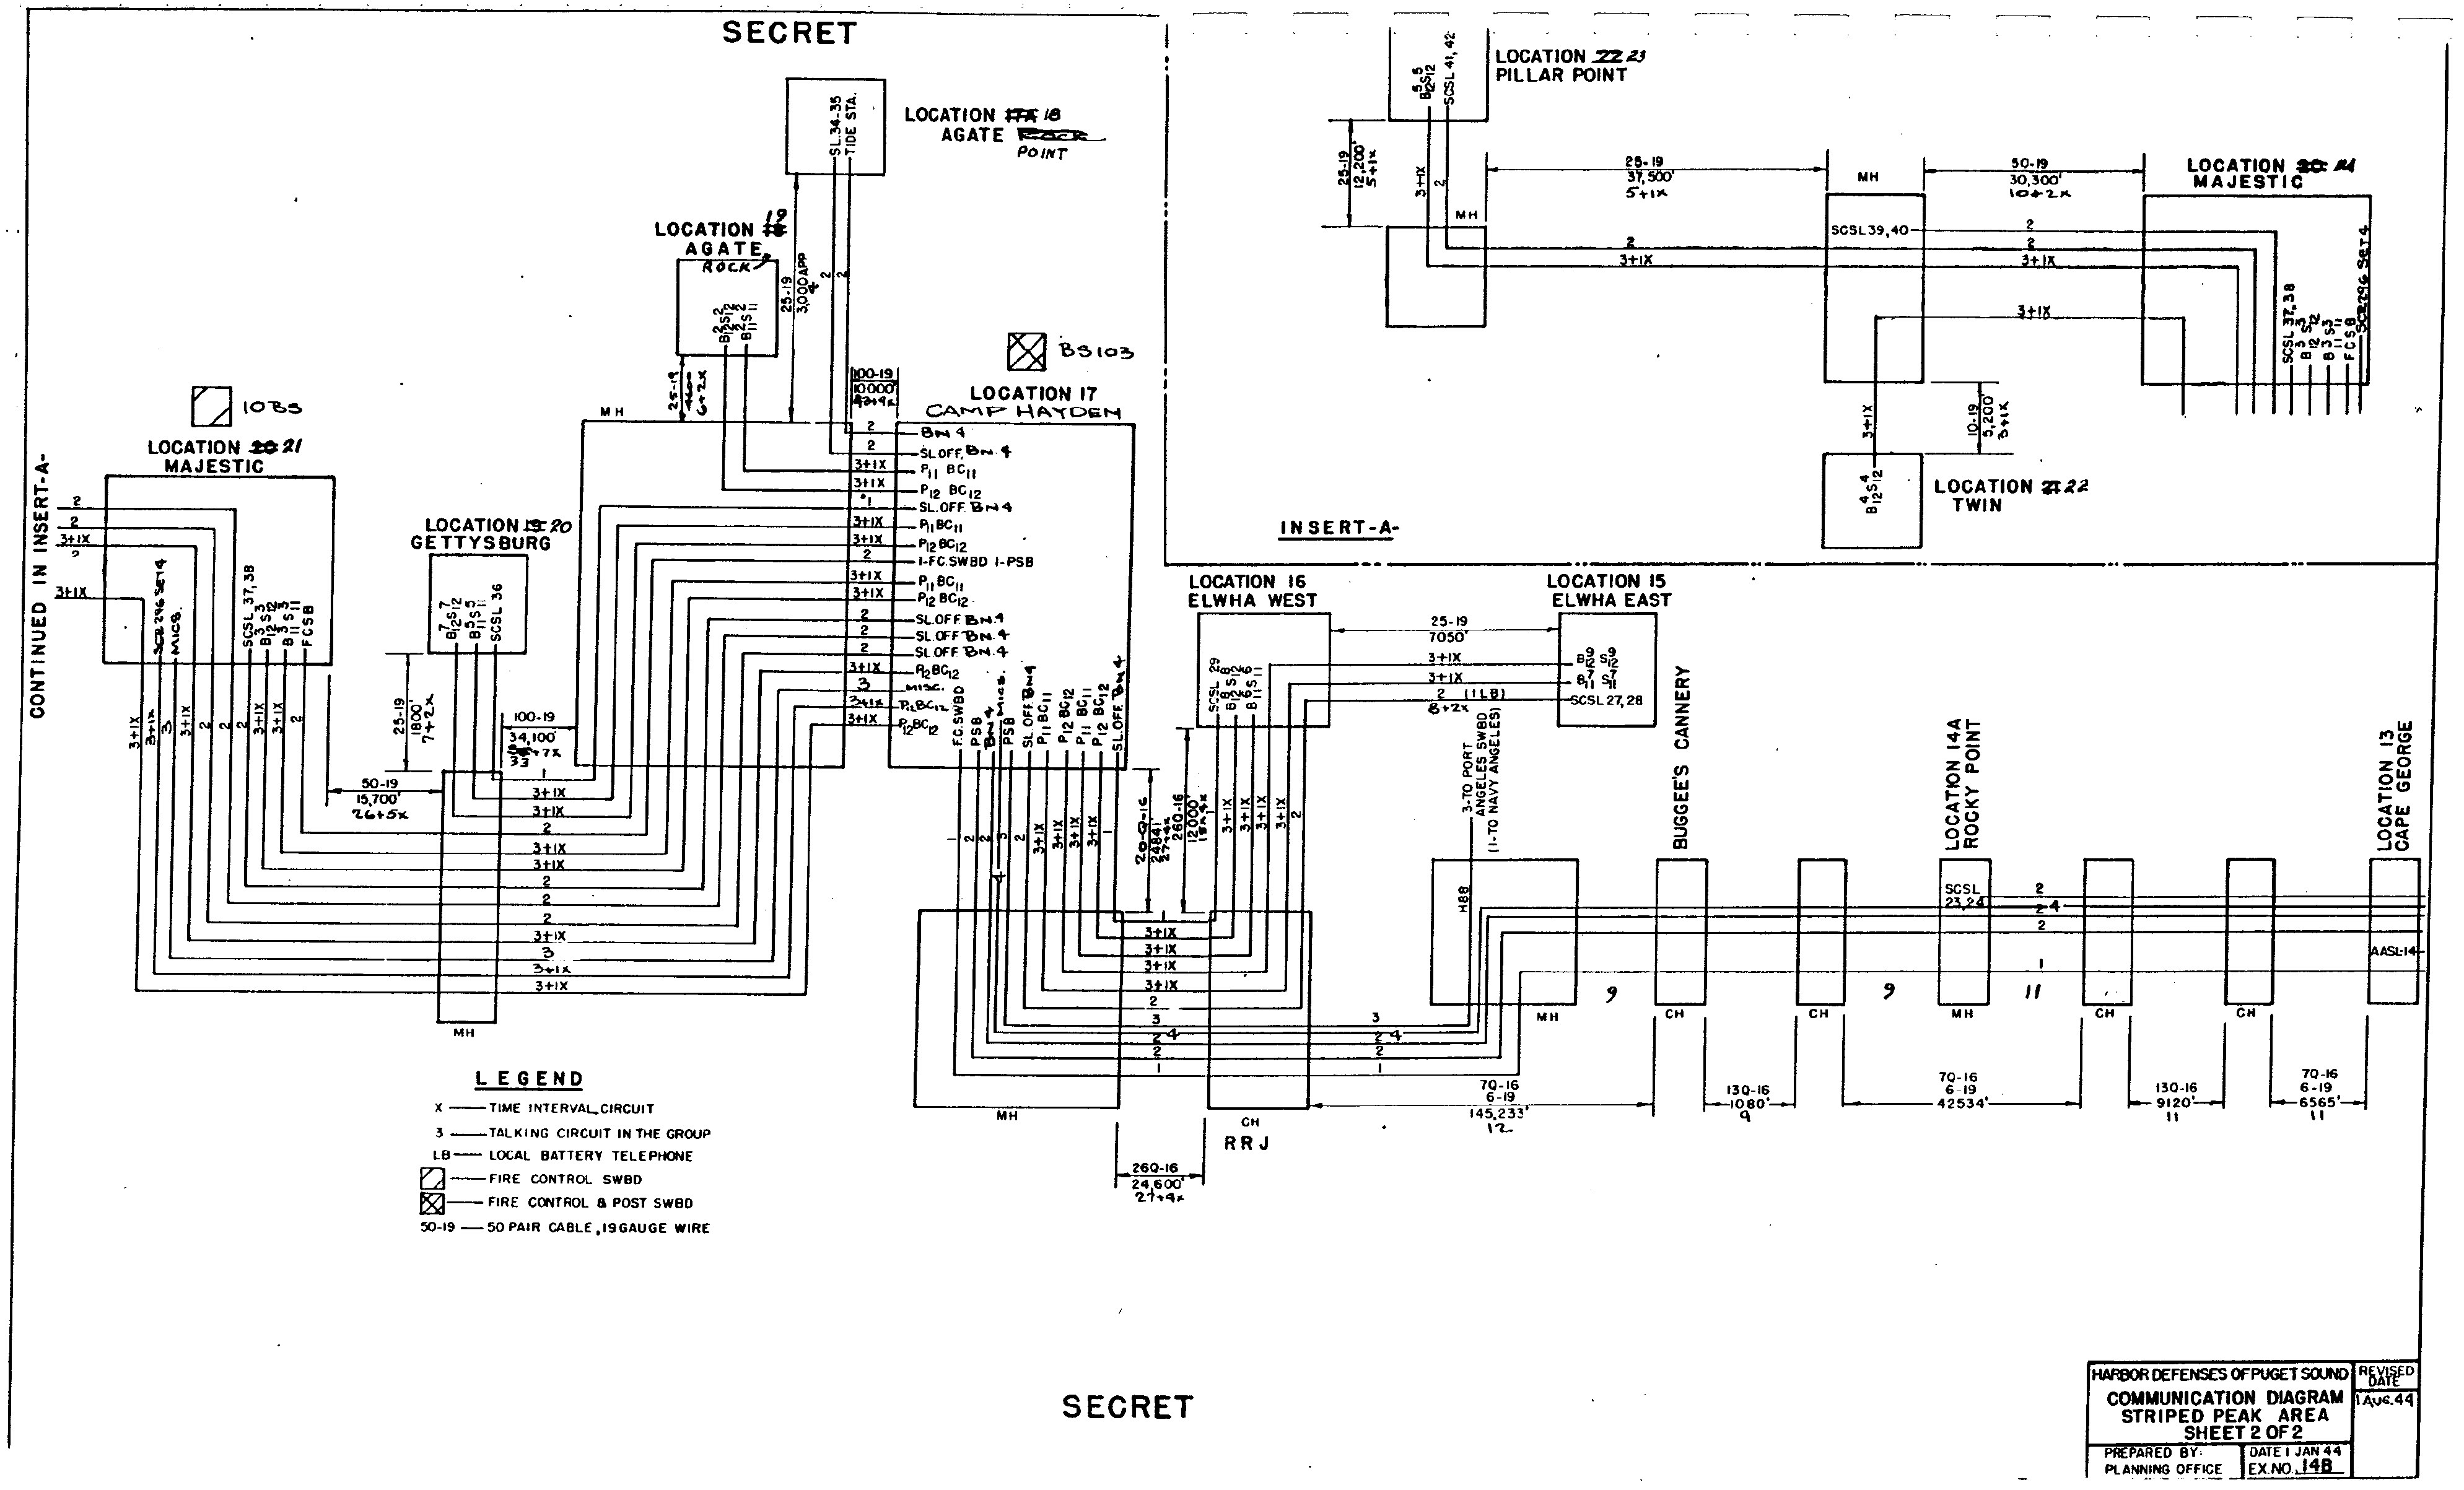
14 - B , Communication Diagram - Striped Peak Area - Sheet 2 of 2 sheets
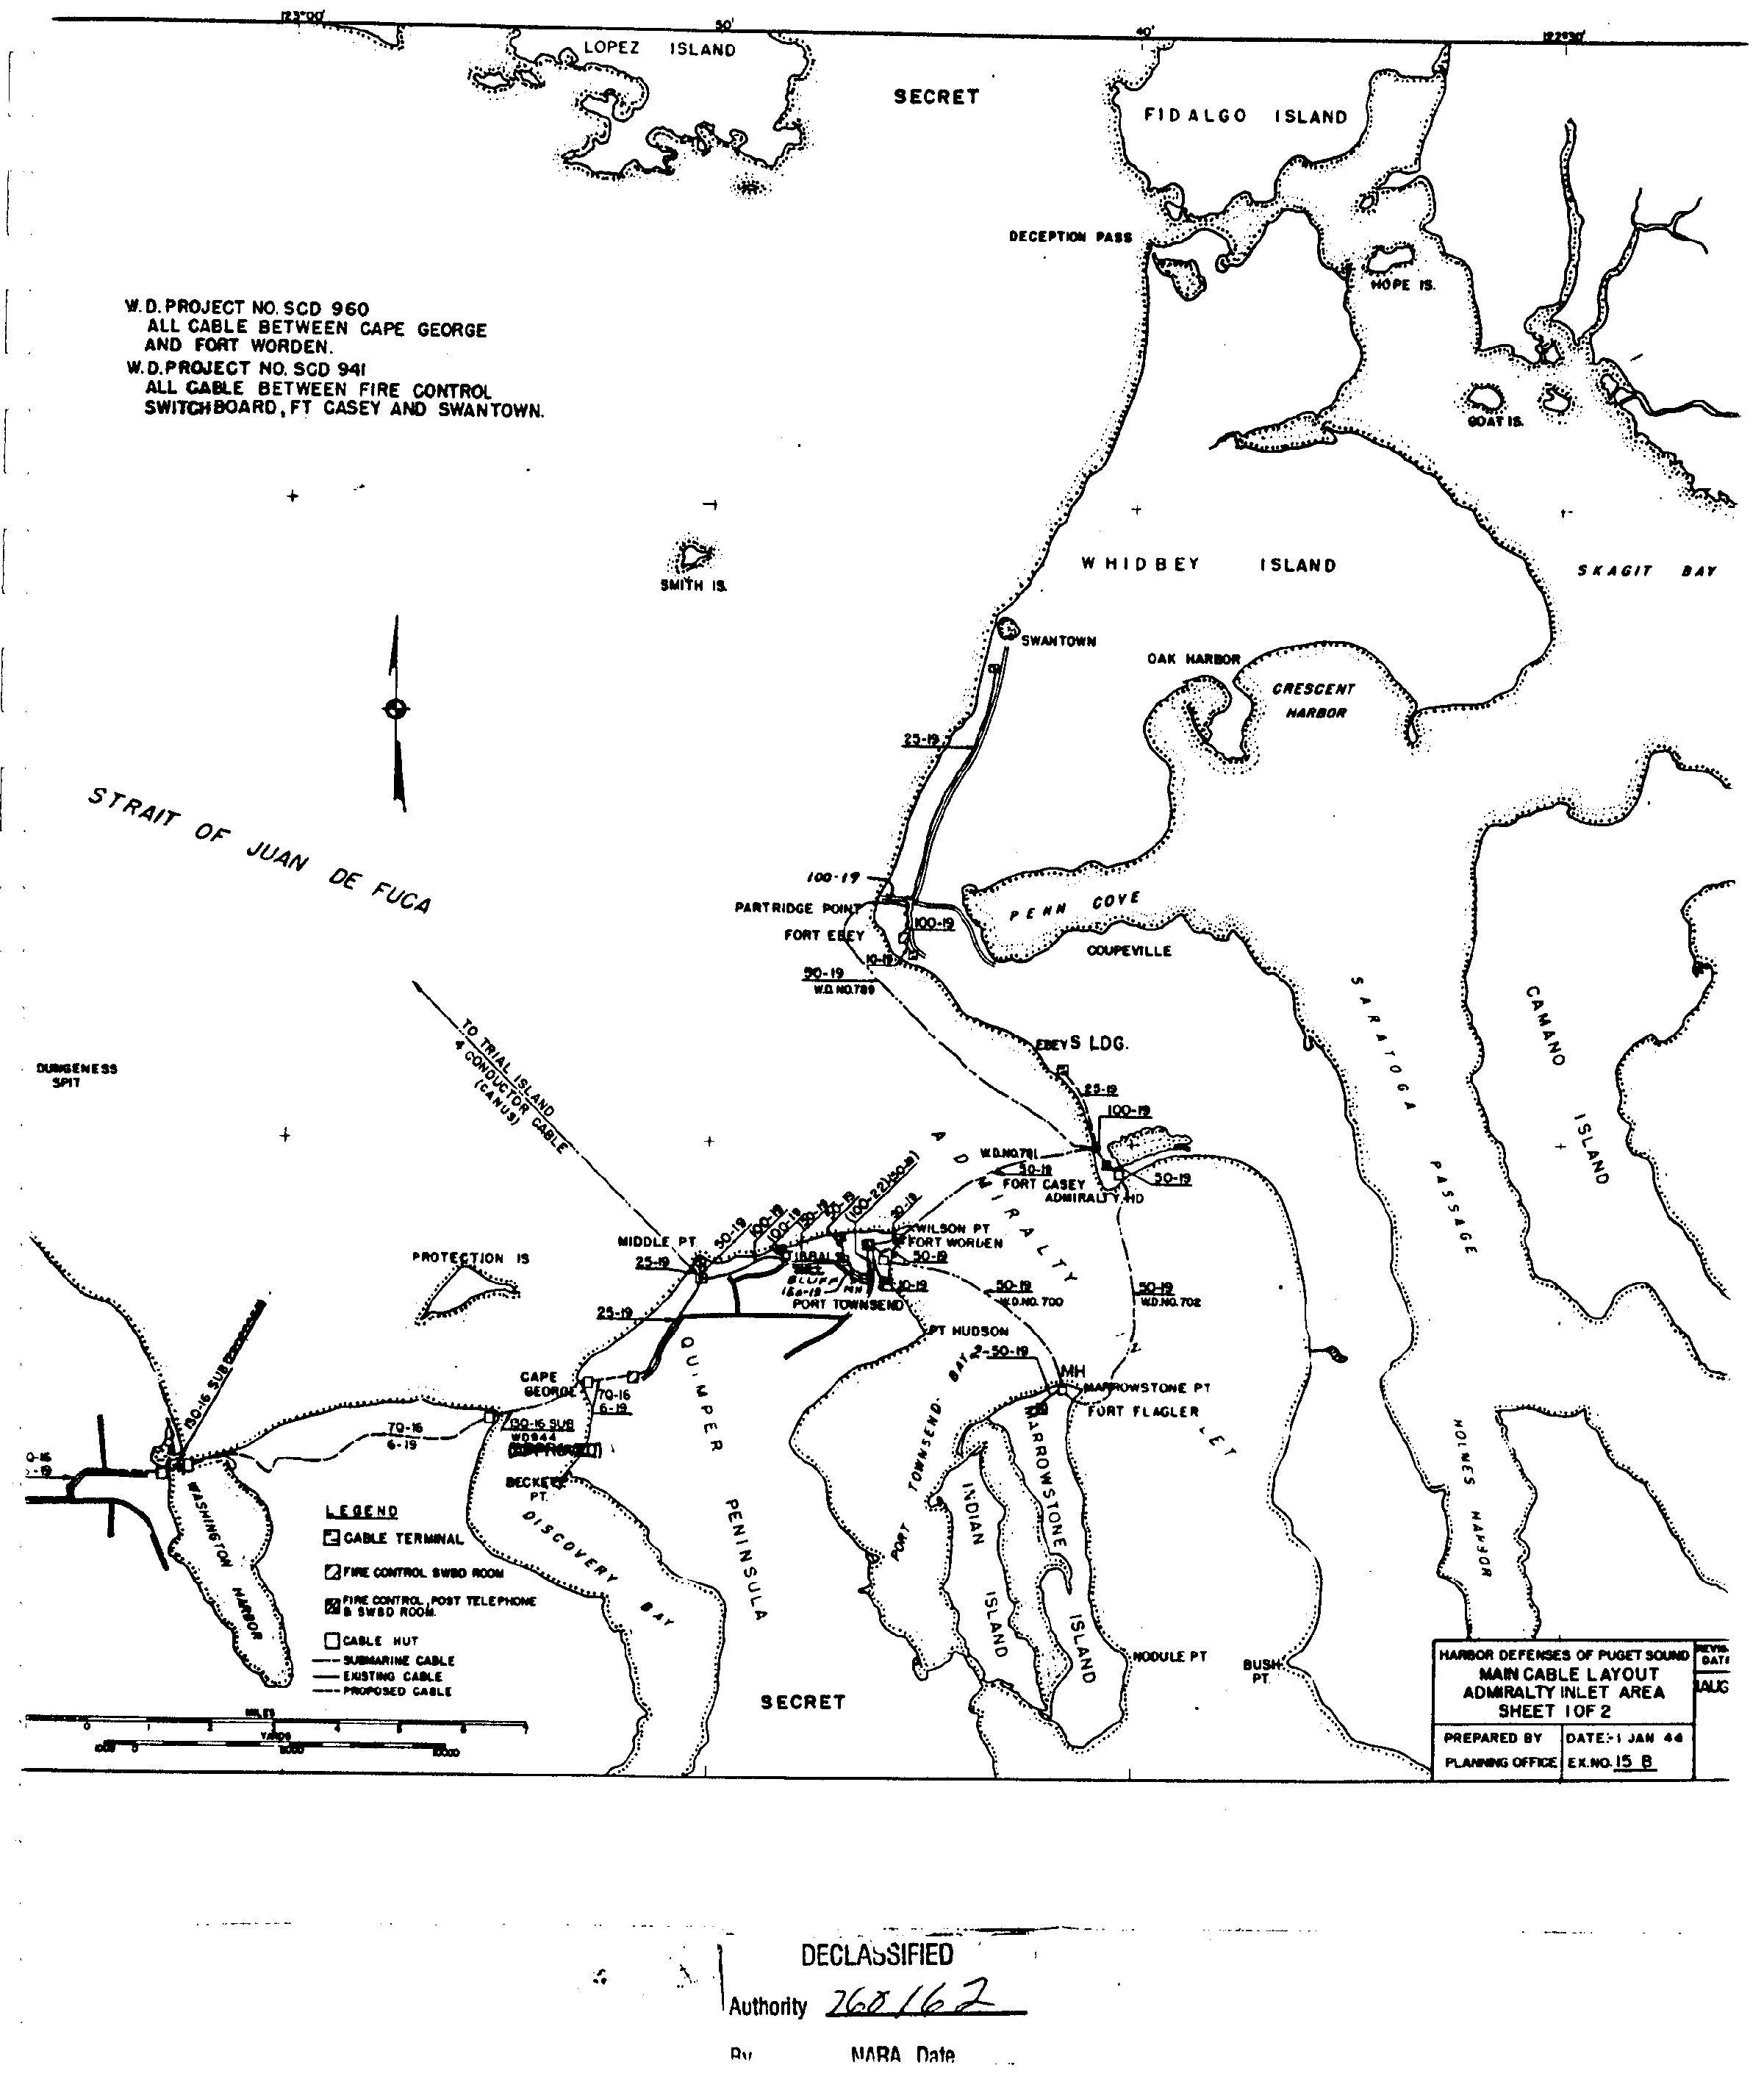
15 - B , Main Cable Layout - Admiralty Inlet Area - Sheet 1 of 2 sheets
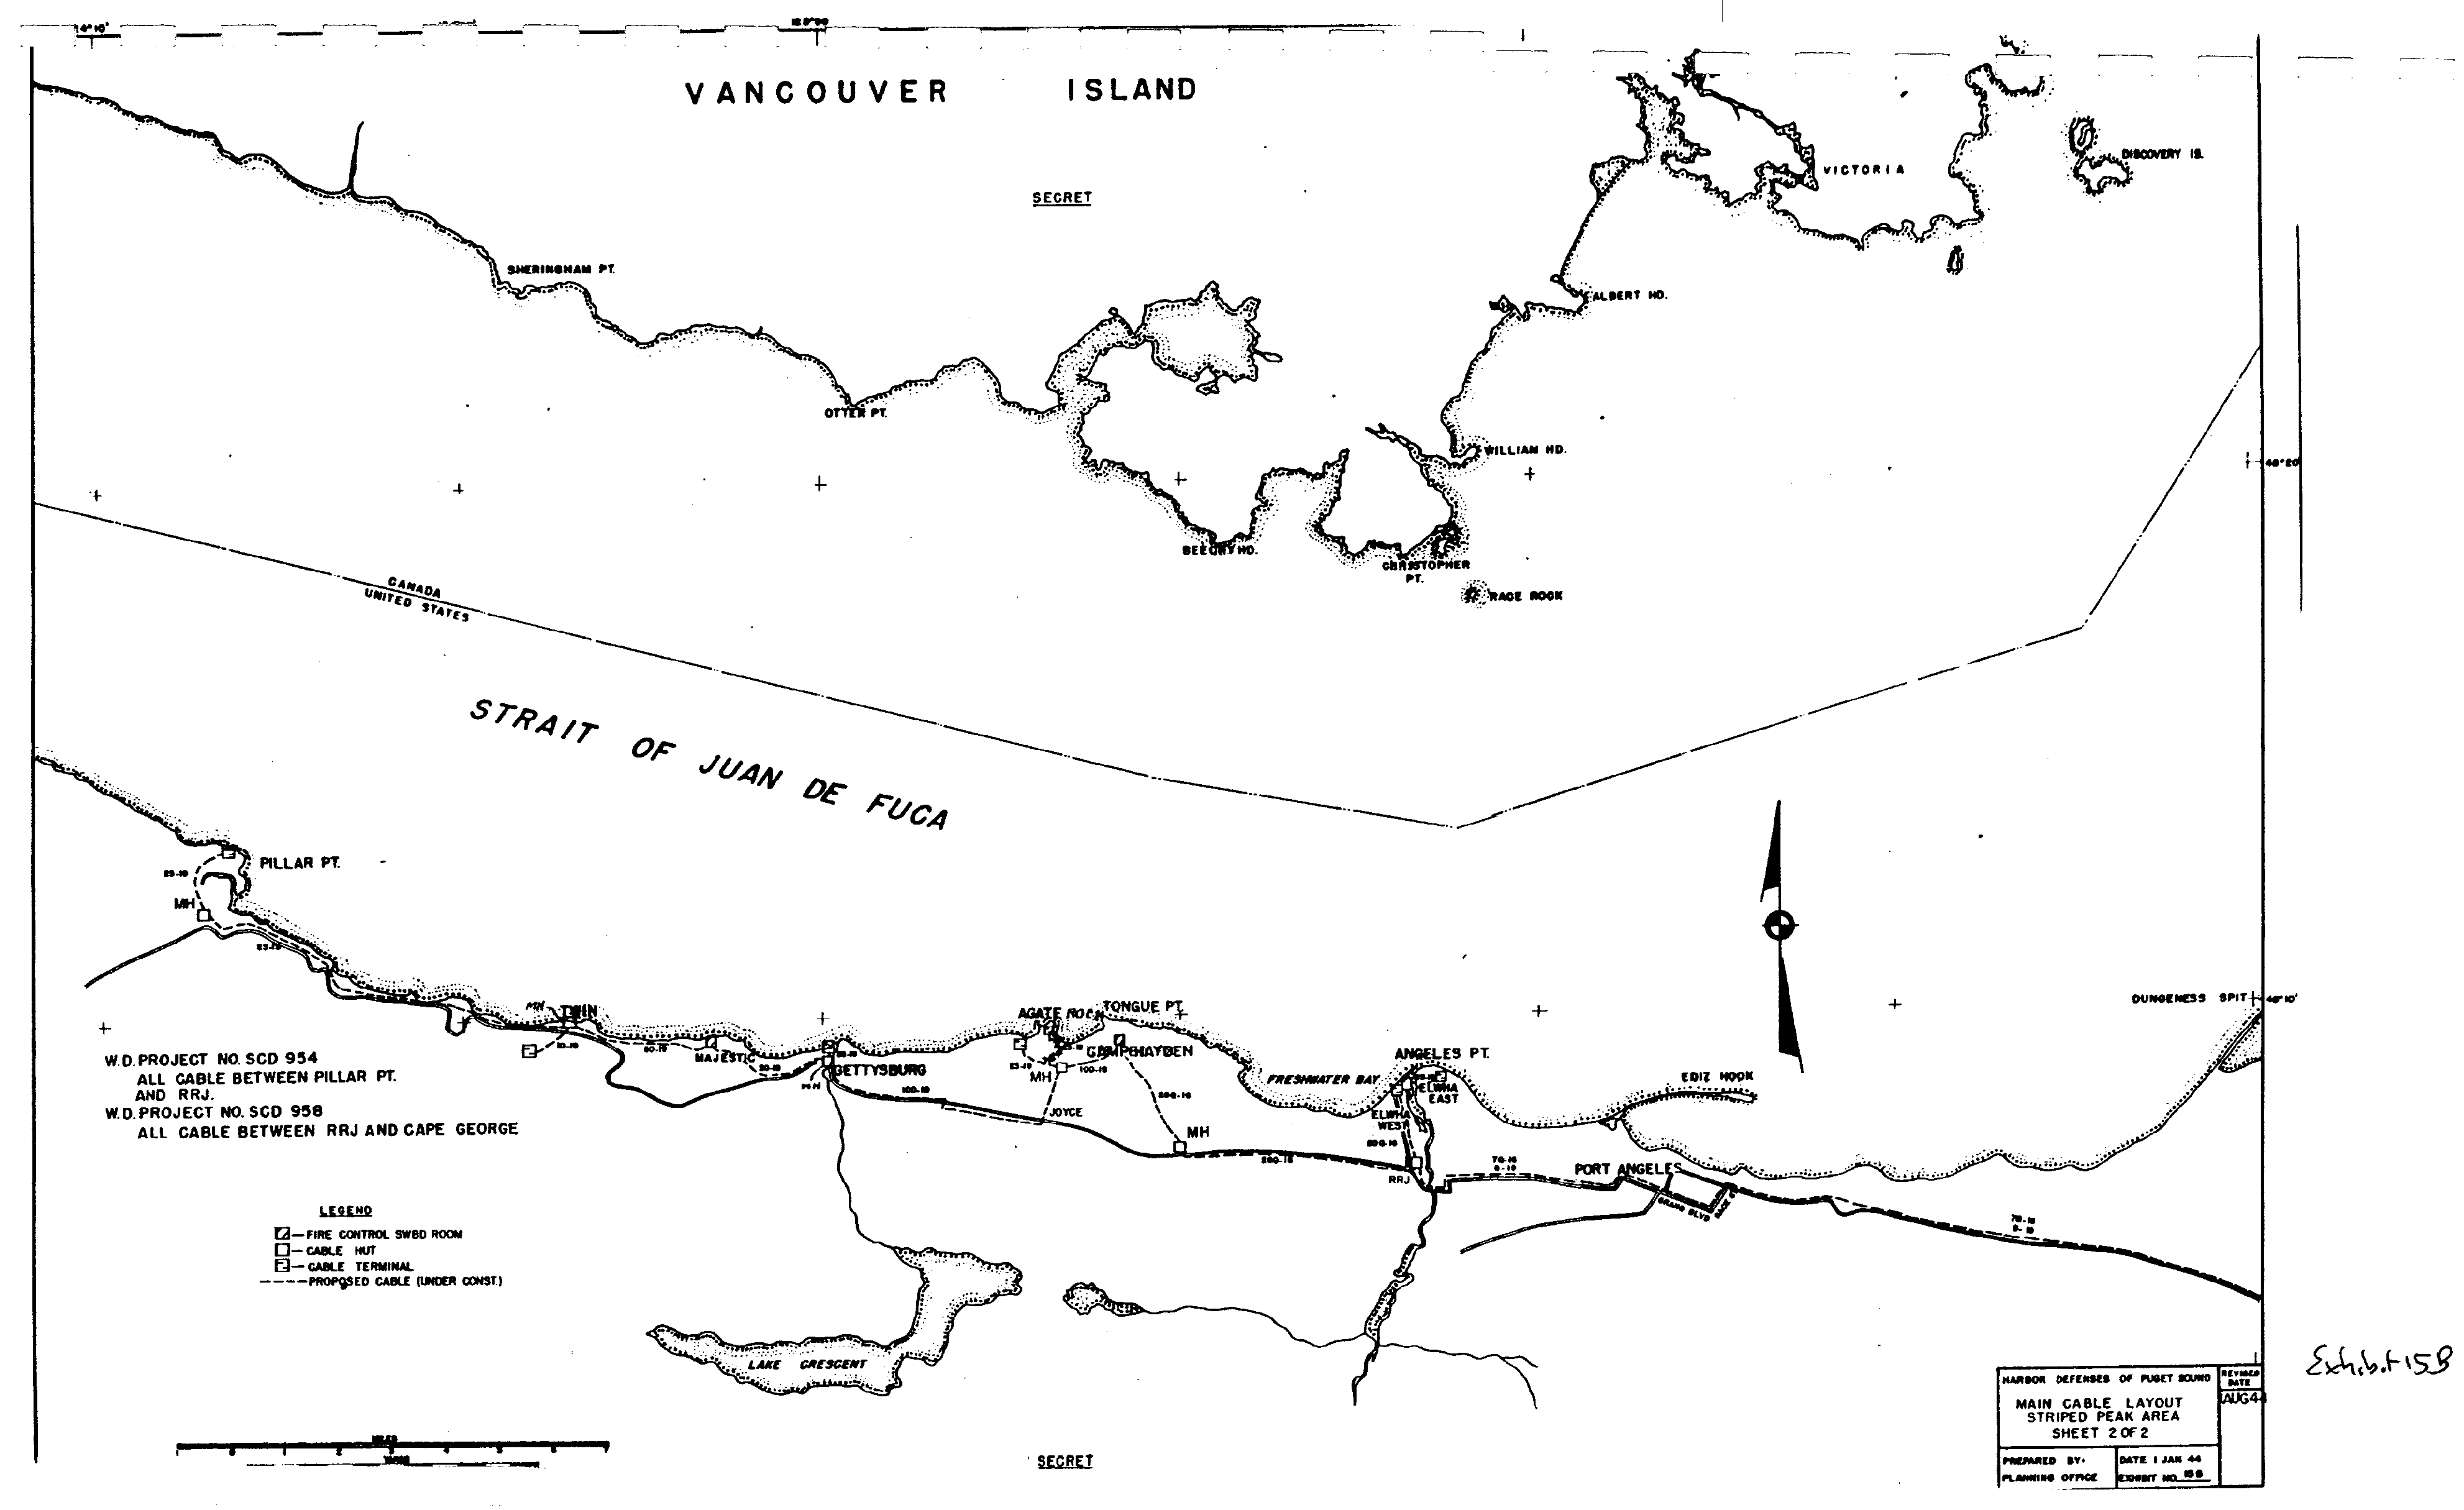
15 - B , Main Cable Layout - Striped Peak Area - Sheet 2 of 2 sheets
16 - B , Schematic Layout - Main Cable, Admiralty Inlet Area - Sheet 1 of 2 sheets
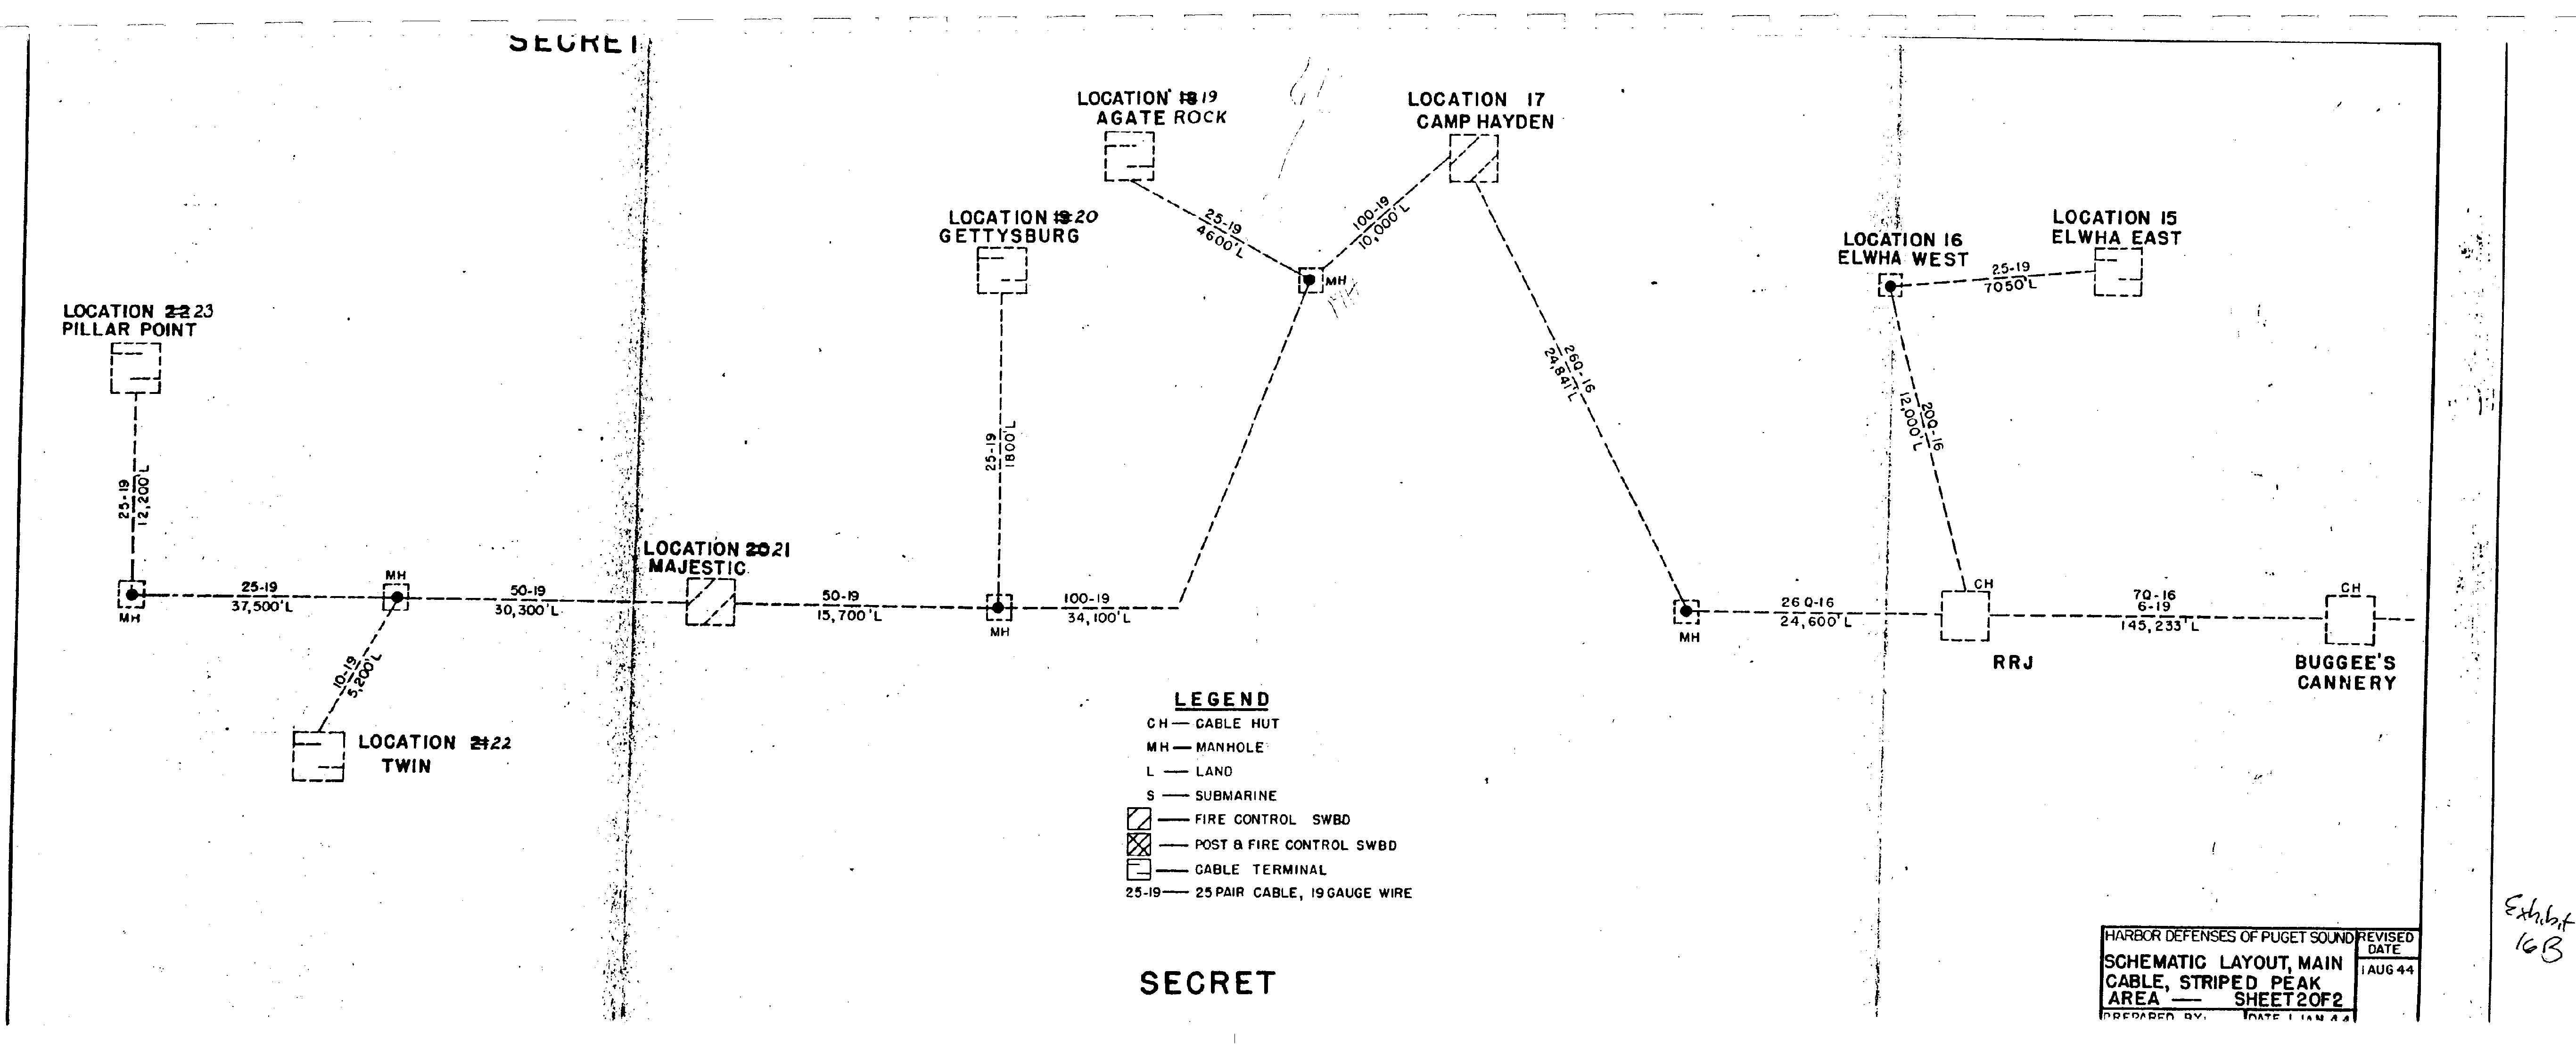
16 - B , Schematic Layout - Main Cable, Striped Peak Area - Sheet 2 of 2 sheets
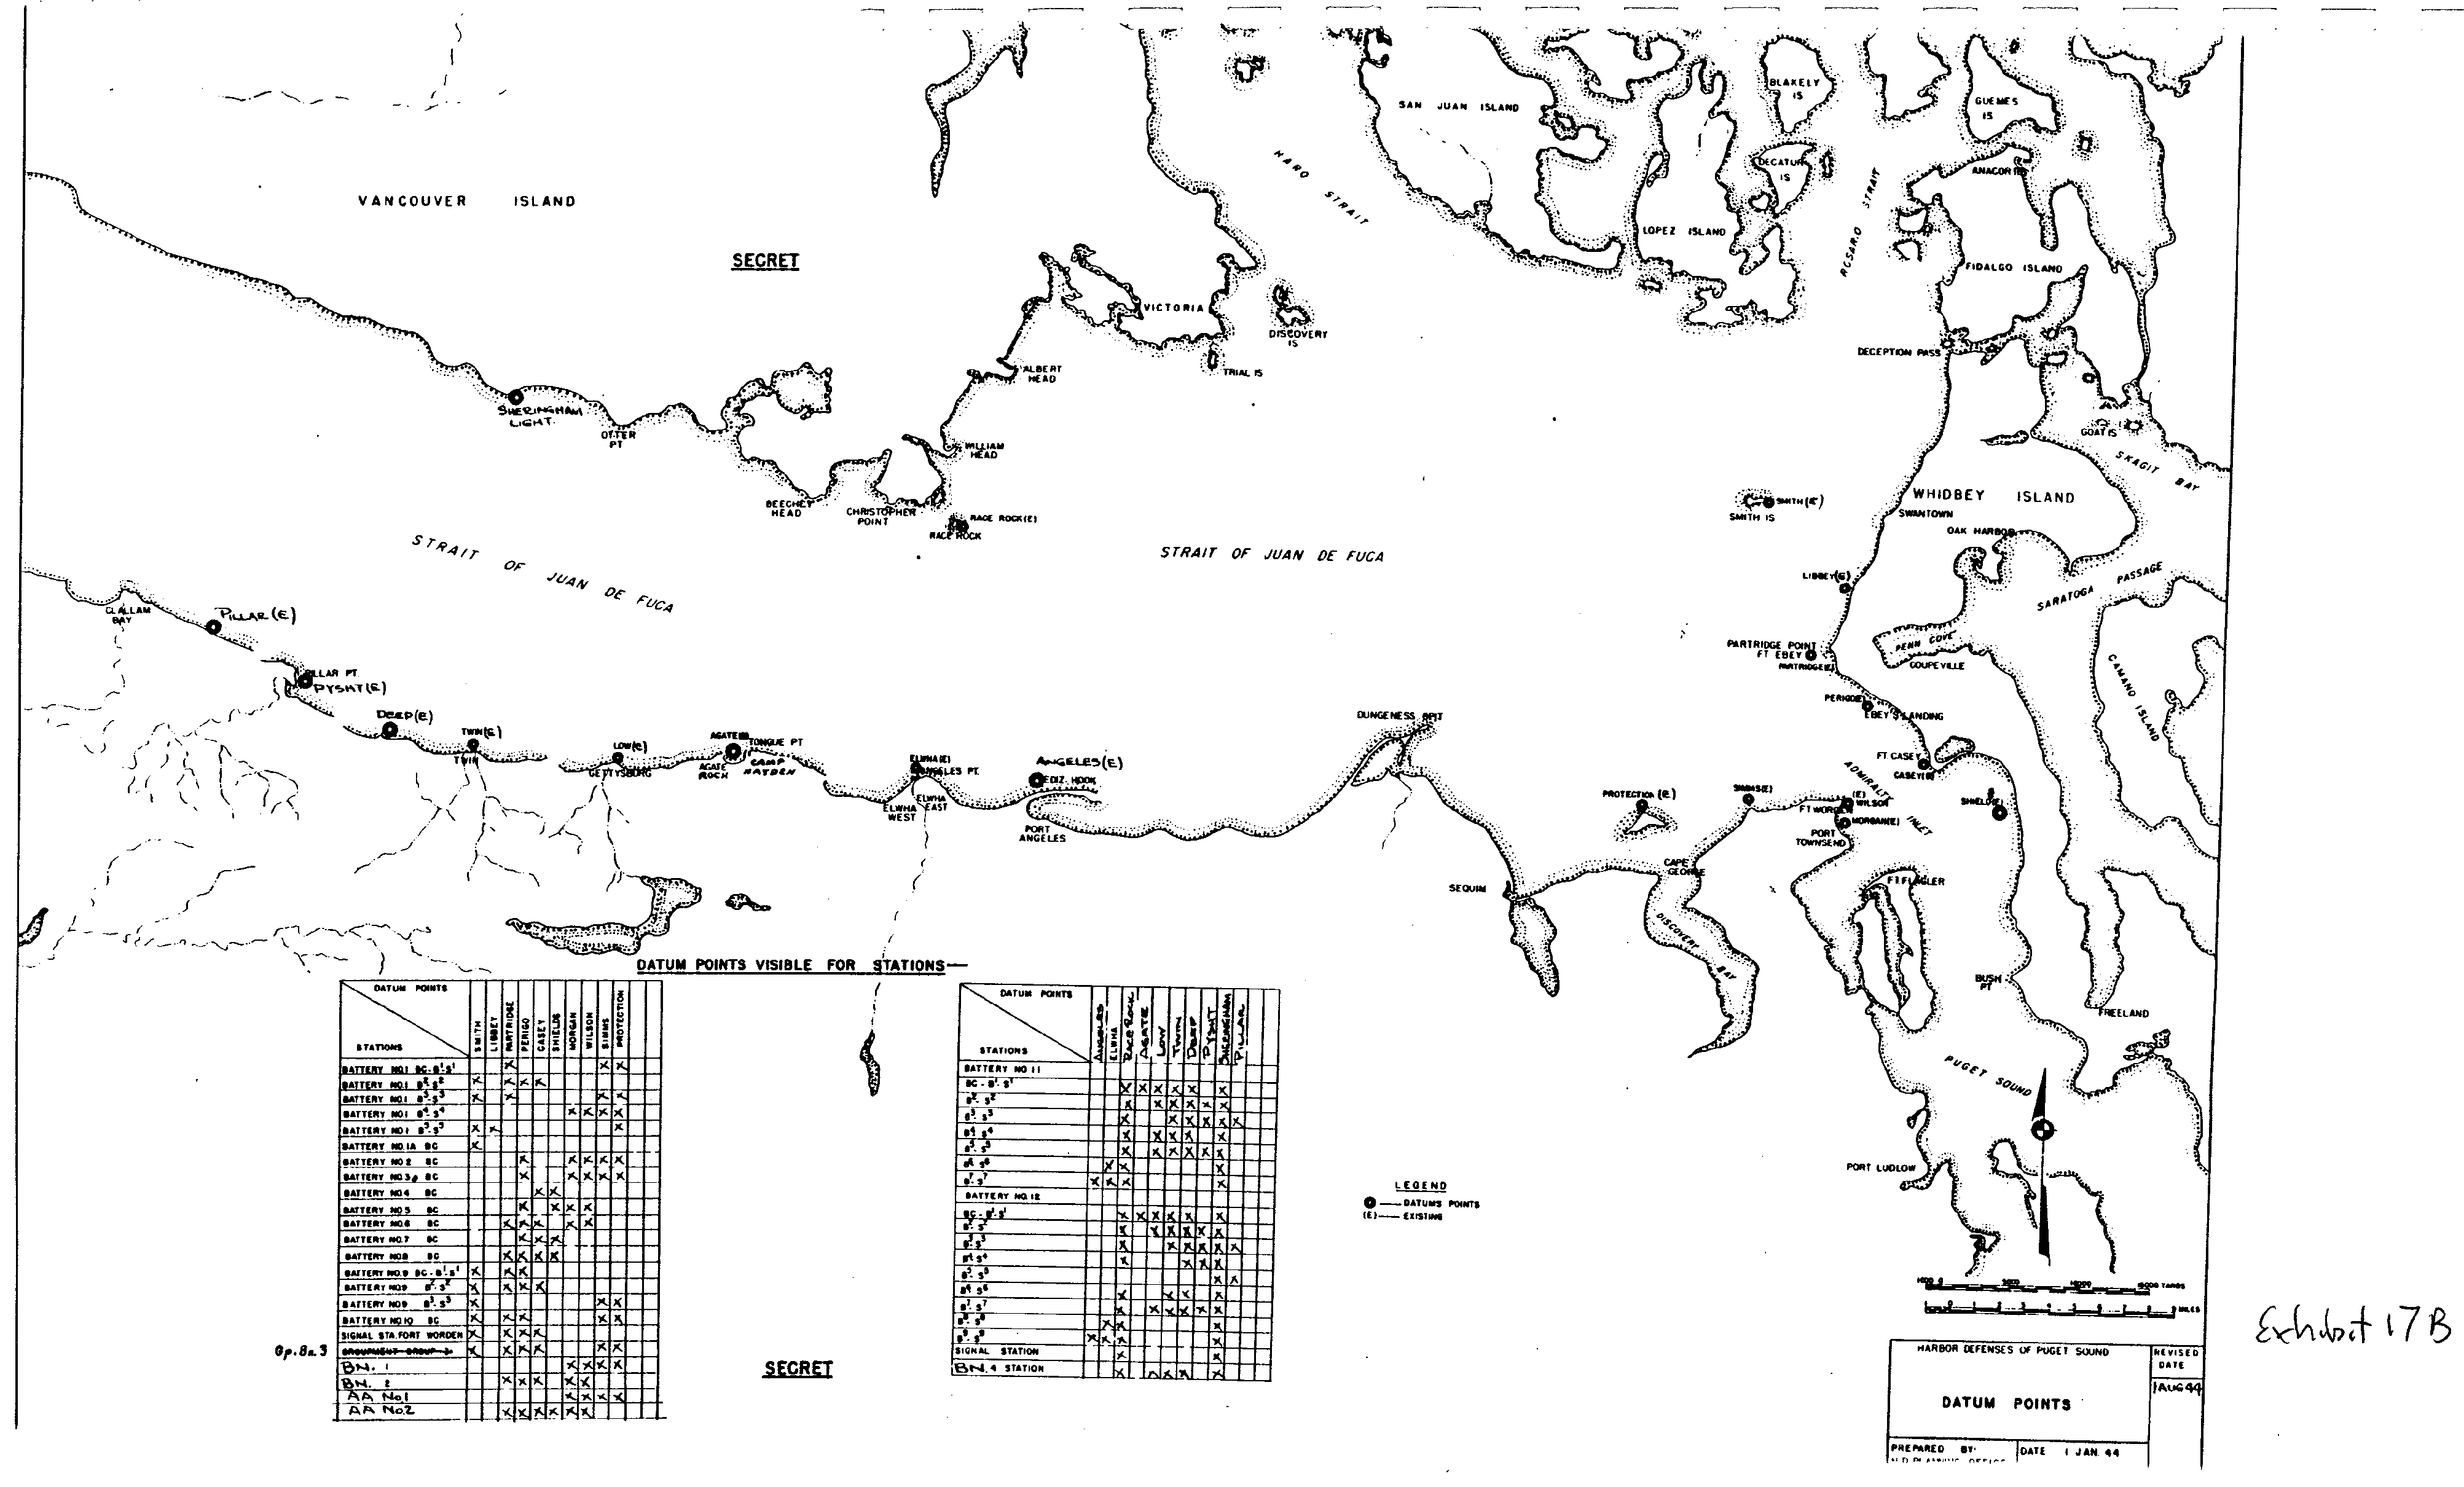
17 - B , Datum Points
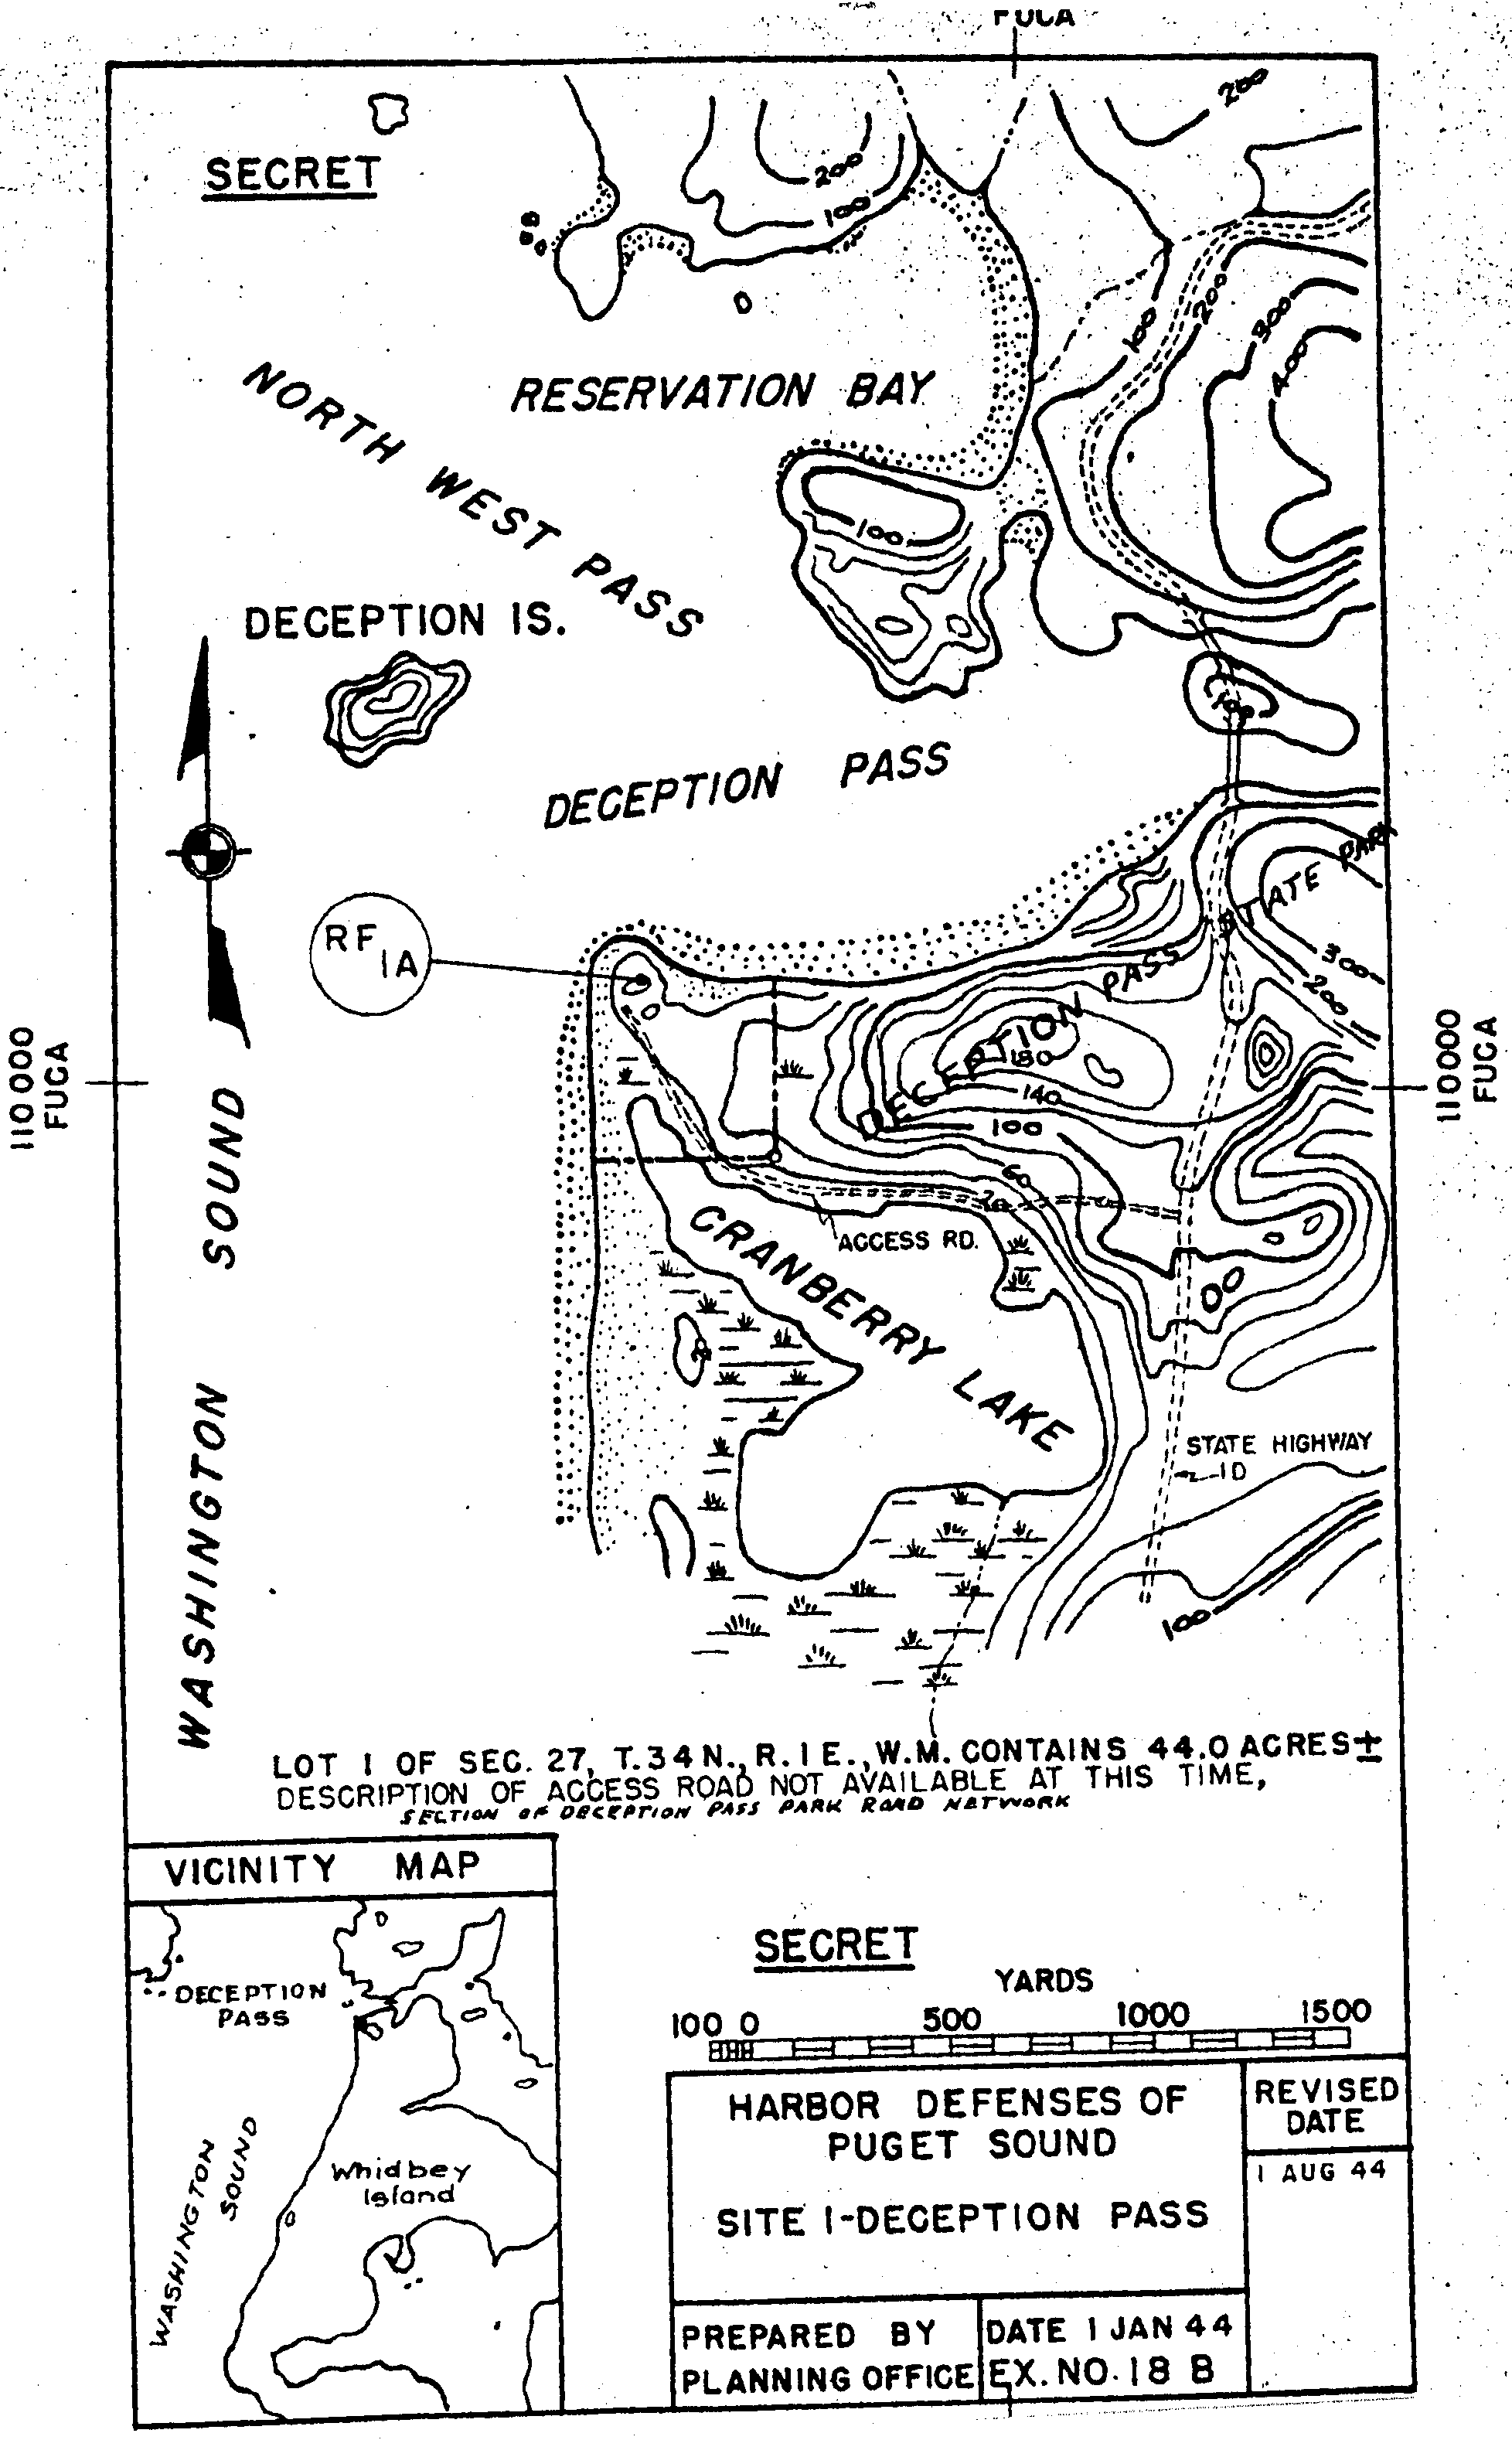
18 - B , Fire Control Locations - Site 1 - Deception Pass
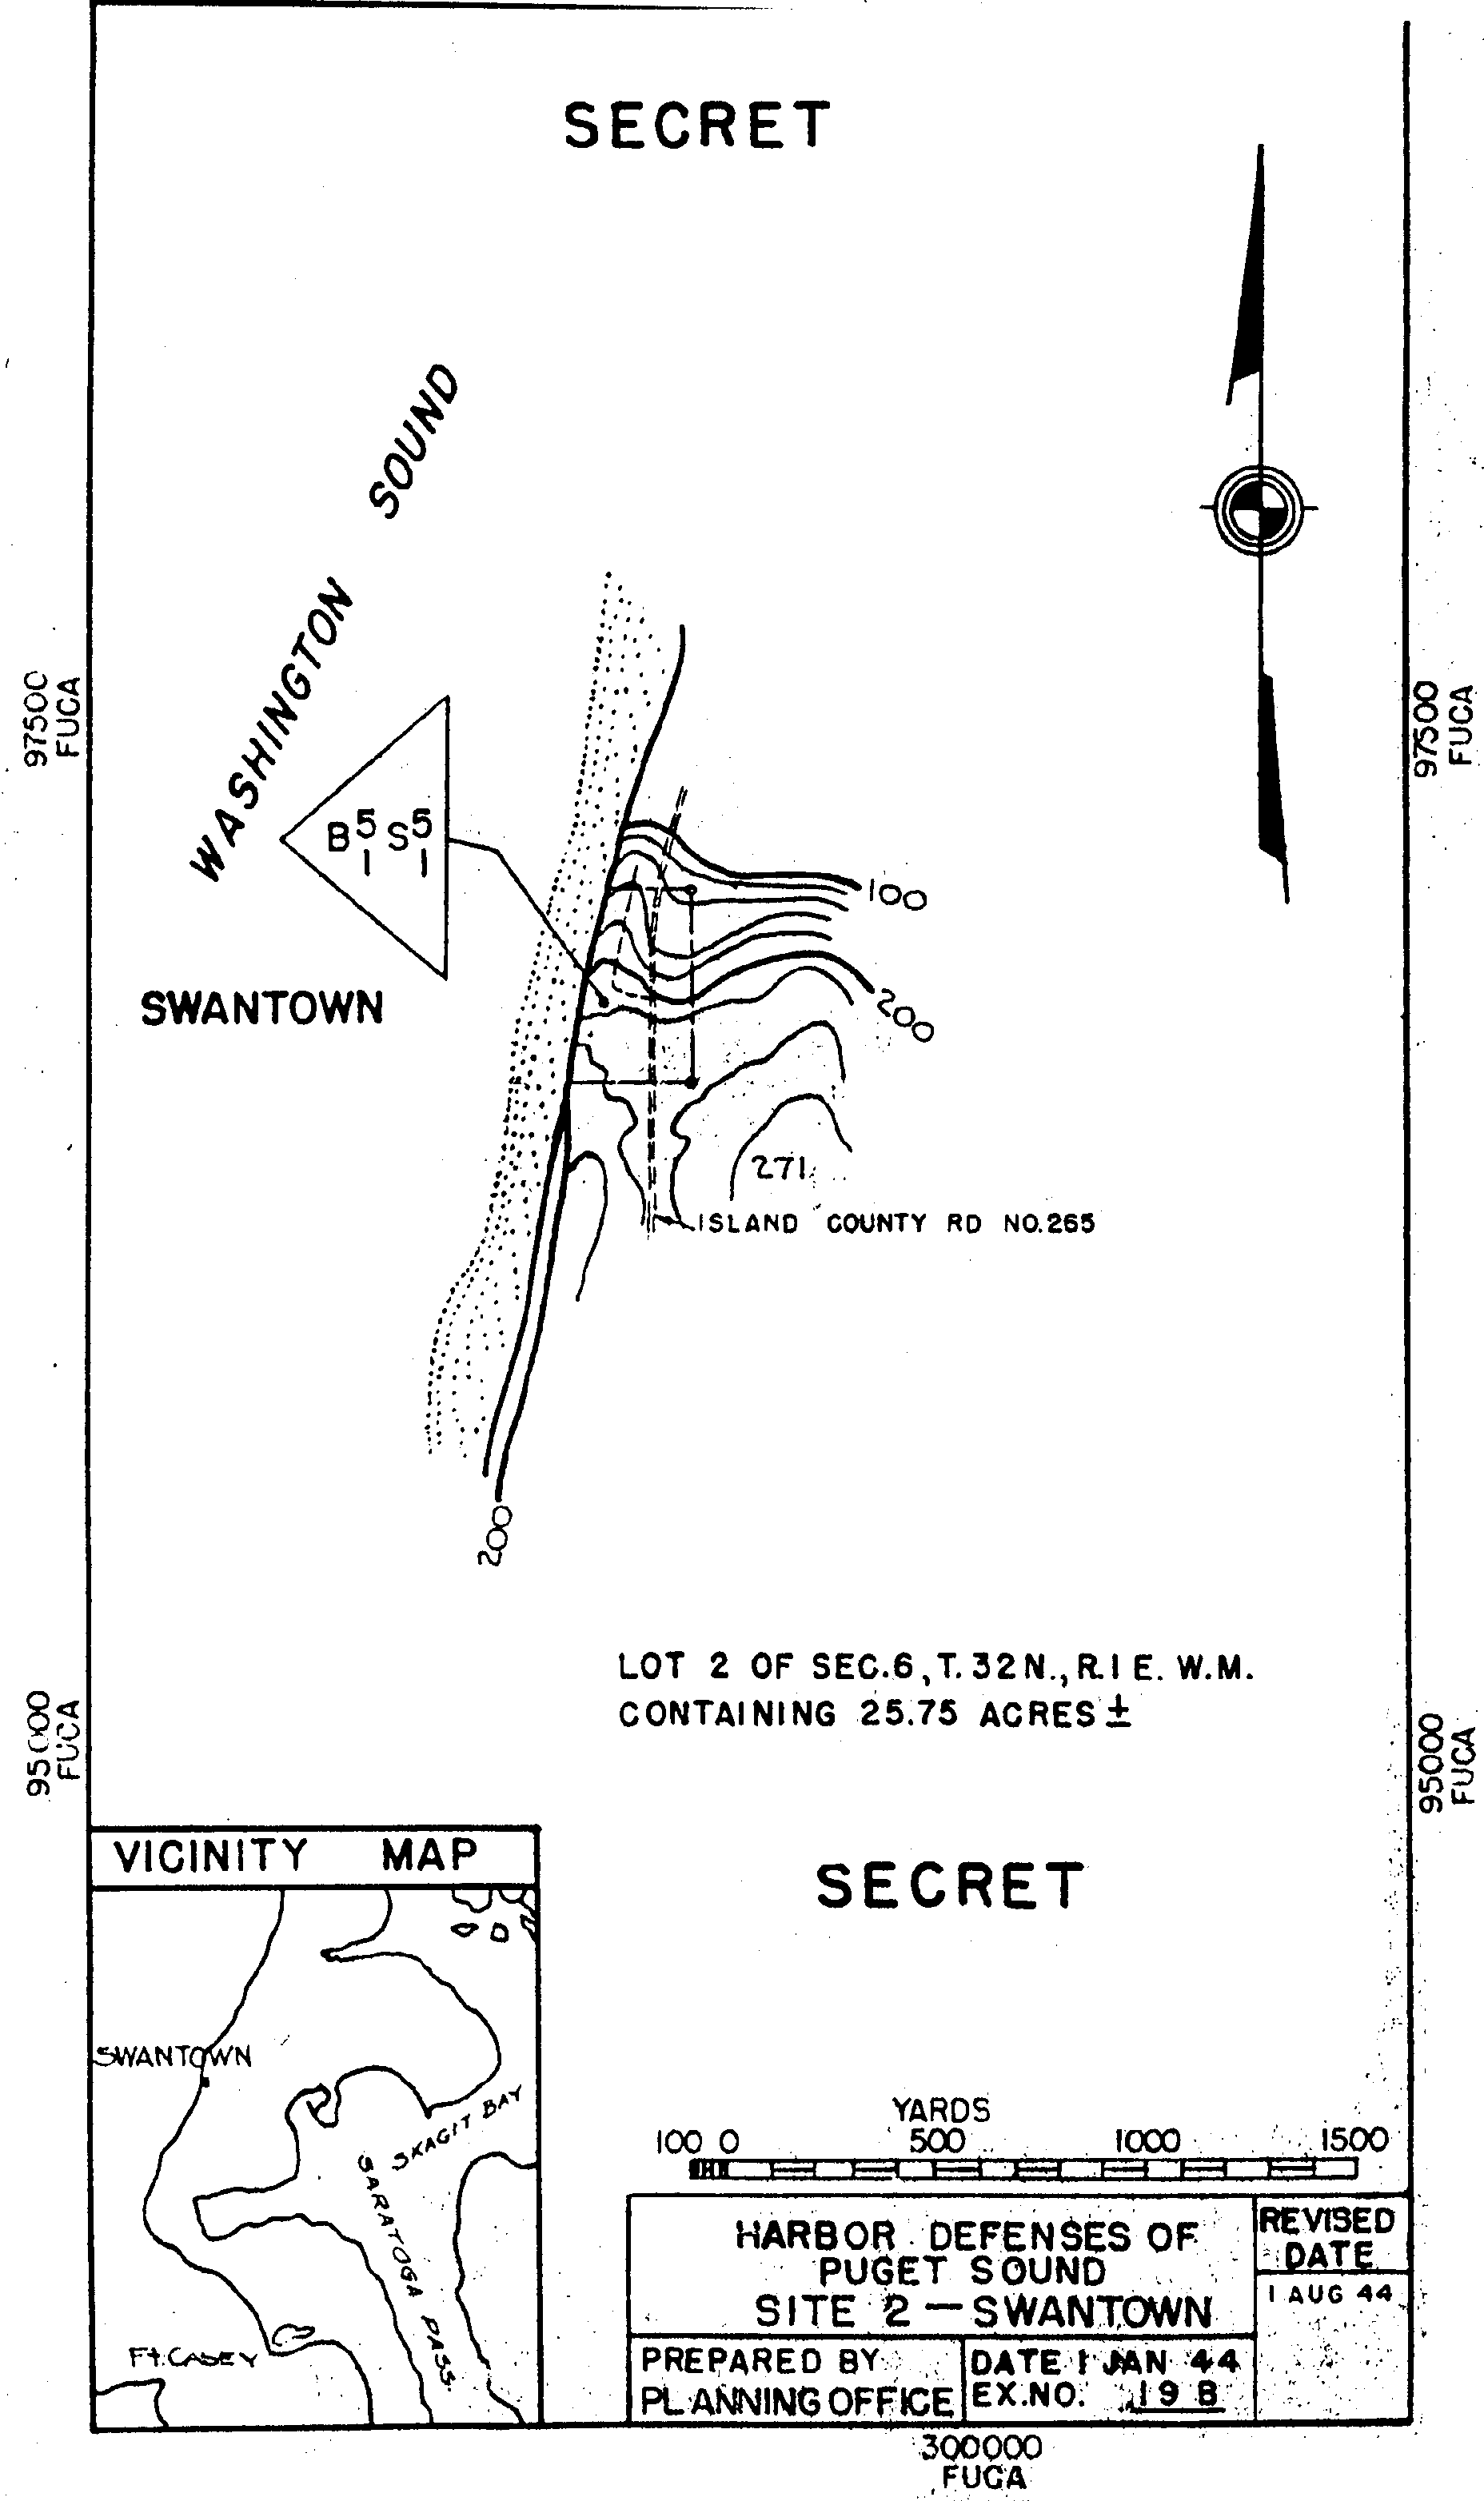
19 - B , Fire Control Locations - Site 2 - Swantown
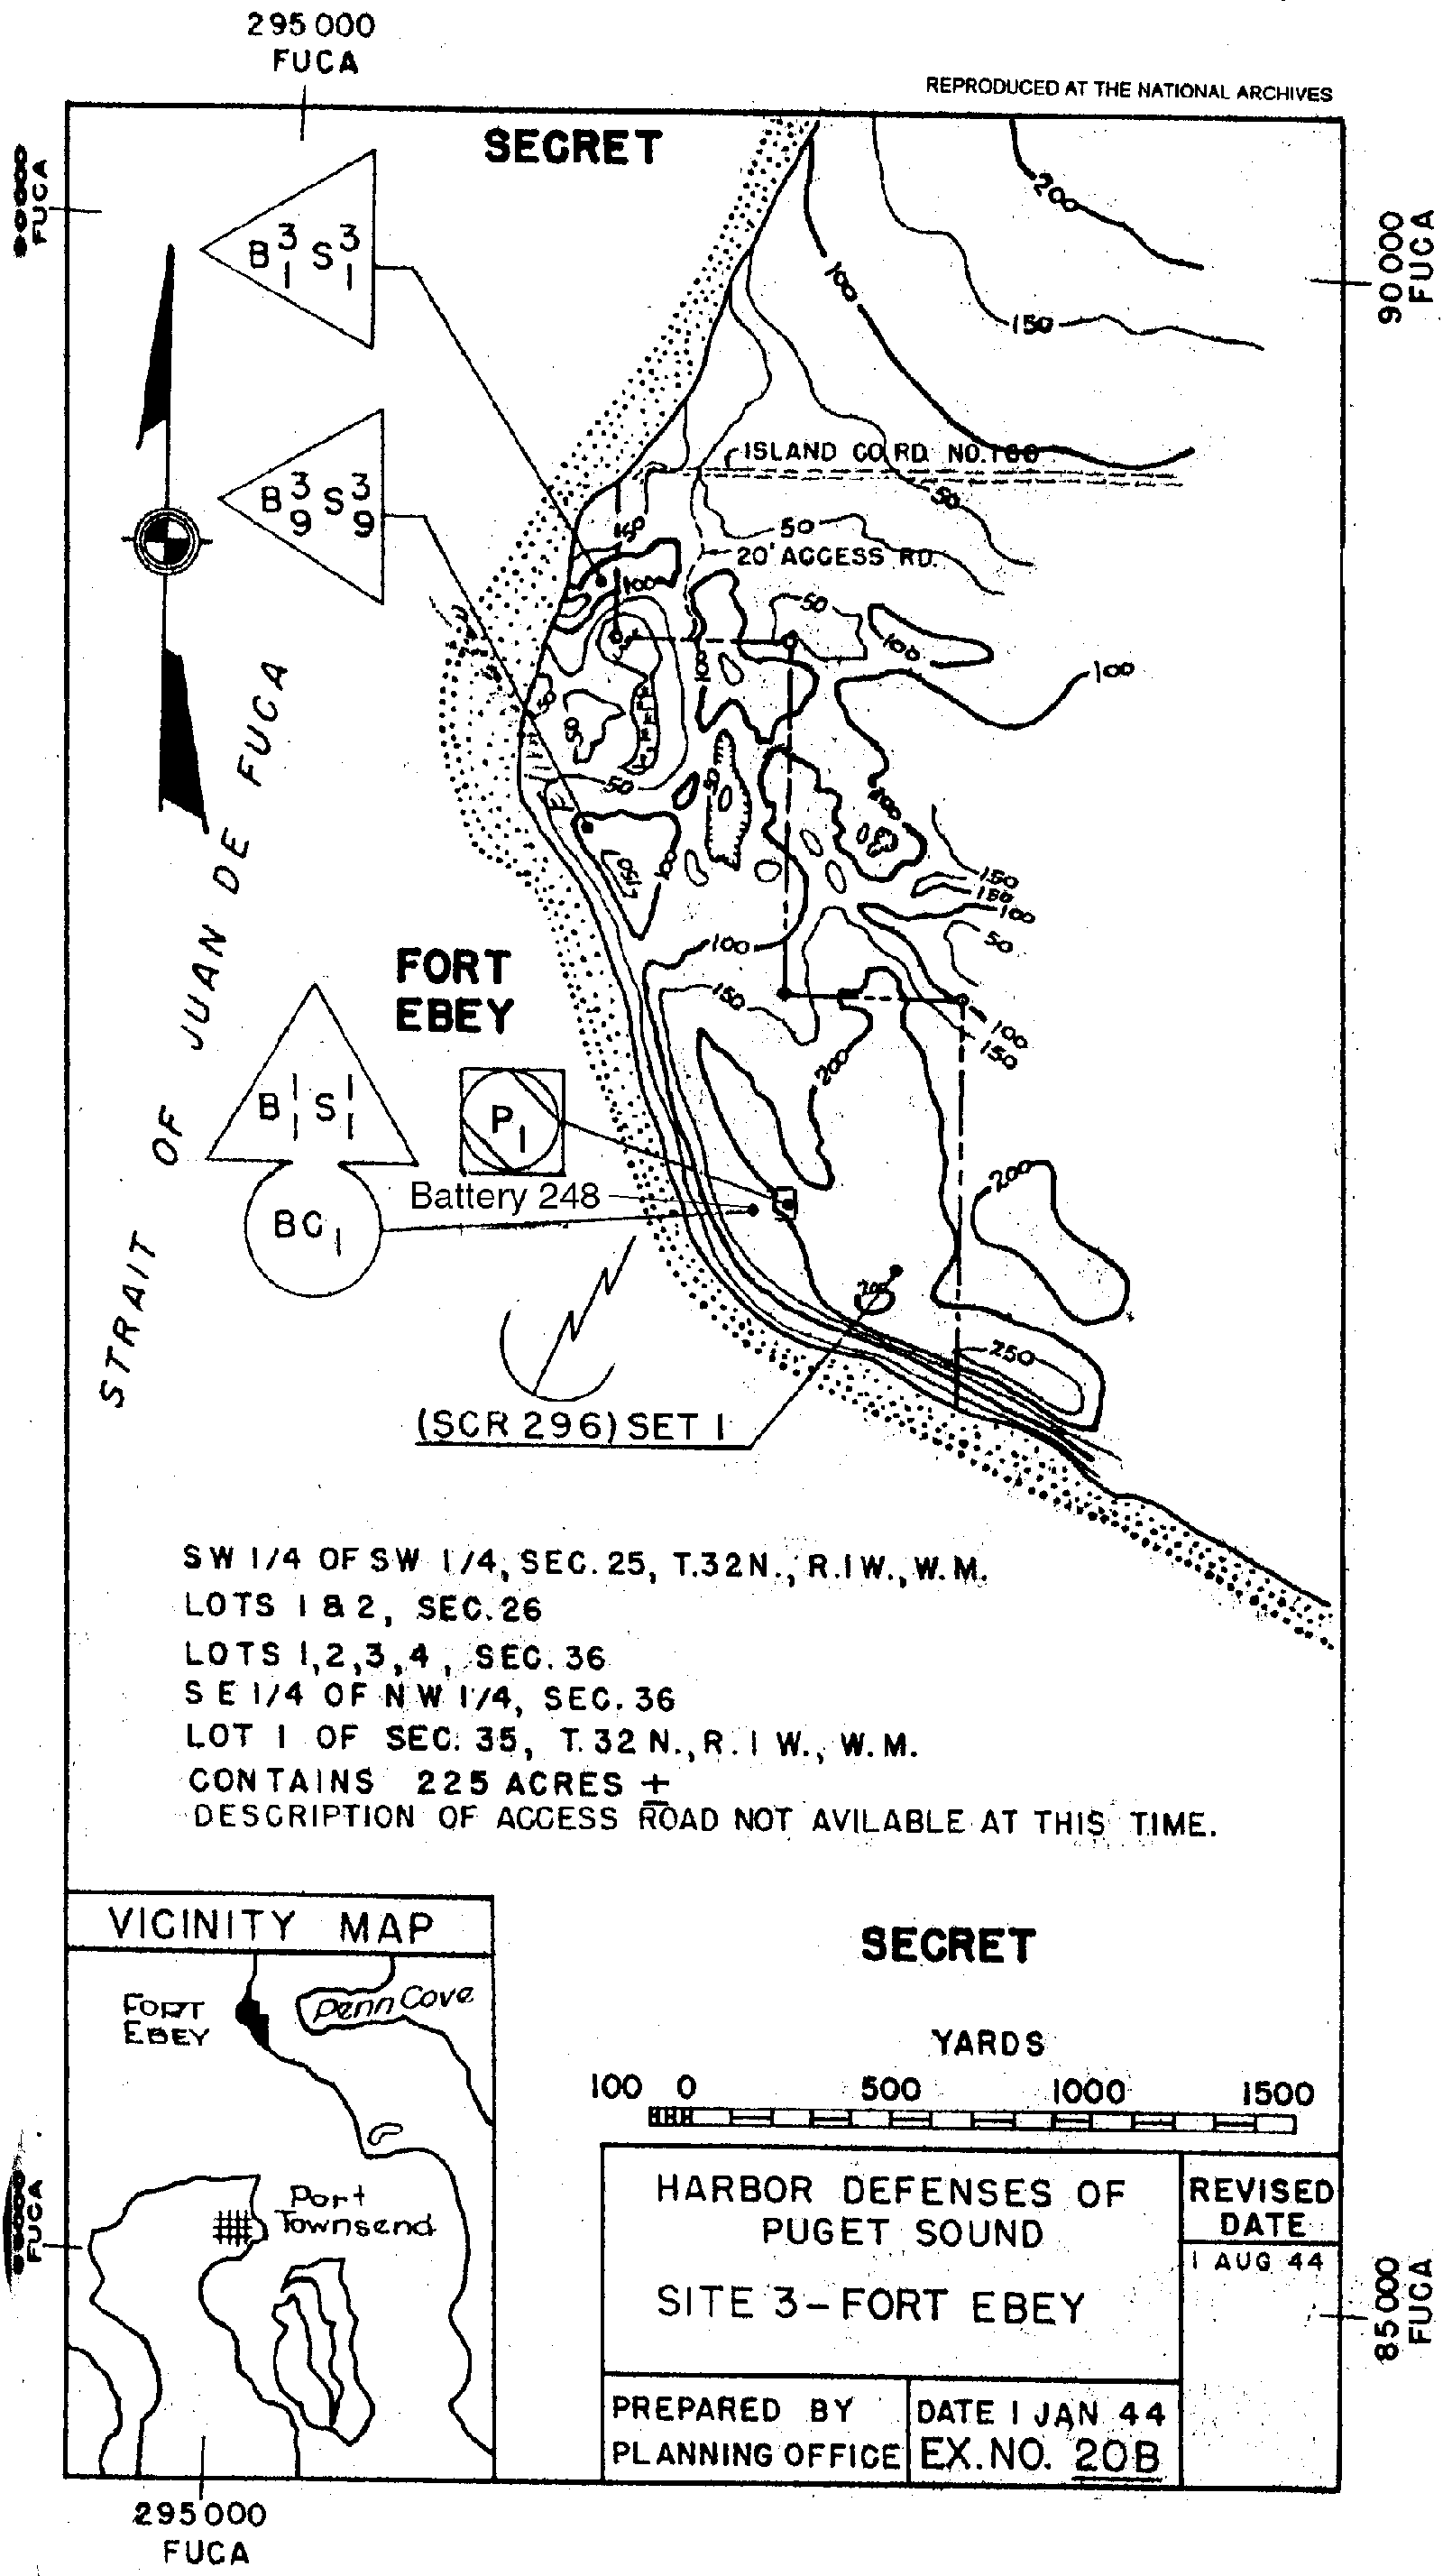
20 - B , Fire Control Locations - Site 3 - Fort Ebey
21 - B , Fire Control Locations - Site 3a - Ebey's Landing
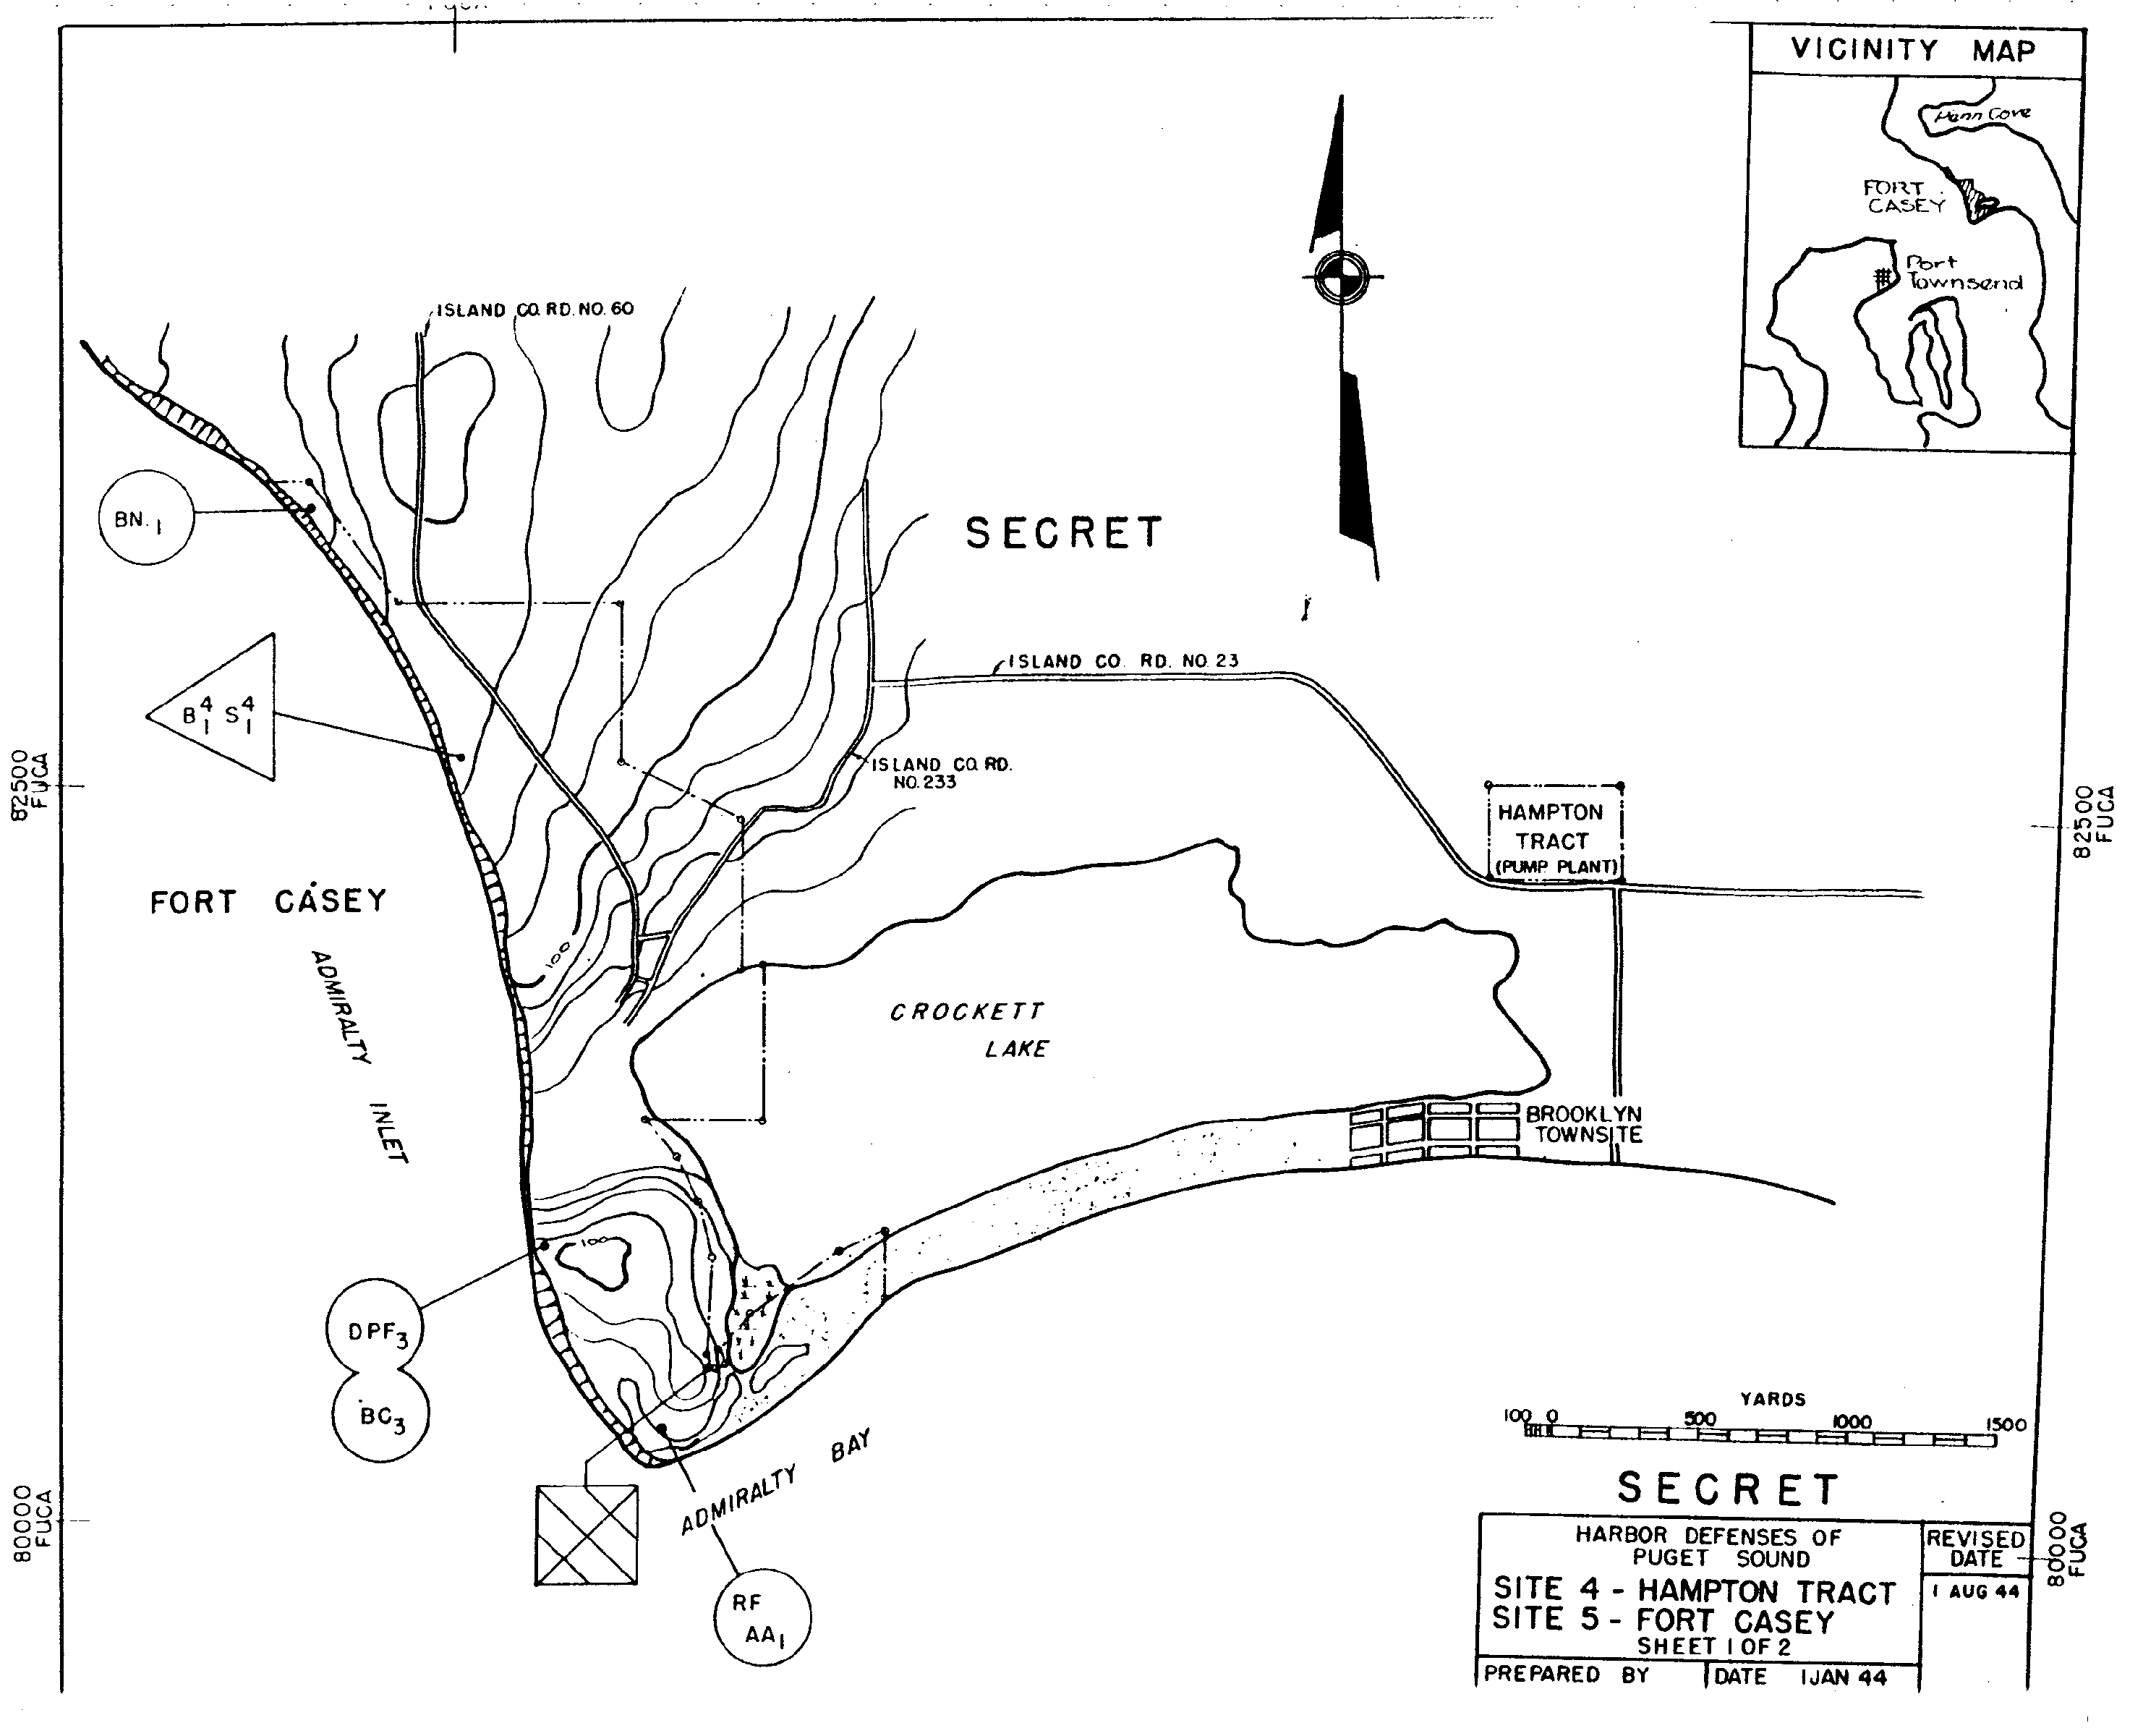
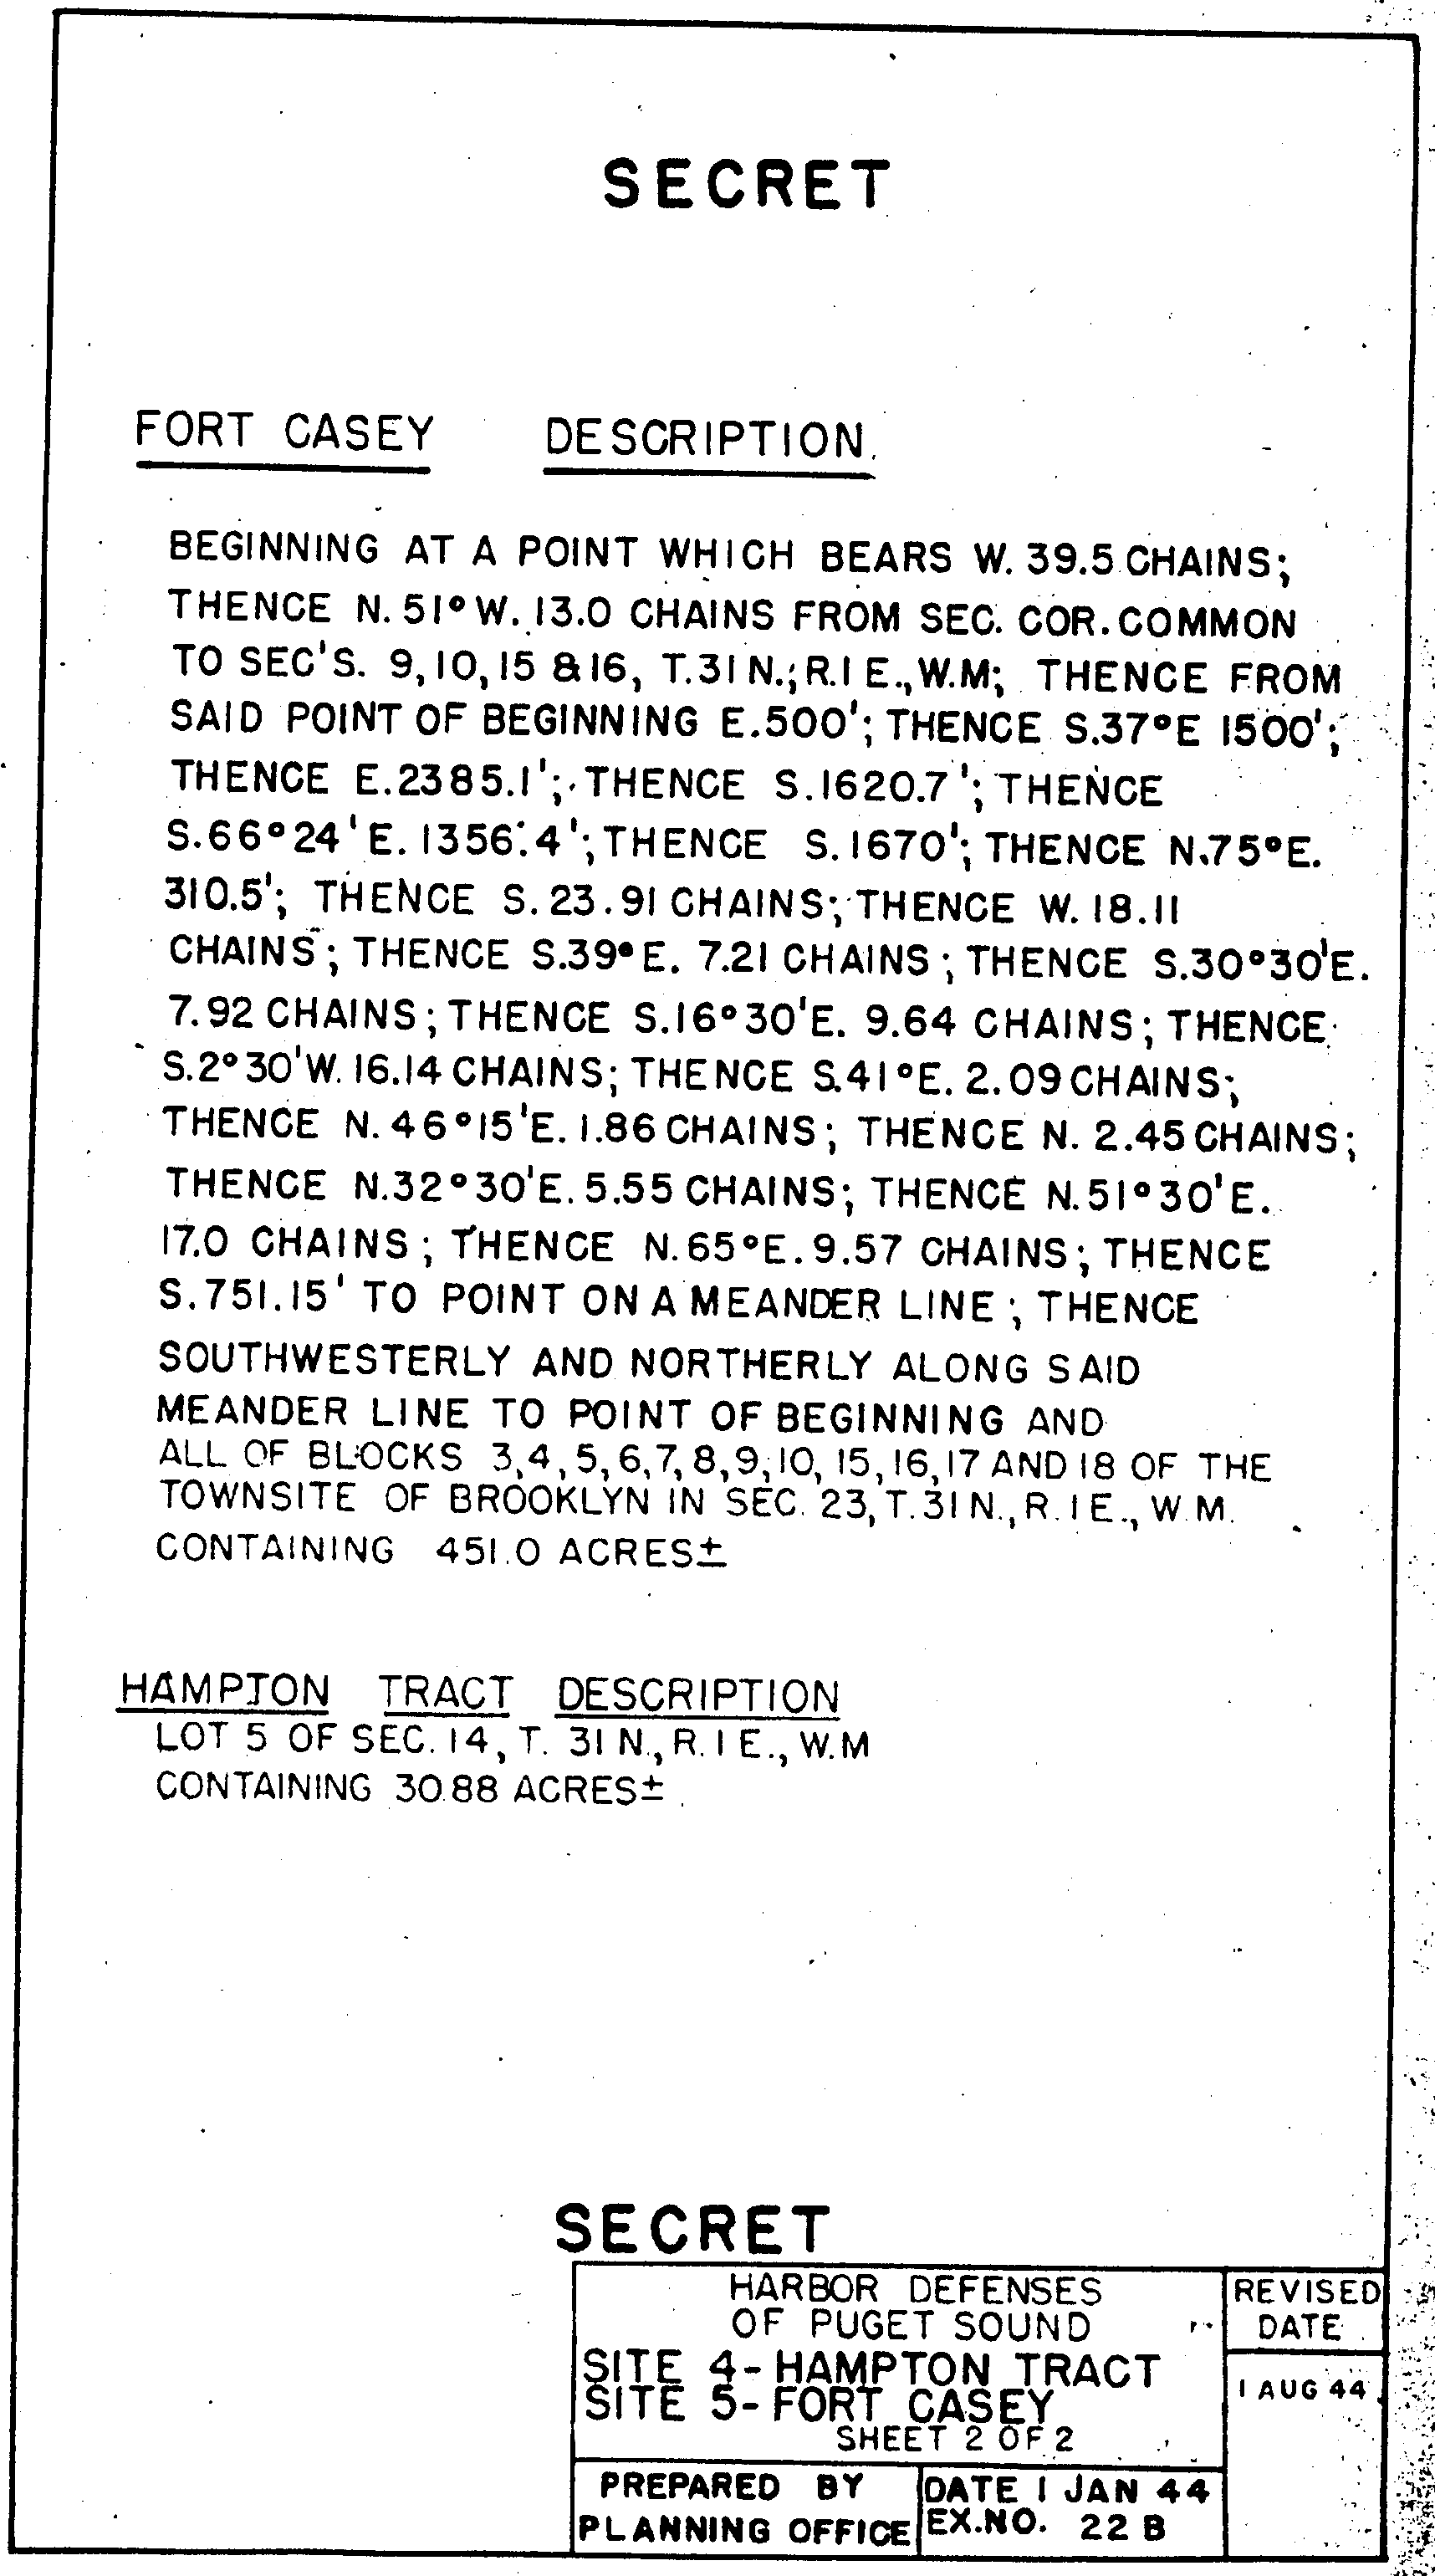
22 - B , Fire Control Locations - Sites 4 and 5 - Fort Casey, sheet 1 of 2
22 - B , Fire Control Locations - Sites 4 and 5 - Fort Casey, sheet 2 of 2
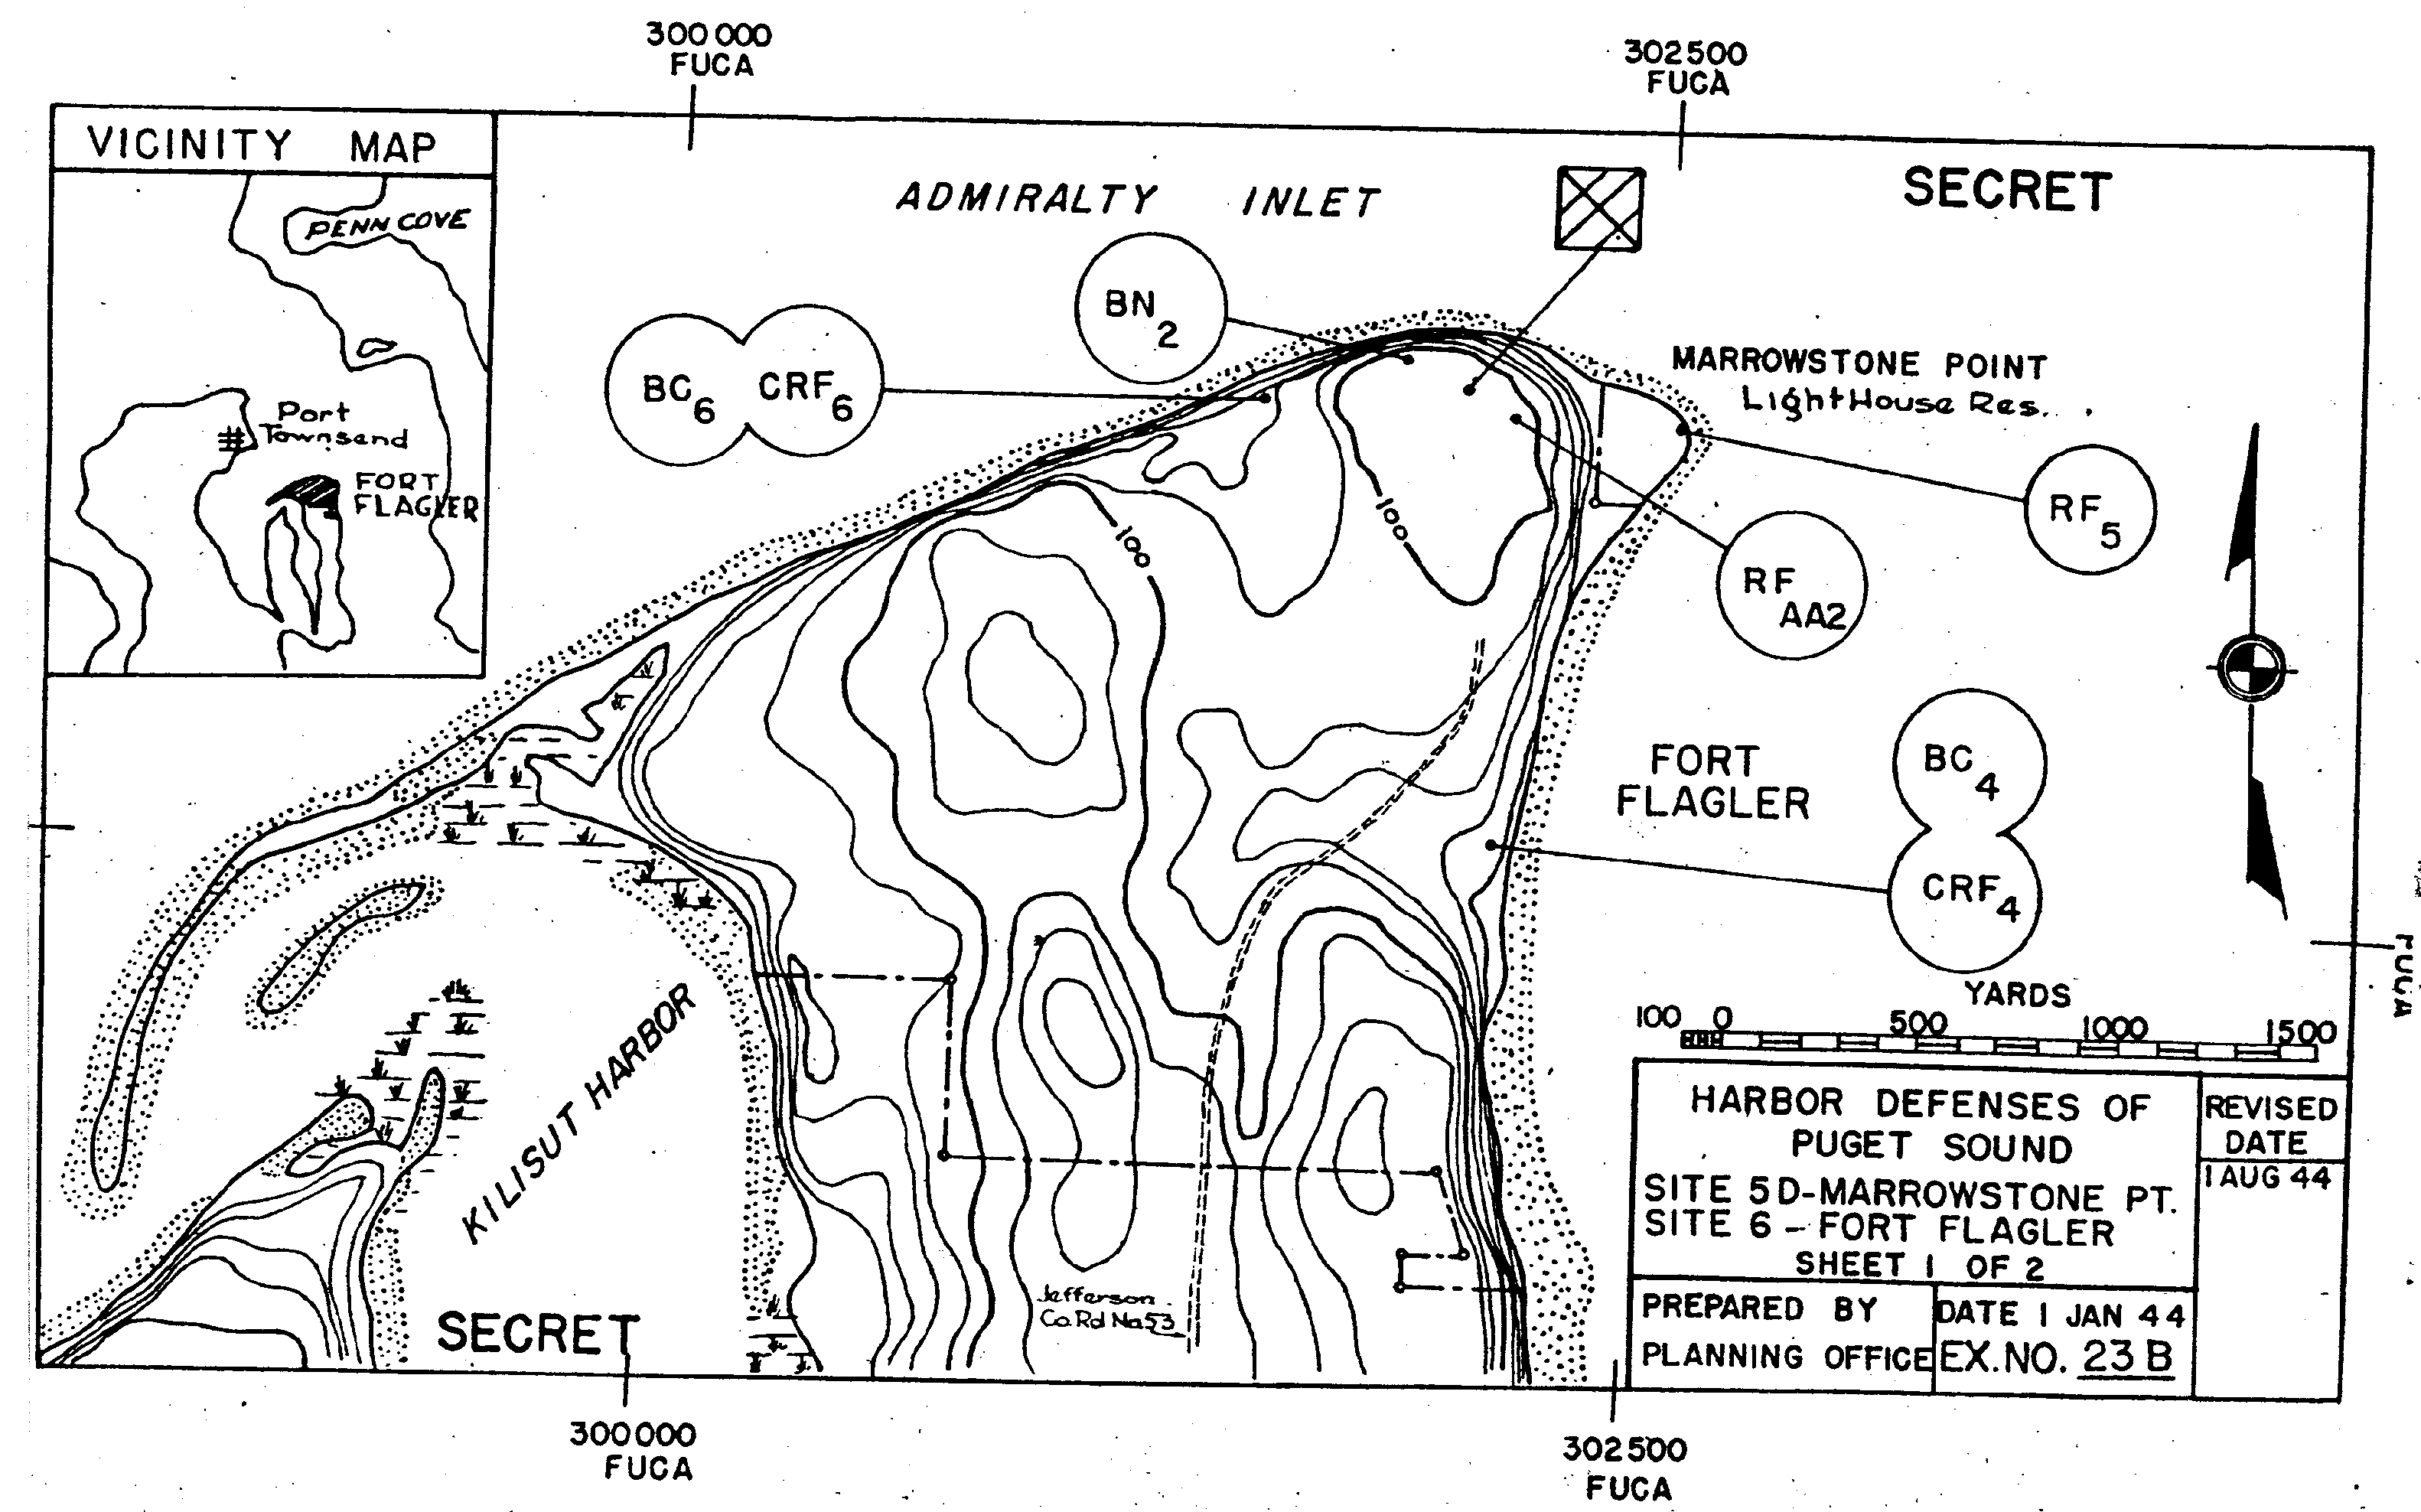
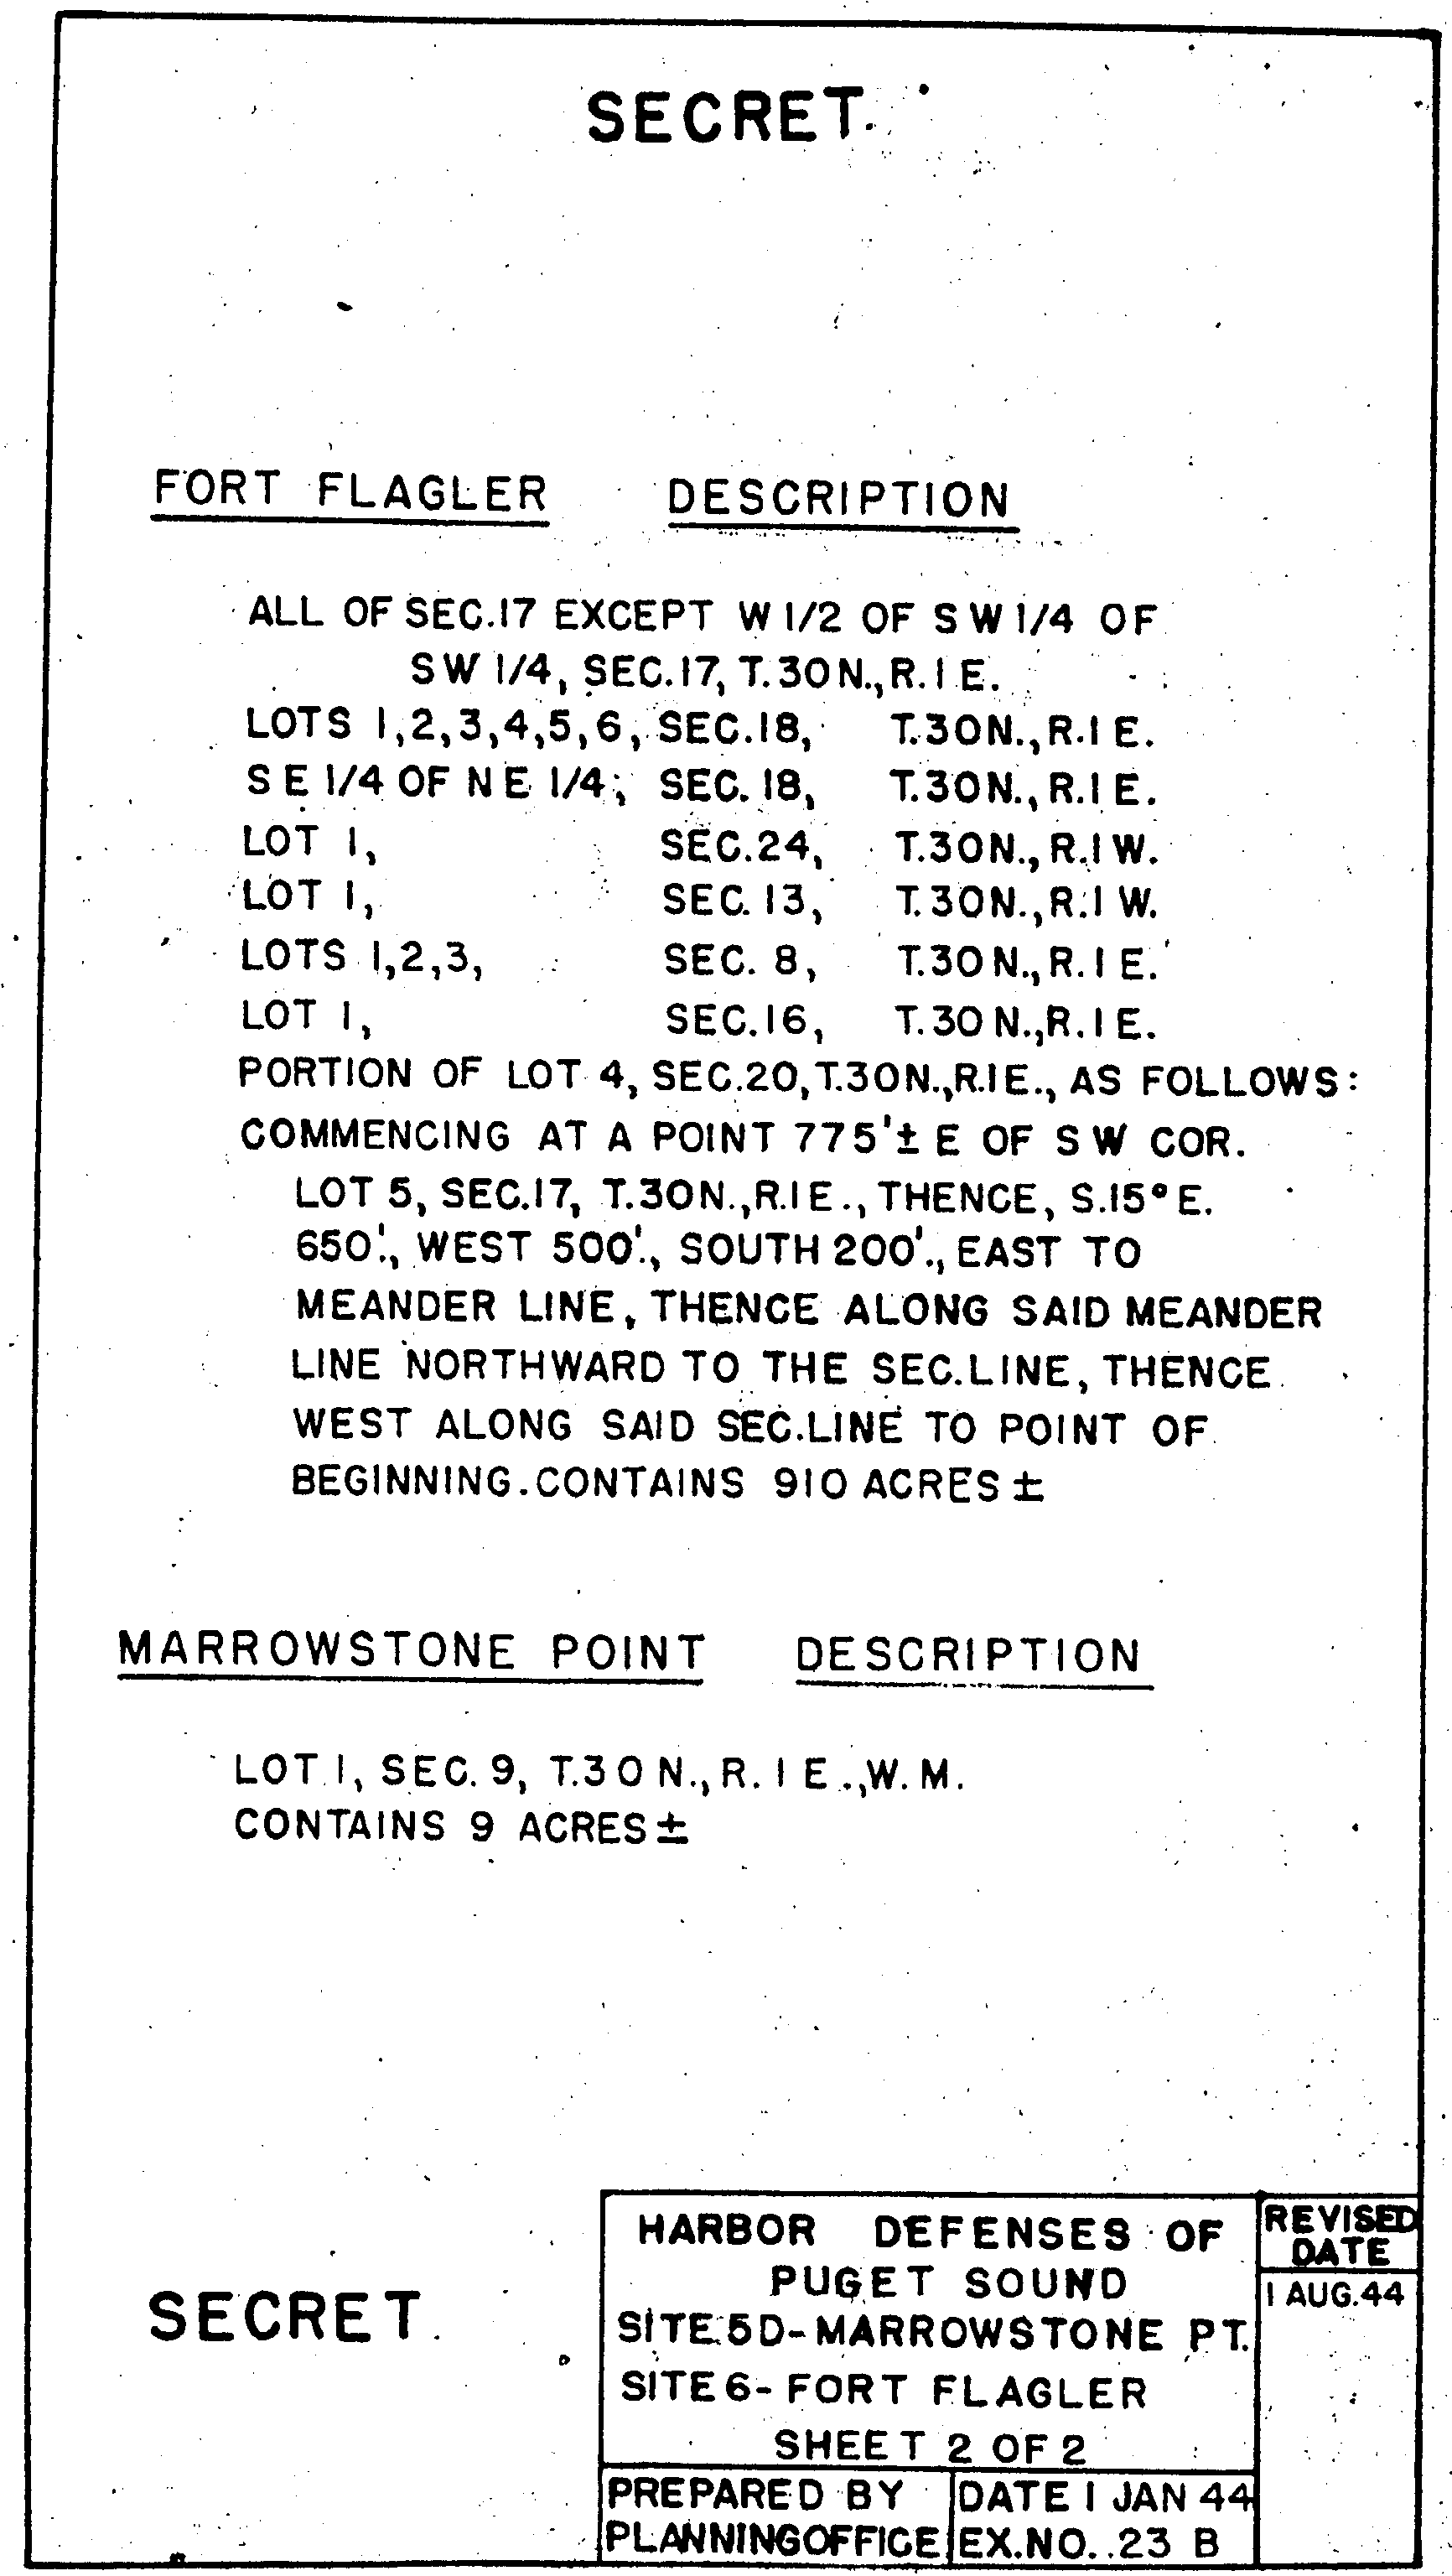
23 - B , Fire Control Locations - Sites 5-D and 6 - Fort Flagler, sheet 1 of 2
23 - B , Fire Control Locations - Sites 5-D and 6 - Fort Flagler, sheet 2 of 2
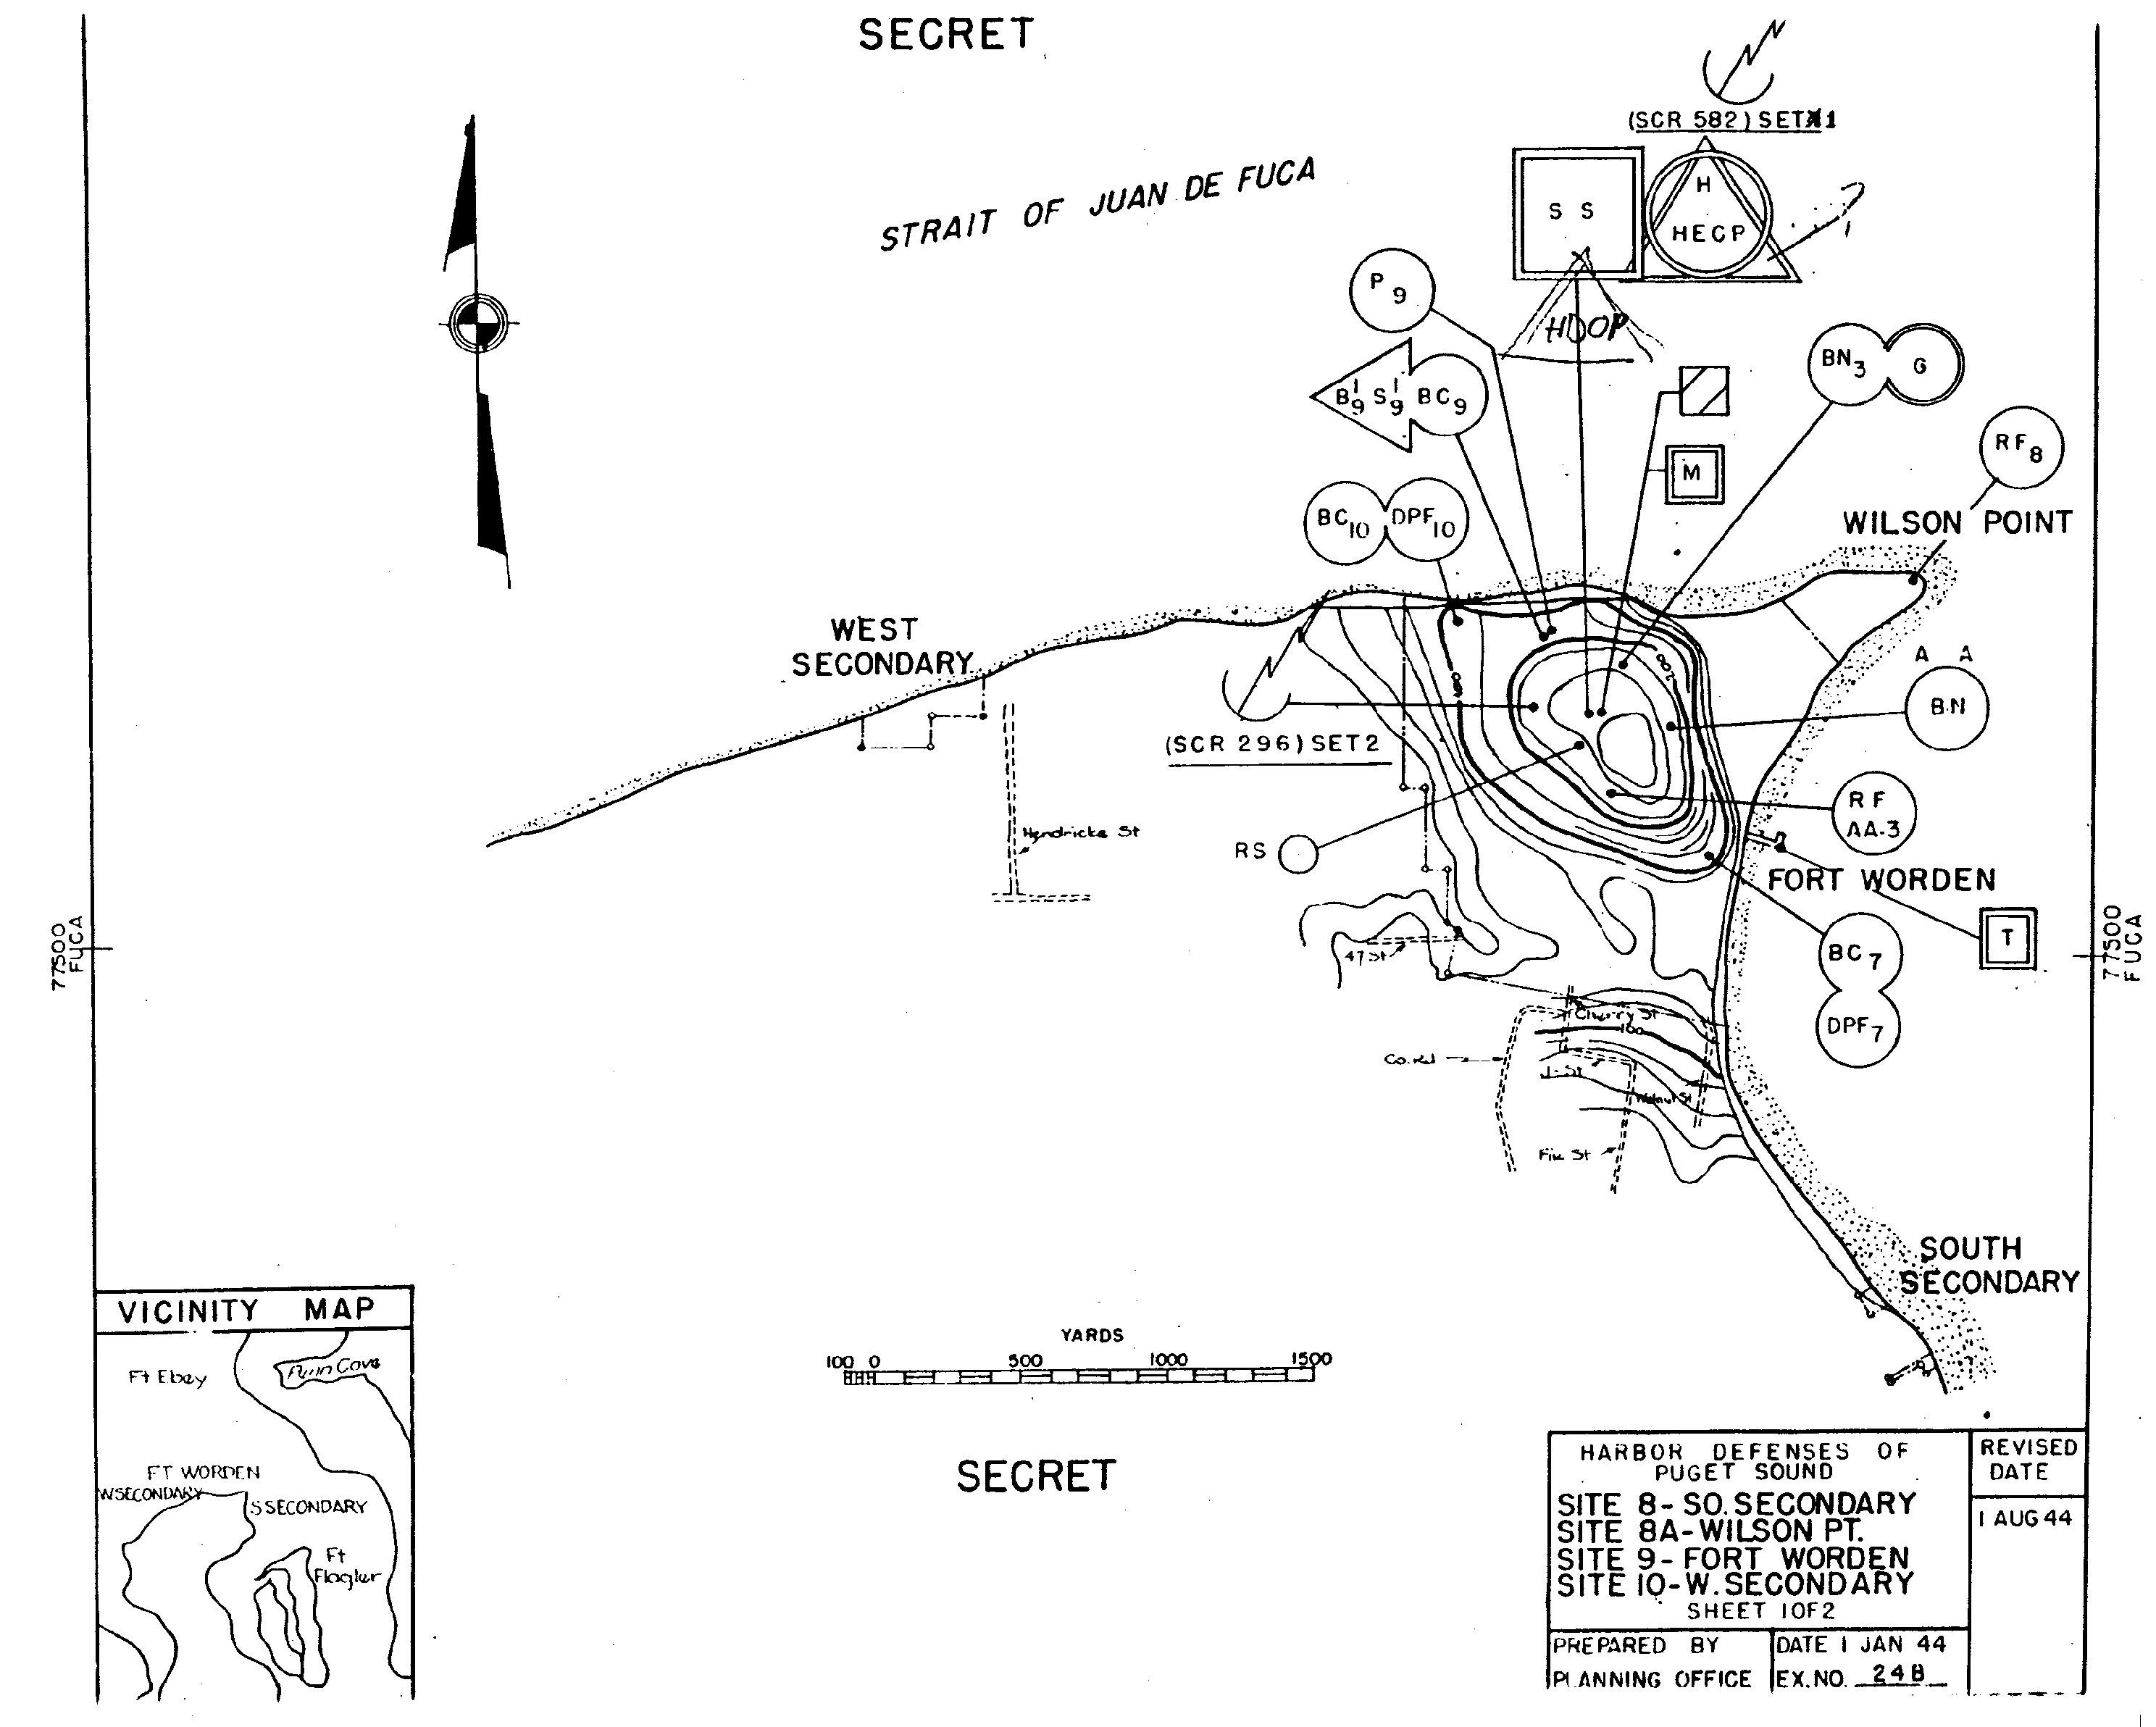
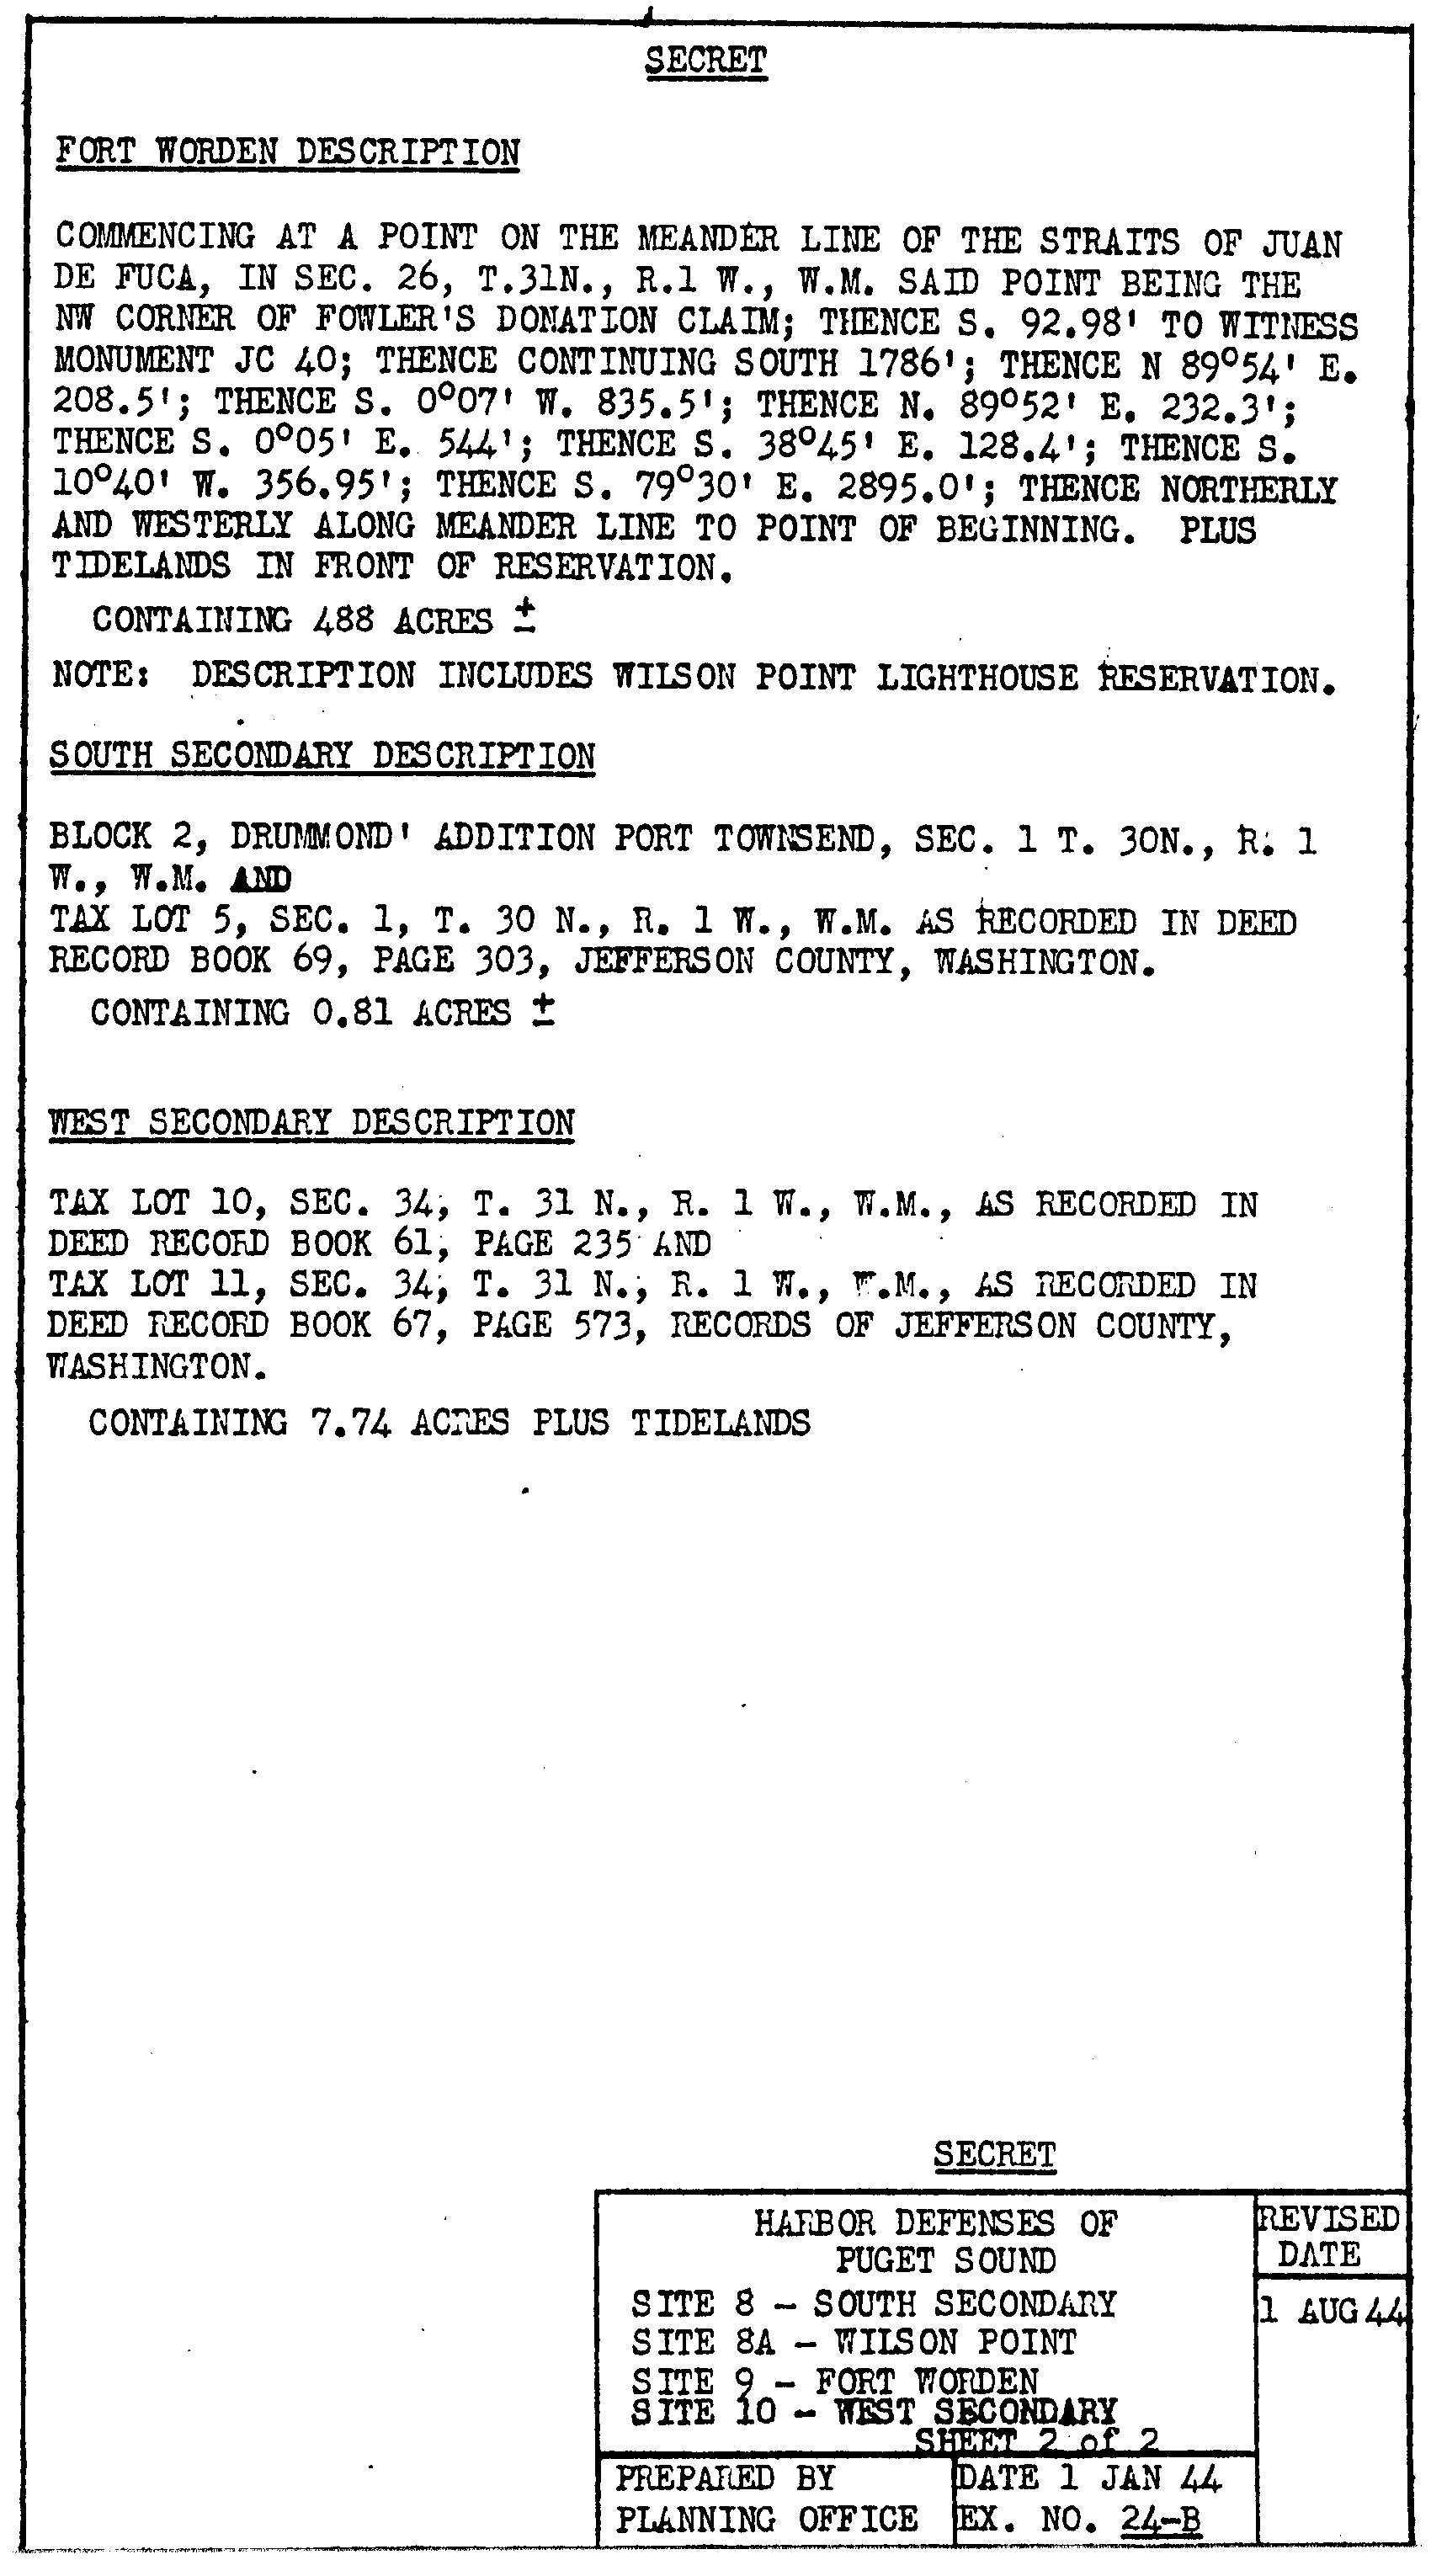
24 - B , Fire Control Locations - Sites 8, 8a, 9 and 10 - Fort Worden, sheet 1 of 2
24 - B , Fire Control Locations - Sites 8, 8a, 9 and 10 - Fort Worden, sheet 2 of 2
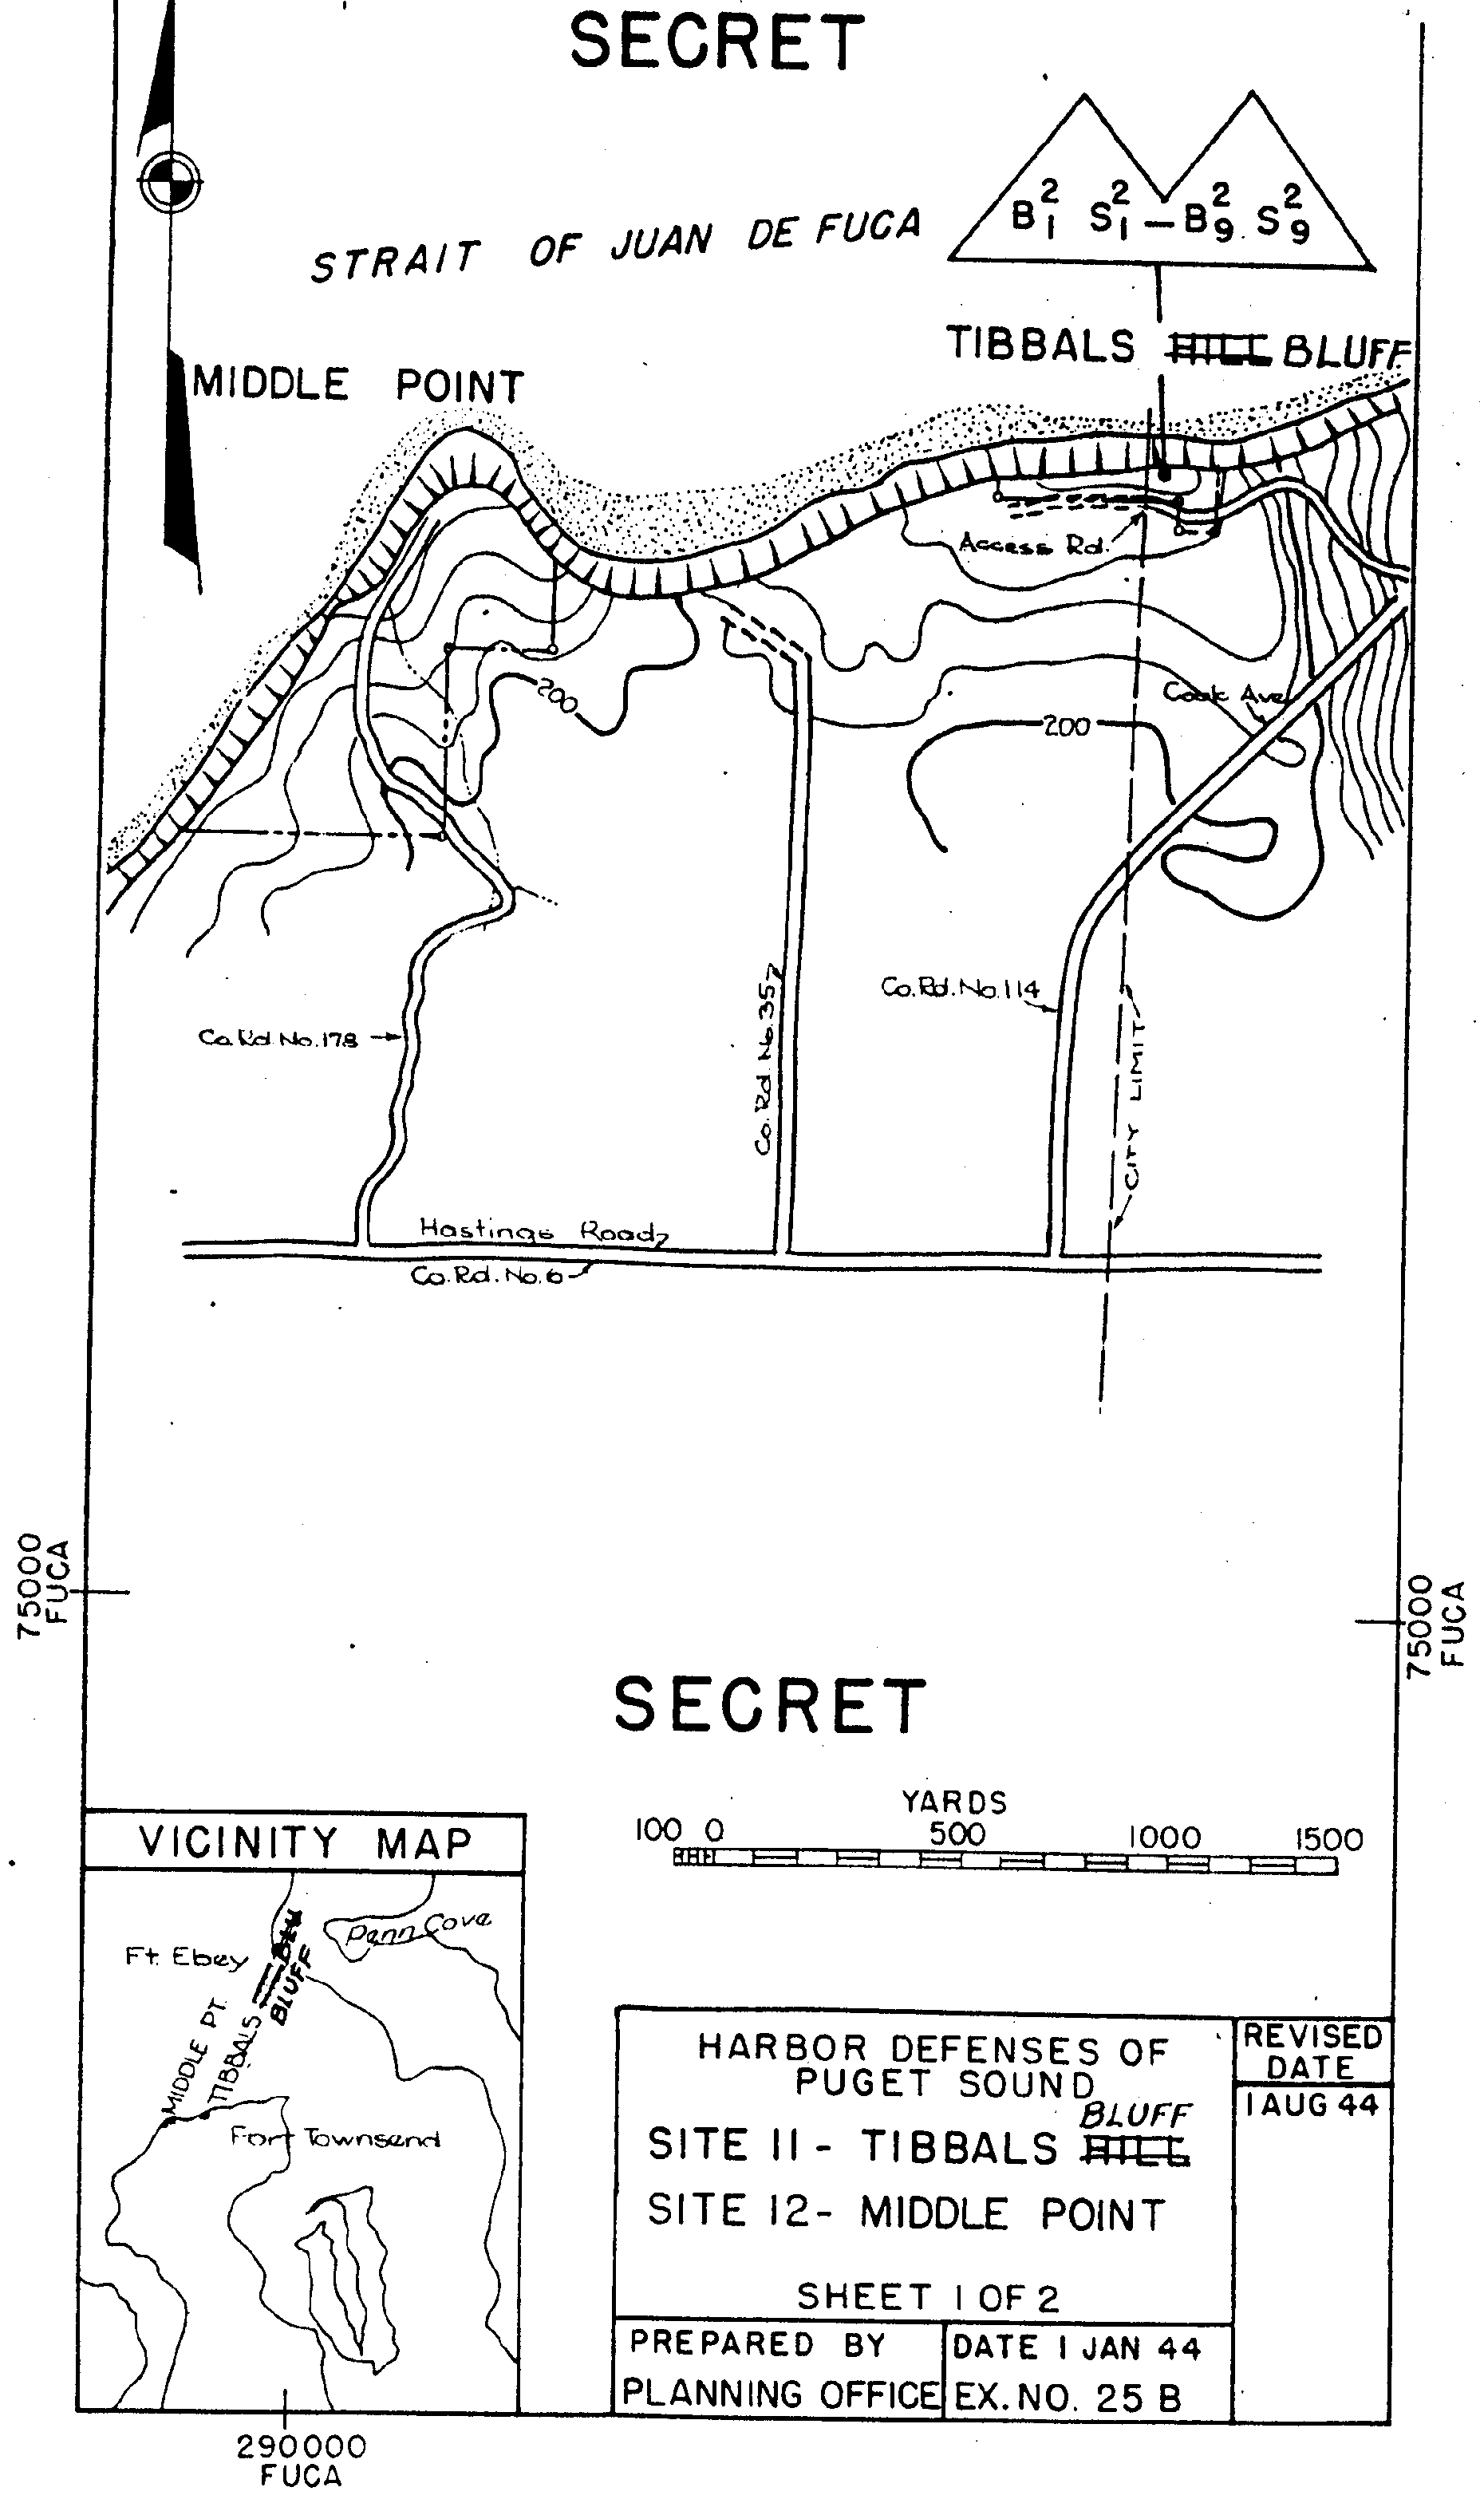
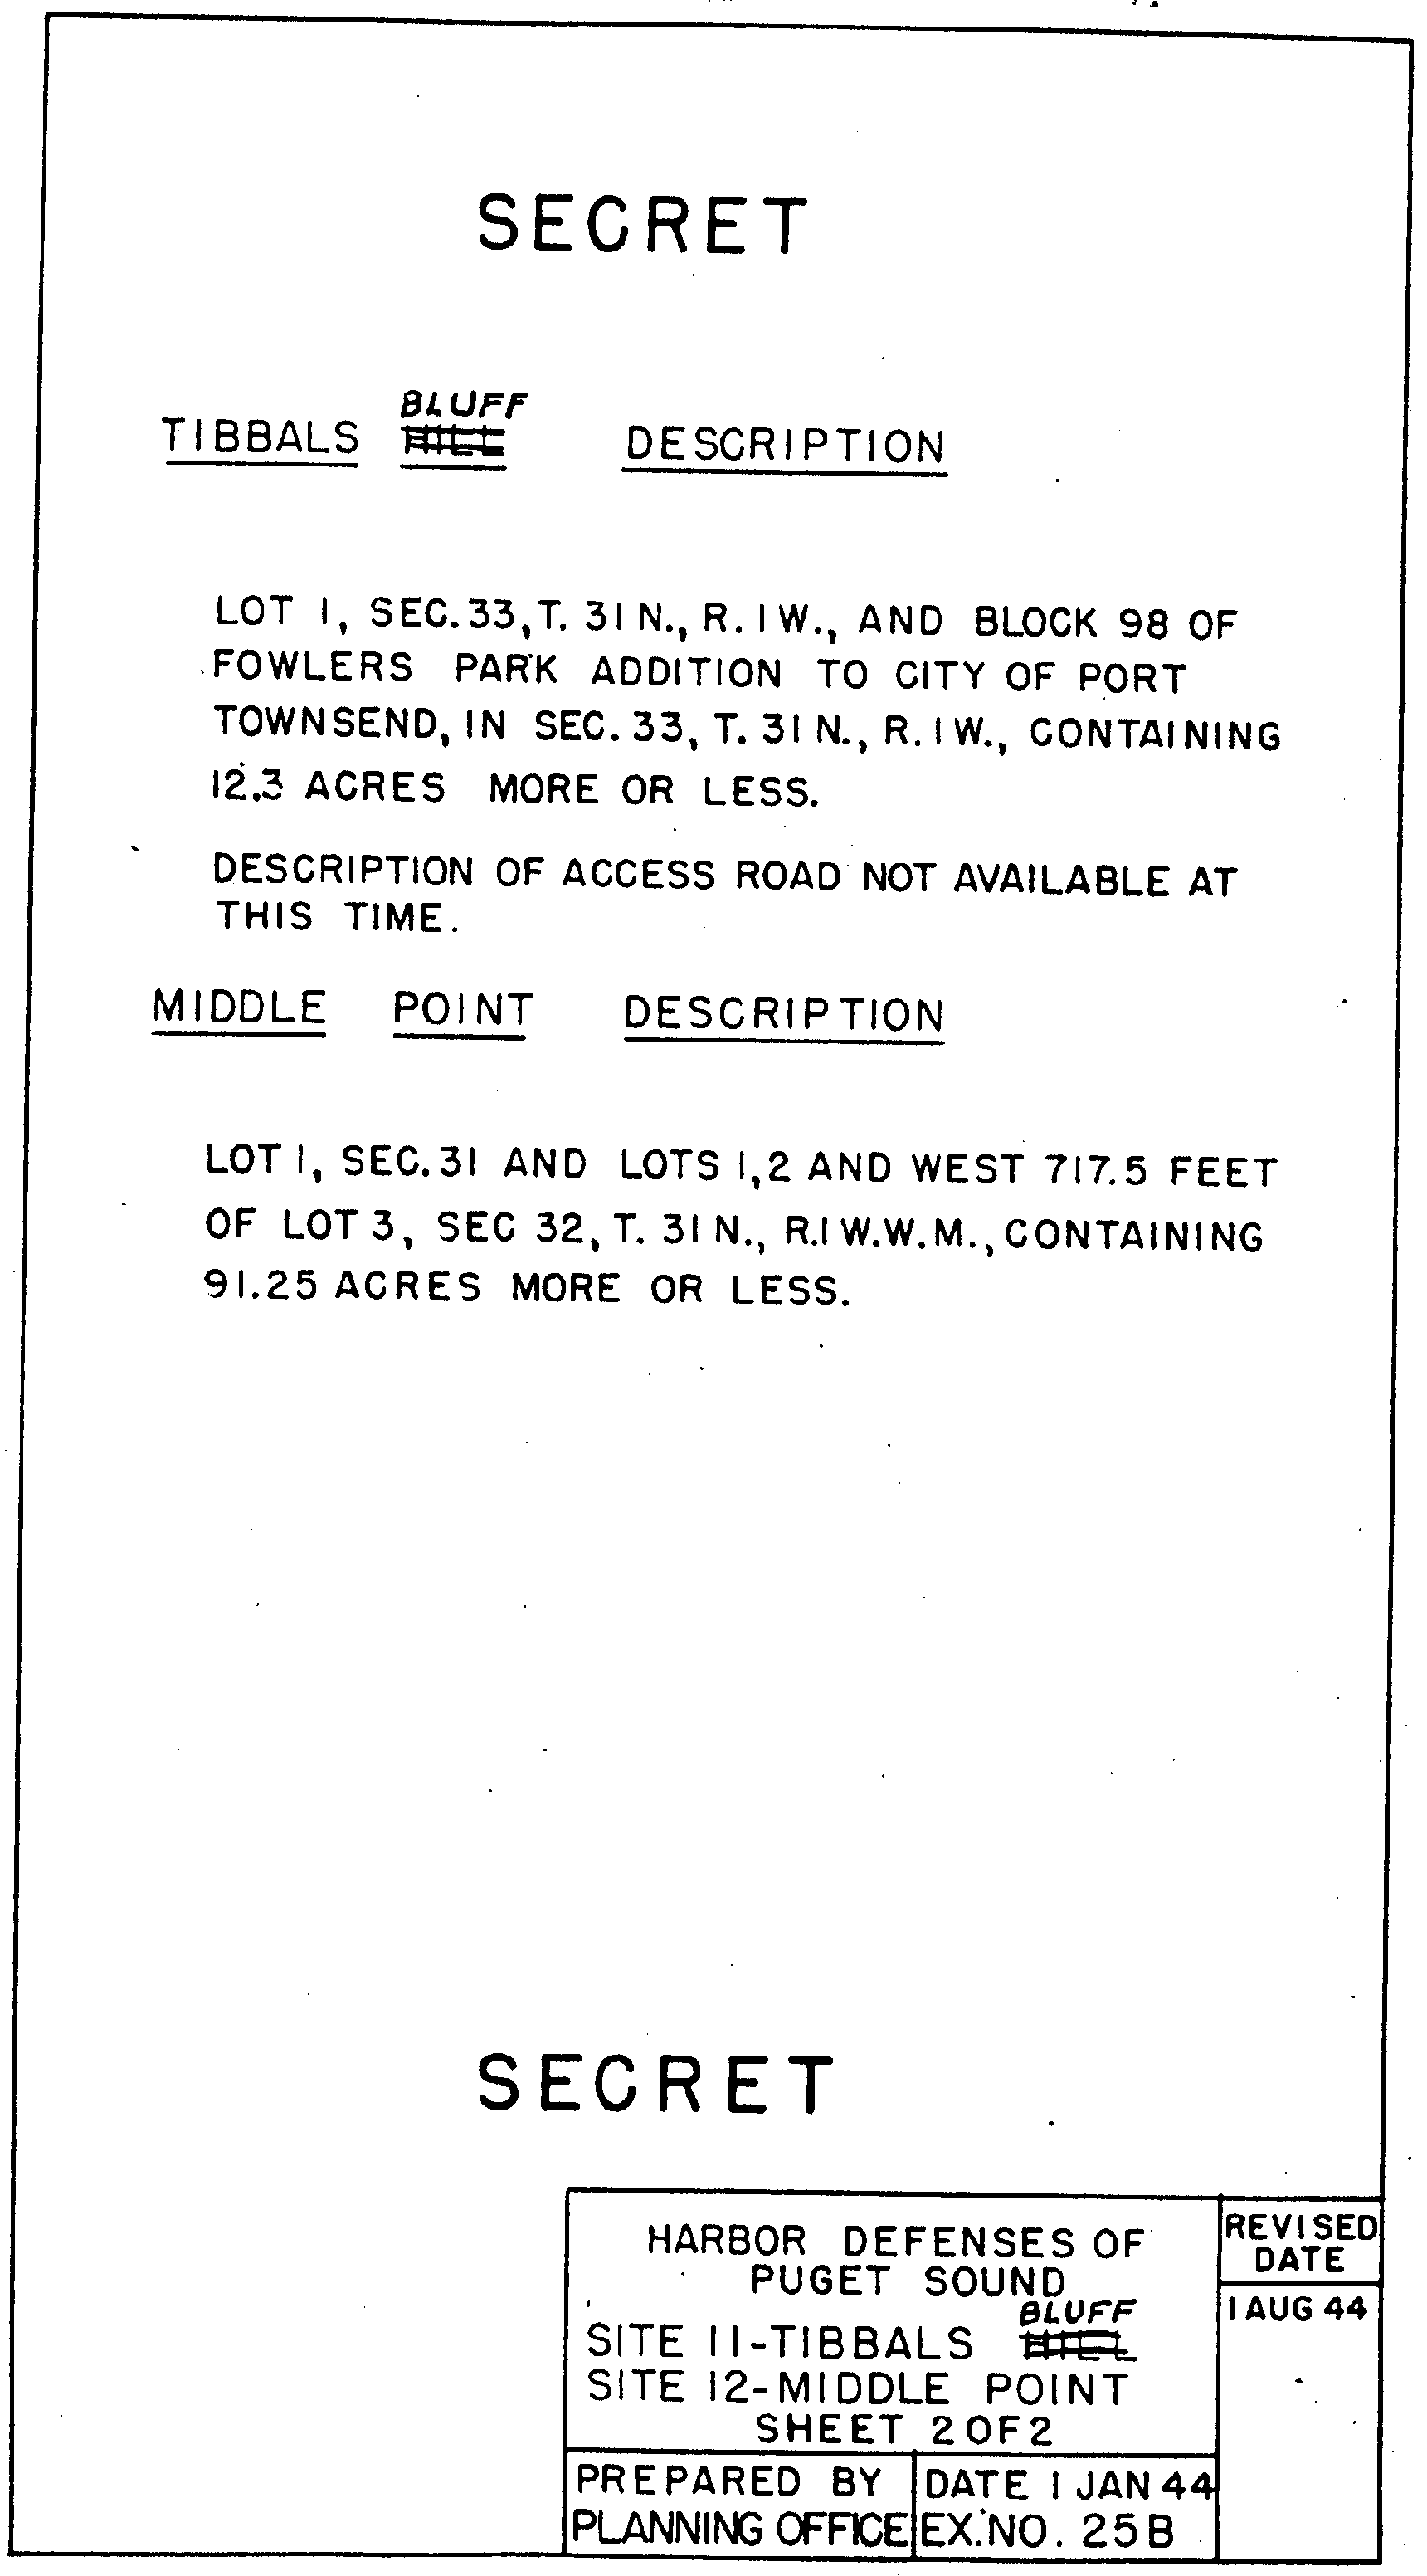
25 - B , Fire Control Locations - Sites 11 and 12 - Tibbals Bluff Area, sheet 1 of 2
25 - B , Fire Control Locations - Sites 11 and 12 - Tibbals Bluff Area, sheet 2 of 2
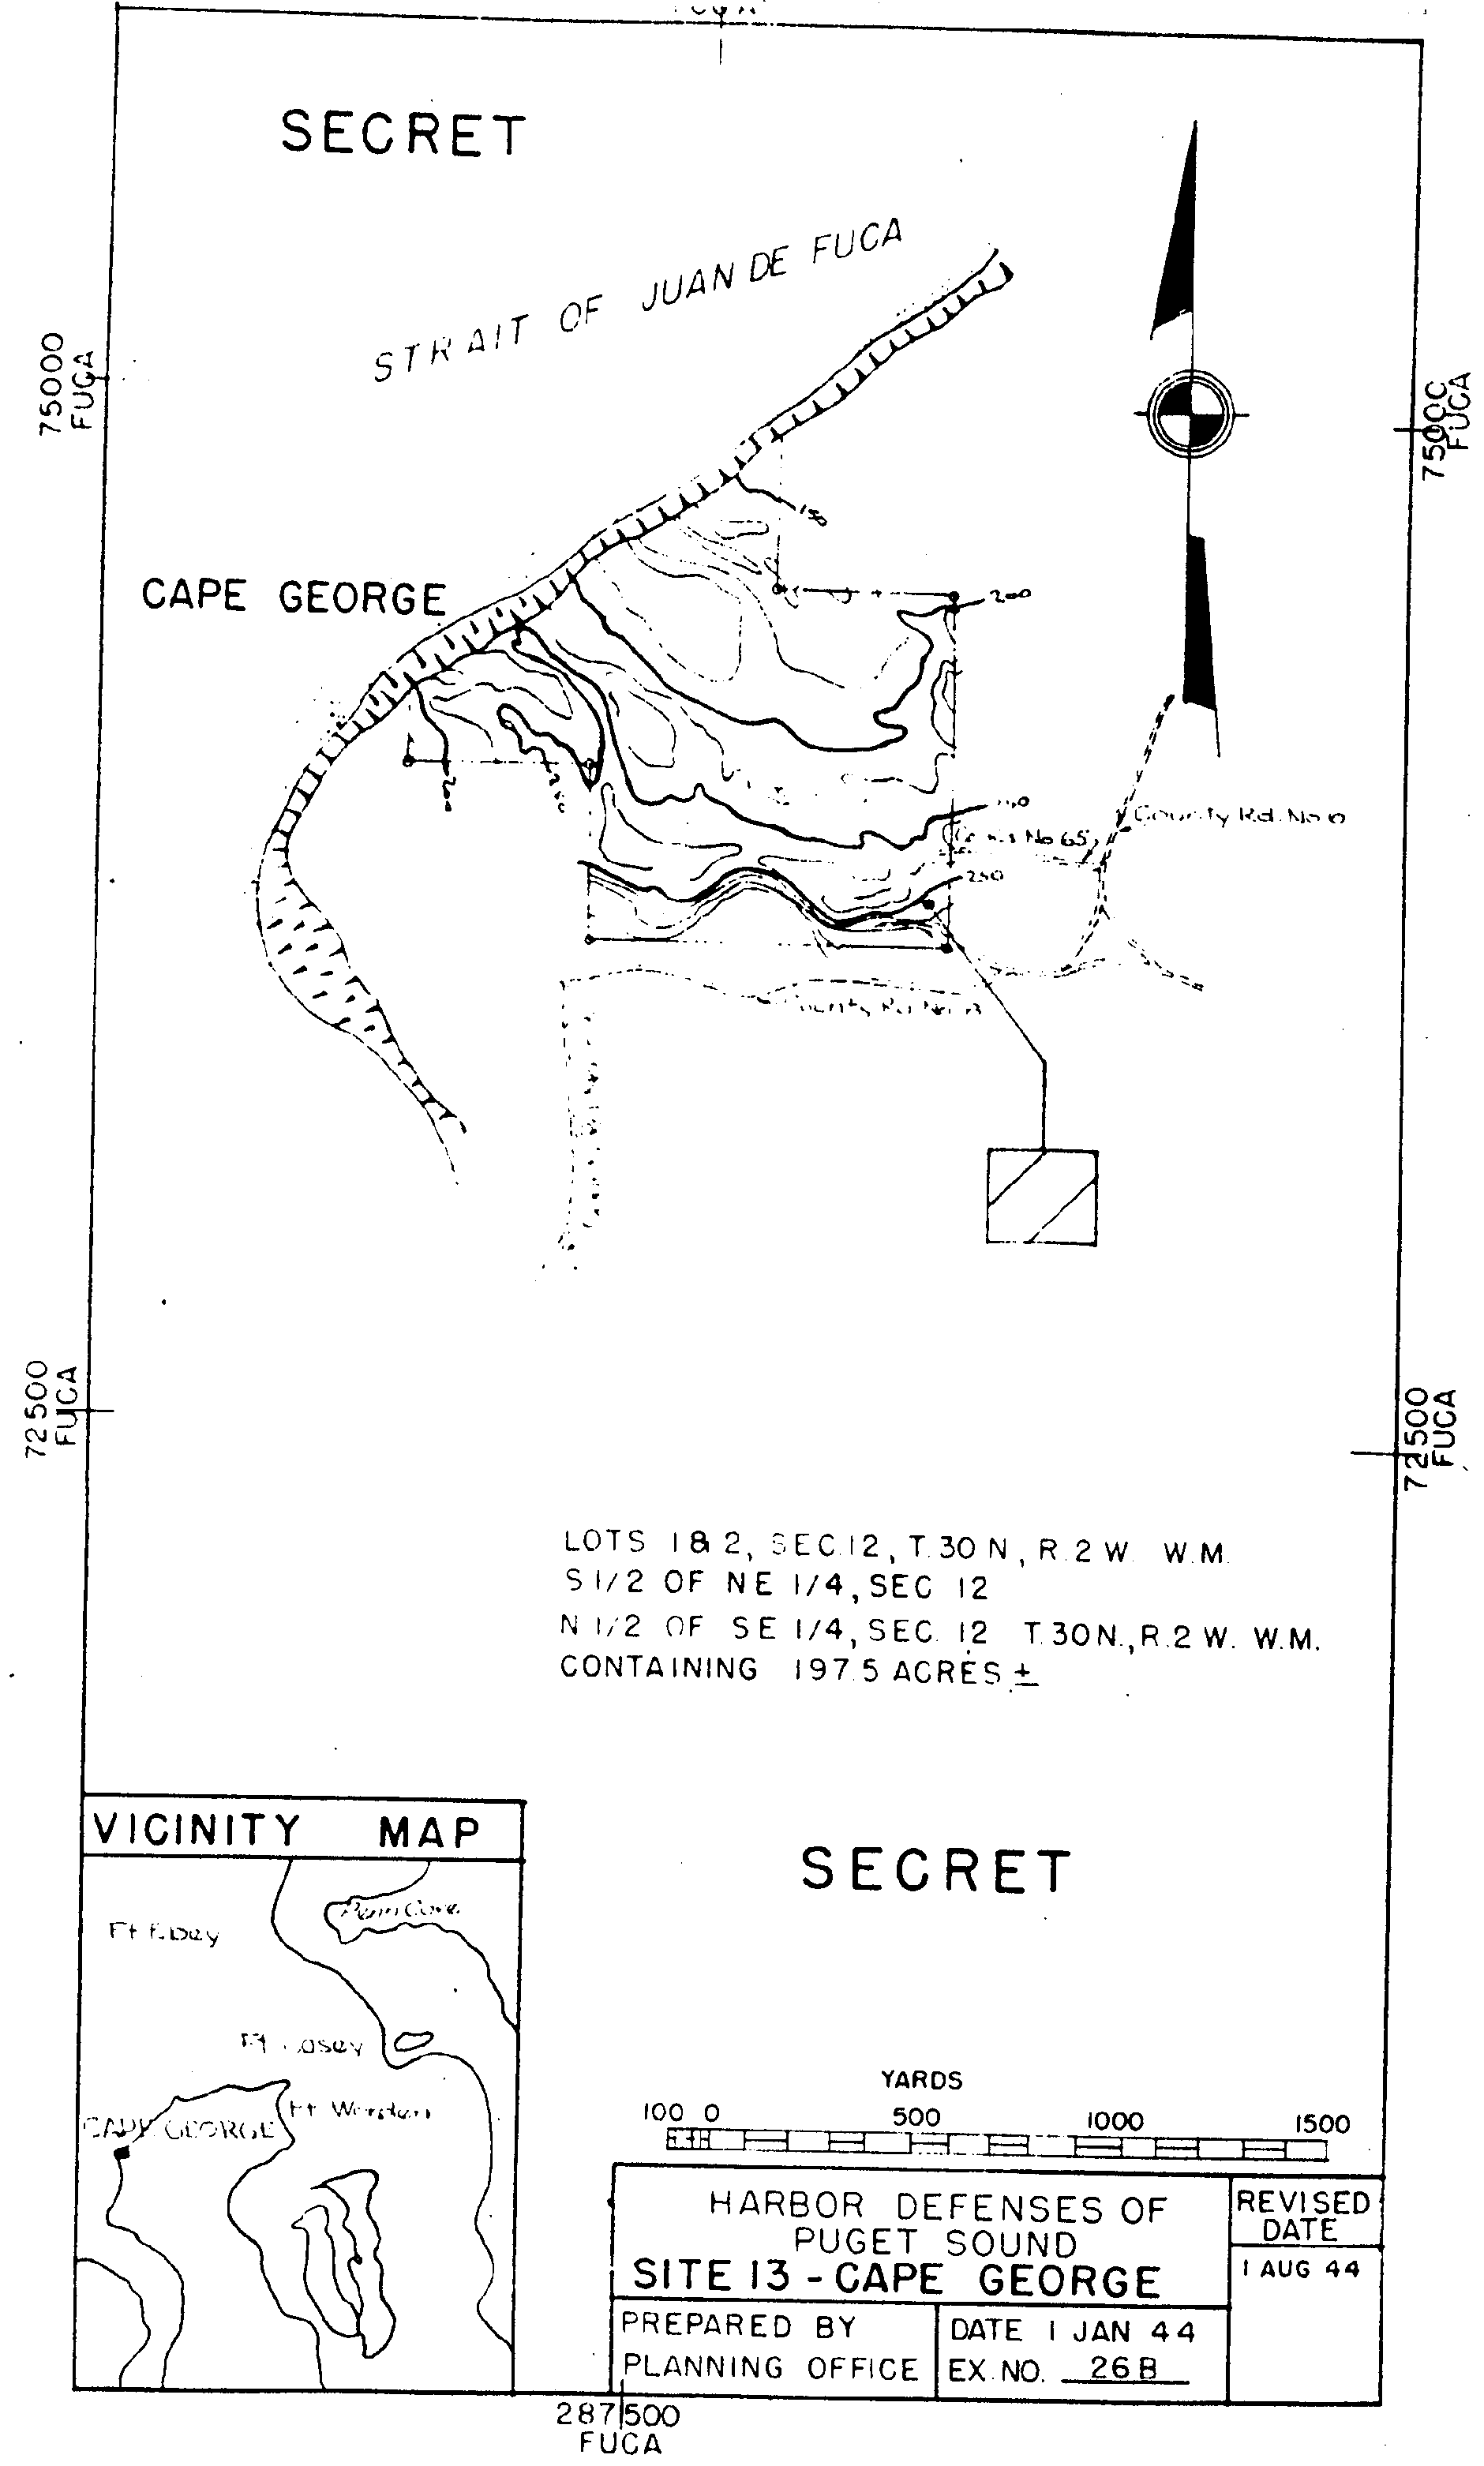
26 - B , Fire Control Locations - Site 13 - Cape George
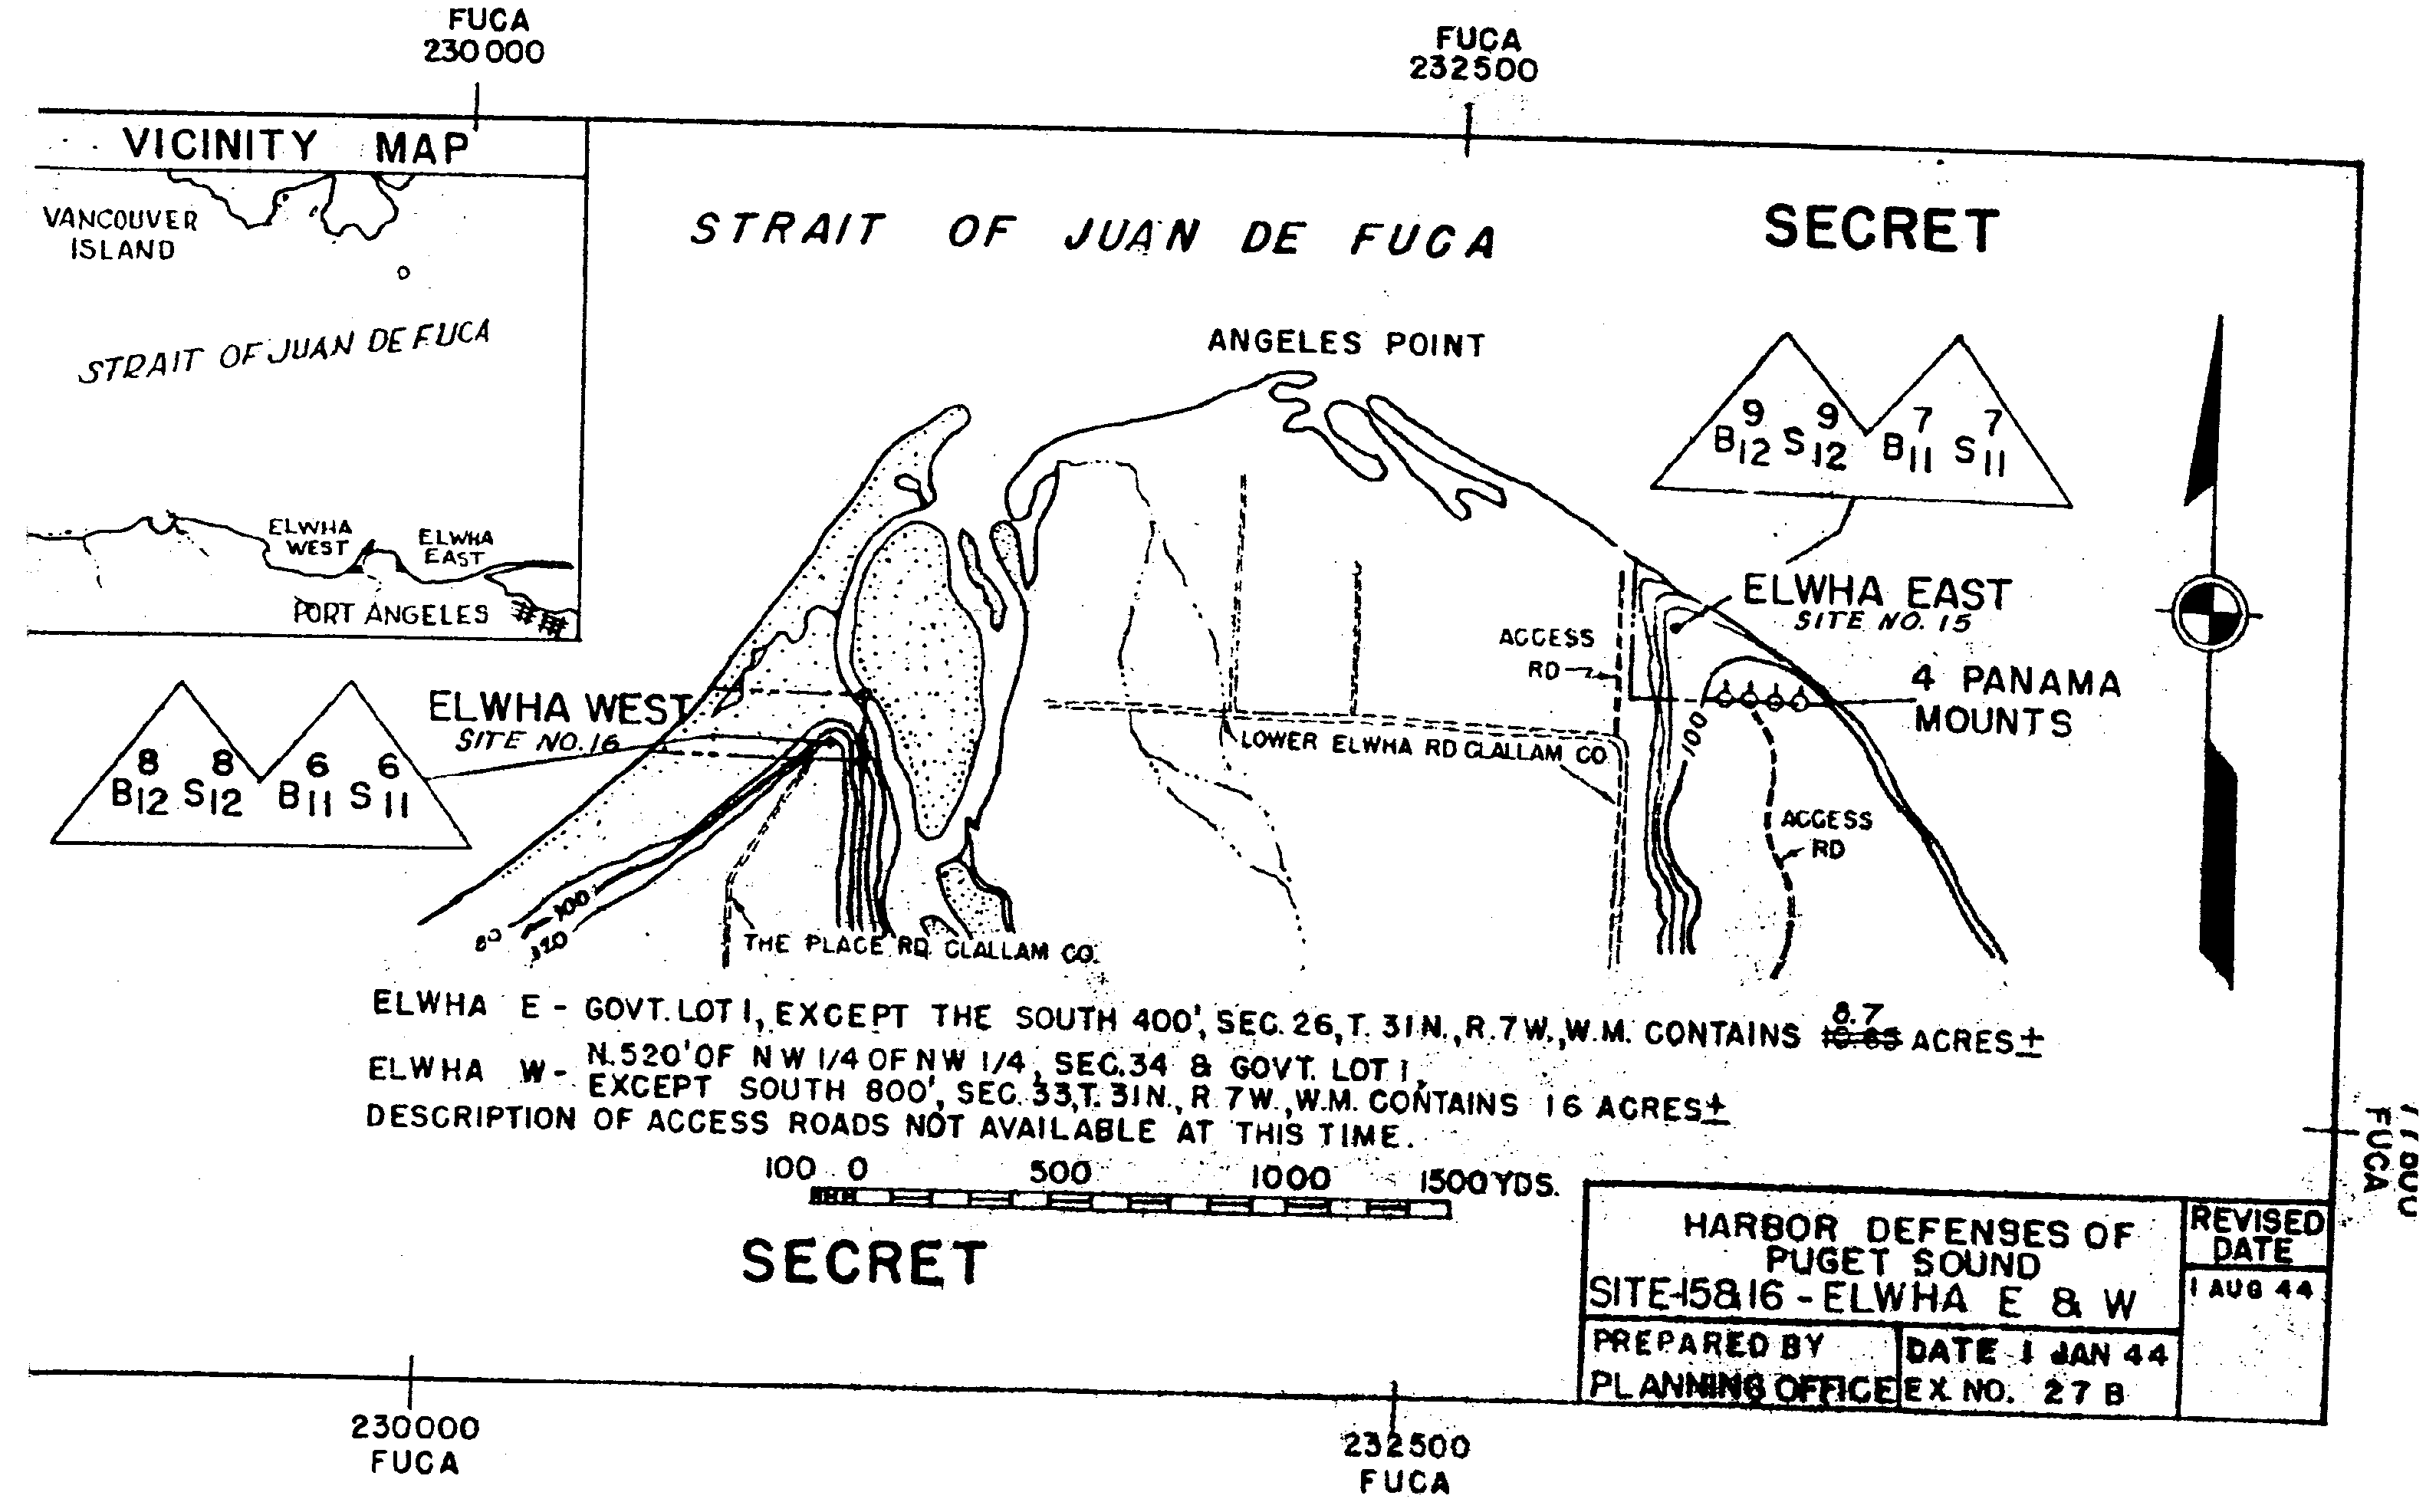
27 - B , Fire Control Locations - Sites 15 and 16 - Elwha East and West
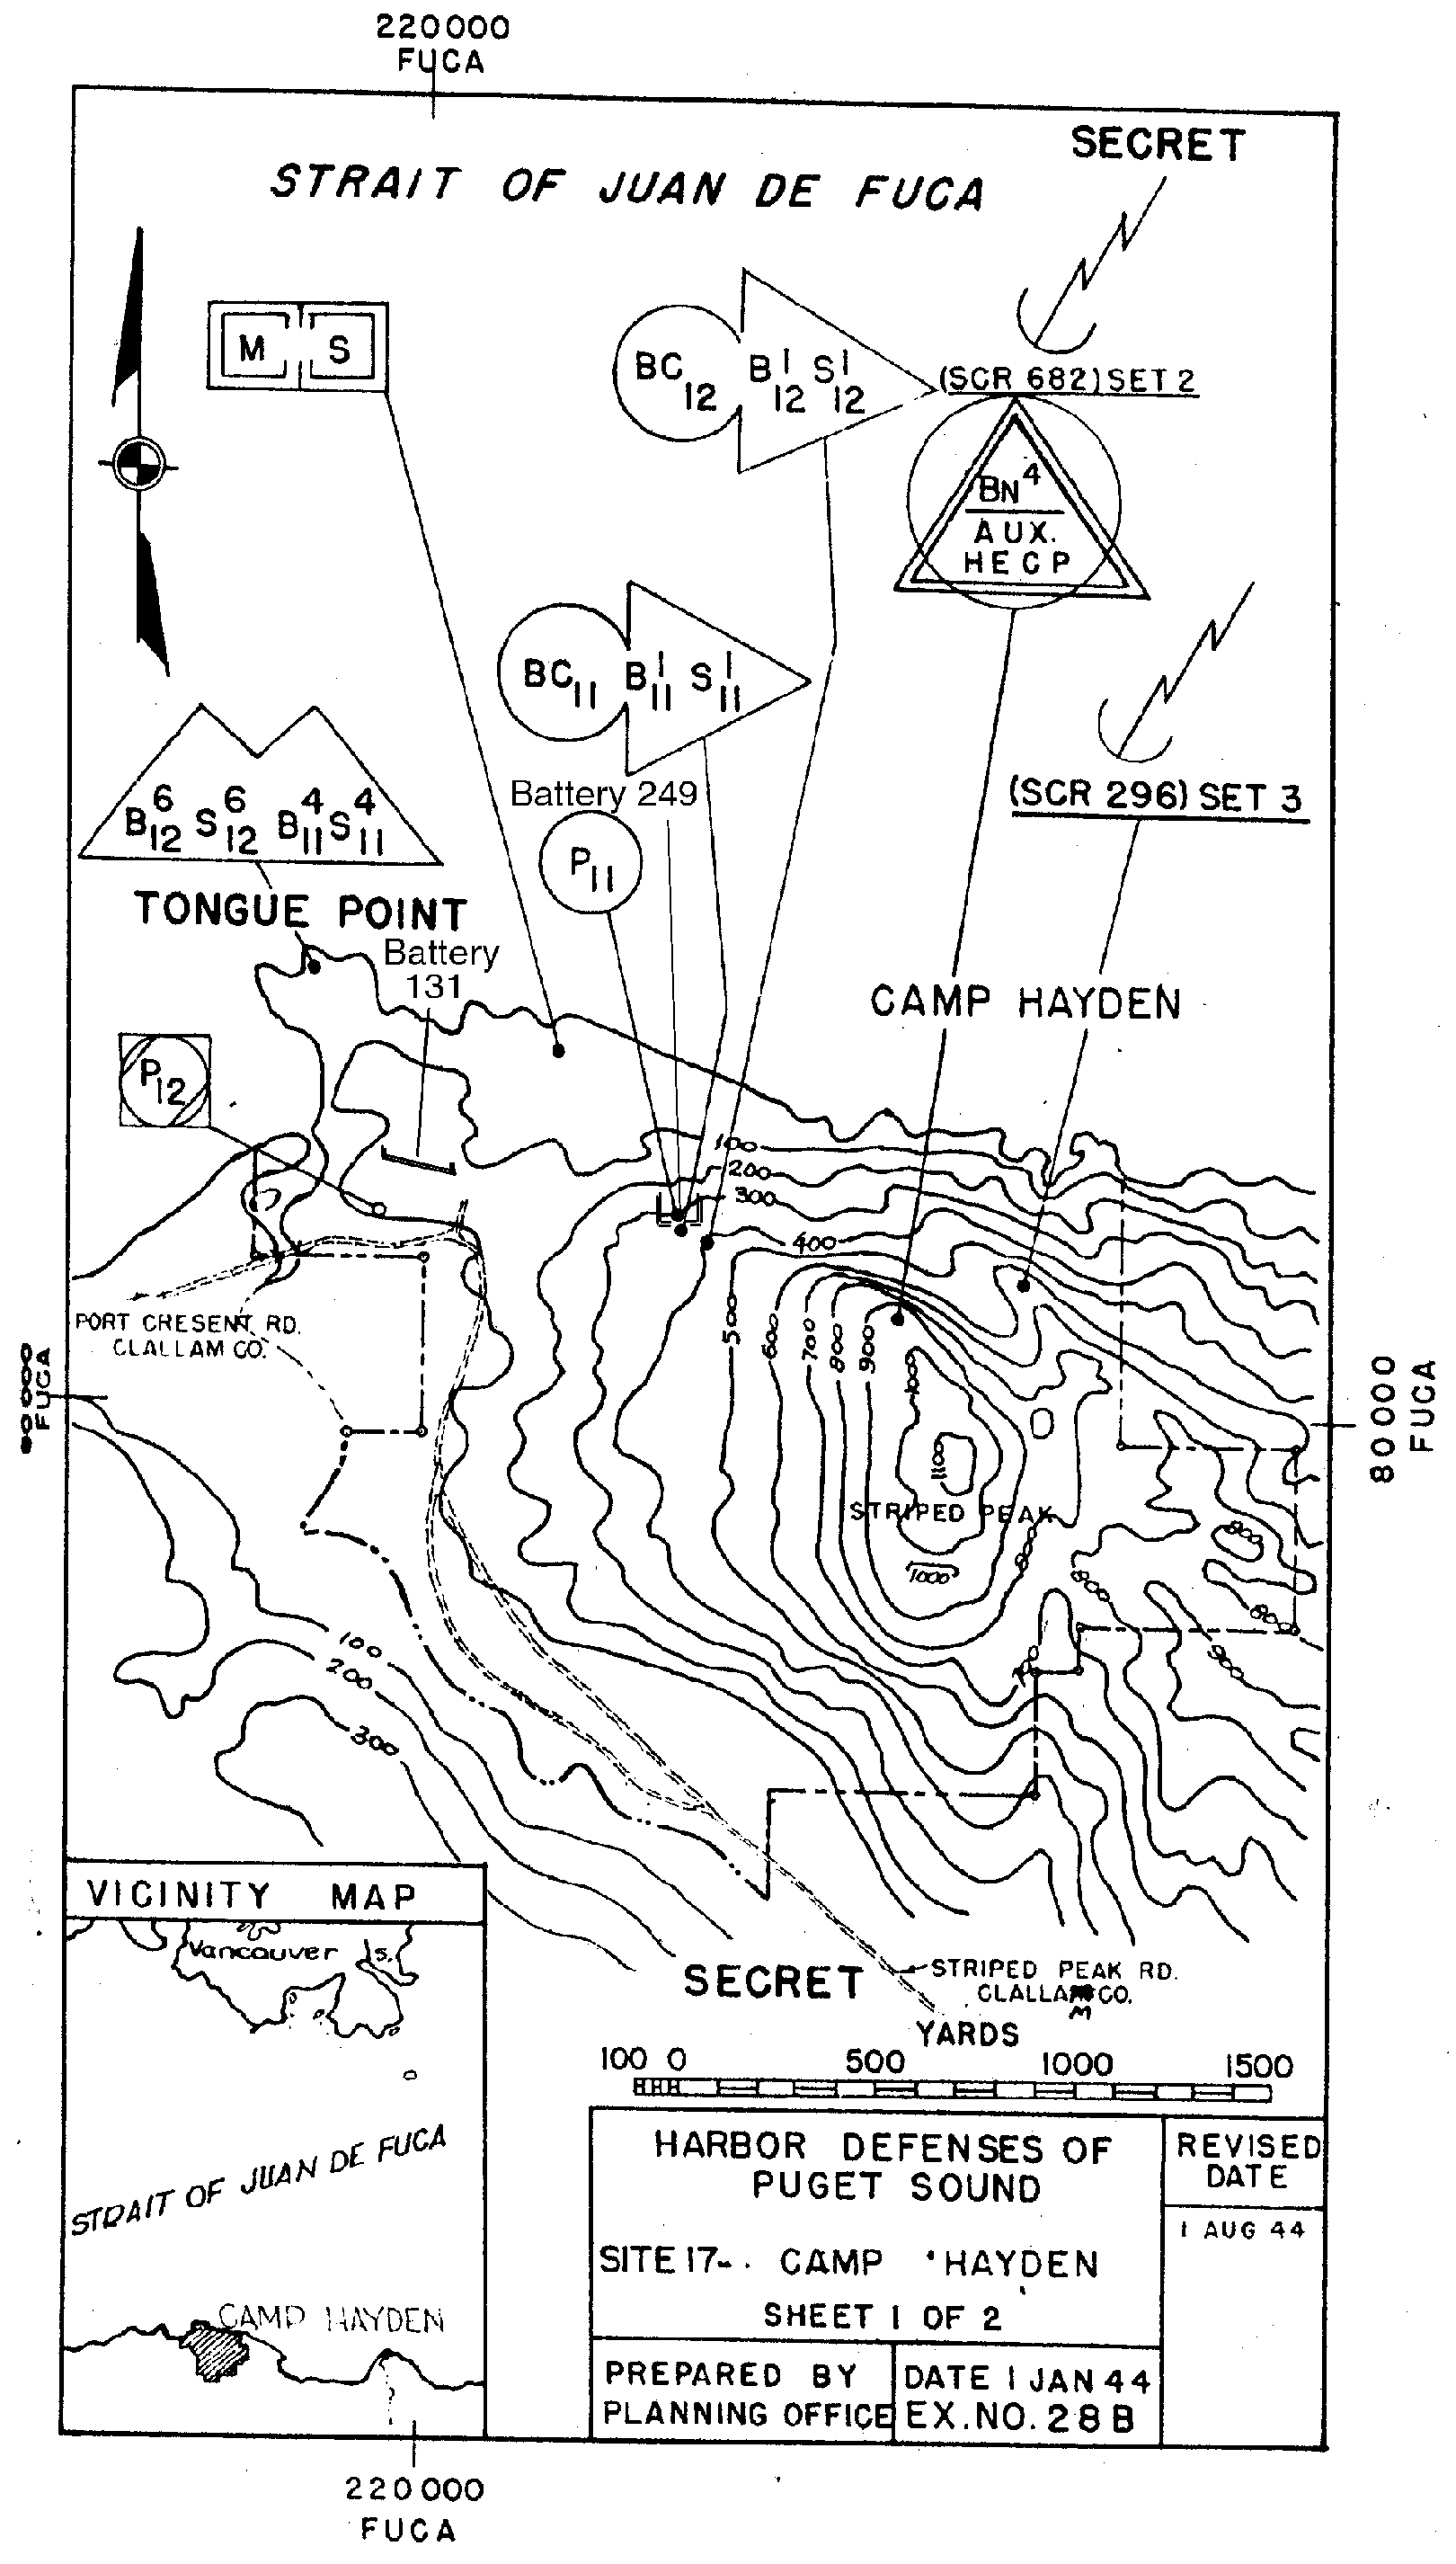
28 - B , Fire Control Locations - Site 17 - Camp Hayden, sheet 1 of 2
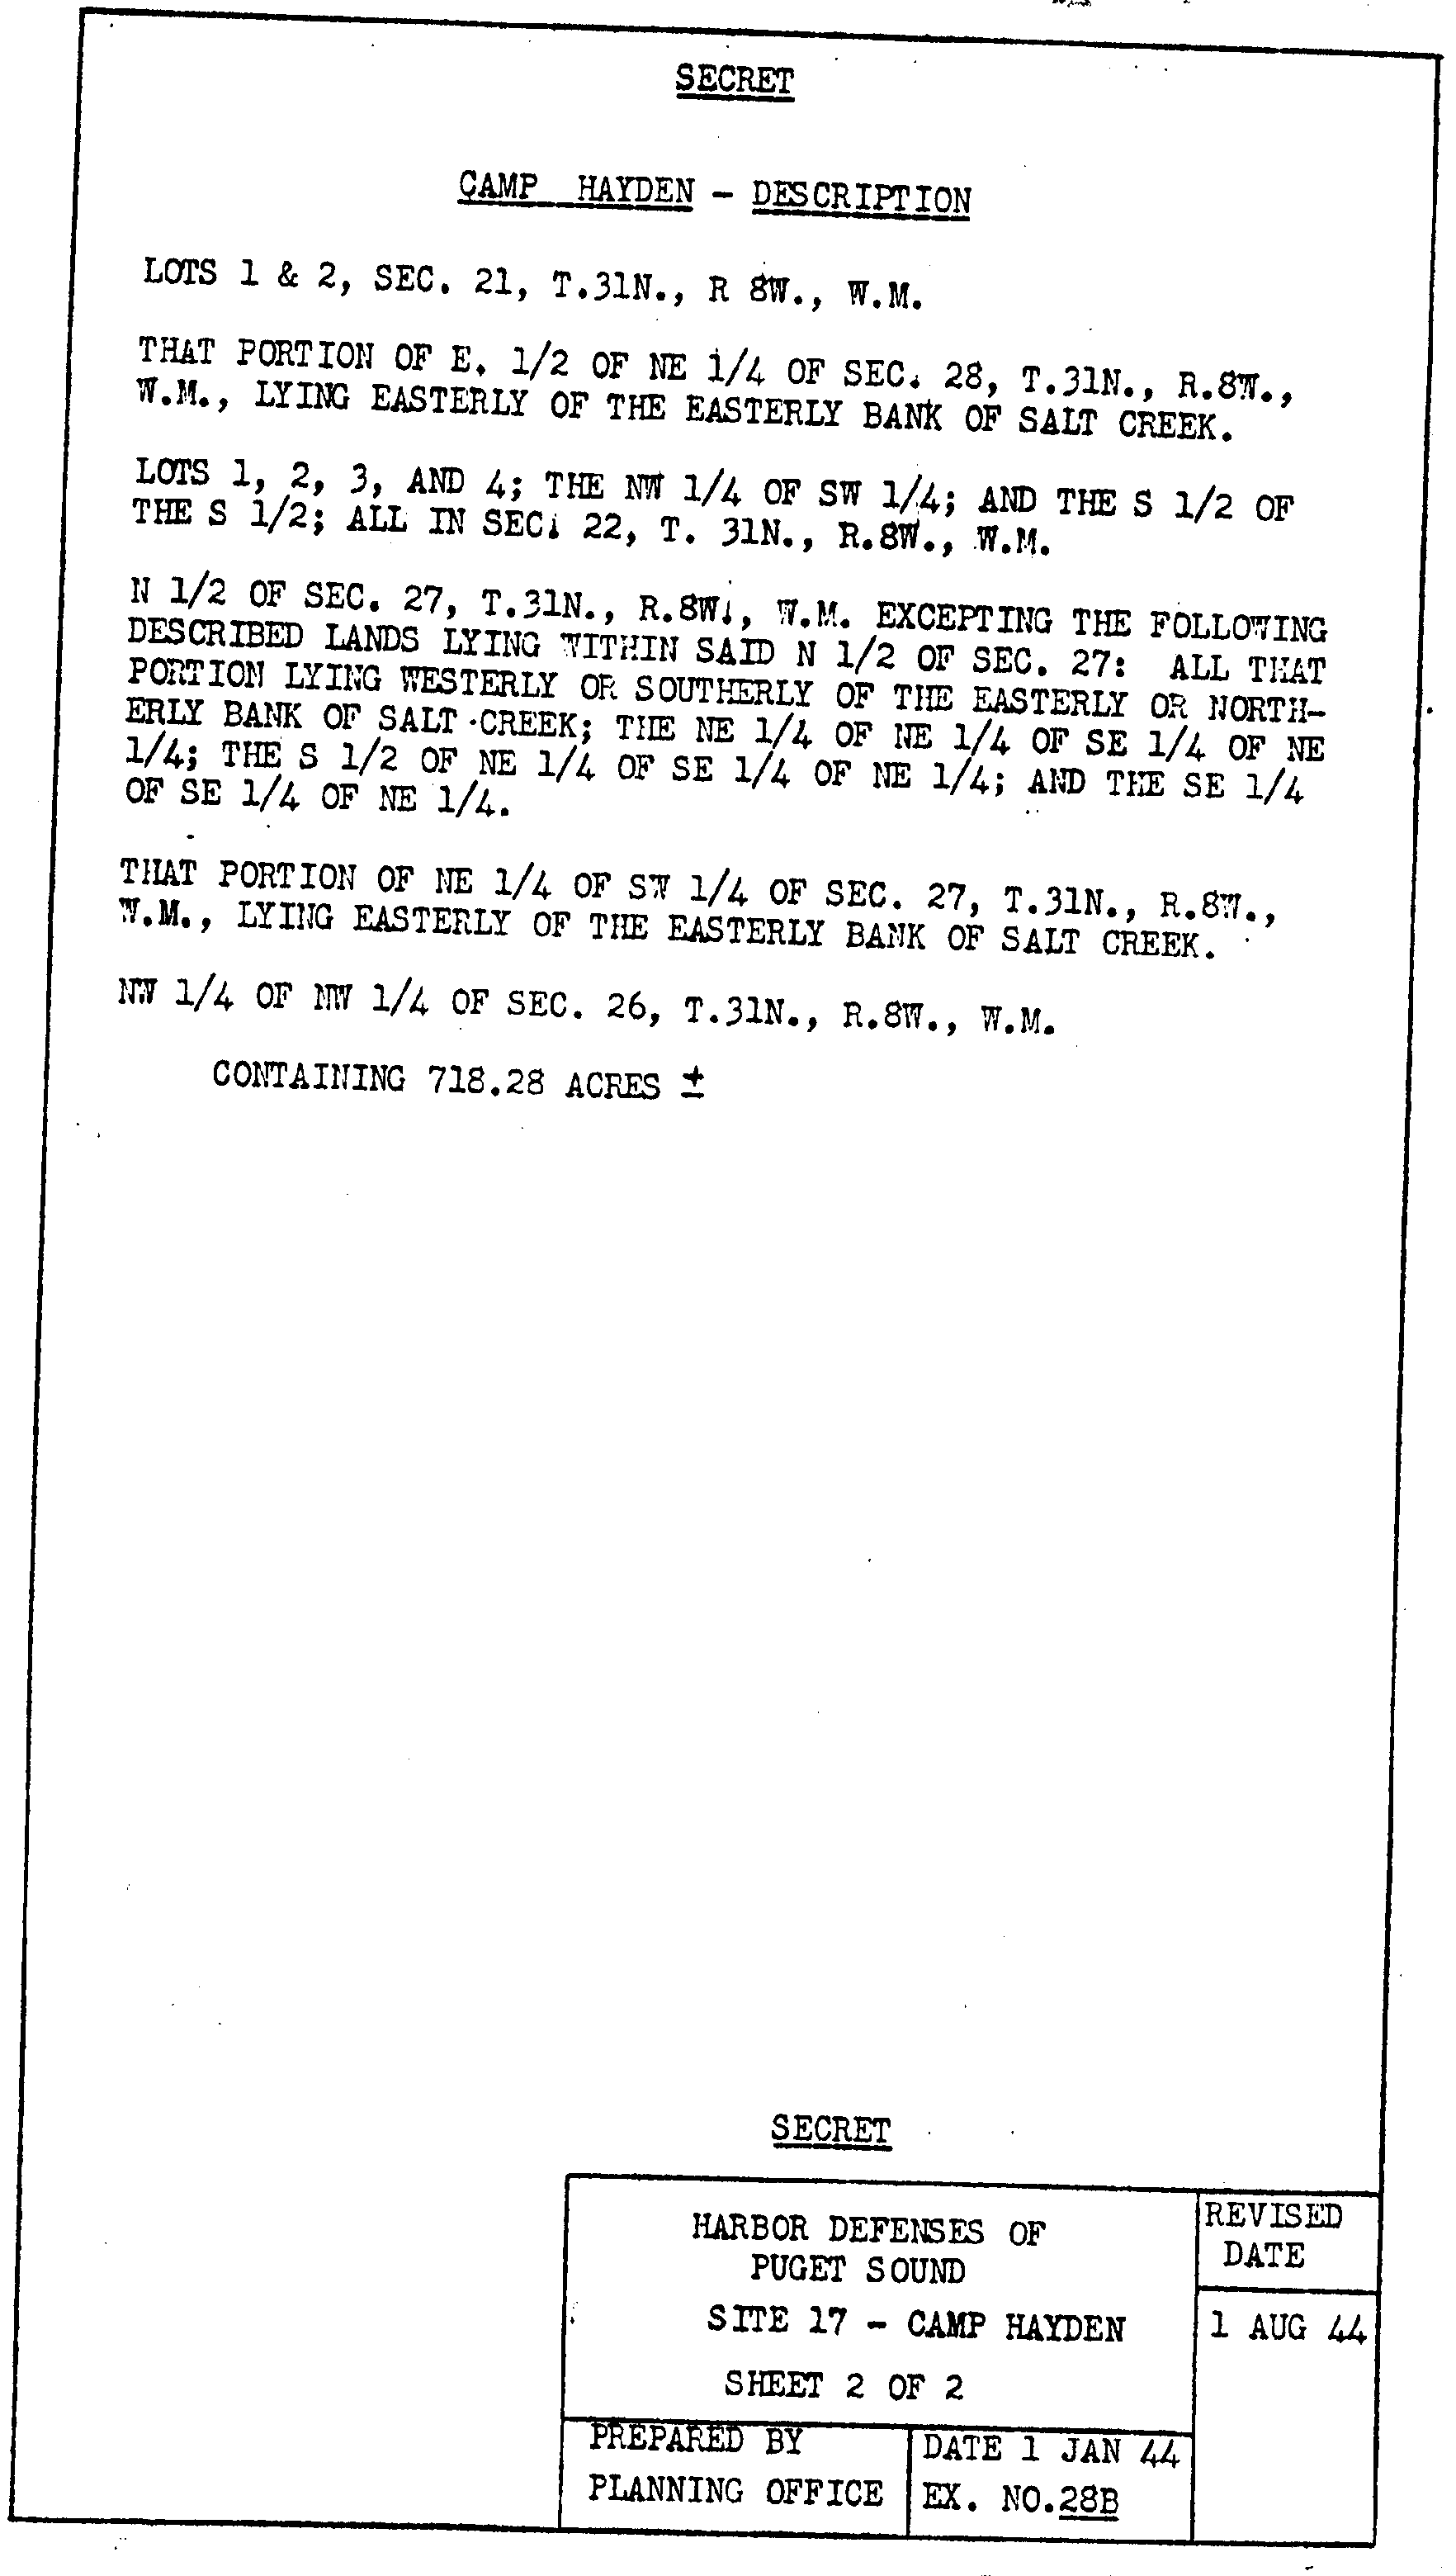
28 - B , Fire Control Locations - Site 17, - Camp Hayden, sheet 2 of 2
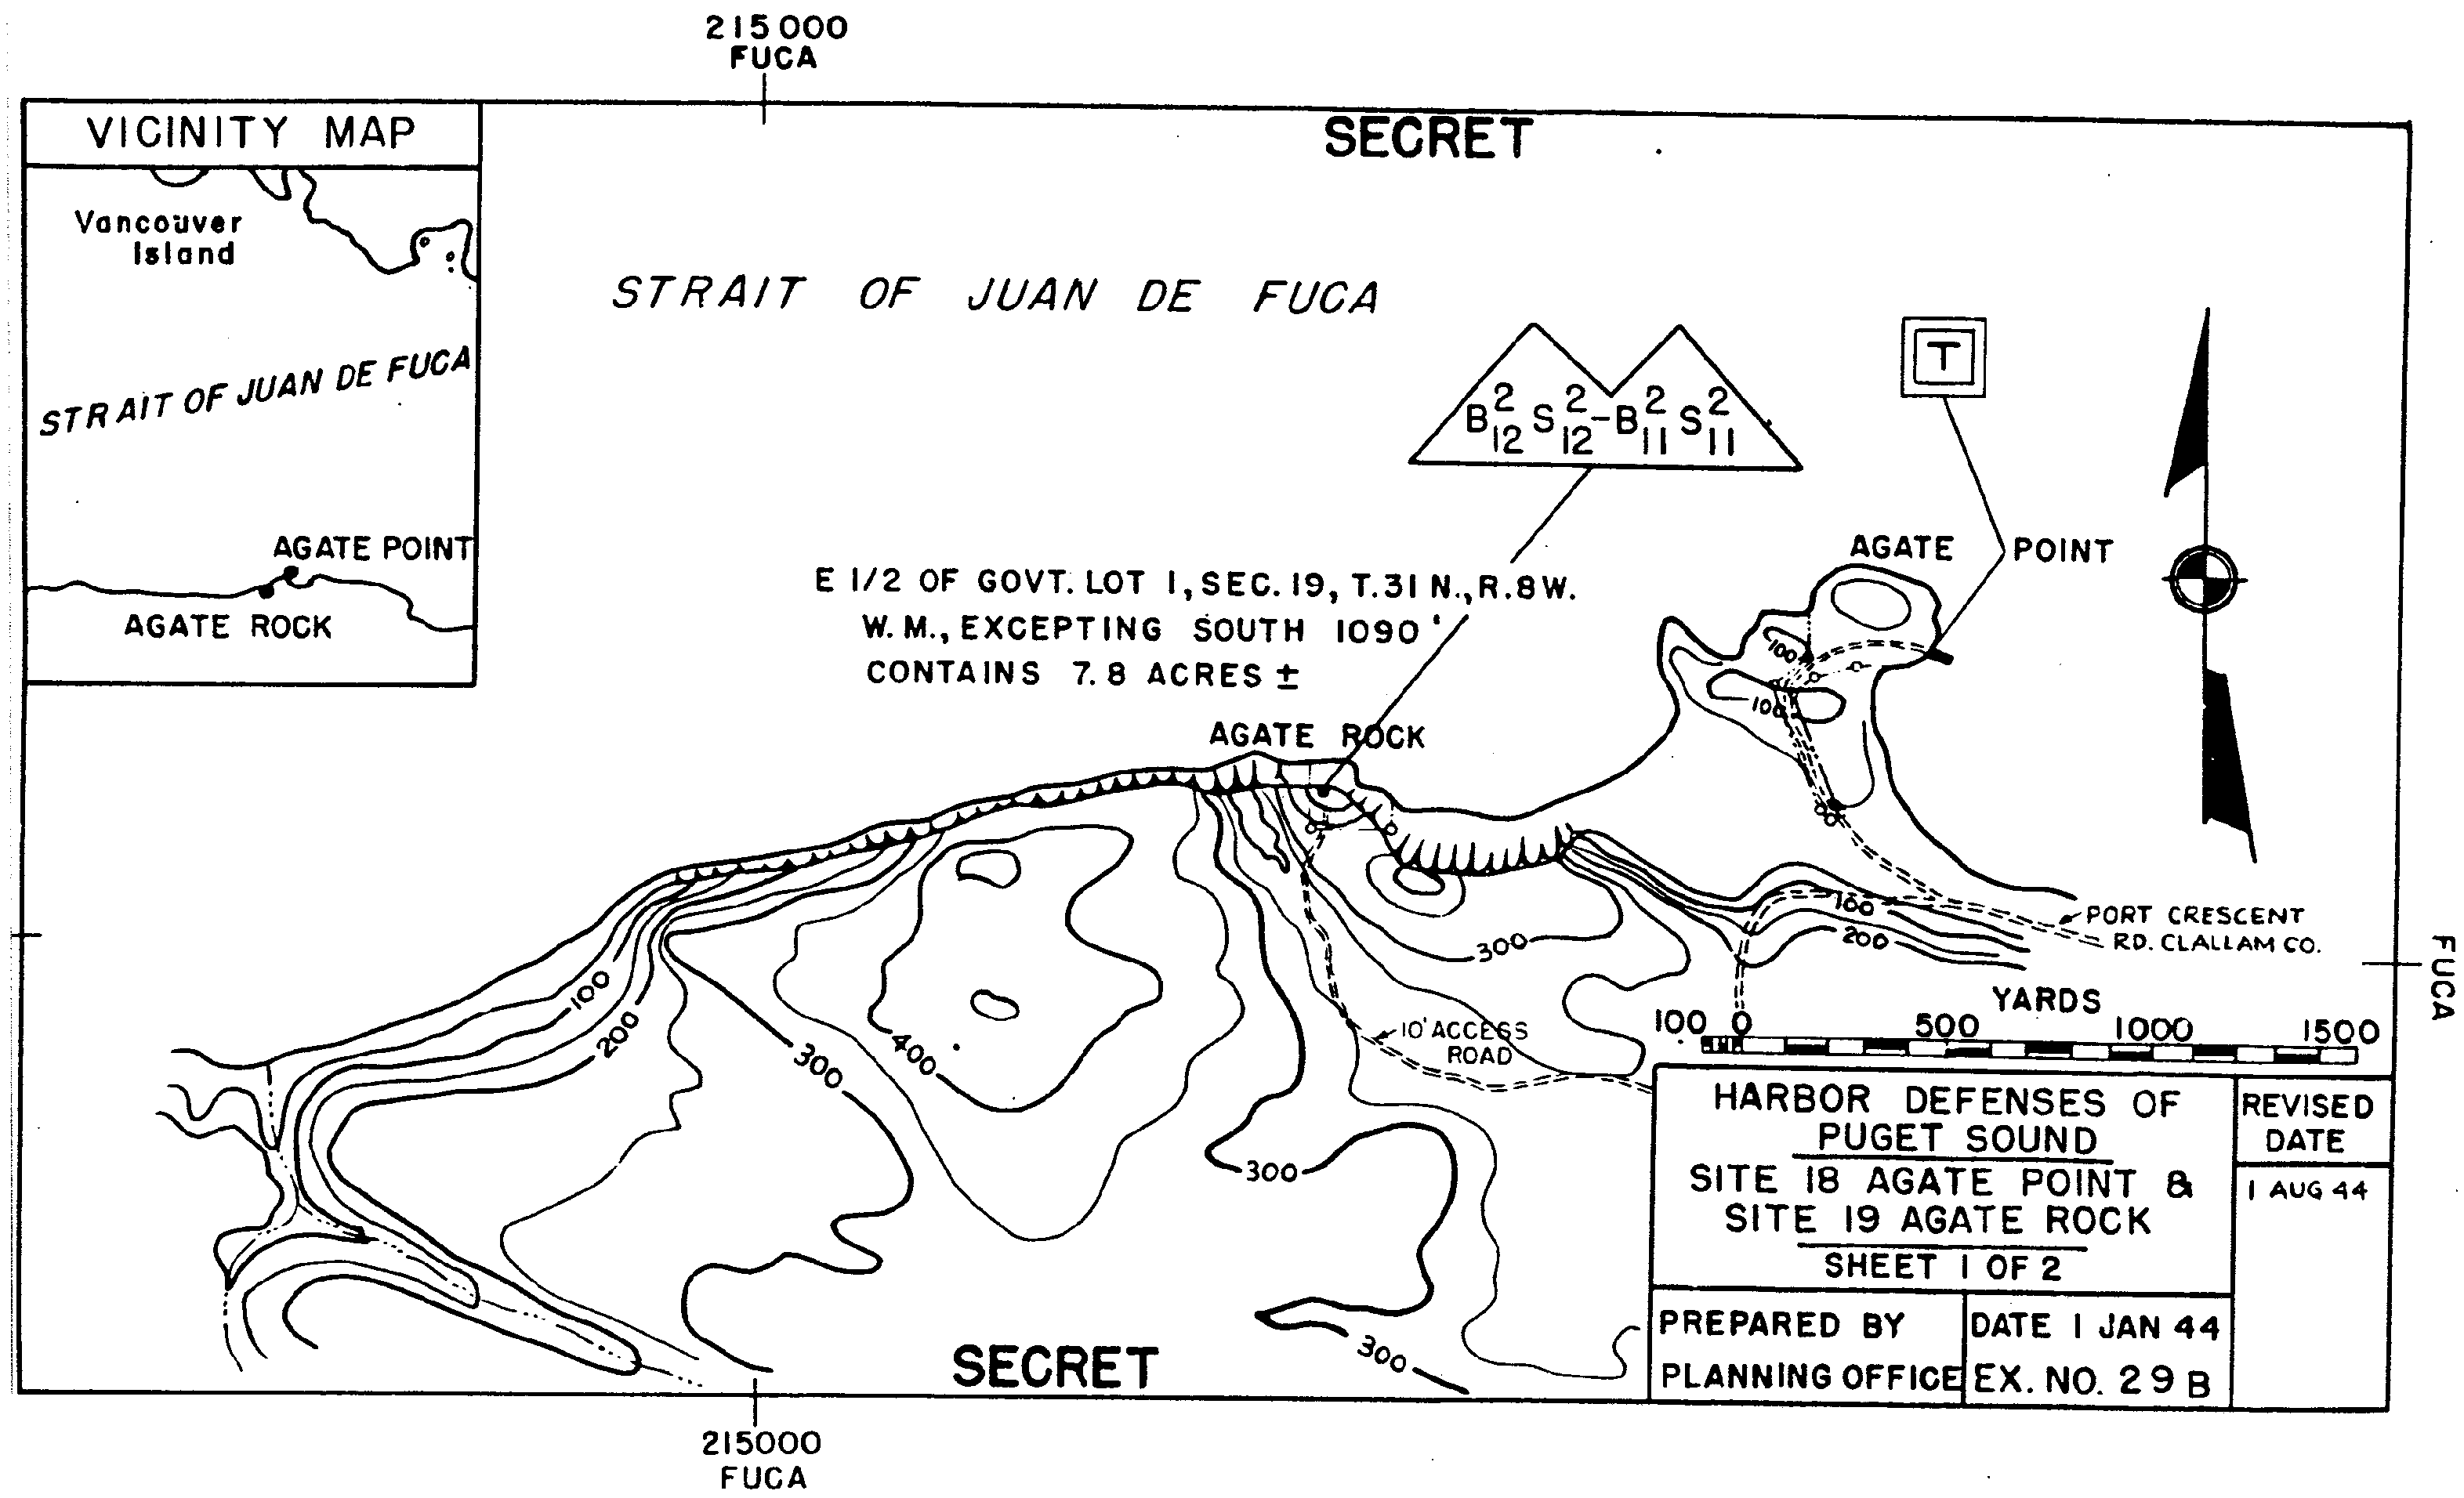
29 - B , Fire Control Locations - Sites 18 and 19 - Agate, sheet 1 of 2
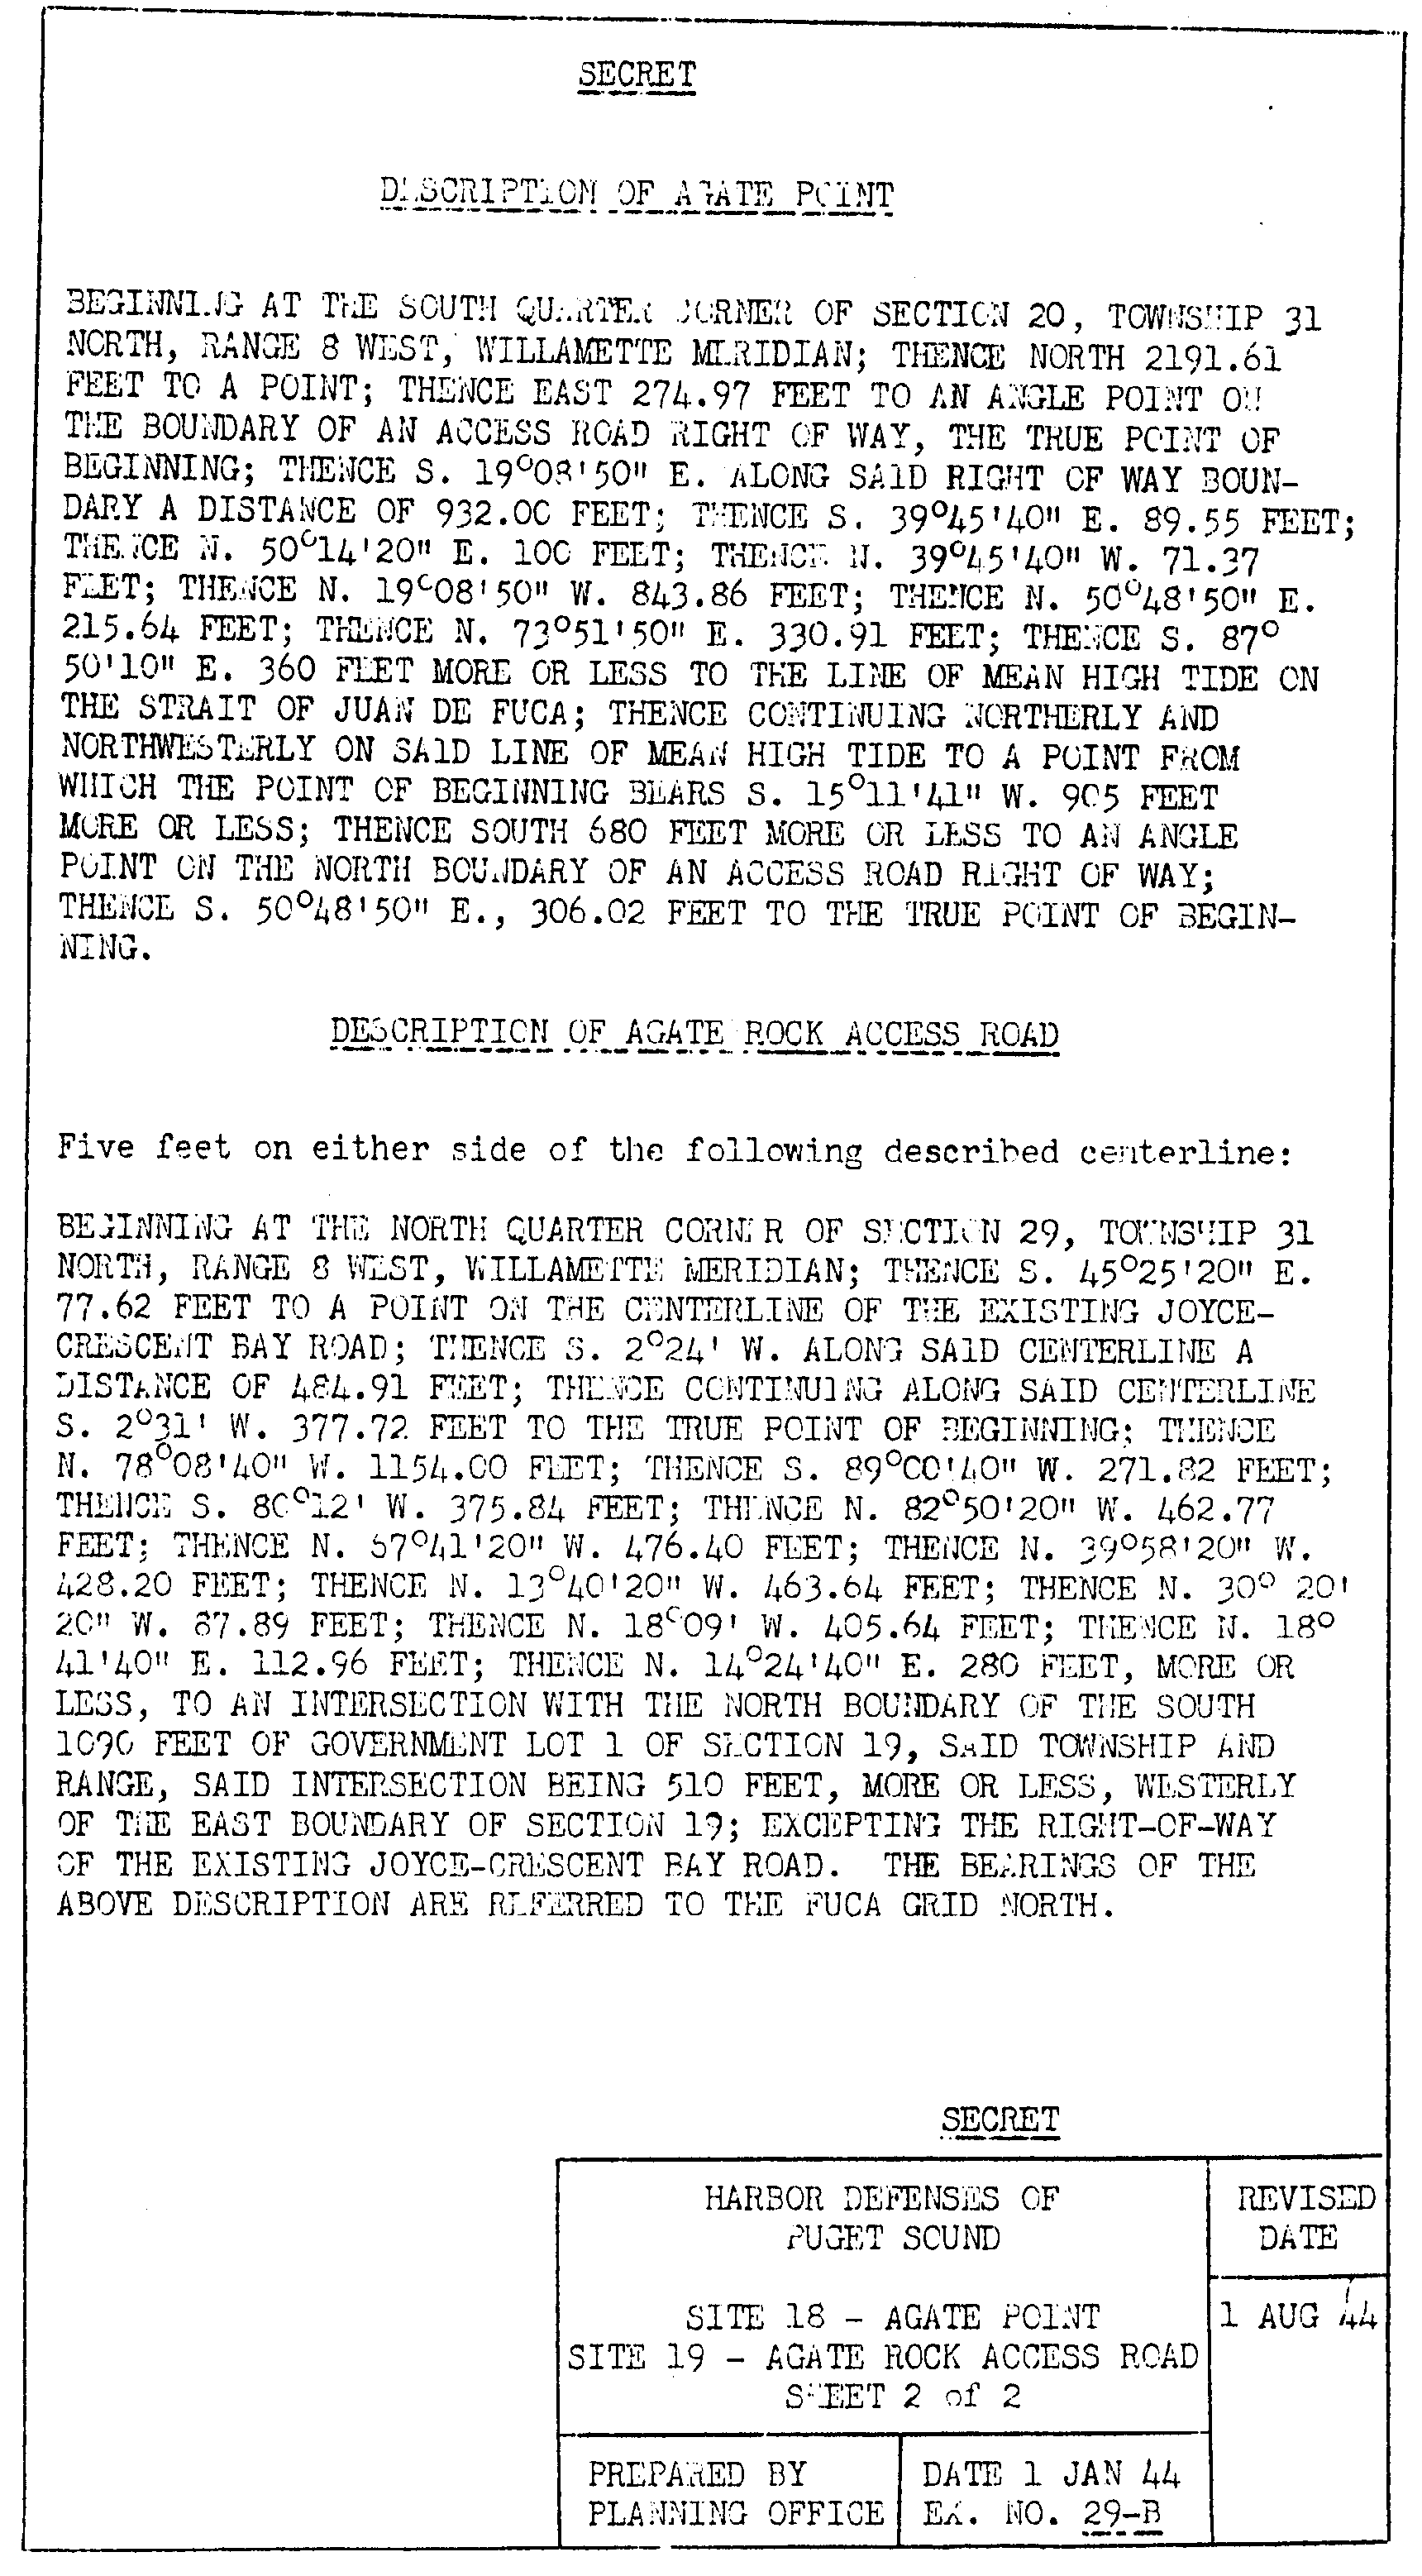
29 - B , Fire Control Locations - Sites 18 and 19 - Agate, sheet 2 of 2
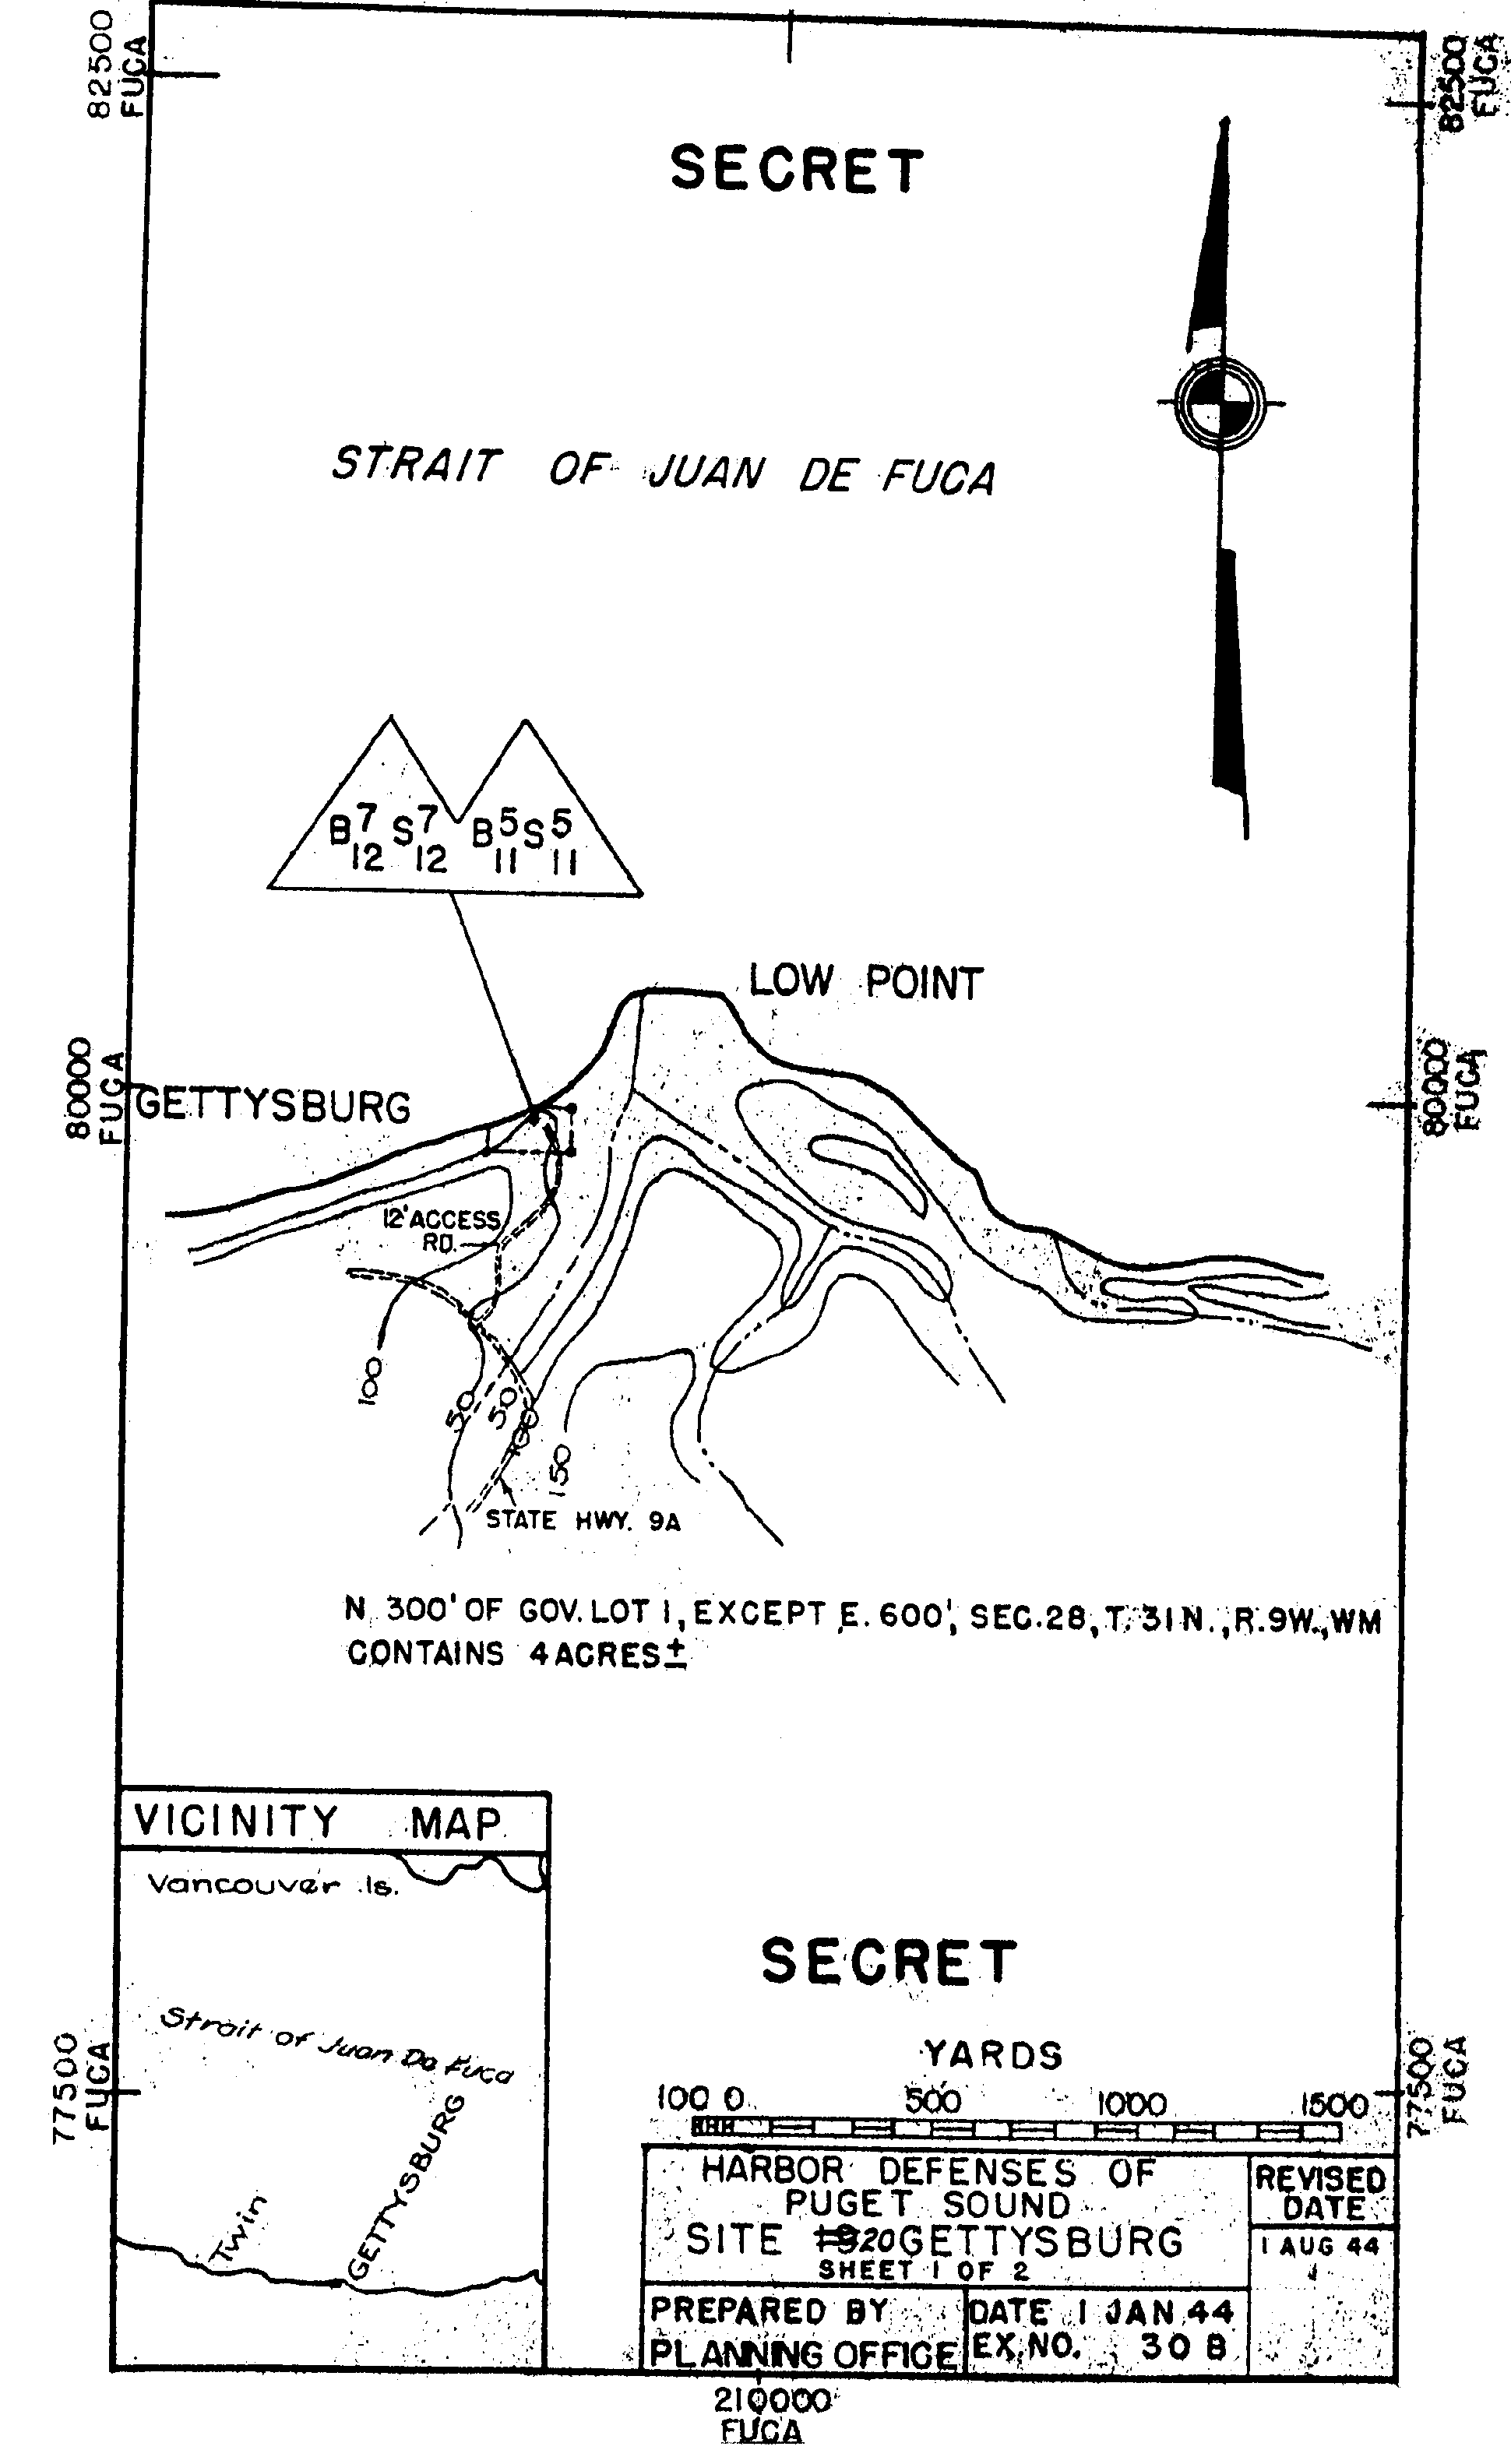
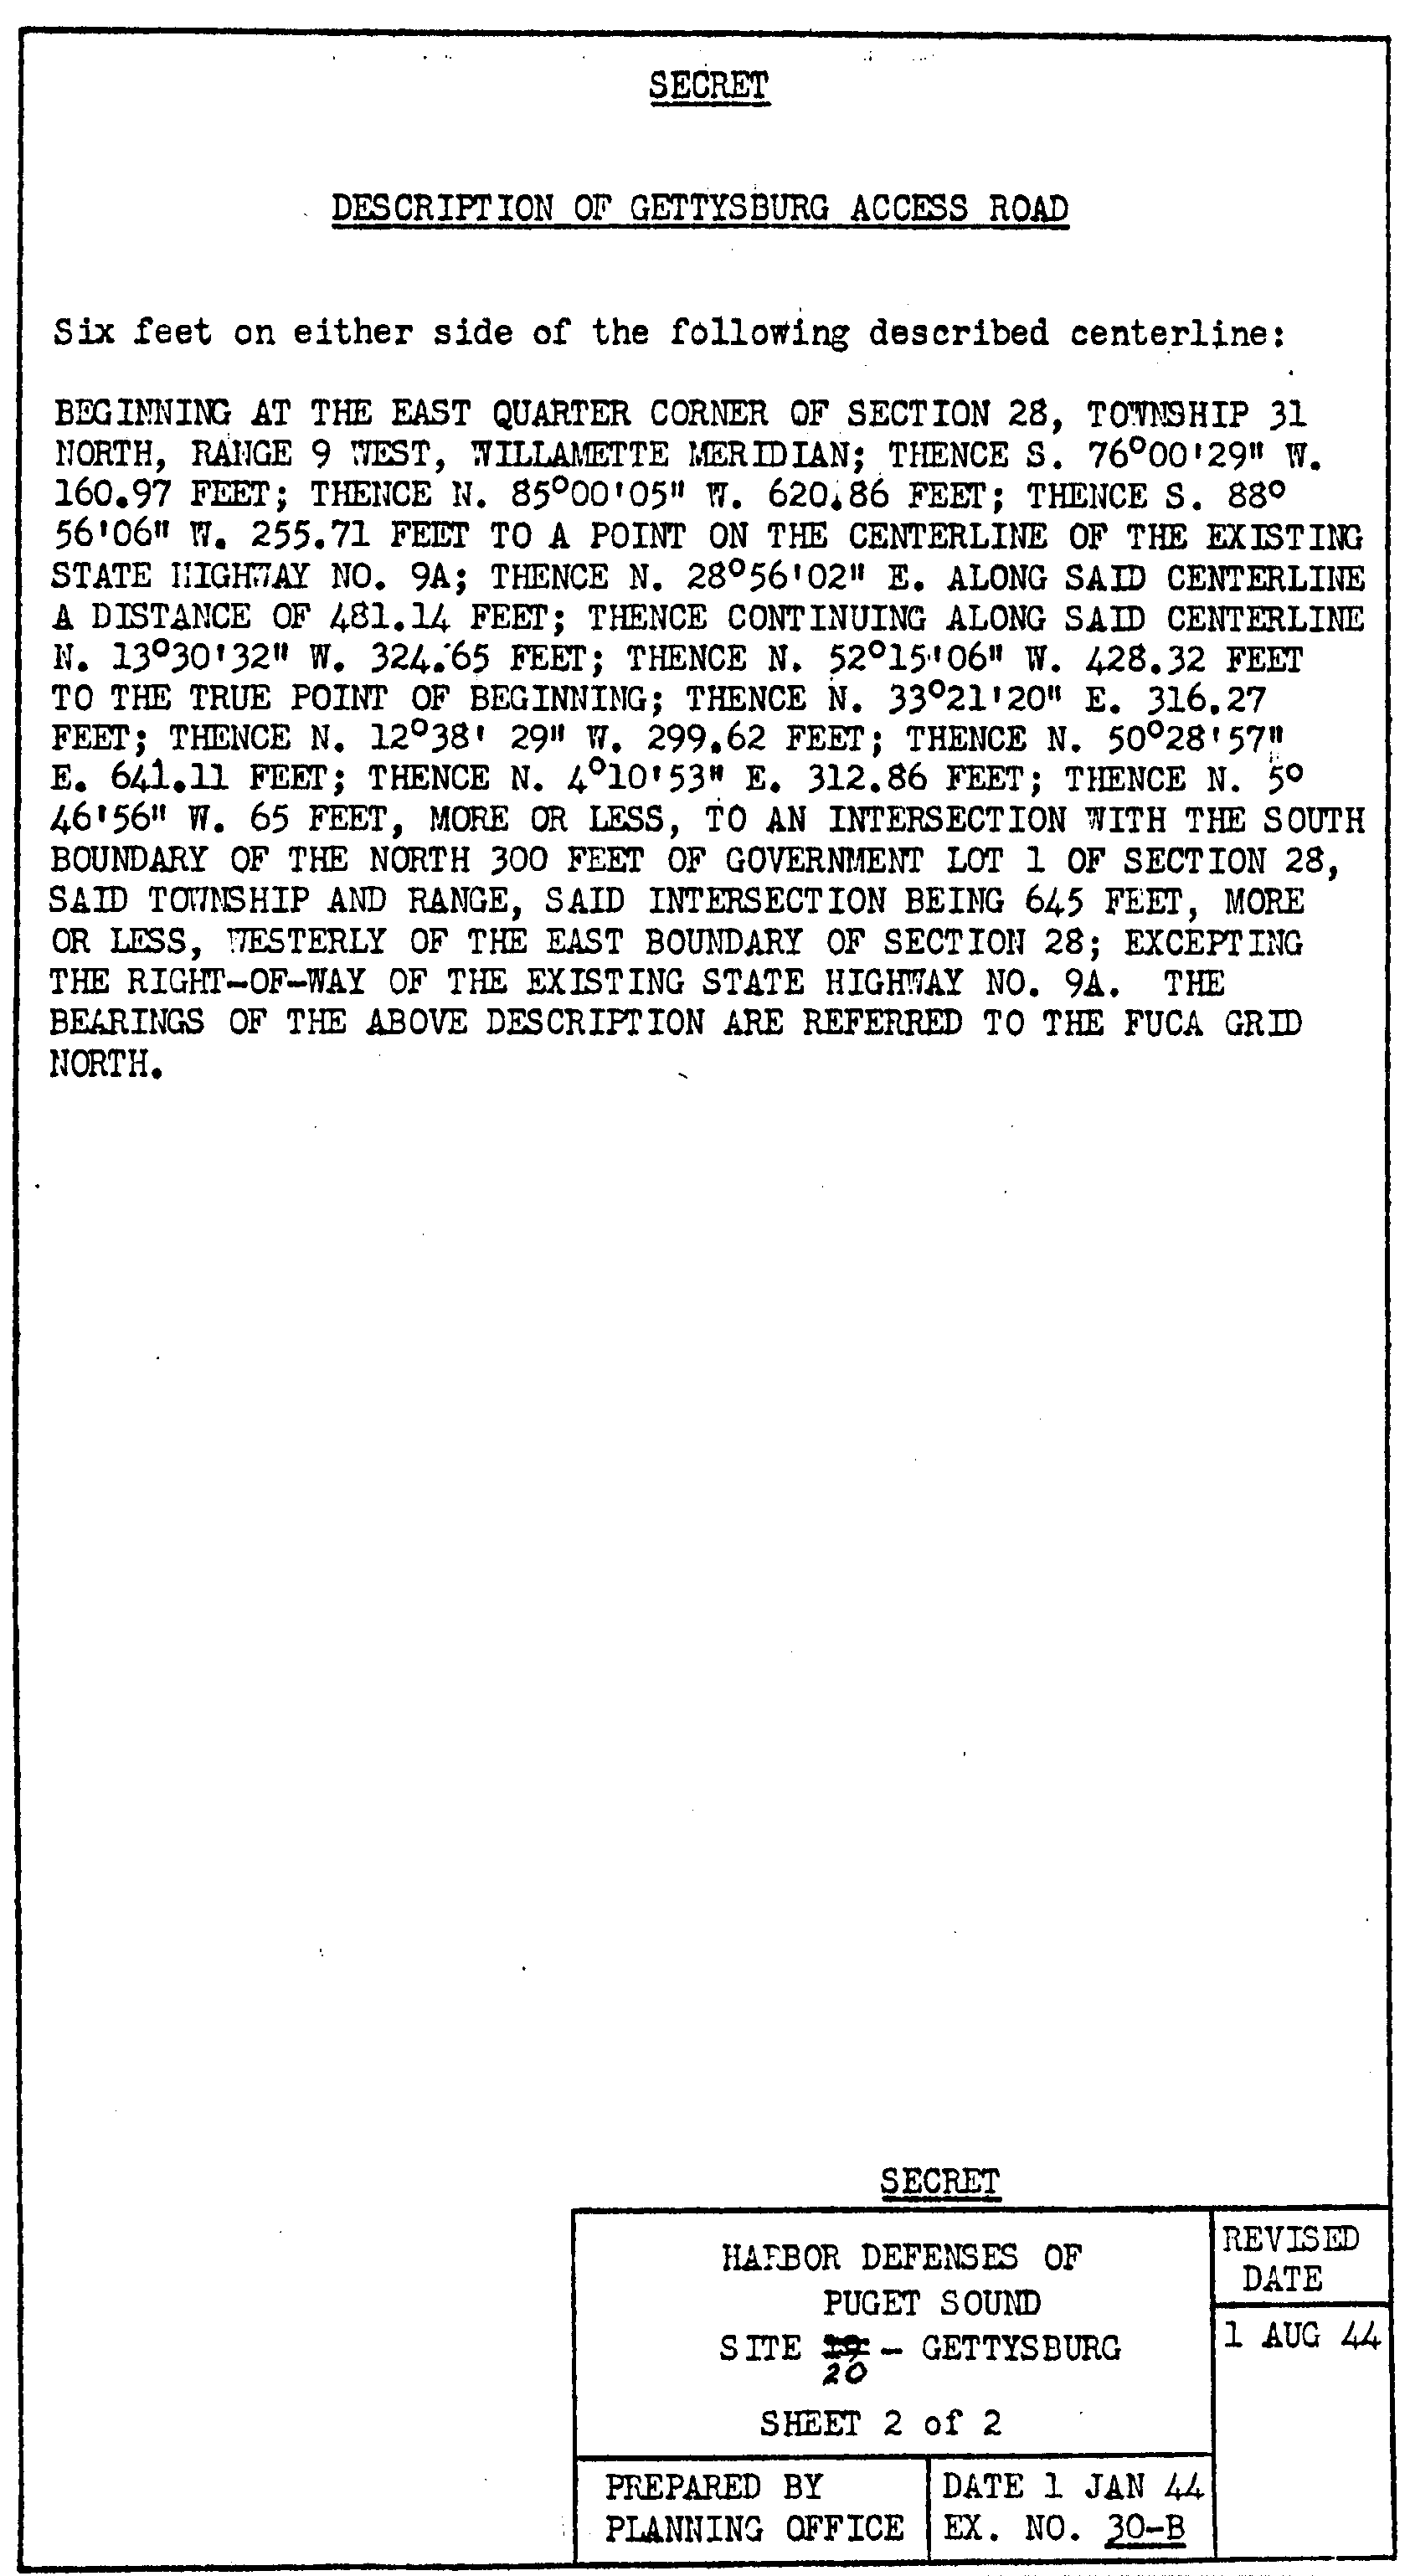
30 - B , Fire Control Locations - Site 20 - Gettysburg, sheet 1 of 2
30 - B , Fire Control Locations - Site 20 - Gettysburg, sheet 2 of 2
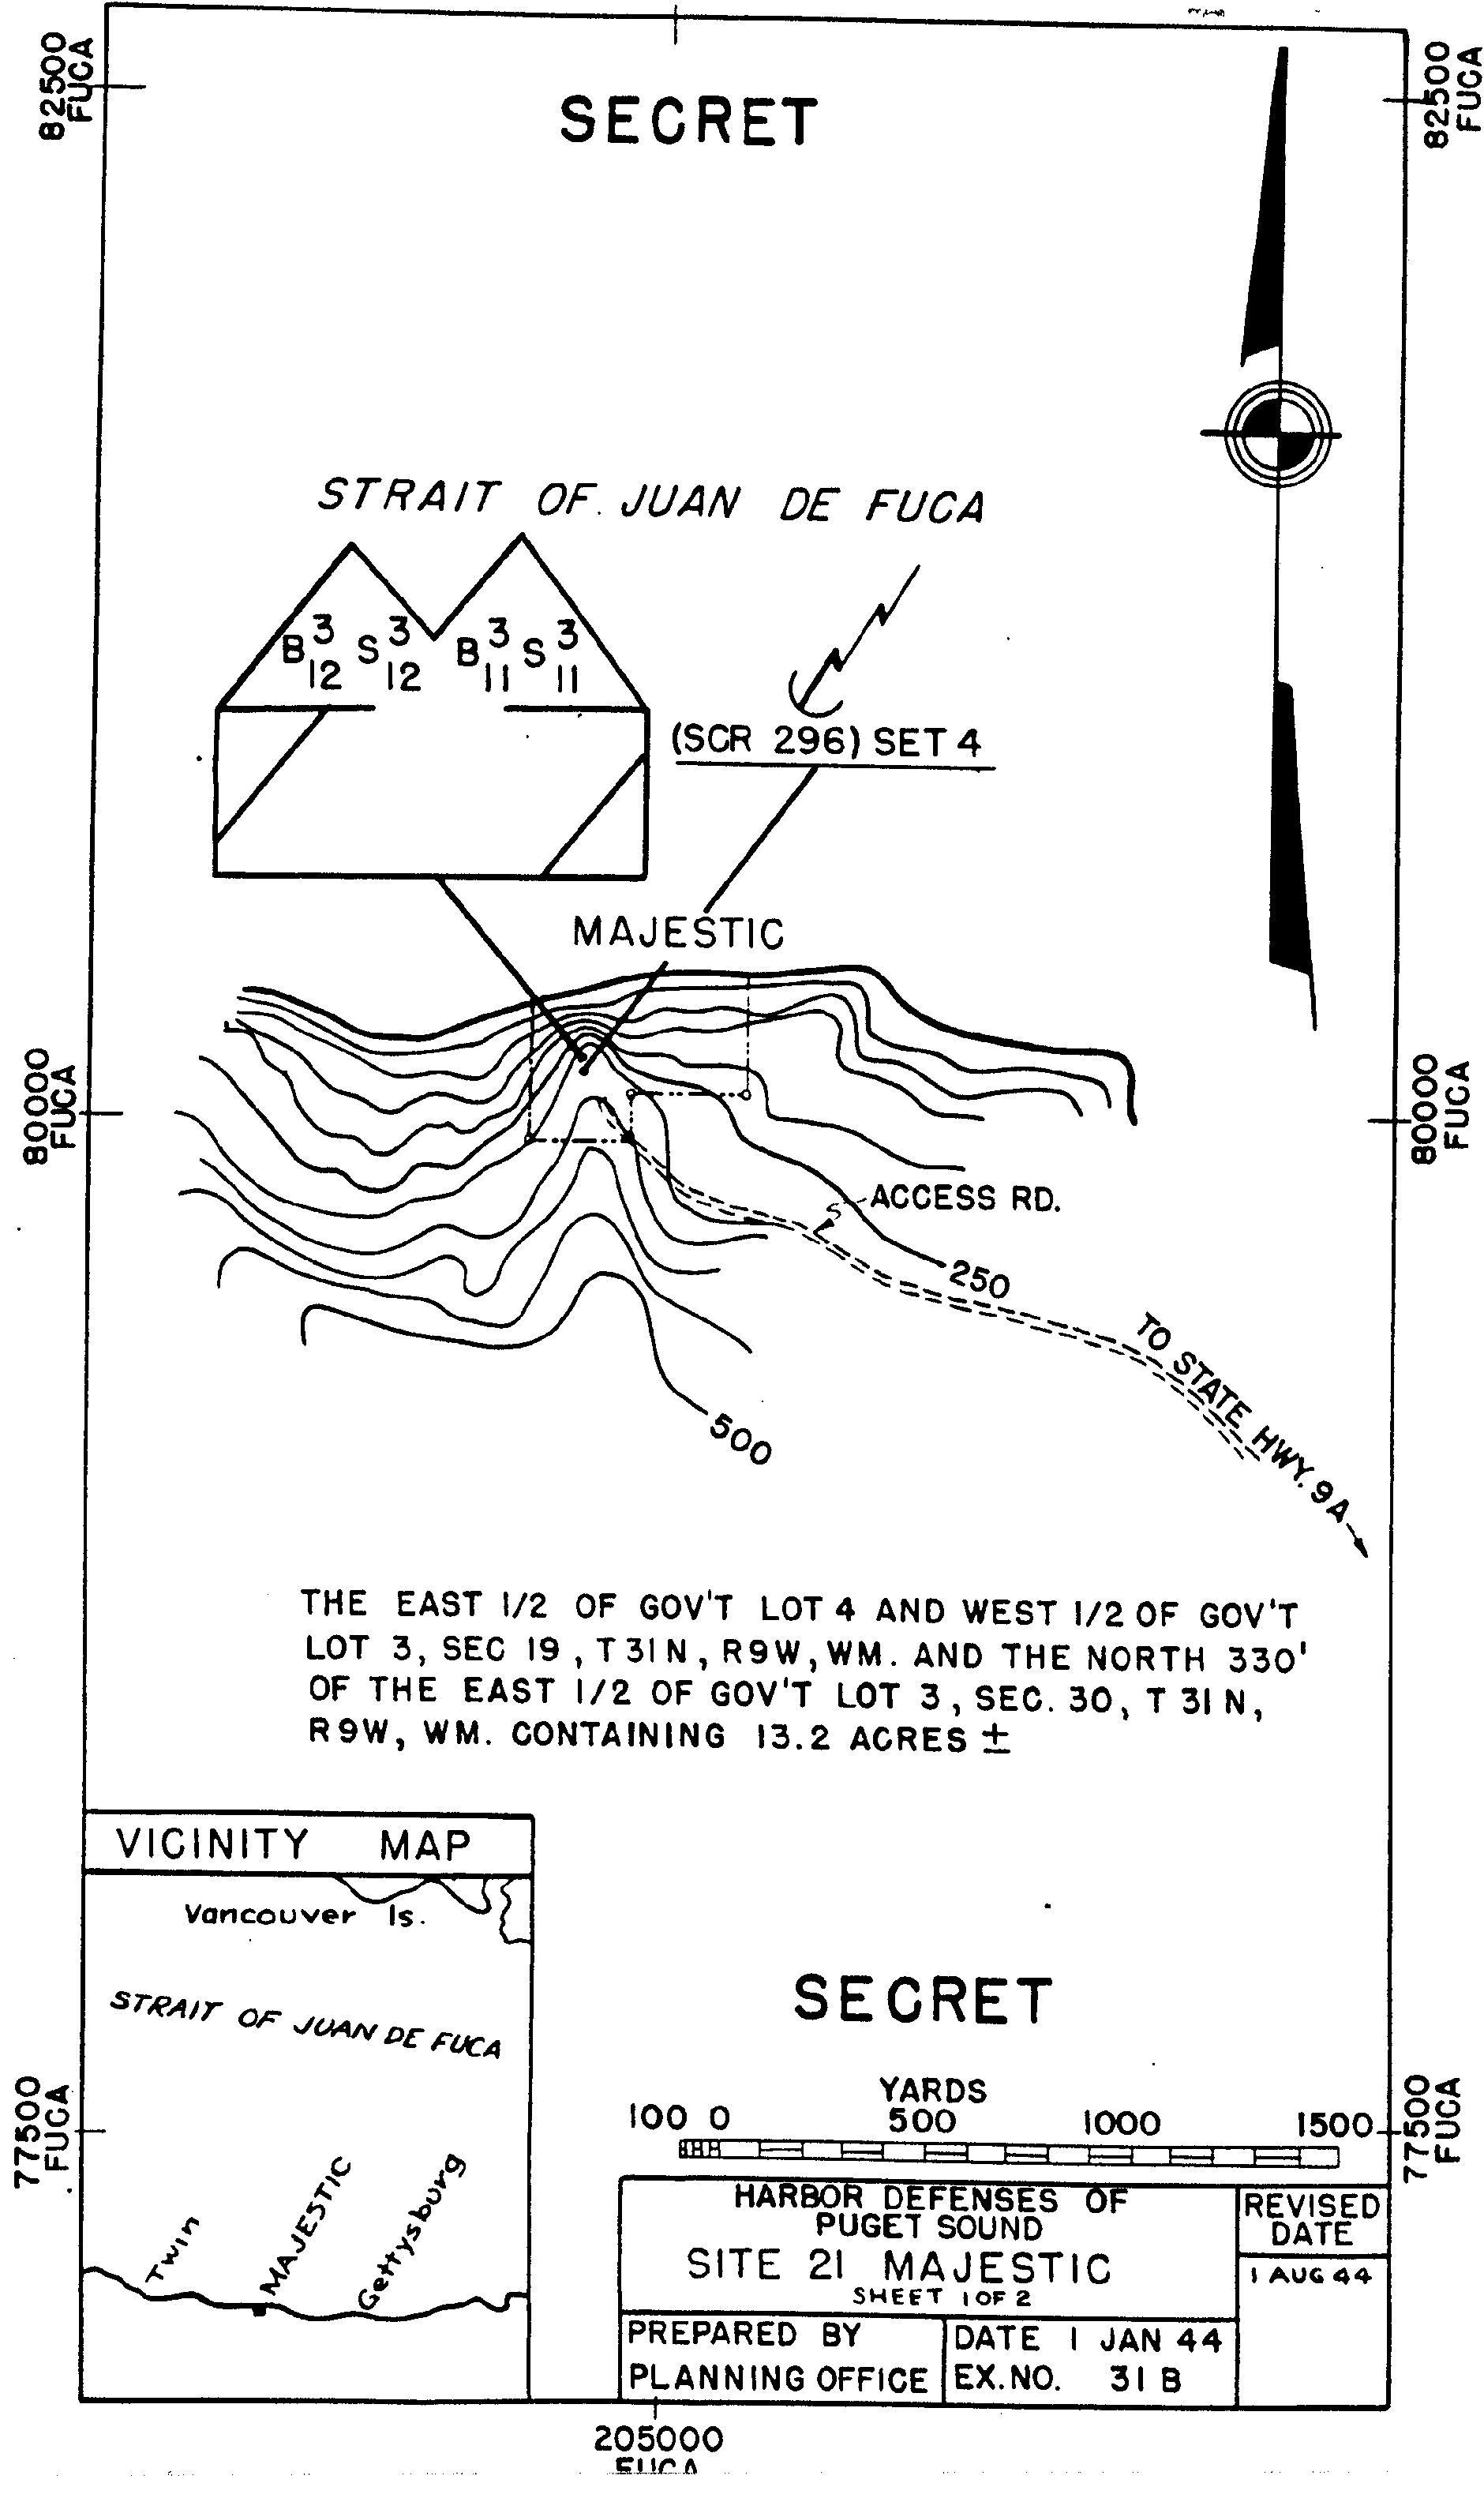
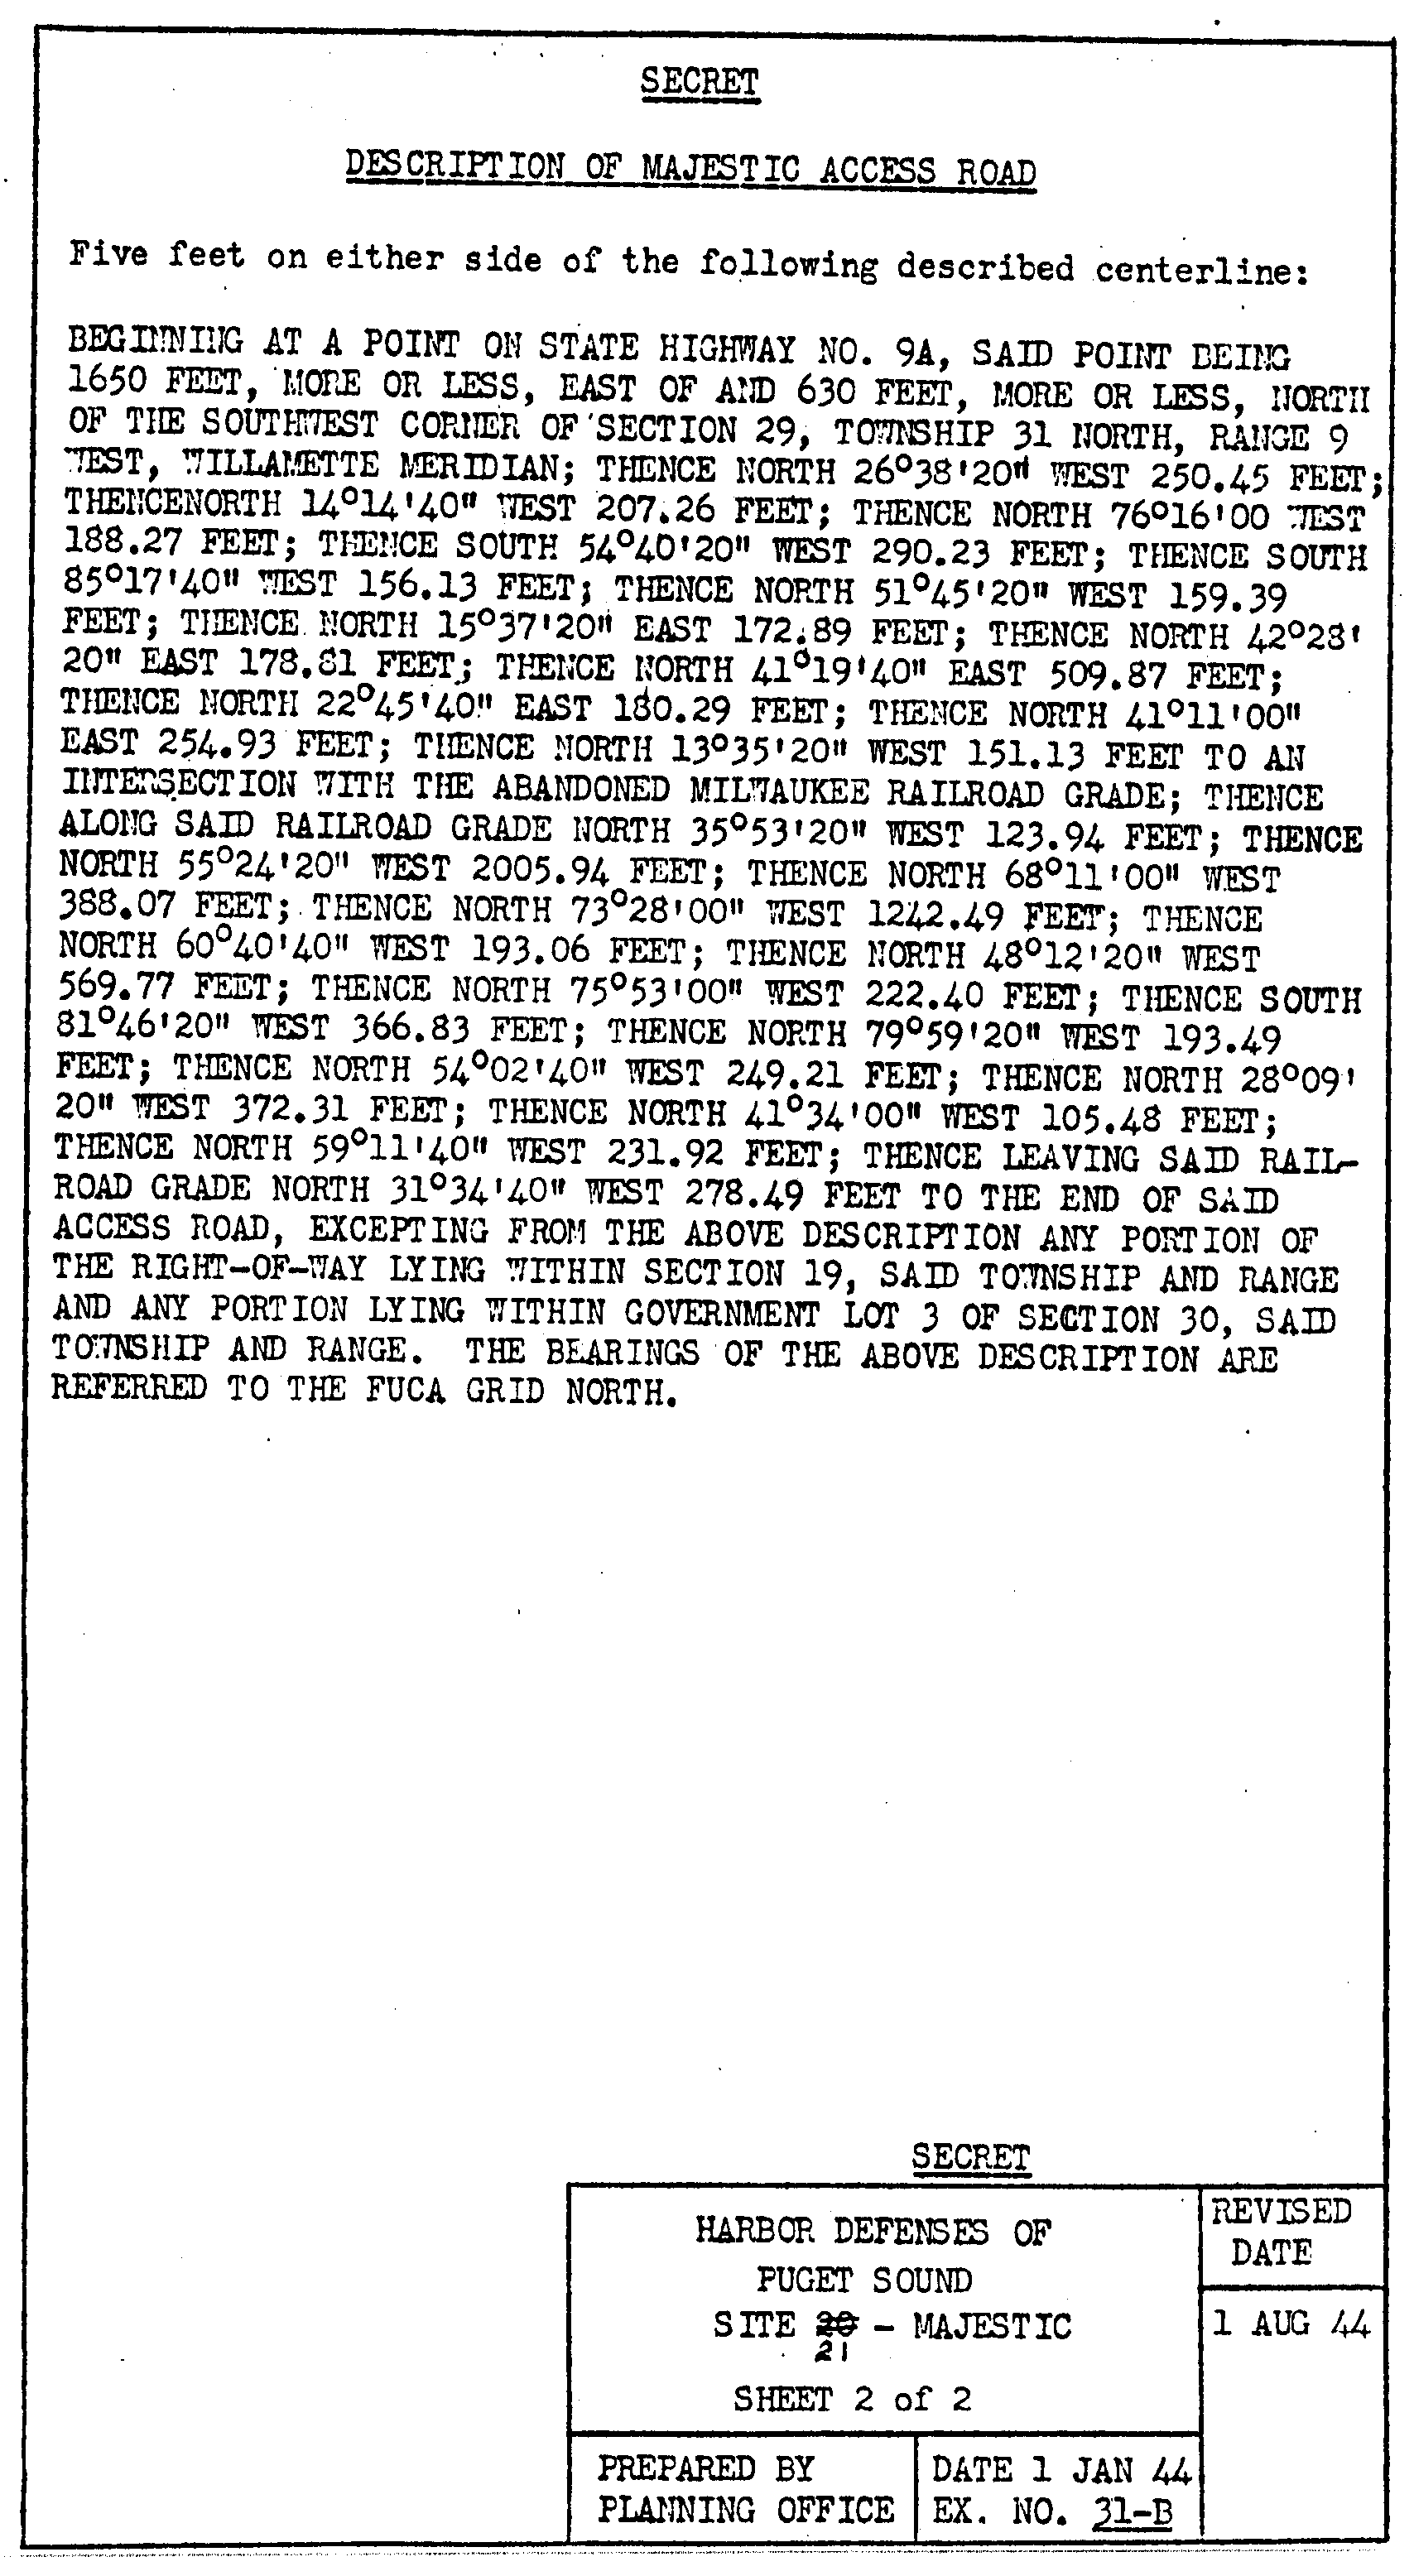
31 - B , Fire Control Locations - Site 21 - Majestic, sheet 1 of 2
31 - B , Fire Control Locations - Site 21 - Majestic, sheet 2 of 2
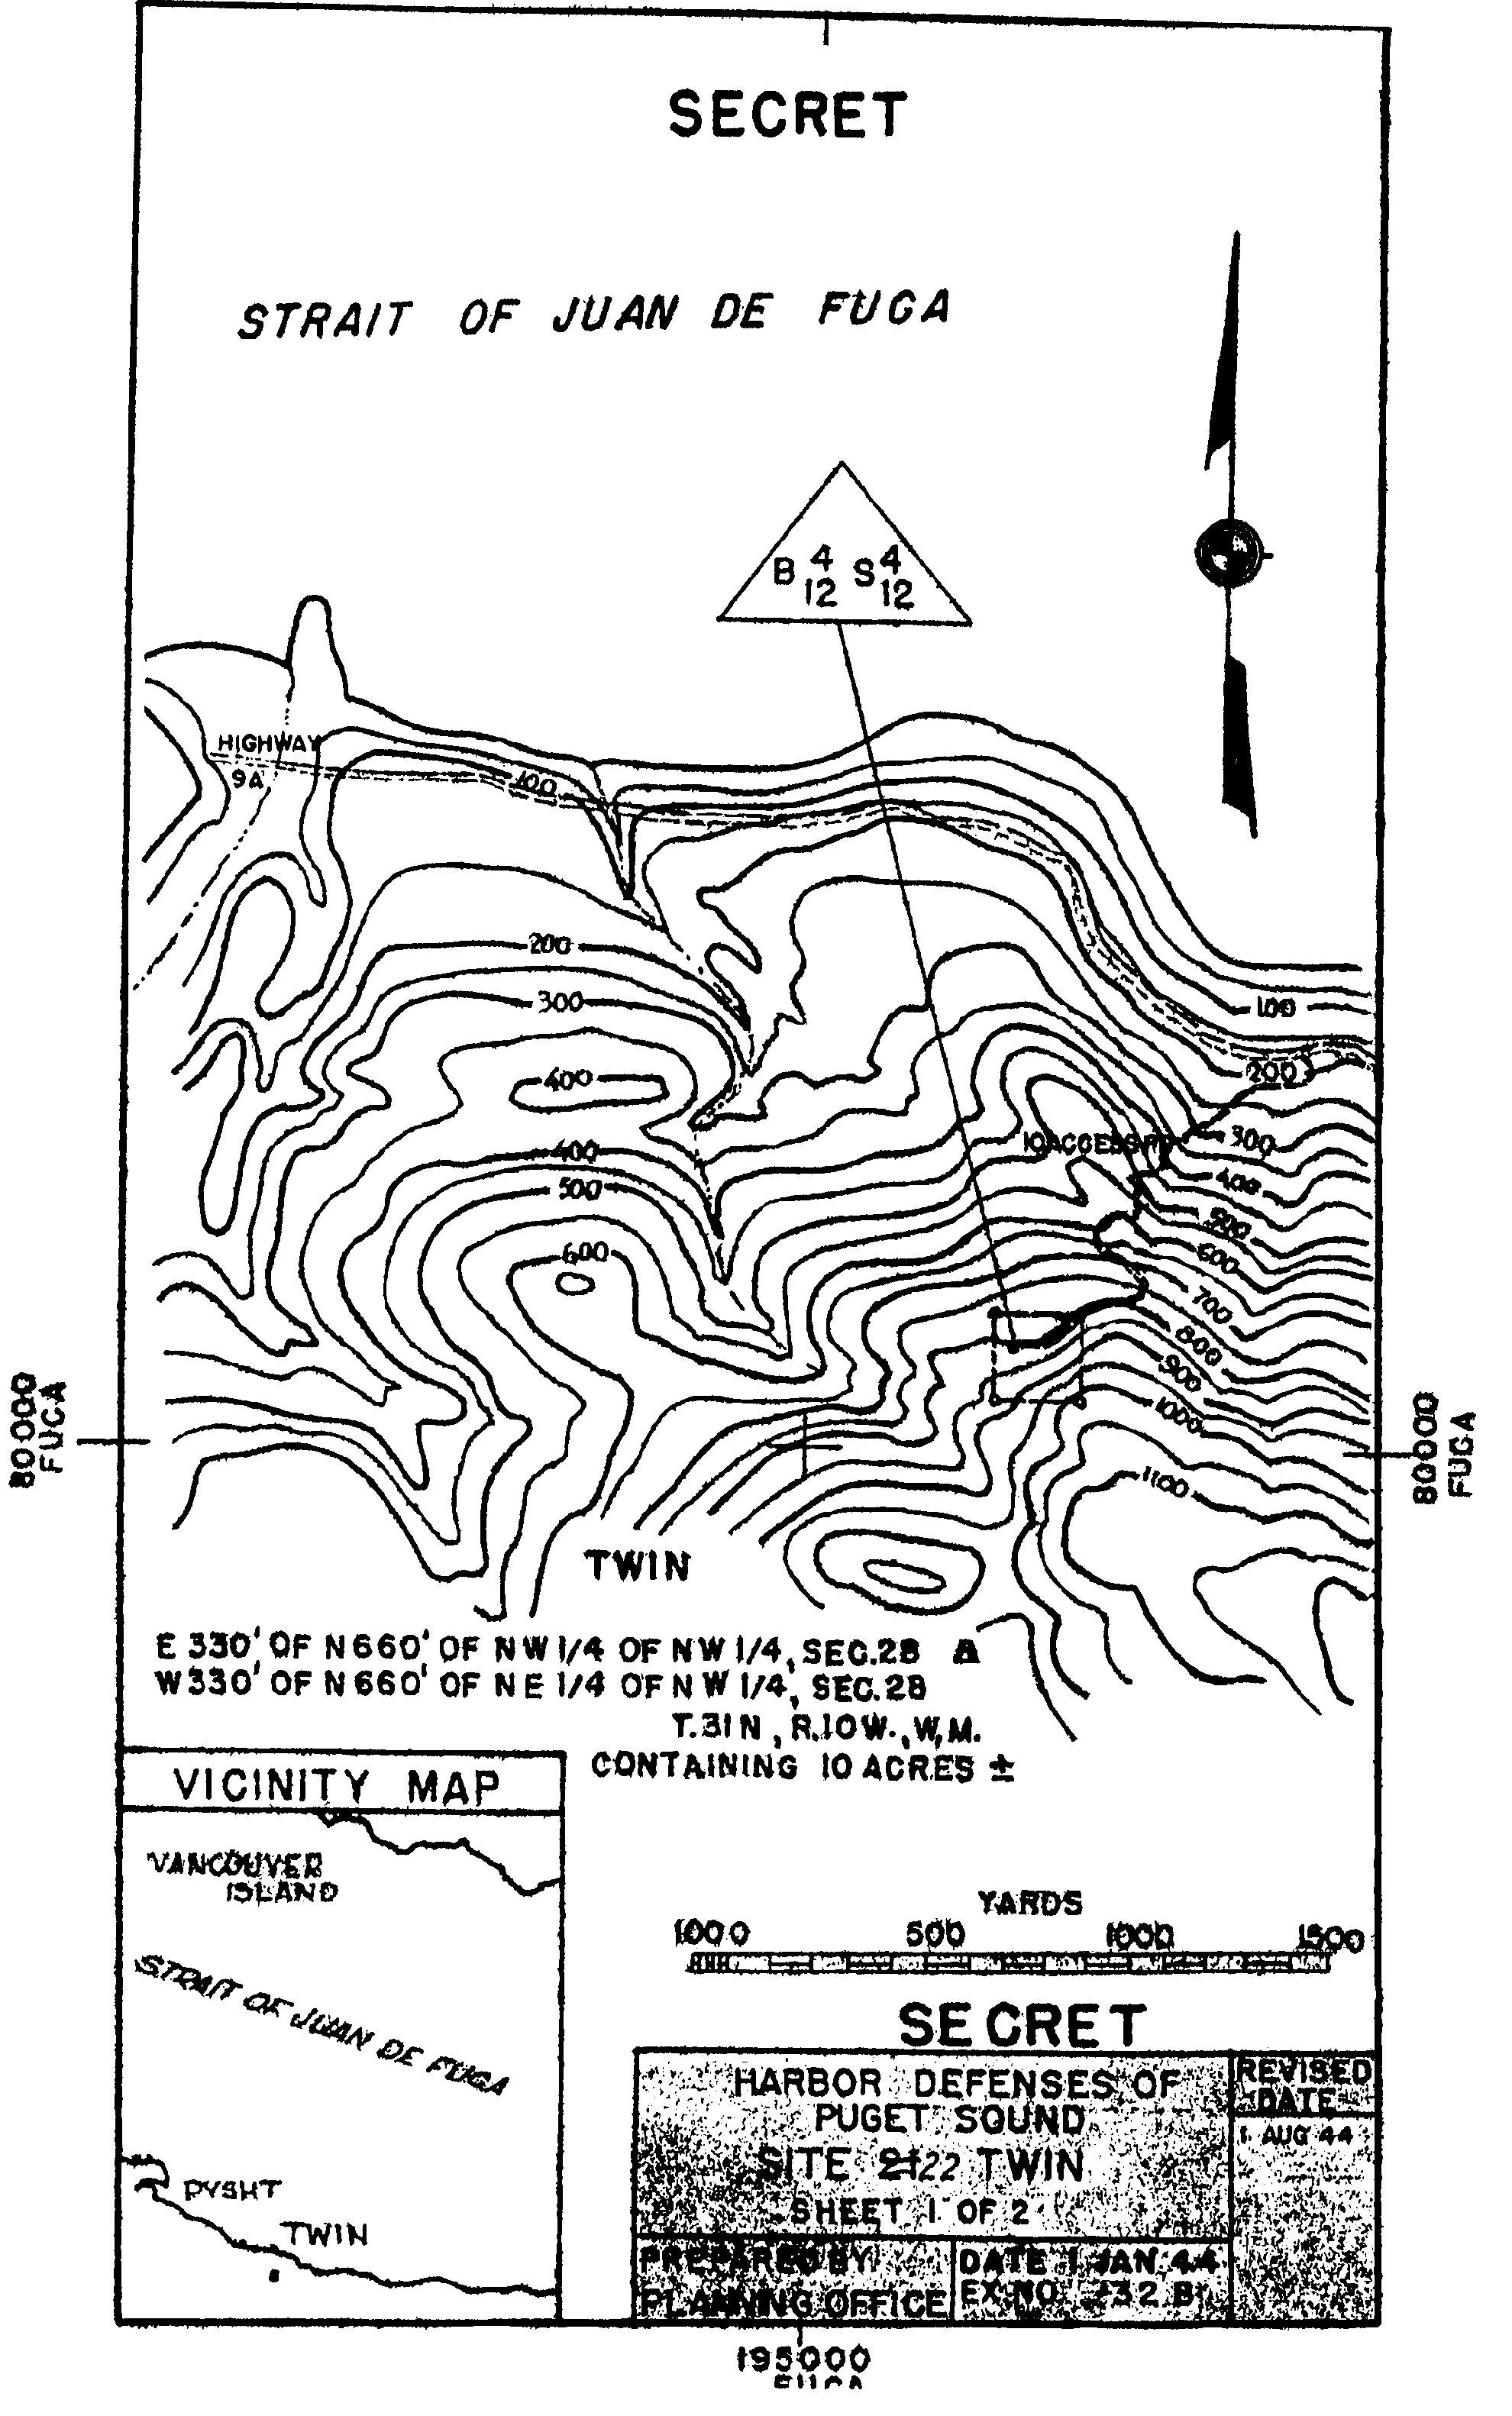
32 - B , Fire Control Locations - Site 22 - Twin, sheet 1 of 2
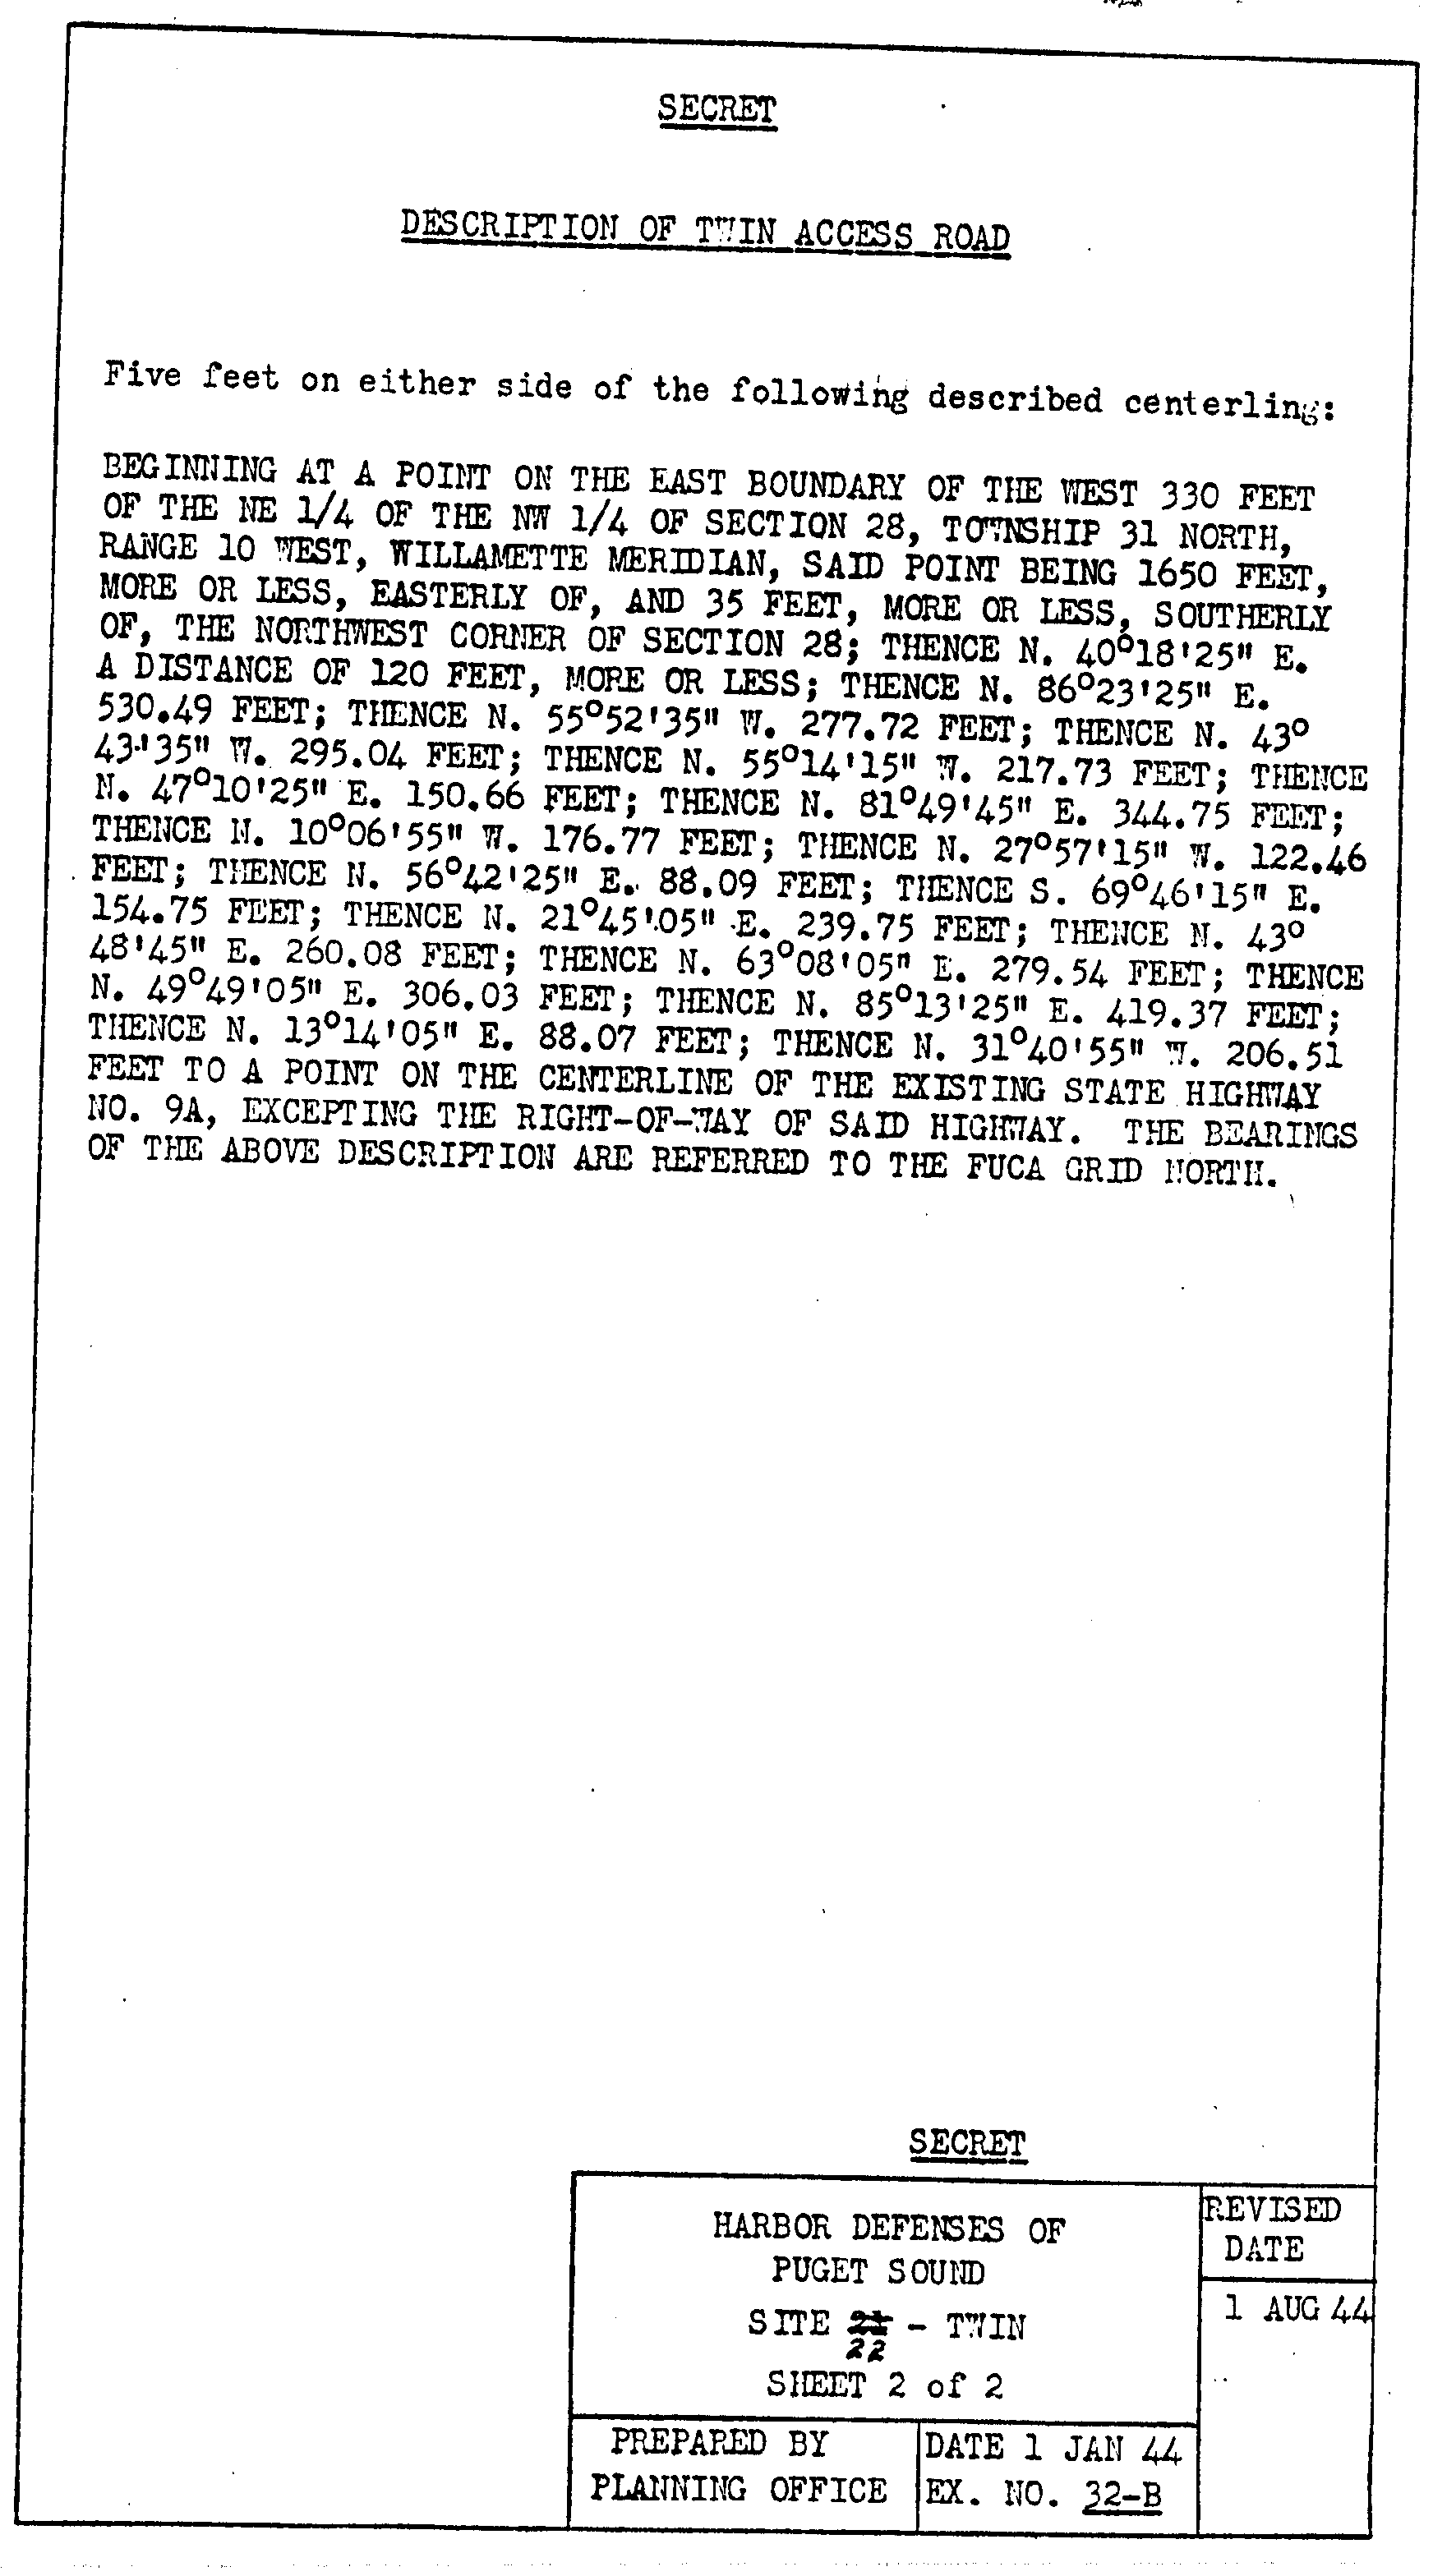
32 - B , Fire Control Locations - Site 22 - Twin, sheet 2 of 2
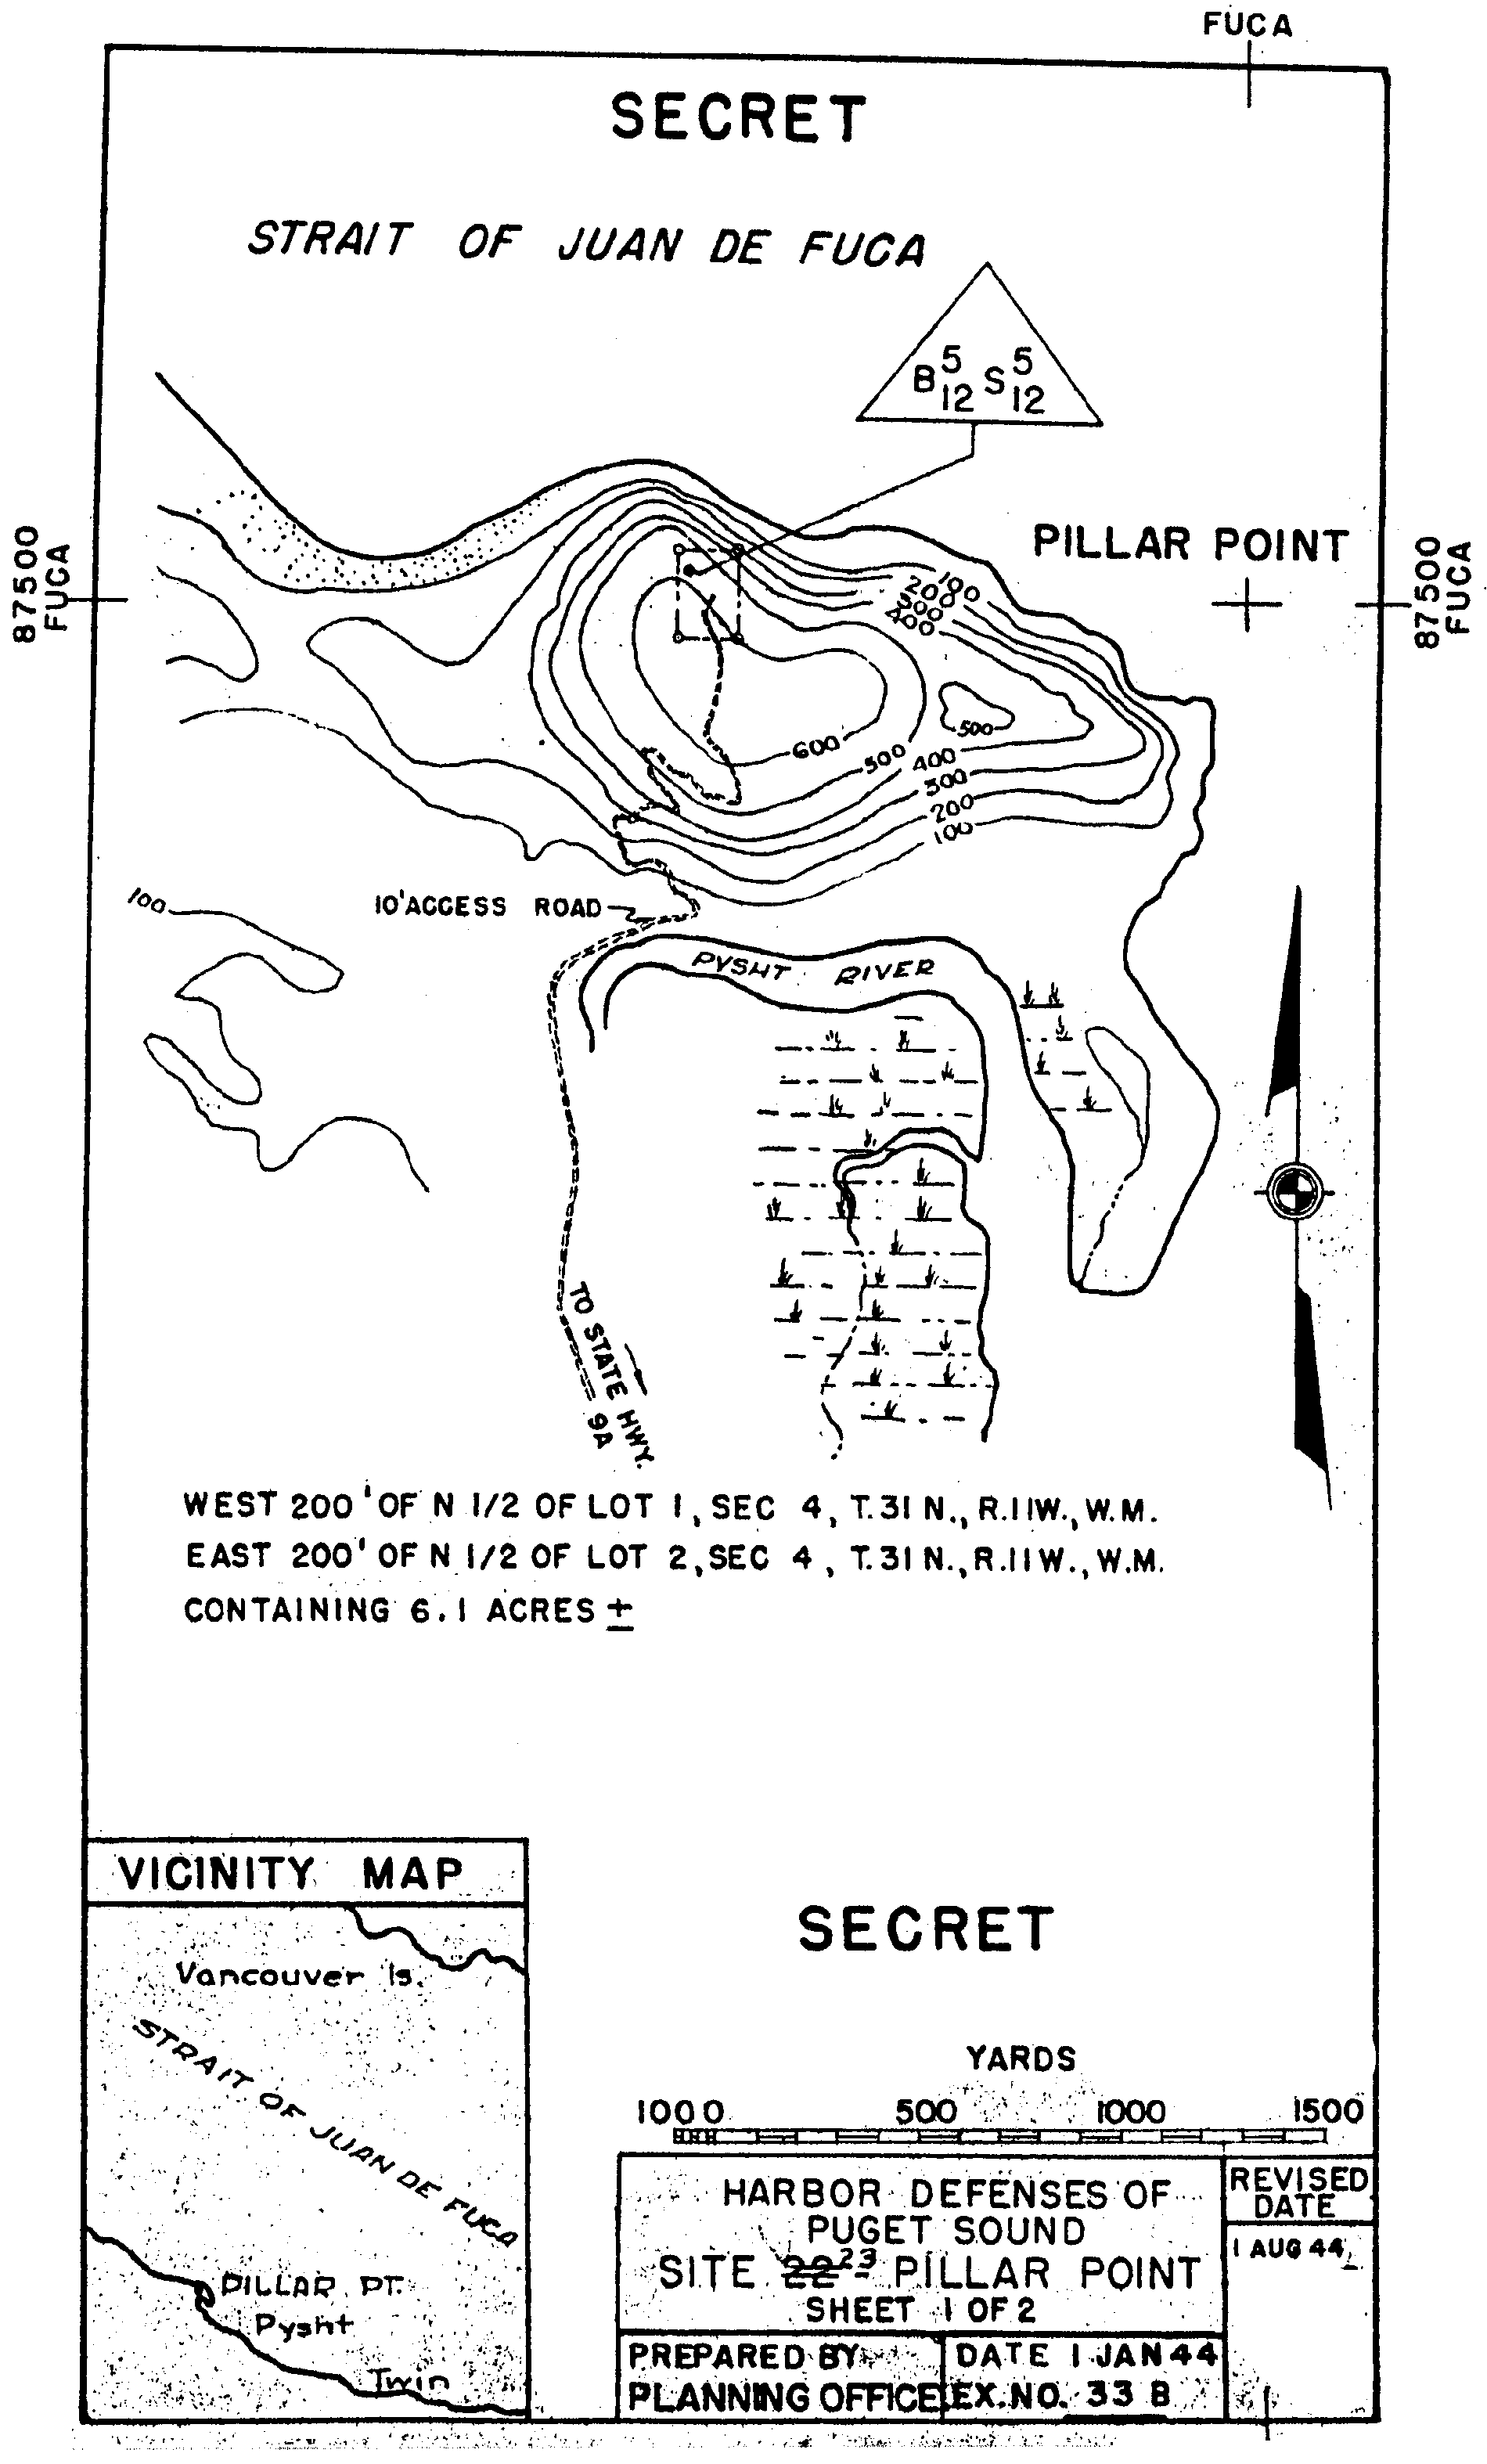
33 - B , Fire Control Locations - Site 23 - Pillar Point, sheet 1 of 2
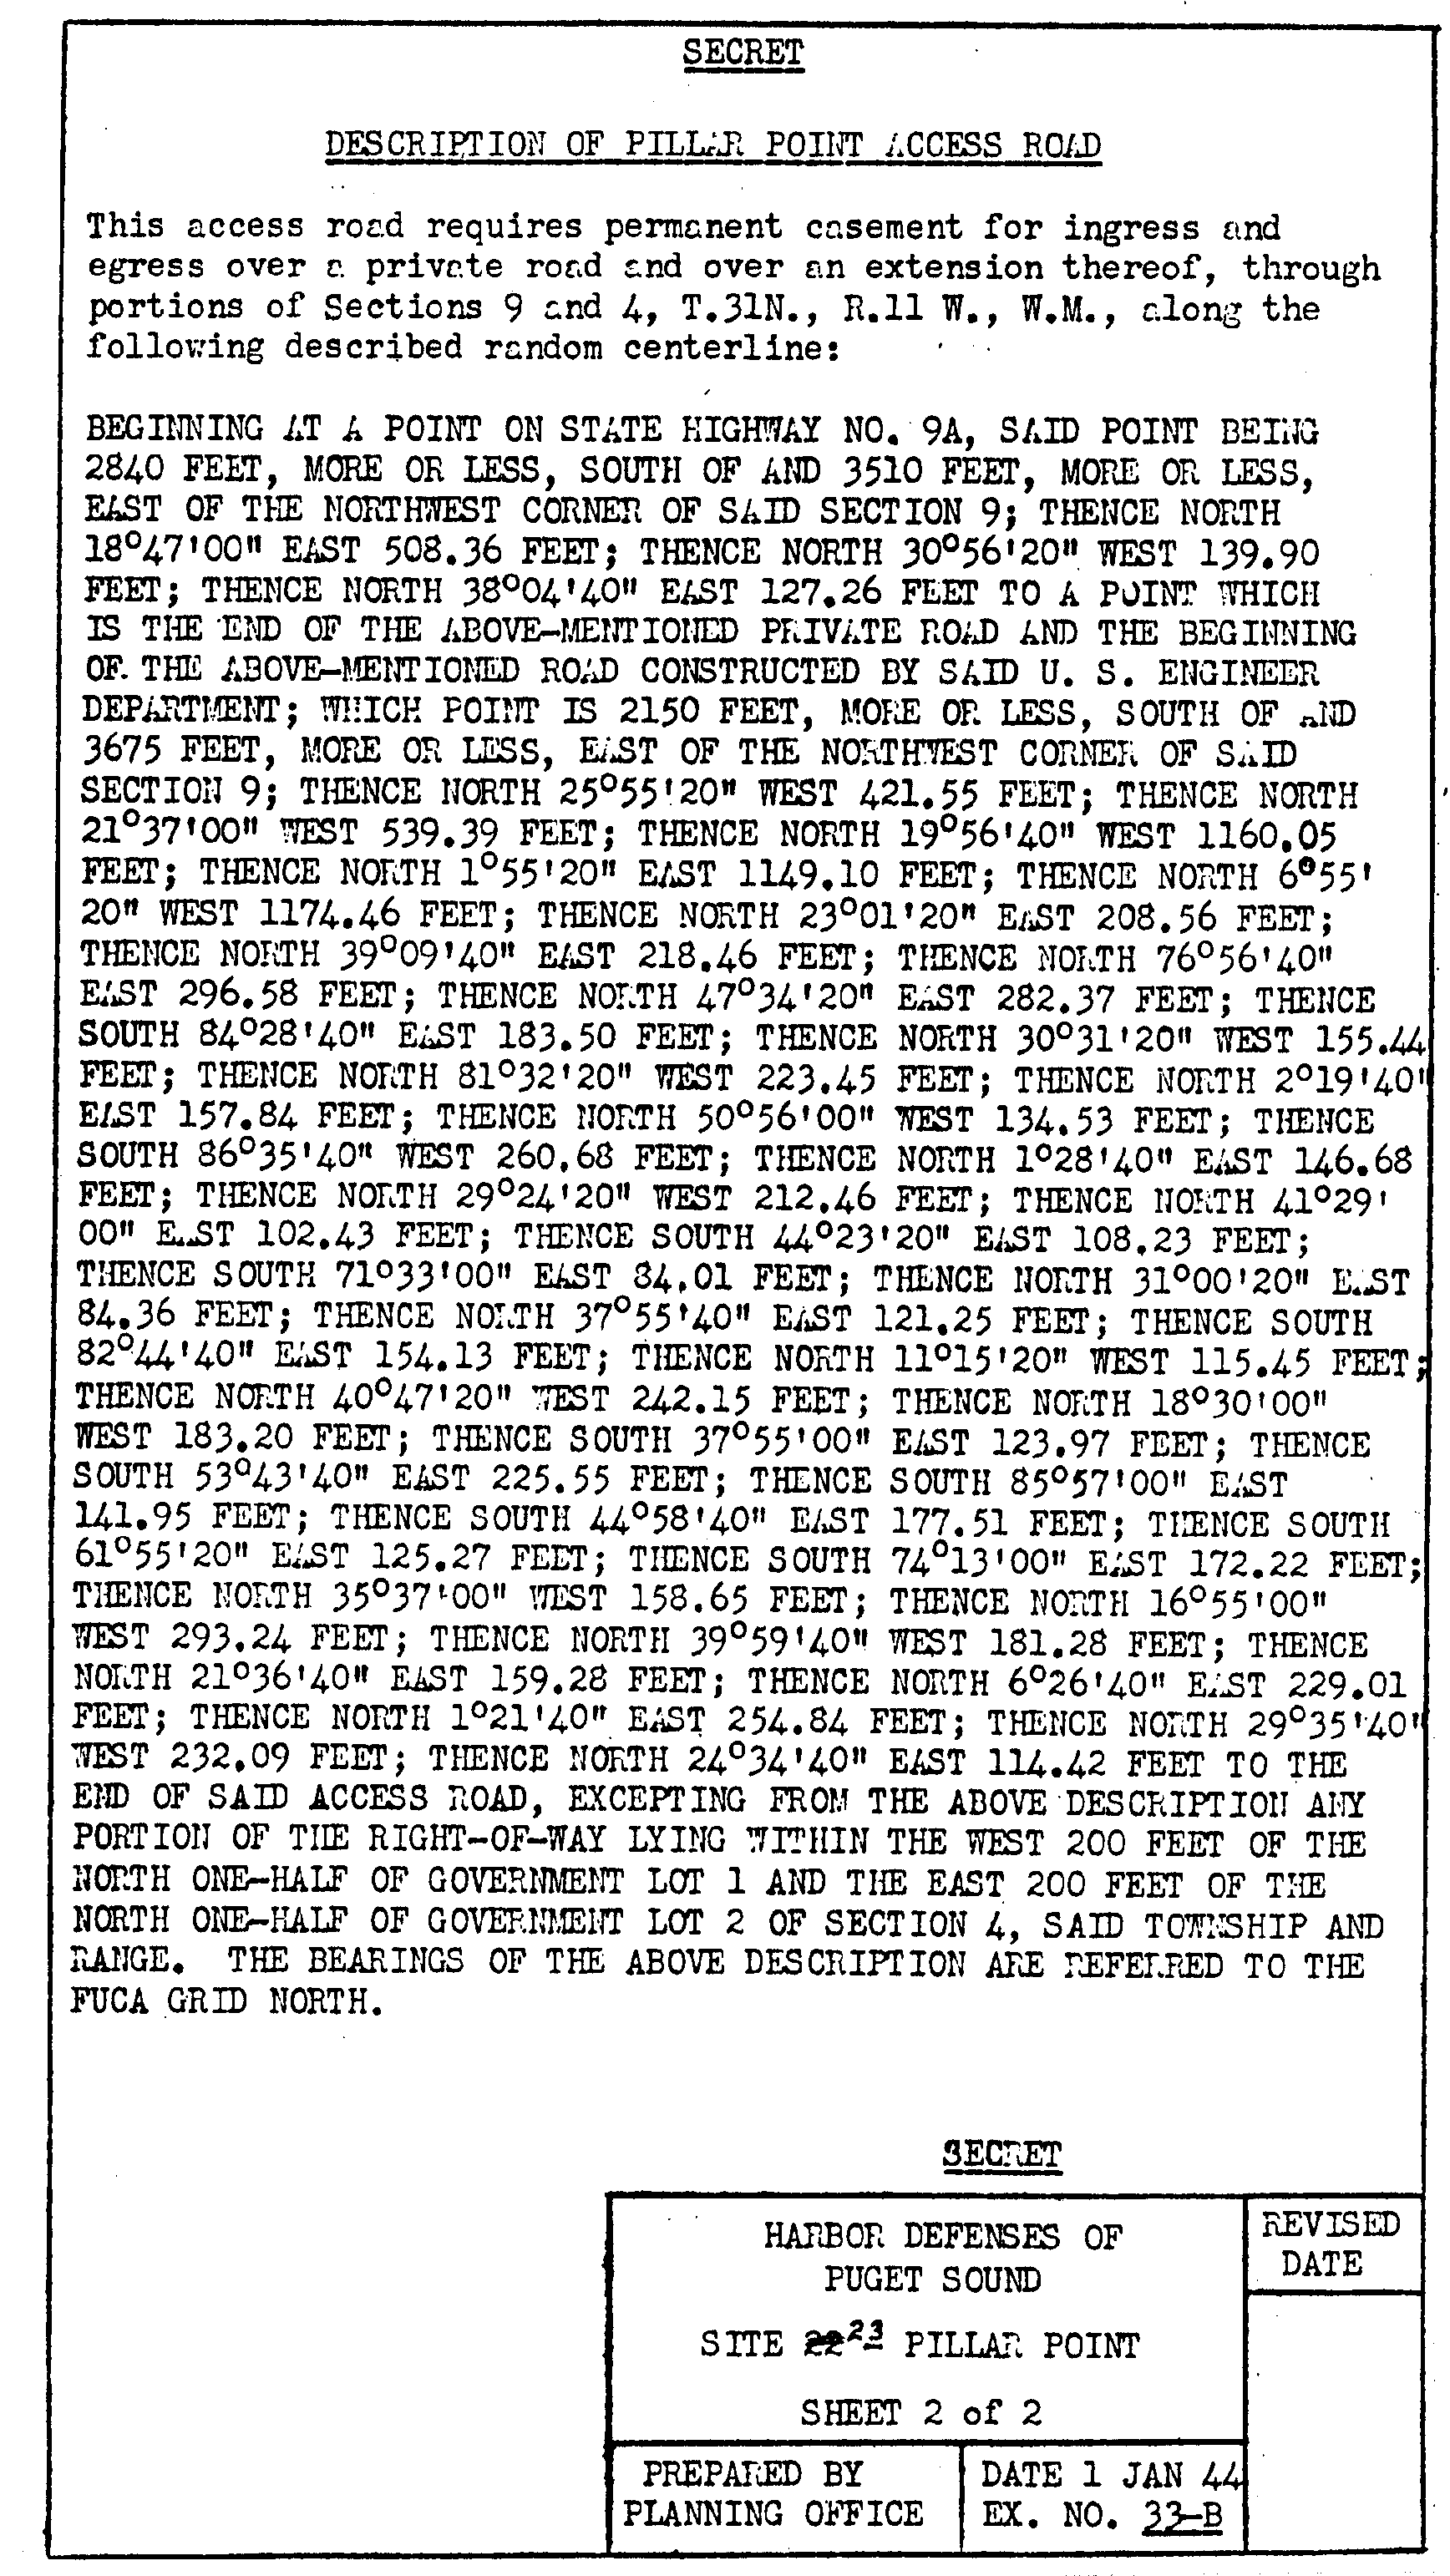
33 - B , Fire Control Locations - Site 23 - Pillar Point, sheet 2 of 2
34 - B , Grid System
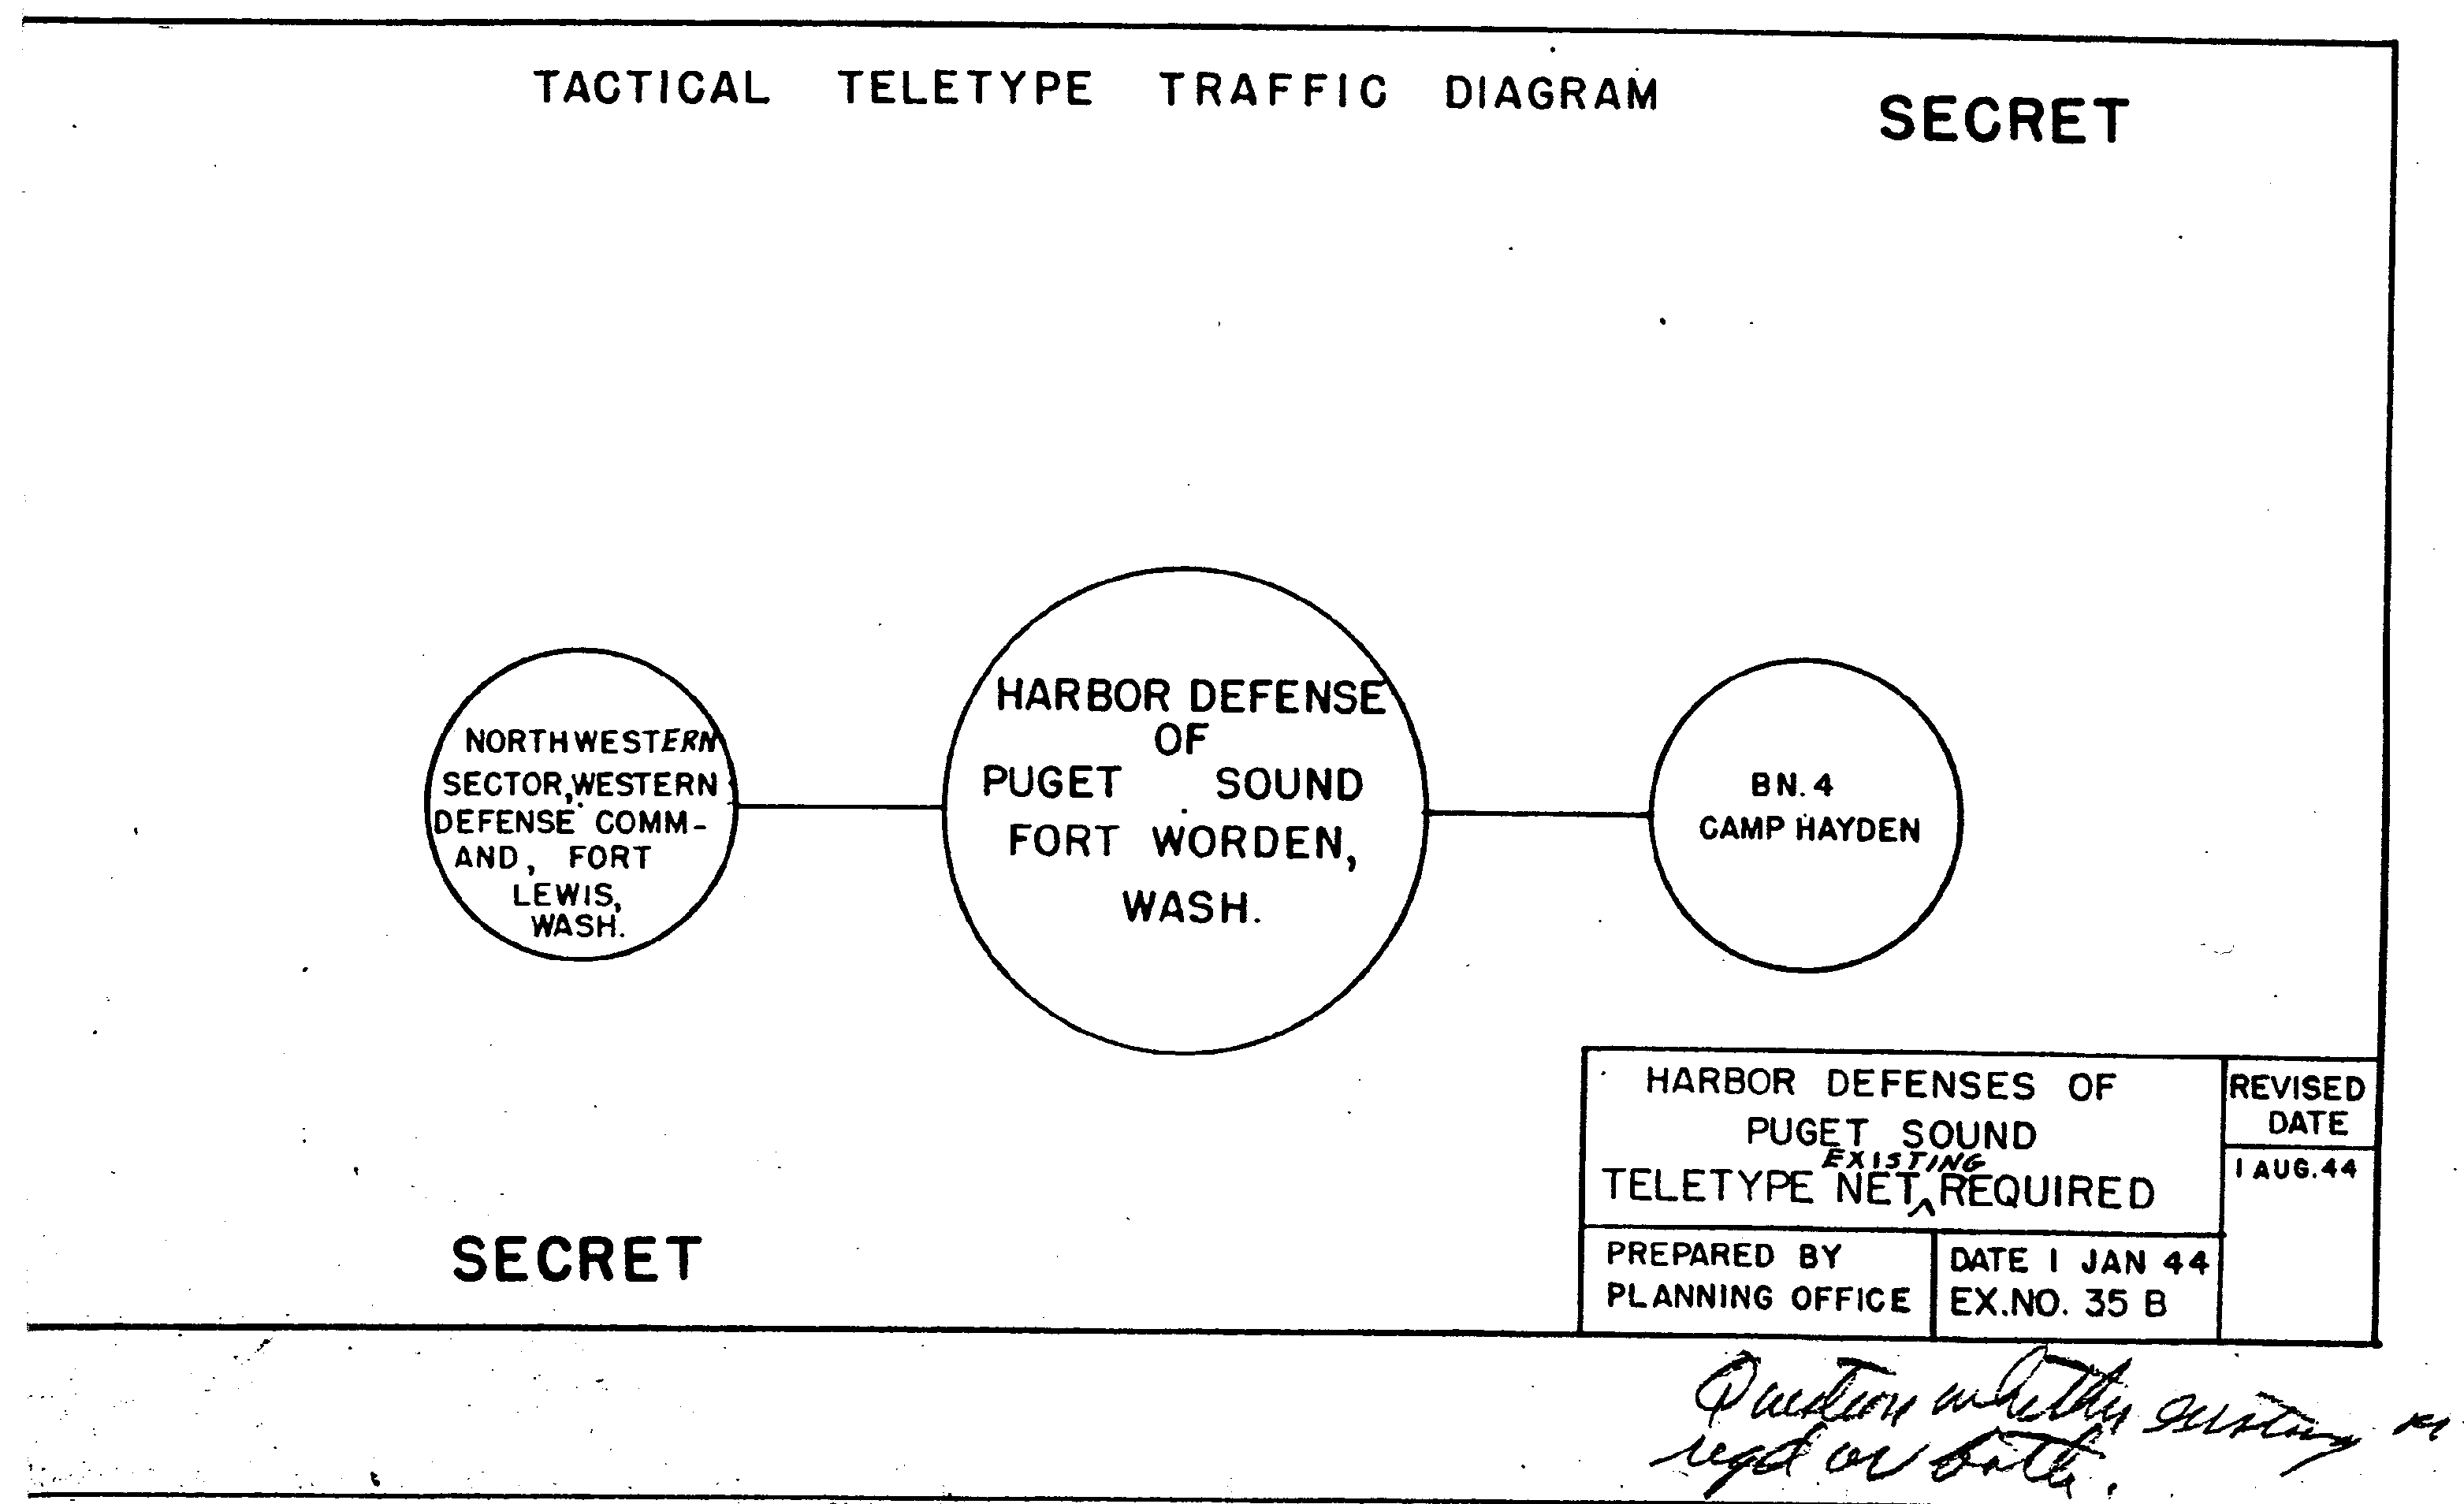
35 - B , Teletype Net - Existing and Required
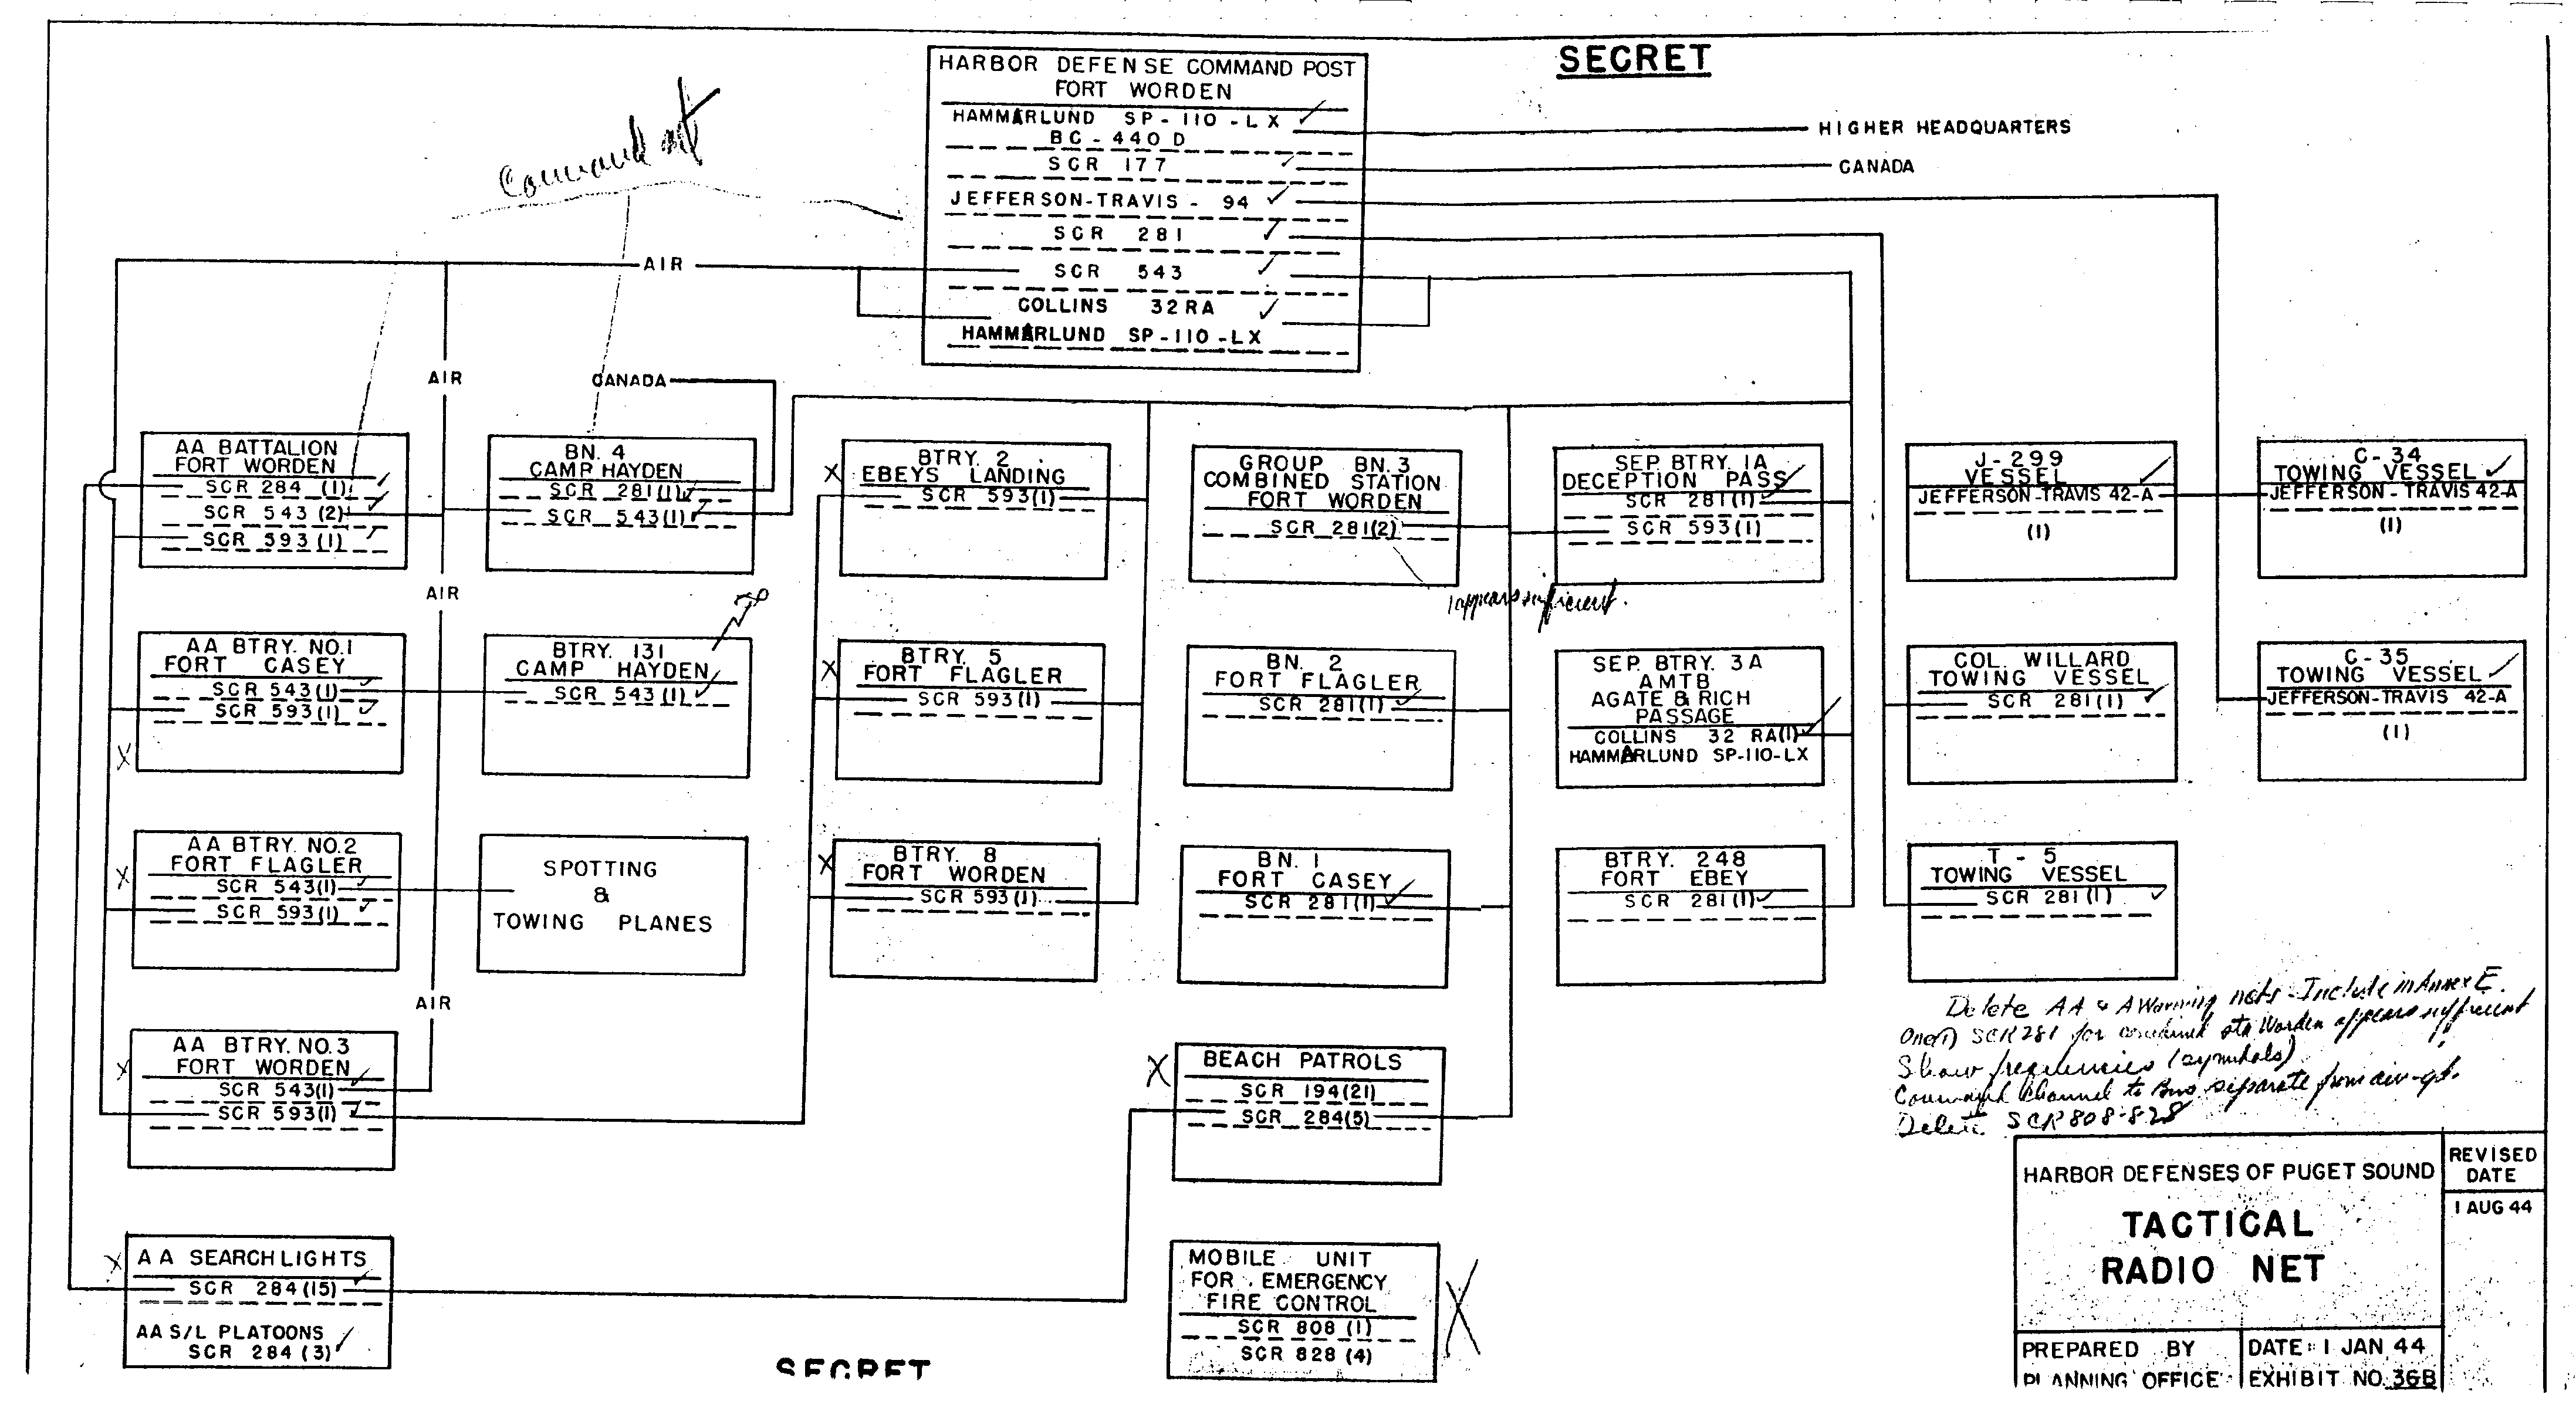
36 - B , Tactical Radio Net
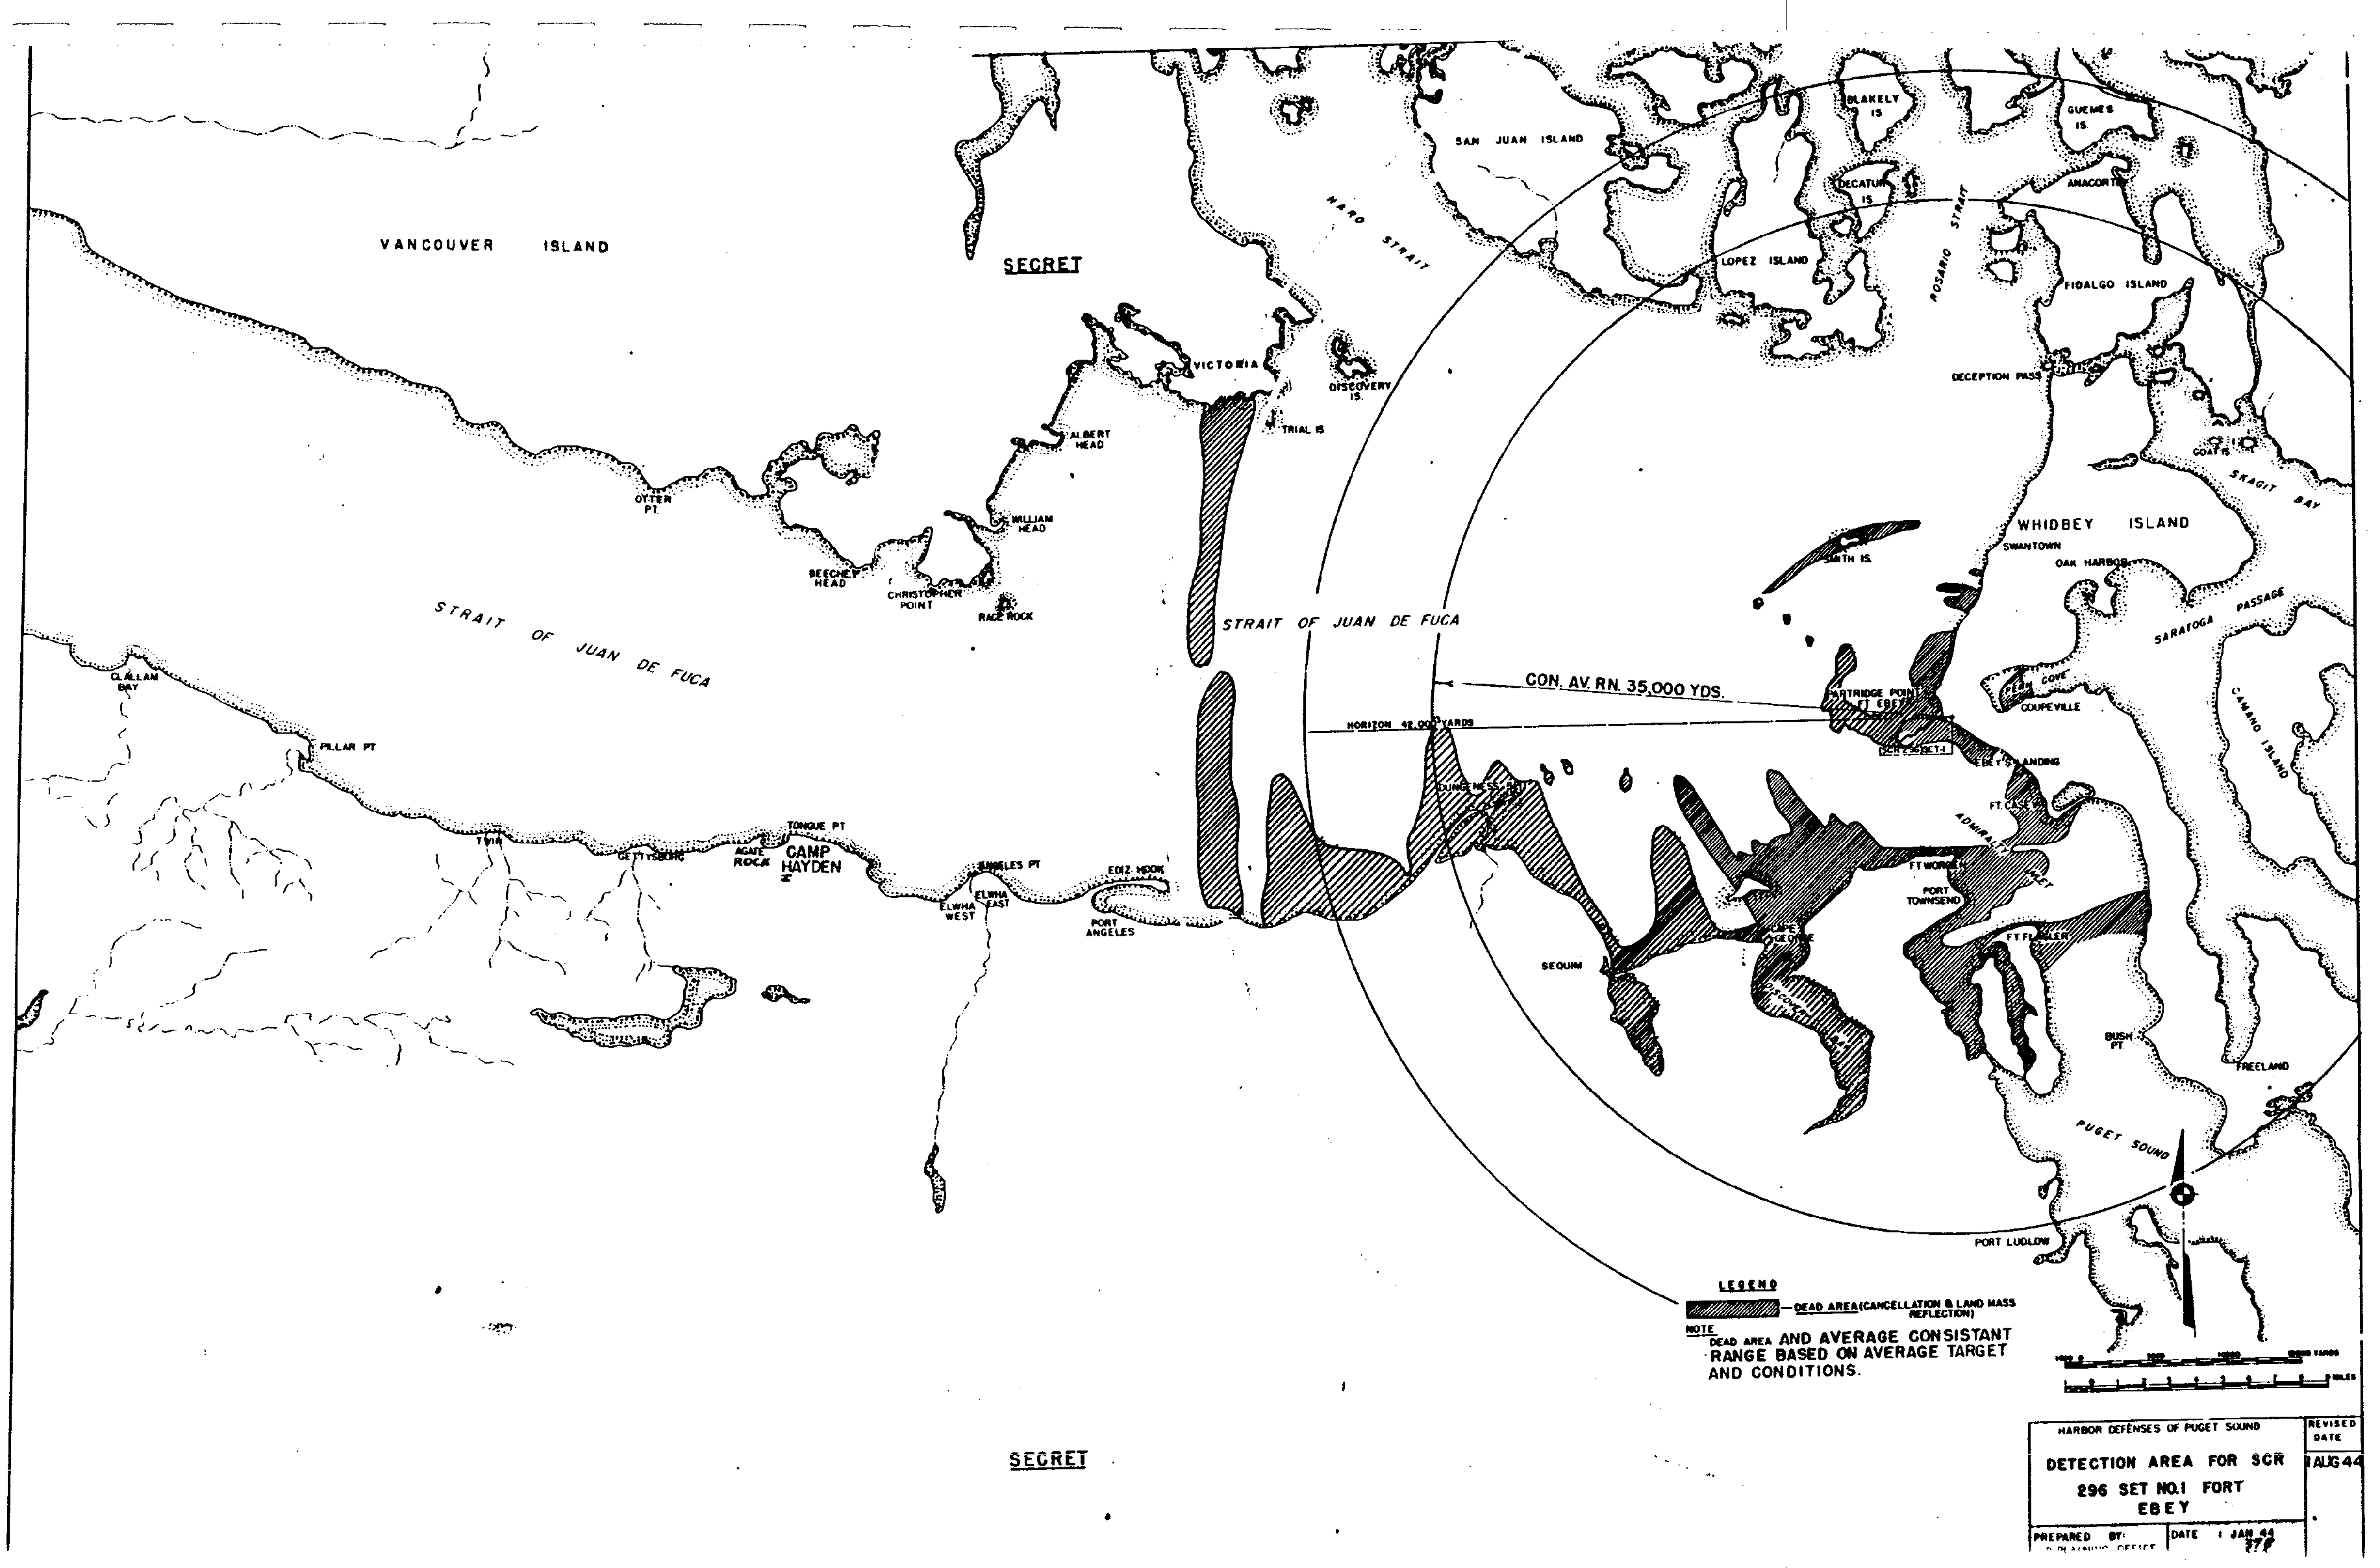
37 - B , Detection Area - Radio Set SCR-296 - Set No. 1 - Fort Ebey
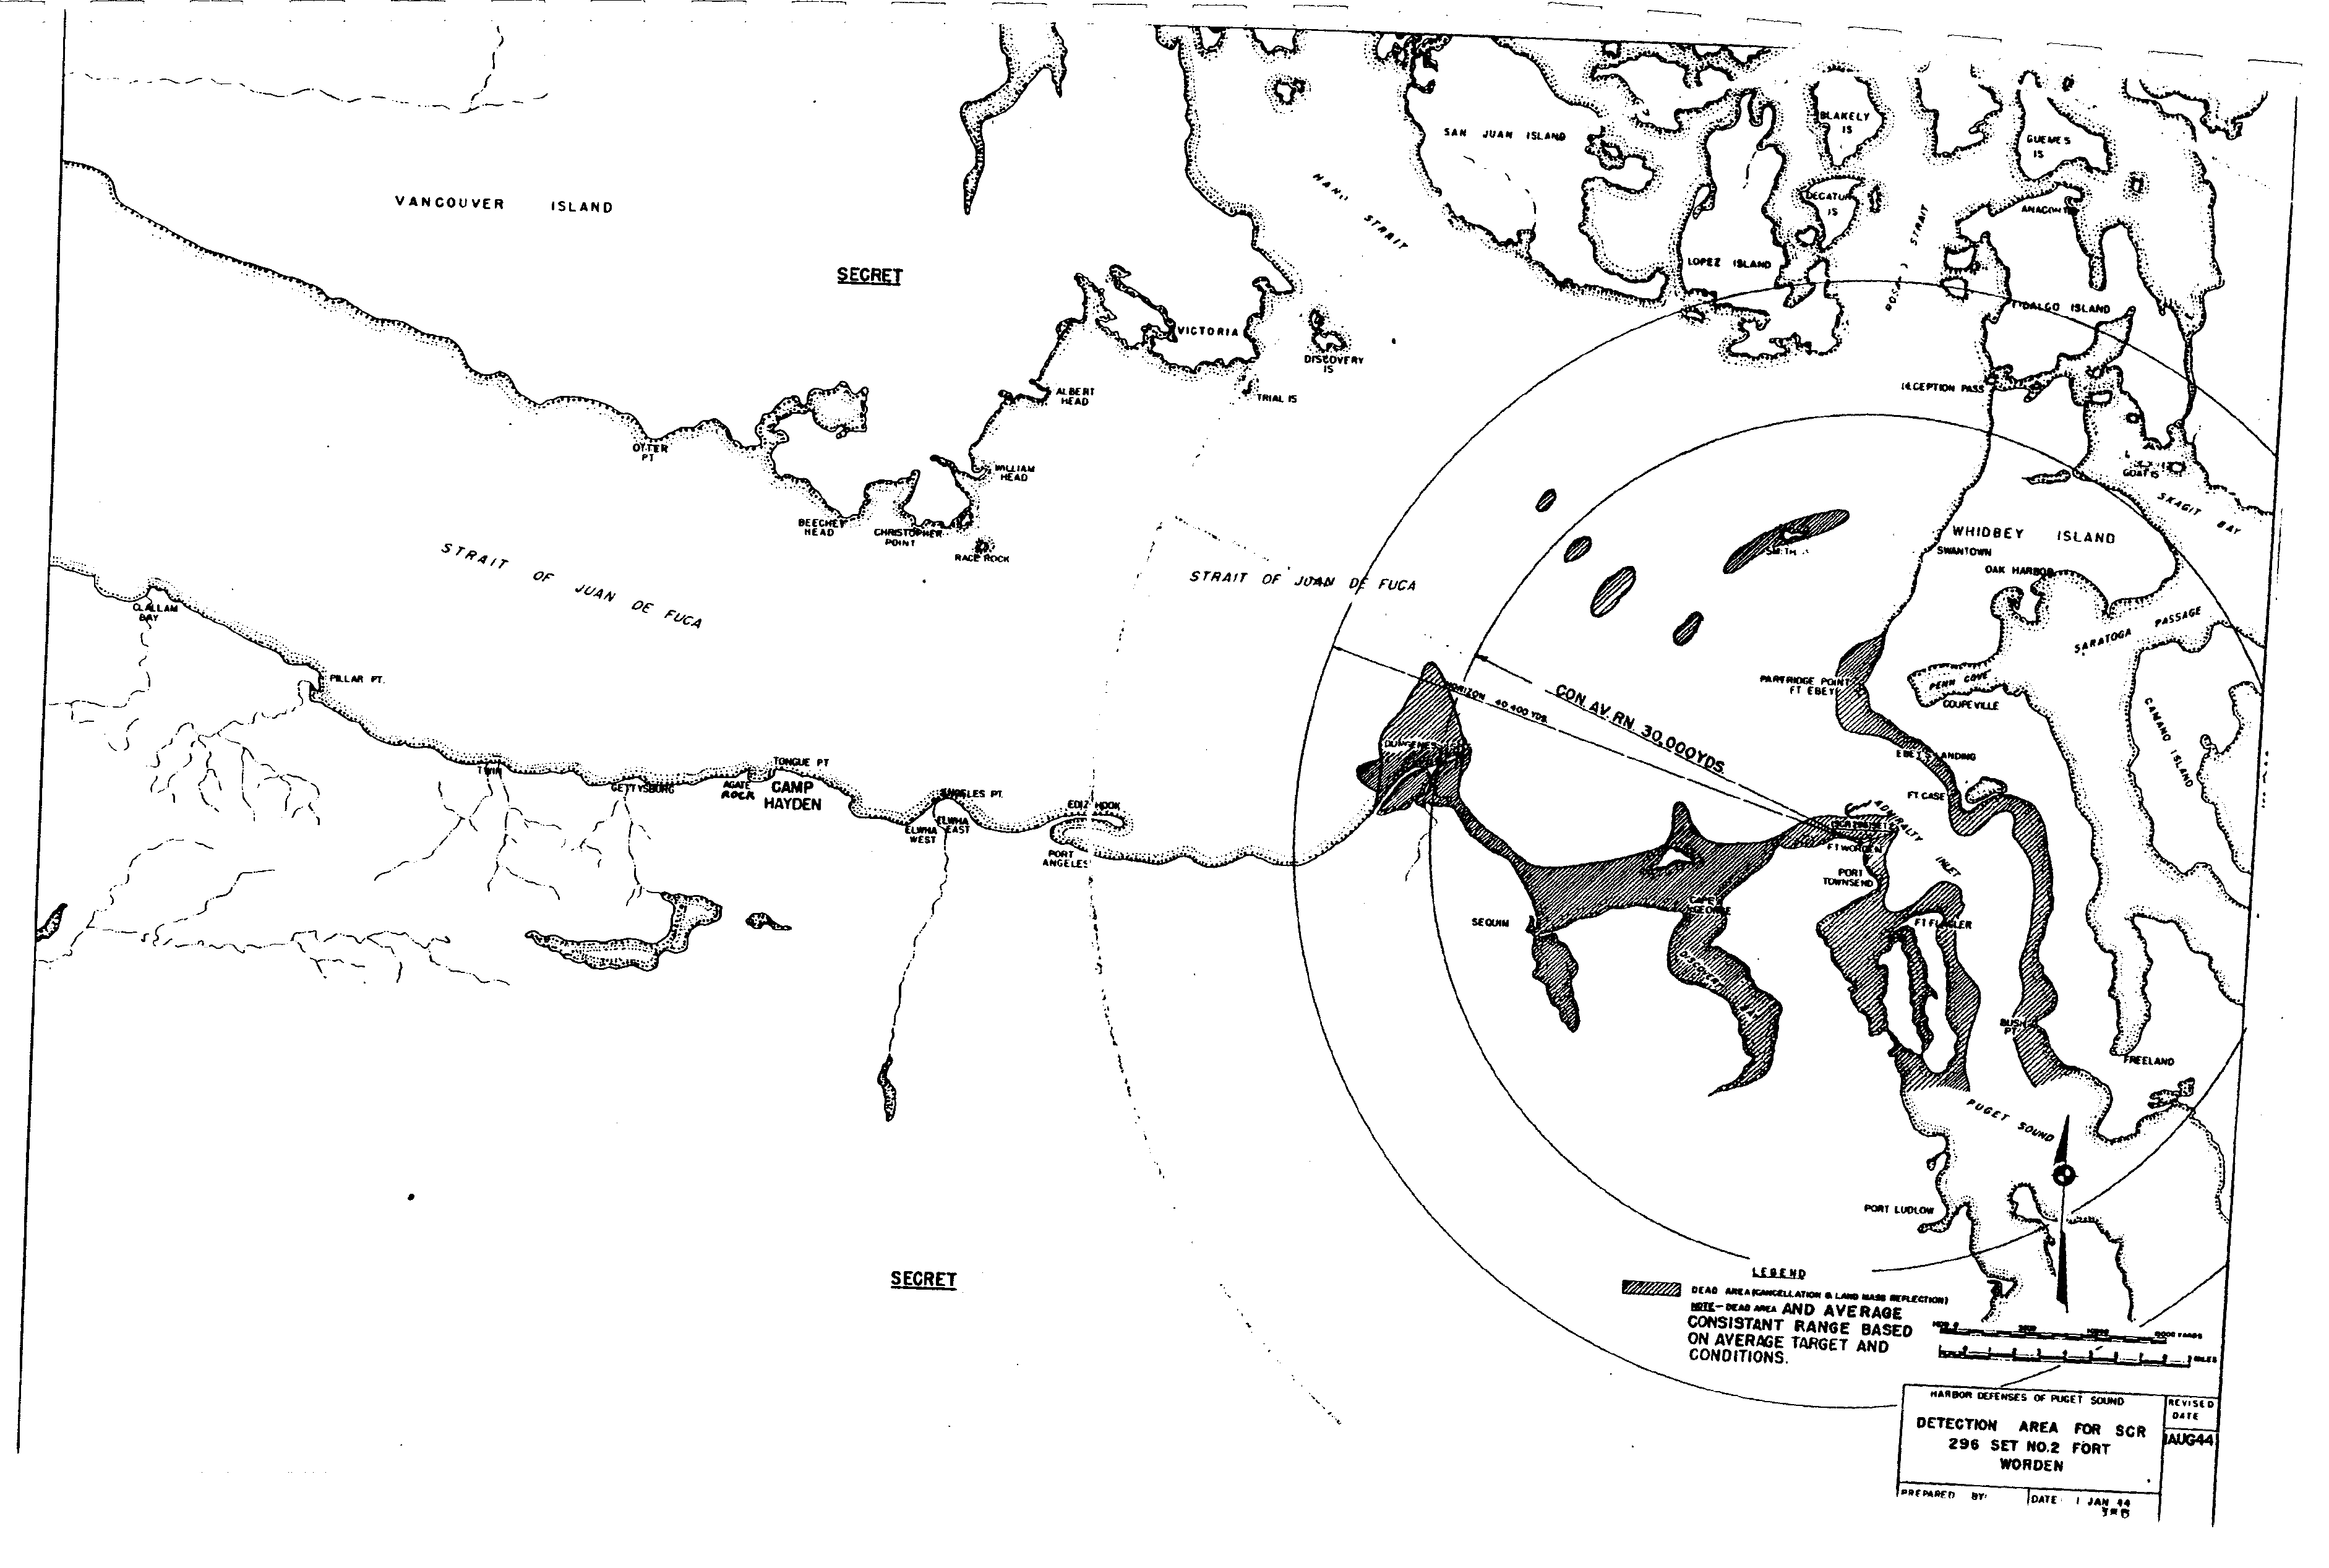
38 - B , Detection Area - Radio Set SCR-296 - Set No. 2 - Fort Worden
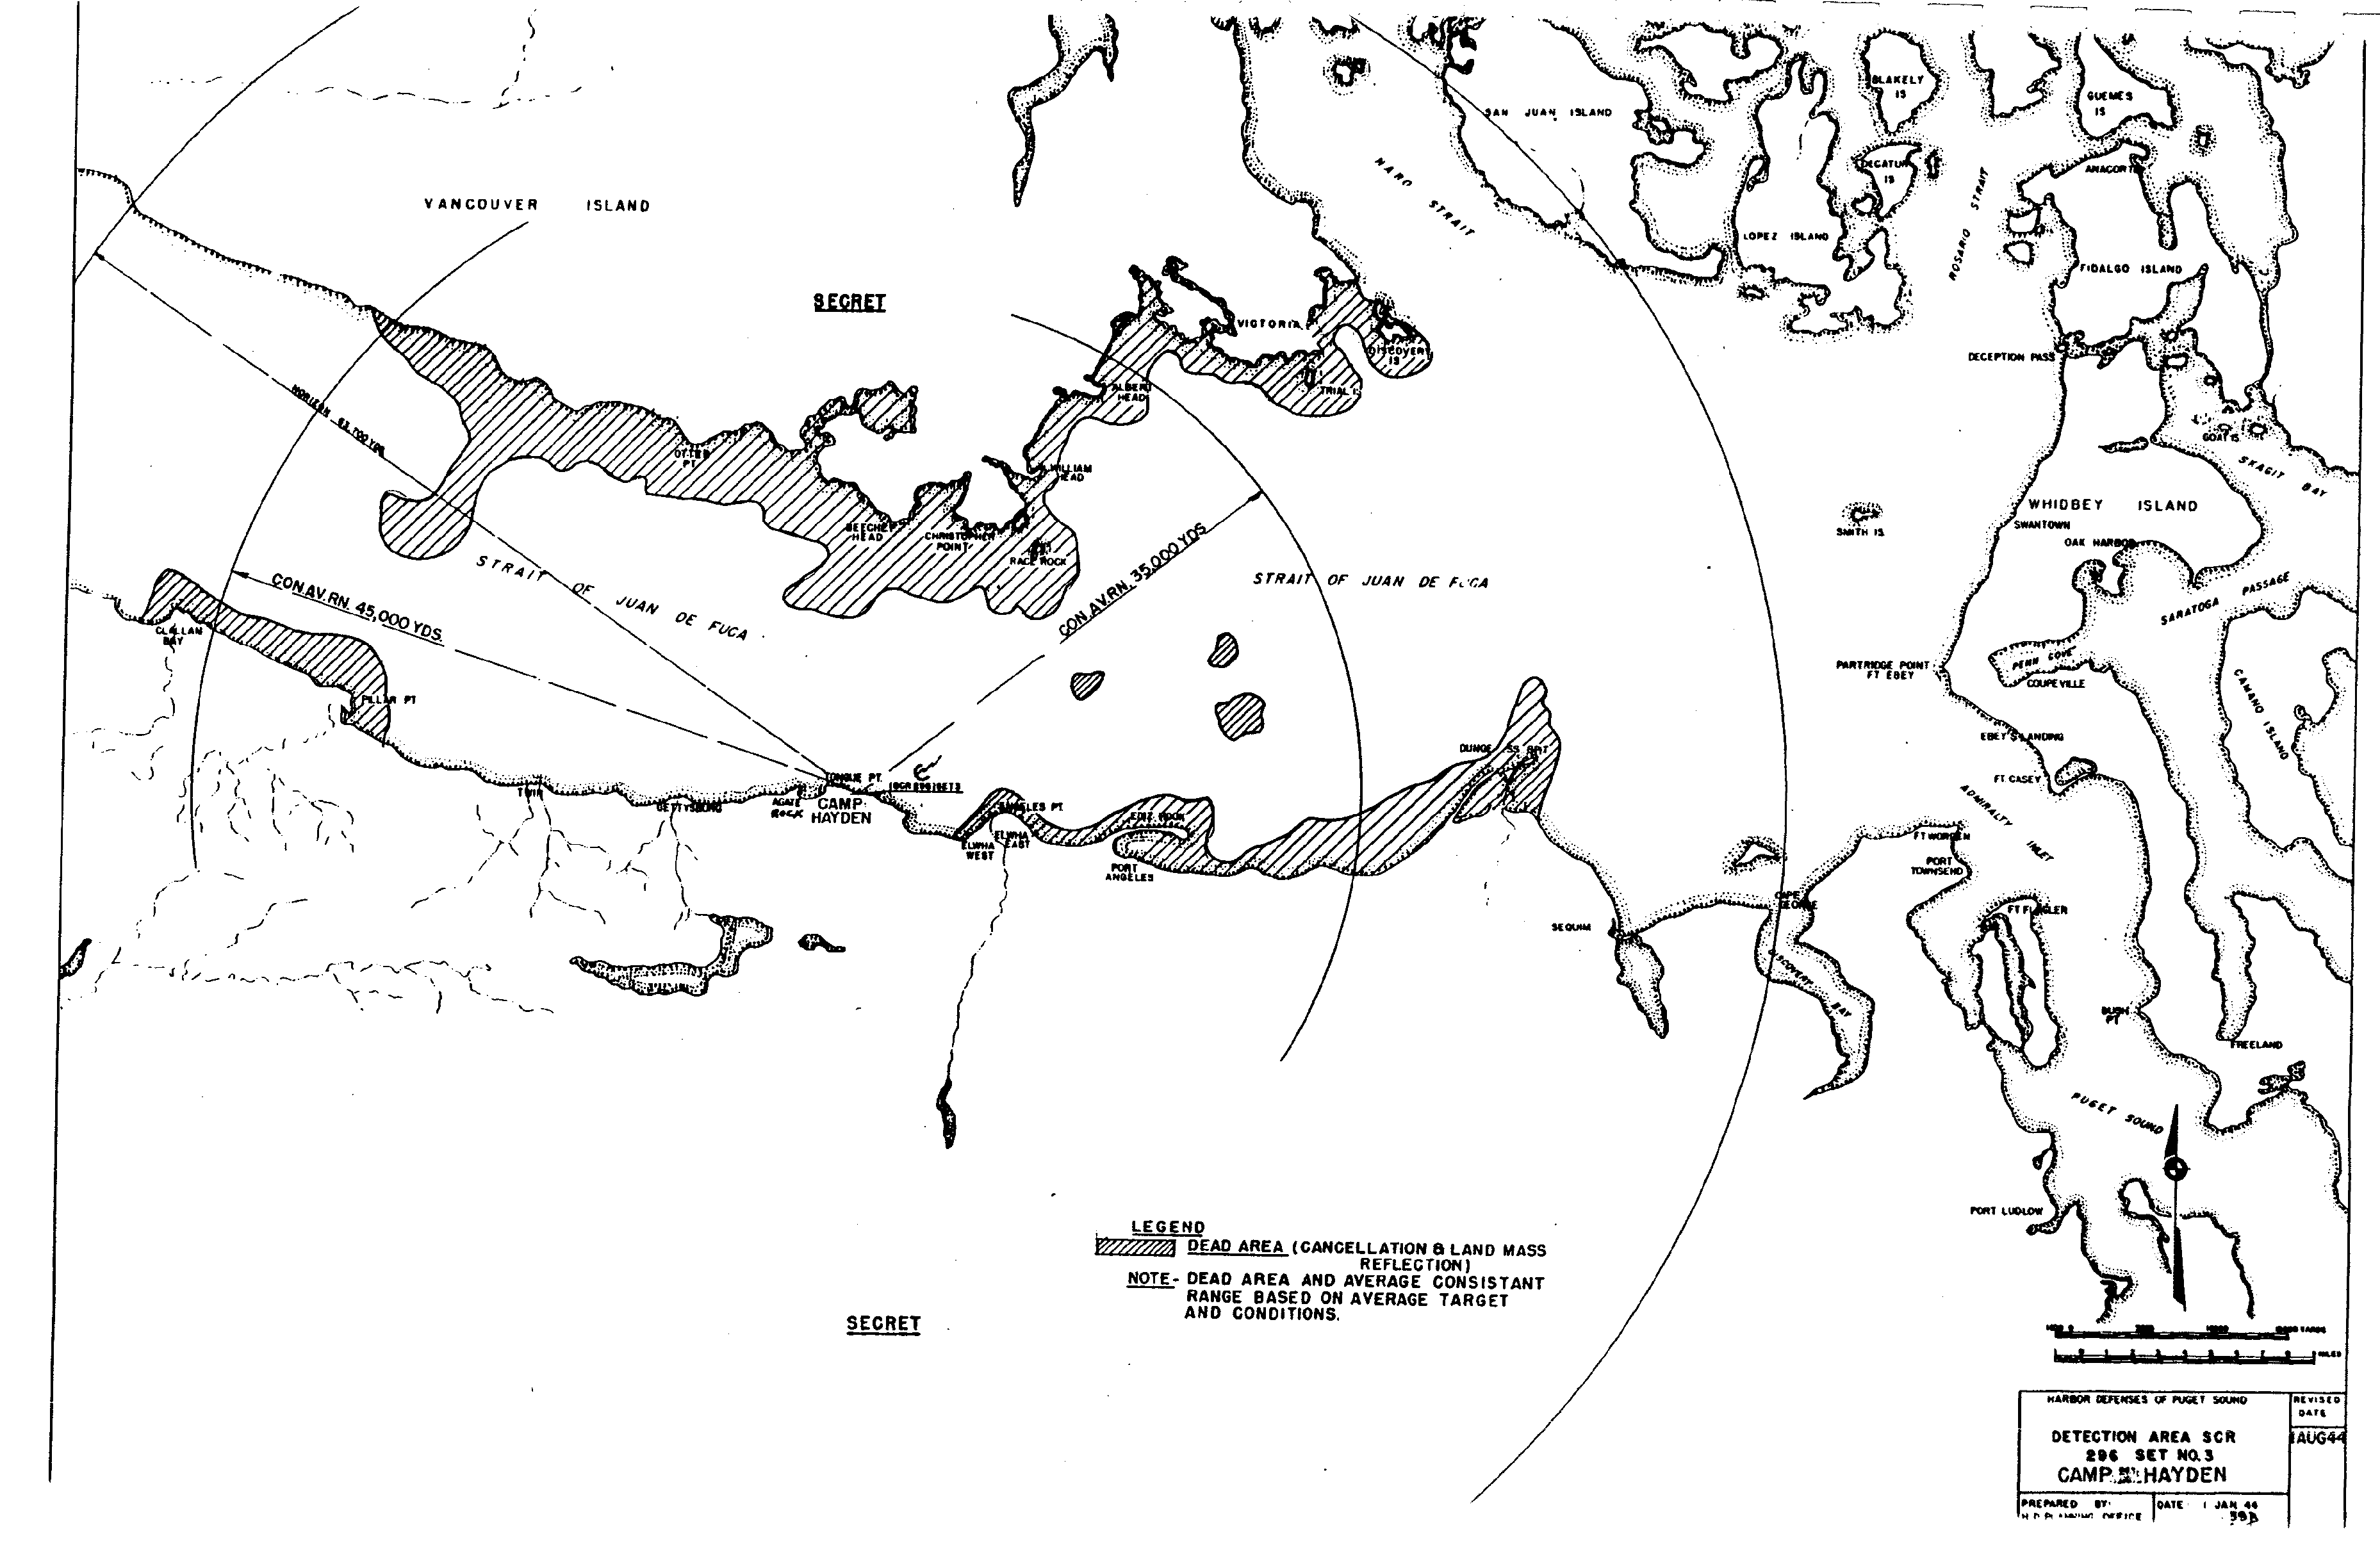
39 - B , Detection Area - Radio Set SCR-296 - Set No. 3 - Camp Hayden
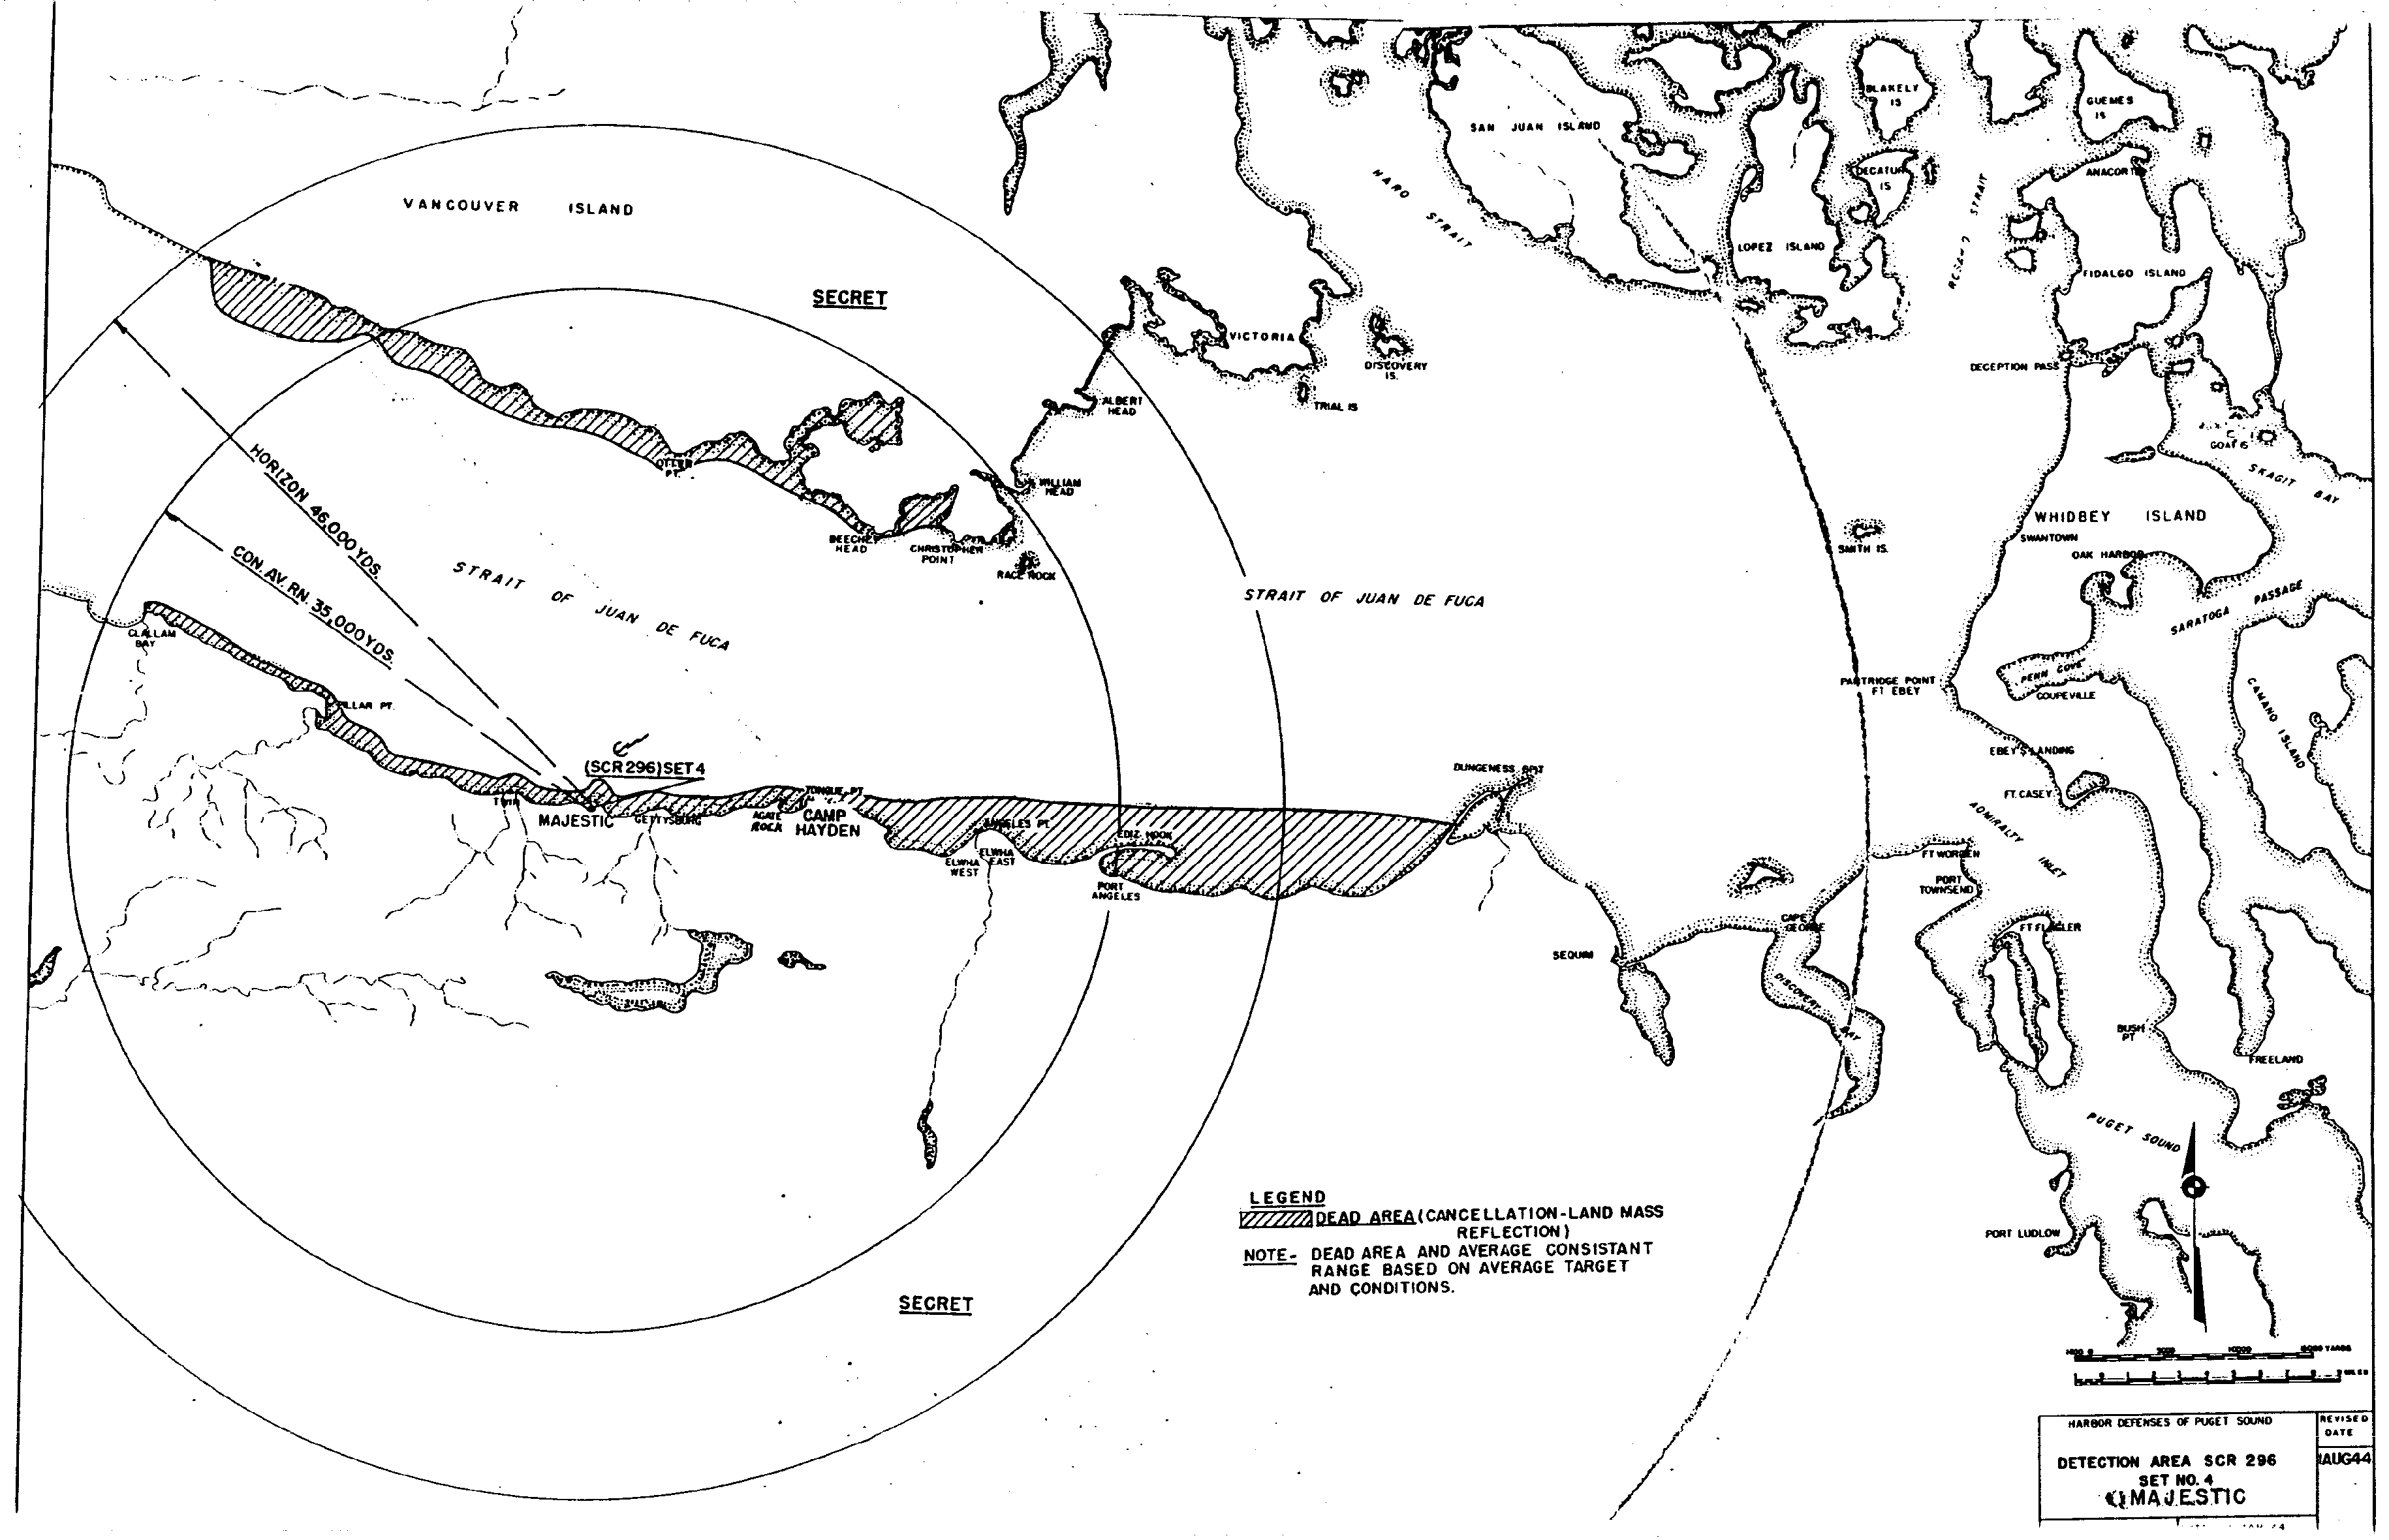
40 - B , Detection Area - Radio Set SCR-296 - Set No. 4 - Majestic
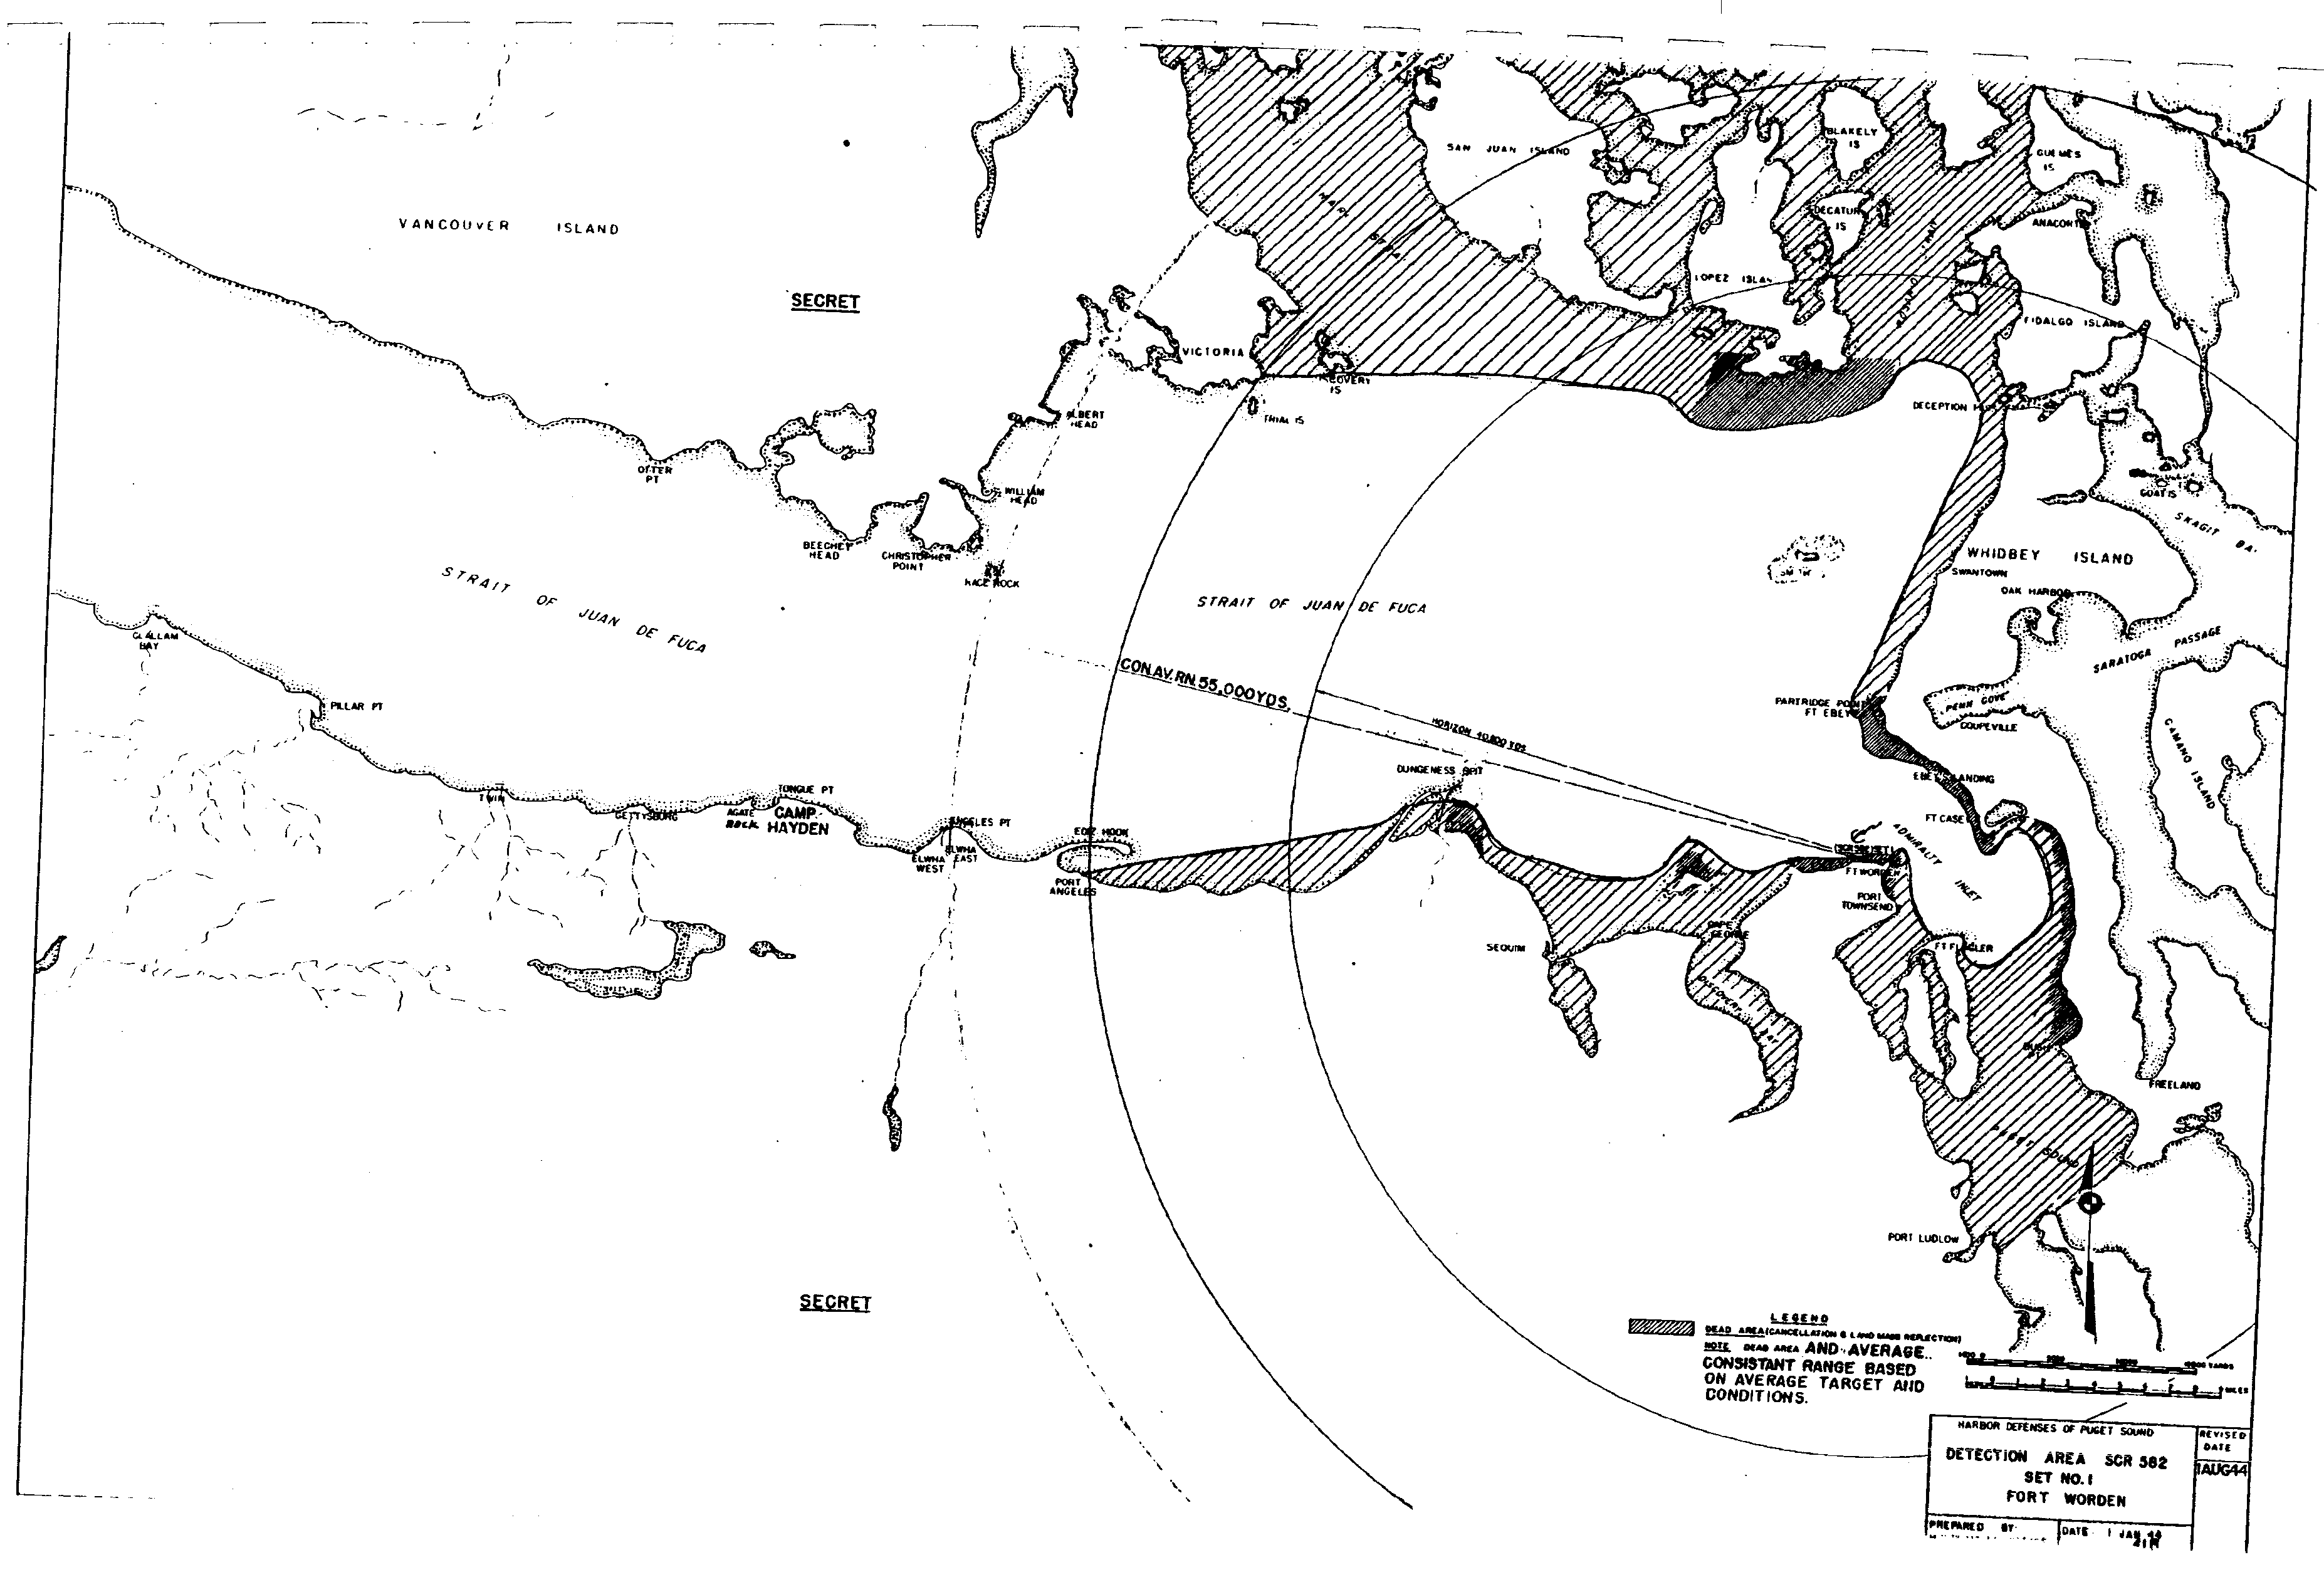
41 - B , Detection Area - Radio Set SCR-582 - Set No. 1 - Fort Worden
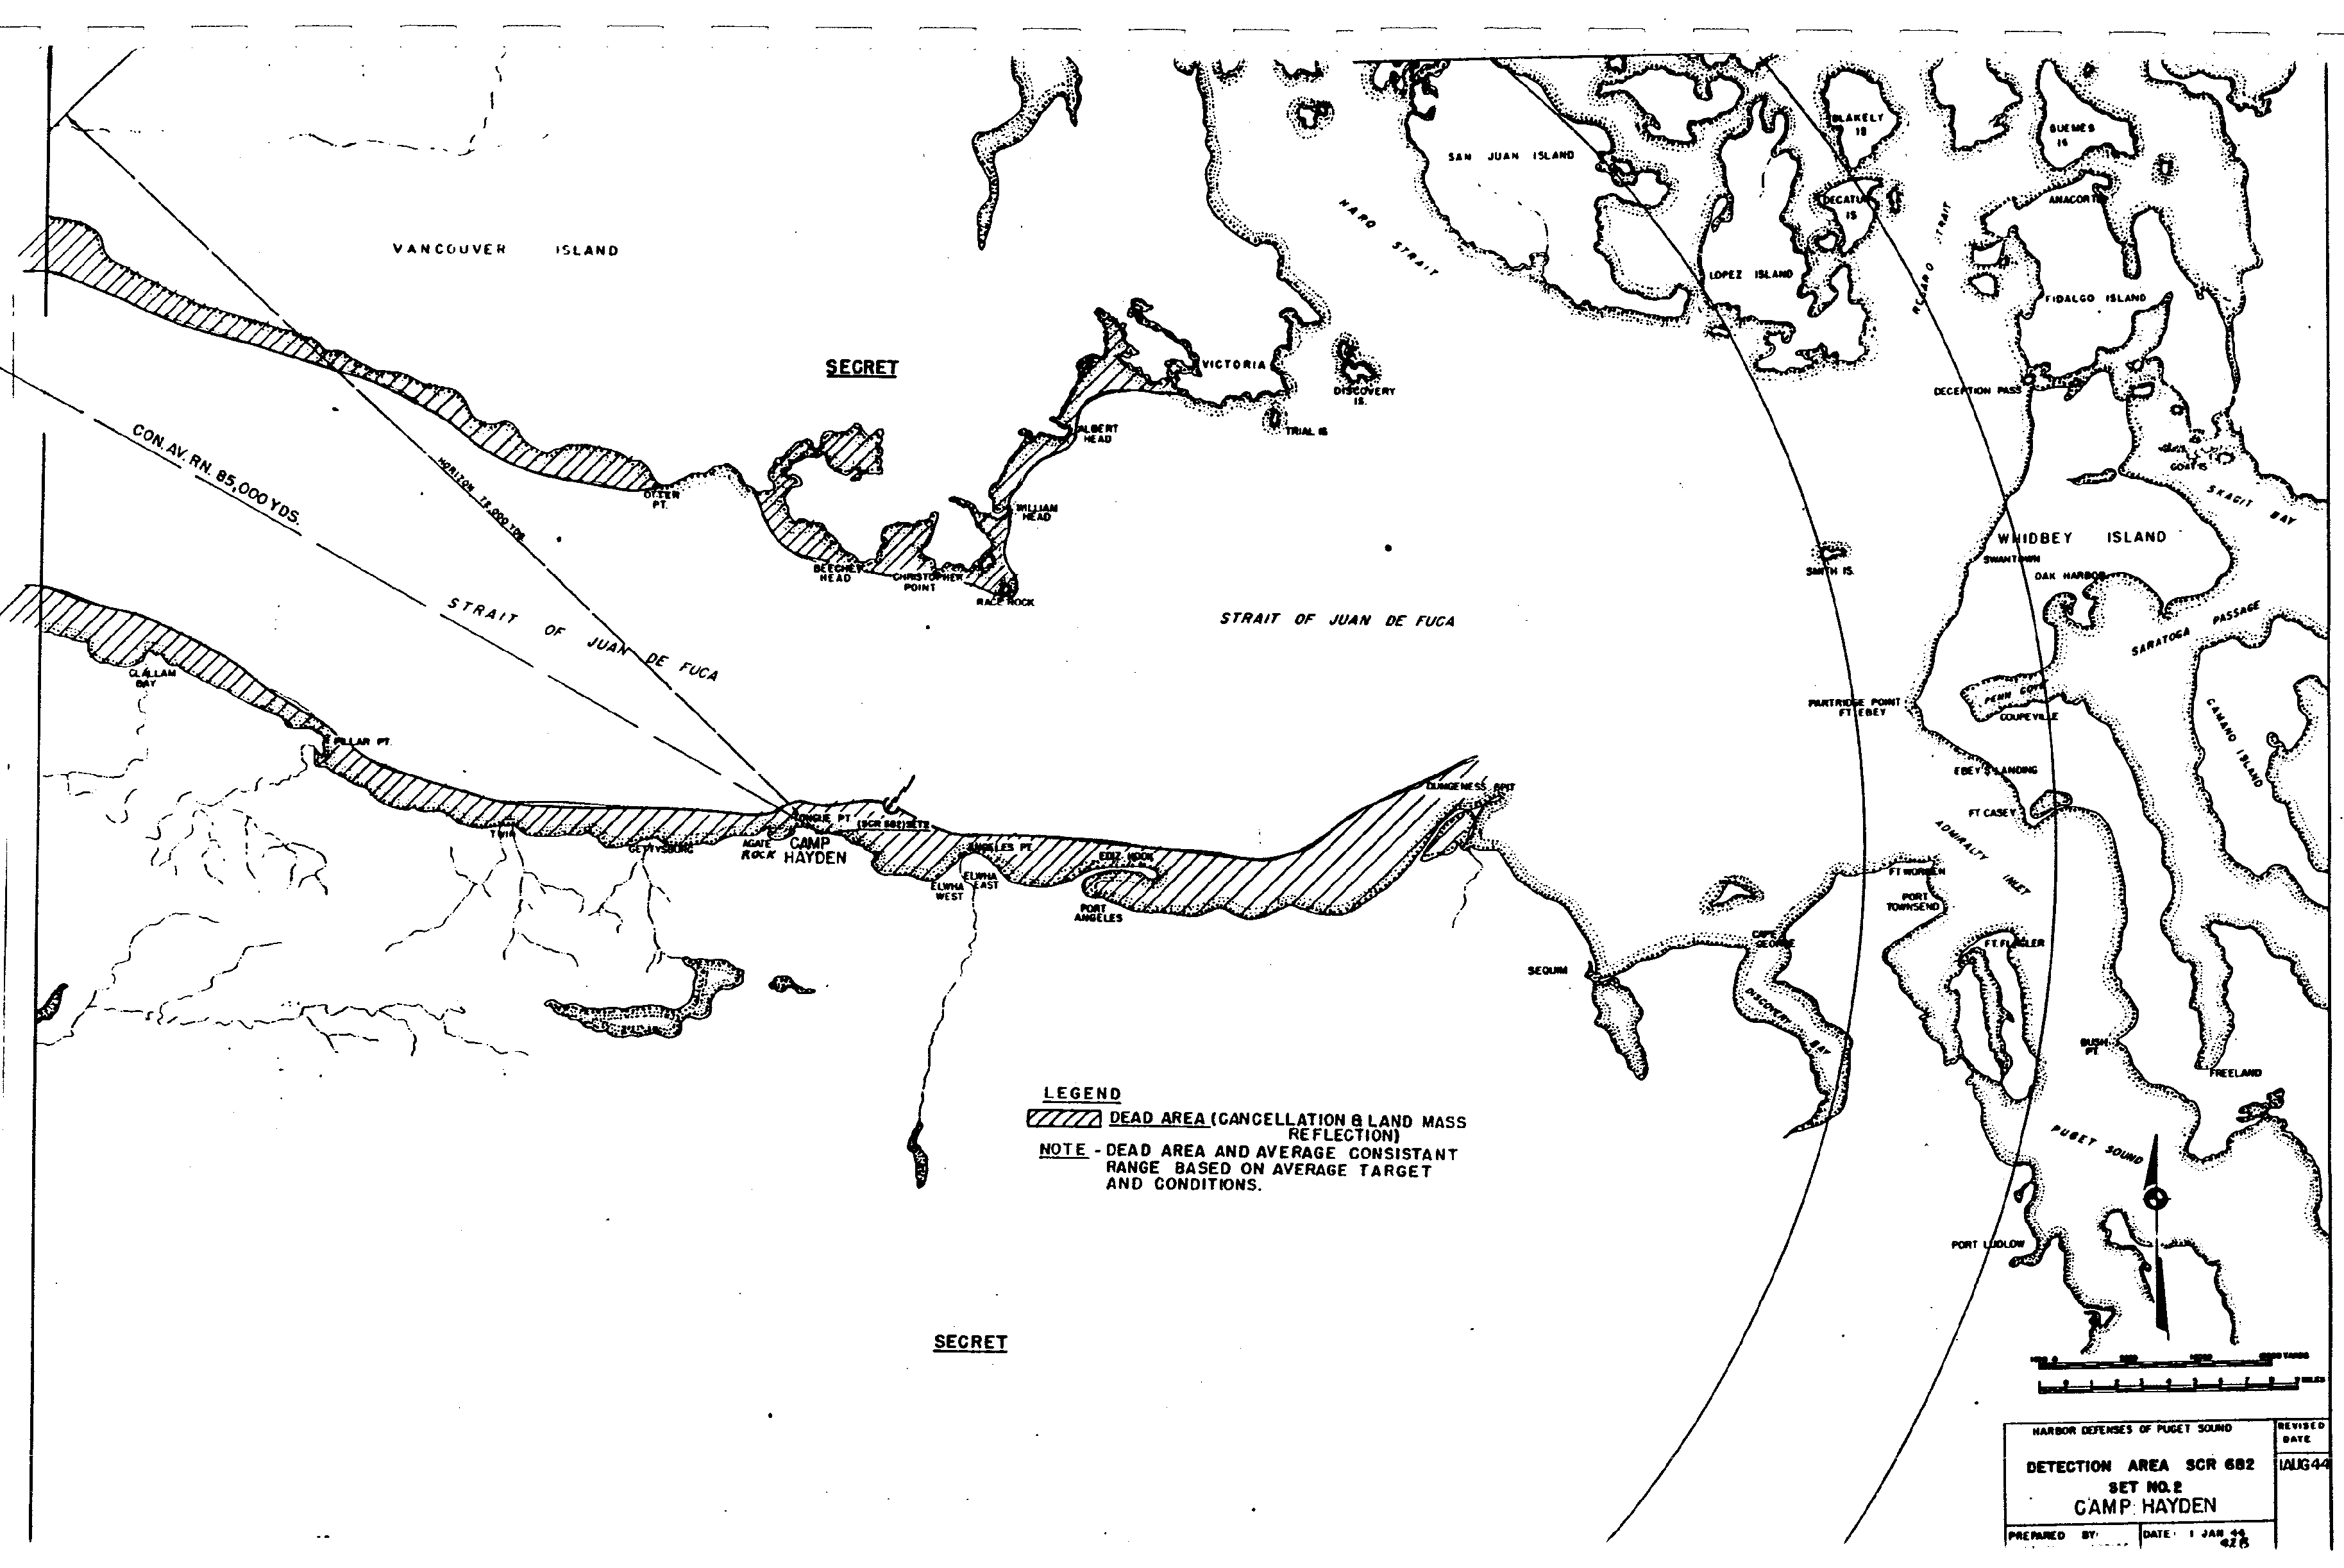
42 - B , Detection Area - Radio Set SCR-682 - Set No. 1 - Camp Hayden
1944 Annexes page
Documents home
Home
Best viewed using Internet Explorer 6.0 at 800 X 850 with 96 PPI
Please make sure javascript is enabled for proper viewing.
Last modified on Thursday, 04/20/06, at 11:52 PM
copyright ©
2003 - 2007
Andy Rohde
Conditions of use and Disclaimers